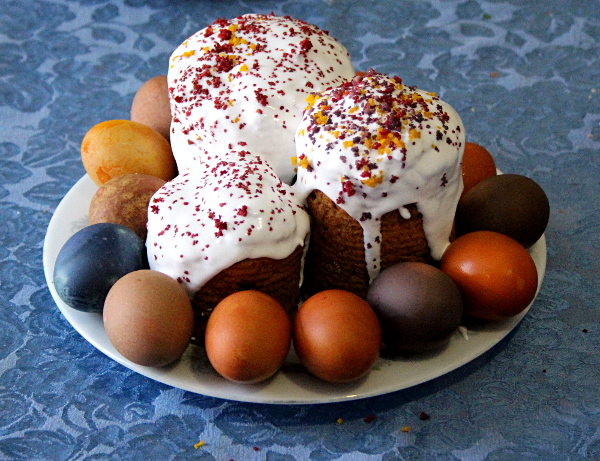
The coming of spring has brought to me the memories of Easter at my grandmother’s place in Russia: sunlight streaming through the lace curtains, smell of baking wafting from the kitchen, a plate with a large paska covered in snow-white icing towering over a ring of brightly-coloured eggs surrounding it, and a promise of a long lazy weekend full of family and delicious food. And this year for the first time I have decided to bring some of those memories to life.
Once children have entered my life, I have come to appreciate the importance of traditions on a whole new level. What we do in these busy years creates our kids’ childhood: something they will come to remember later, hopefully with a fond smile. And despite my lack of interest in any religious take on Easter, the celebration of spring and fertility sings to me. Kids love messy projects, and what better way to create fun Easter traditions than dye some eggs?
I have decided not to involve myself with artificial (even “approved”) food colouring, and stick to a few simple ways of using vegetables and spices to create several colours. We had boiled two dozen eggs, and created four different dyes: golden orange with onion skins, blue with blueberries, pink with beets, and dark yellow with turmeric.
How to dye eggs with natural dyes:
1. Boil the eggs and once done, run cold water over them so they peel easier afterwards.
2. Boil 2 cups of water with your choice of colouring material for 15 minutes. Per 2 cups of water, use:
– 2 tablespoons of turmeric to get yellow dye, or
– 1 cup of blueberries to get blue/grey dye, or
– 2 cups of shredded beets to get pink/purple dye, or
– skins of 5-6 onions to get golden orange dye.
3. Let the dye cool to room temperature and add 2 tablespoons of white vinegar to each – it helps set the colour.
4. Now the fun step in which the kids can participate: lower the eggs carefully into the containers with dyes and put them into the fridge overnight (I used glass containers).
5. In the morning, the kids can carefully remove the coloured eggs and set them on a plate or tray to dry.
It is best to choose white eggs as they pick up the colour better than the brown ones (with the exception of the golden orange of onions that works equally well on either). Turmeric is easily staining so be careful. I must say, the best colours came from beets and onion skins. The boiled blueberries gave a not-very-interesting grey colour, and attempt to eat the blueberries themselves afterwards revealed them not very palatable, so it feels like a waste to me. The beets can later be sauteed with some coconut oil and roasted walnuts and consumed as a salad.
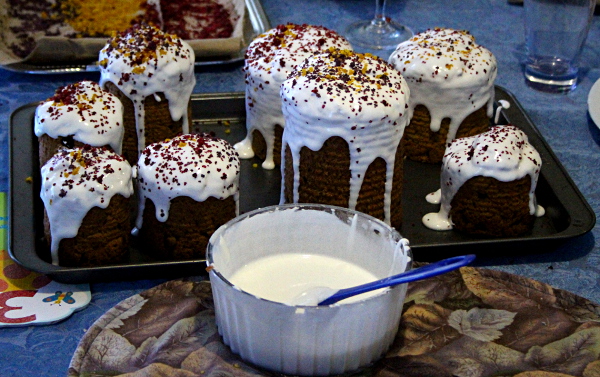
The making of the paska from scratch takes a better part of the day. Going the old school way, I used the cans from tomato juice, coconut milk, and other ones I had around. Starting up the yeast, beating the egg yolks with sugar, beating the whites with salt, kneading the dough, and waiting in-between different stages to let the yeast work their magic, followed by baking and decorating: this project is lengthy. I found kneading the dough very grounding though, letting myself be taken by the memories with the rhythm of it. Fingering zen indeed.
The paska itself is about as unhealthy the creation as they come, but as I do not bake often, I have resigned to that. It was the process that captivated me. The only variations on the recipe were using coconut sugar instead of white, and putting couscous dyed with beets, turmeric, and blueberries on top of the paska, to mimic the coloured grains used in fertility celebrations. That made for a better alternative to artificially-coloured sprinkles from a grocery shelf. My three-year old loved helping out with the paska top decorations.
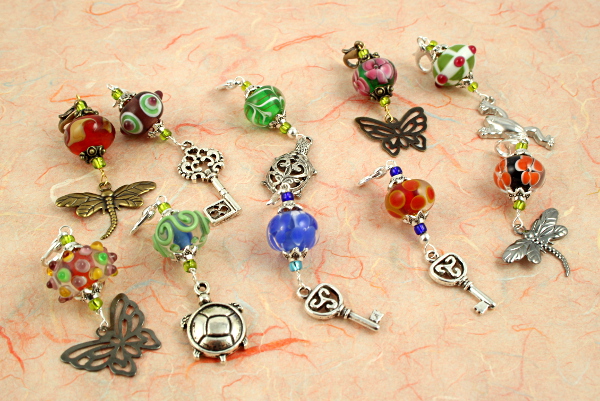
On Saturday, we were invited to a friend’s gathering with about 15 children, and everyone had to bring 10 Easter eggs per child, stuffed with little treasures. We had no plastic eggs (and no way would I be purchasing those), so we made eggs from the empty egg cartons loosely following a simple recipe I found online (except we used green paper tape instead of gluing them with flour). After much internal debate, I have made ten charms in a style similar to my Blessingway beads, only with butterflies, dragonflies, and keys as charms, and with a lobster clasp to use them as pendants, treasures, or to attach them to anything random. The charms made for less a choking hazard than a single bead (although anything going into those small eggs is potentially a choking hazard), and ended up being treasured by girls and boys alike.
The gathering was a potluck, for which I had made mashed sweet potatoes with coconut oil and Himalayan salt, Italian meatballs with spaghetti sauce, and a batch of home-made sangria. Kids had an Easter egg hunt and lots of playtime indoors and outside. And for adults it has been a long relaxing afternoon filled with smiles, conversation, good food, and merry drink.
Overall, Easter has been a great opportunity for cherishing memories, experimenting with beads, food colours and baking, and fun activities with family and friends.


Any chance of you sharing your paska recipe with us? :)
It would be quite lengthy, and I’m not sure it’s the best one out there. I started with my grandma’s recipe, only to realize that it has quite a few gaps in it, so I switched to another one I found online. It is in Russian, but if you like to take a peek: https://www.youtube.com/watch?v=Cjf4Tj944f0.
Pingback: Welcoming spring and fertility - Fingering Zen