


We spend lots of time in the kitchen, which has a splendid view of our back yard. Last year, when we just moved to our new place in May, we brought in a few yards of good soil and planted all the seedlings I’ve started at the old place all over the yard. The only back yard project for which we had time was an herb spiral with a small pond. With three trees and a play structure taking up space, most of the garden filled with a tomato forest, and harvest was quite a challenge. This year, as part of my edible landscaping project, I’ve decided to shape the back garden to maximize planting spaces, make the best use of the sunny areas and have an easier time during harvest.
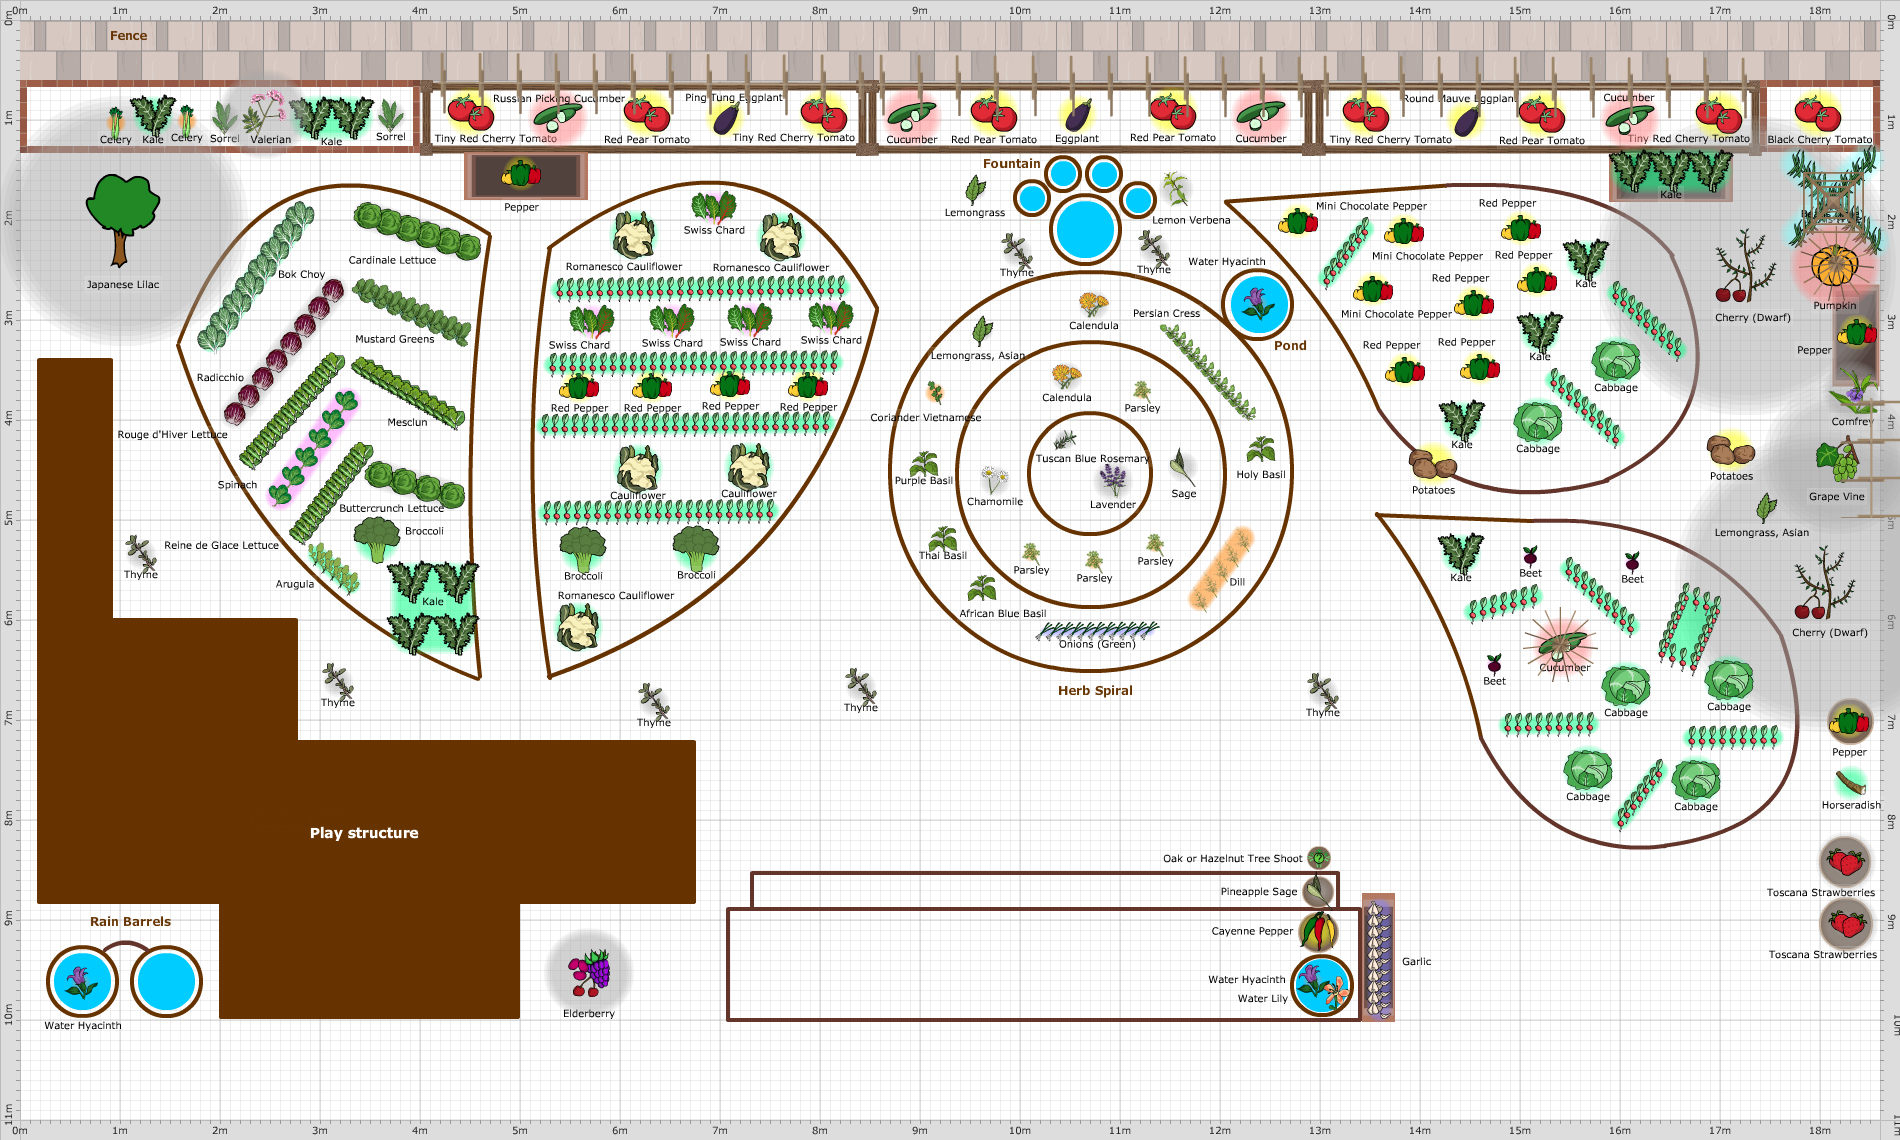
That meant removing two trees (the third one is at the bottom of a play structure slide, so whatever would be planted there would likely be trampled during play), building raised beds (we have very tough rocky clay soil), bringing in good soil and compost mix, and using trellises to maximize vertical space. Aesthetically, I prefer curves to straight lines and right angles, and thus the following plan was born:
We love the herb spiral, so it is here to stay. The first major challenge was removing the corner weeping elm tree. We really wanted it to live, so we posted ads online to invite people to come and take it.
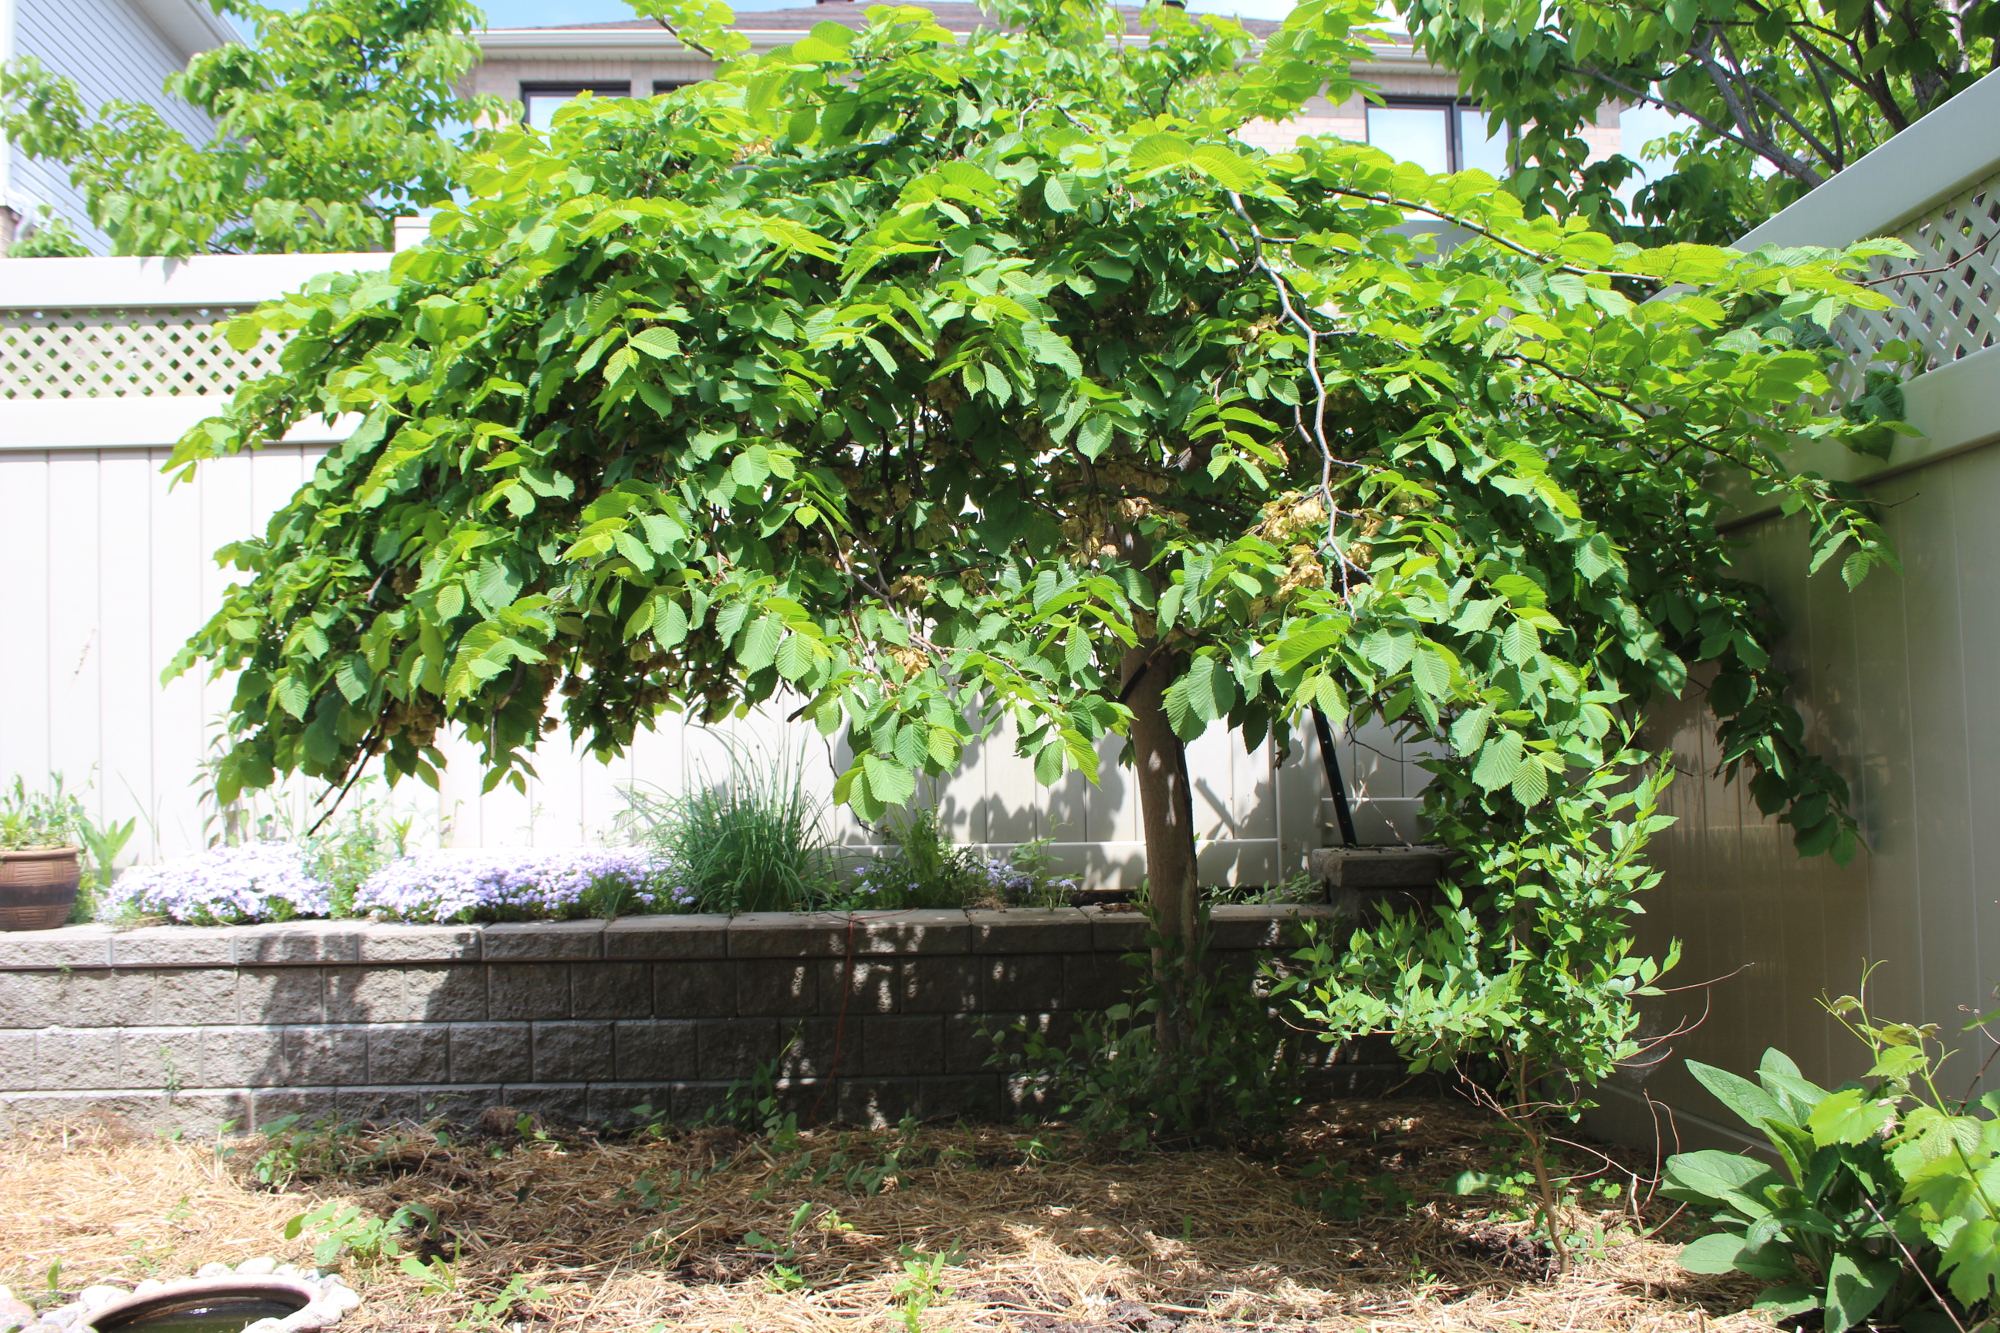
Here is the back yard before we started, with the weeping elm and the lilac tree (just visible at the right edge of the photo) still in place.

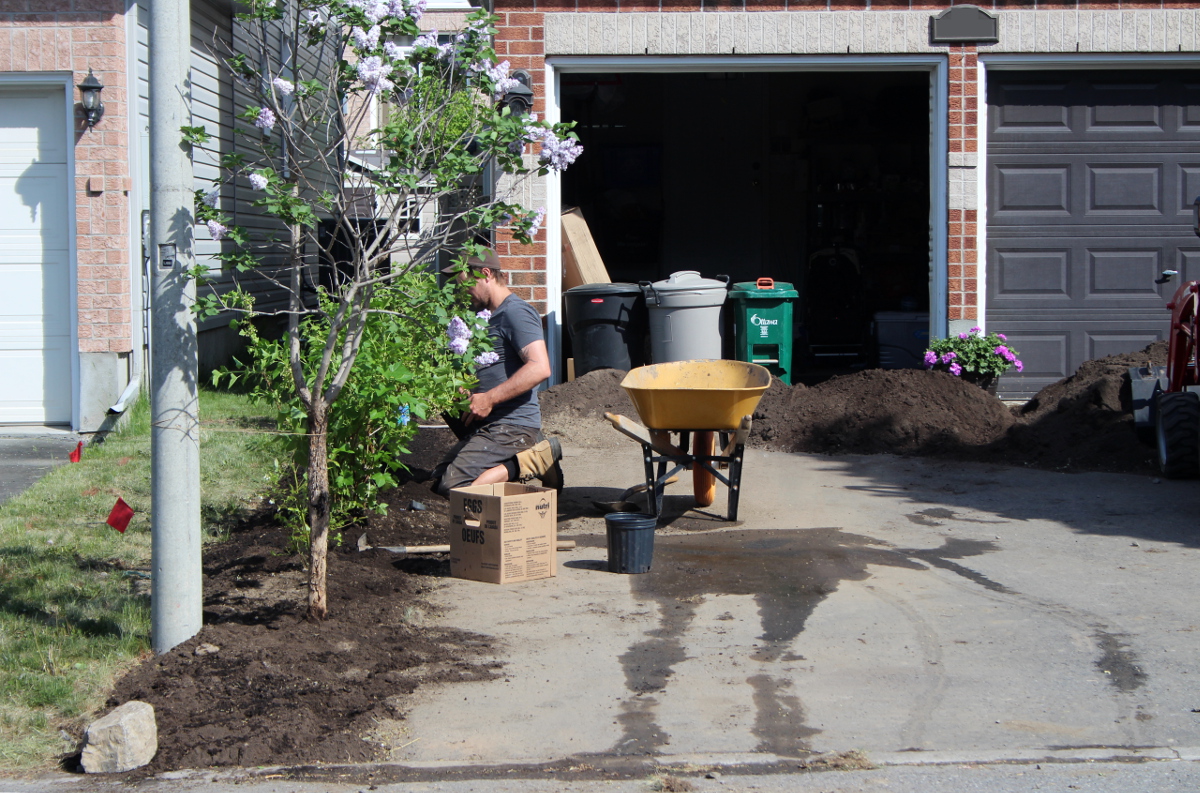
The weeping elm was dug up, and we had quite a challenge removing it from the garden, since it was heavy and the garden gate was too narrow. It took a wheelbarrow and four adults to carry and guide the branches out of the gate, and a trailer to transport it away, hopefully to a continued existence.

The lilac-coloured mini-phlox that used to grow along the back fence, together with some chives, got replanted into the front yard river bed. The lilac tree ended up crowning a row of bushes in the front.
We’ve cut up a large cardboard box salvaged at a road side into squares, and have placed them around the spiral and between raised beds, to indicate where the paths will be. Behind the barbeque, there is a large sheet of white paper which served as my dynamic garden plan. I’ve updated it as I went, with garden bed placement, paths, trellises, and plants once they were in place. Later, I’ve converted it into a digital copy linked above.
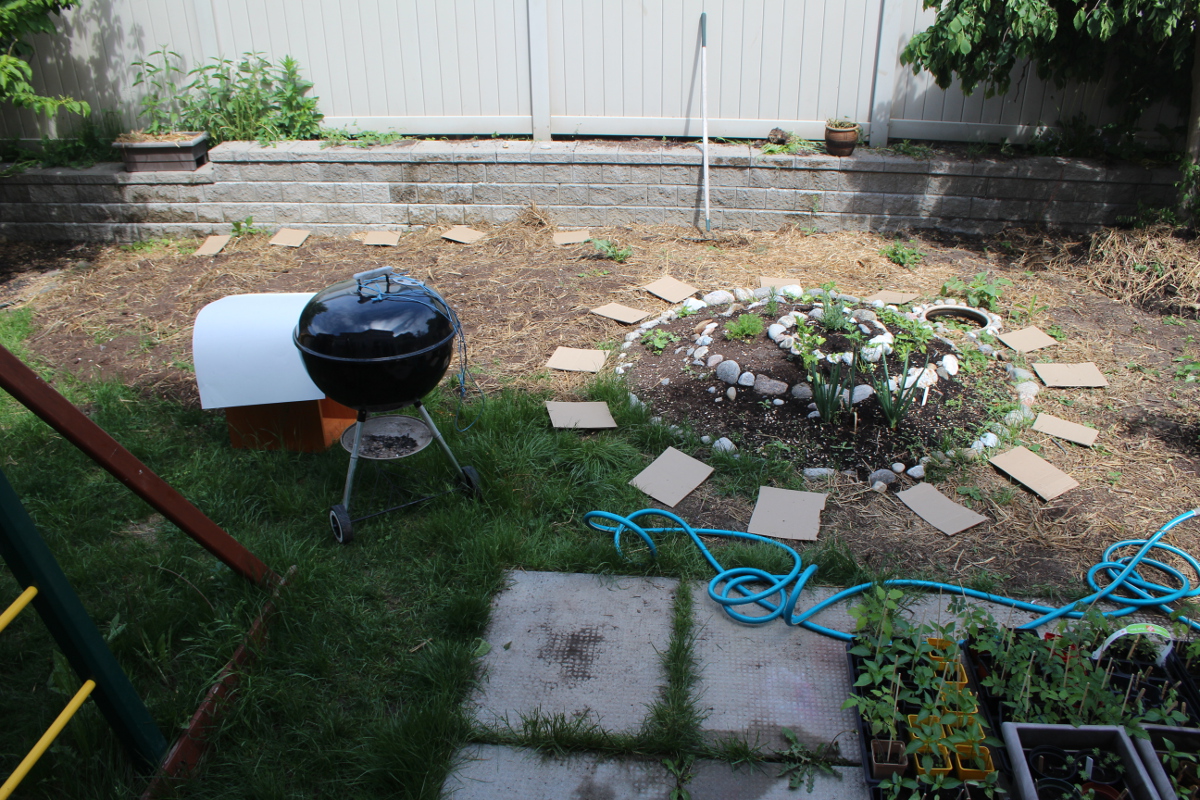
The squares had to be held up with rocks against the wind. We have also planted two small cherry trees in place of the trees we’ve removed. Grapes and comfrey were left to grow at the side fence, since they are very happy there.
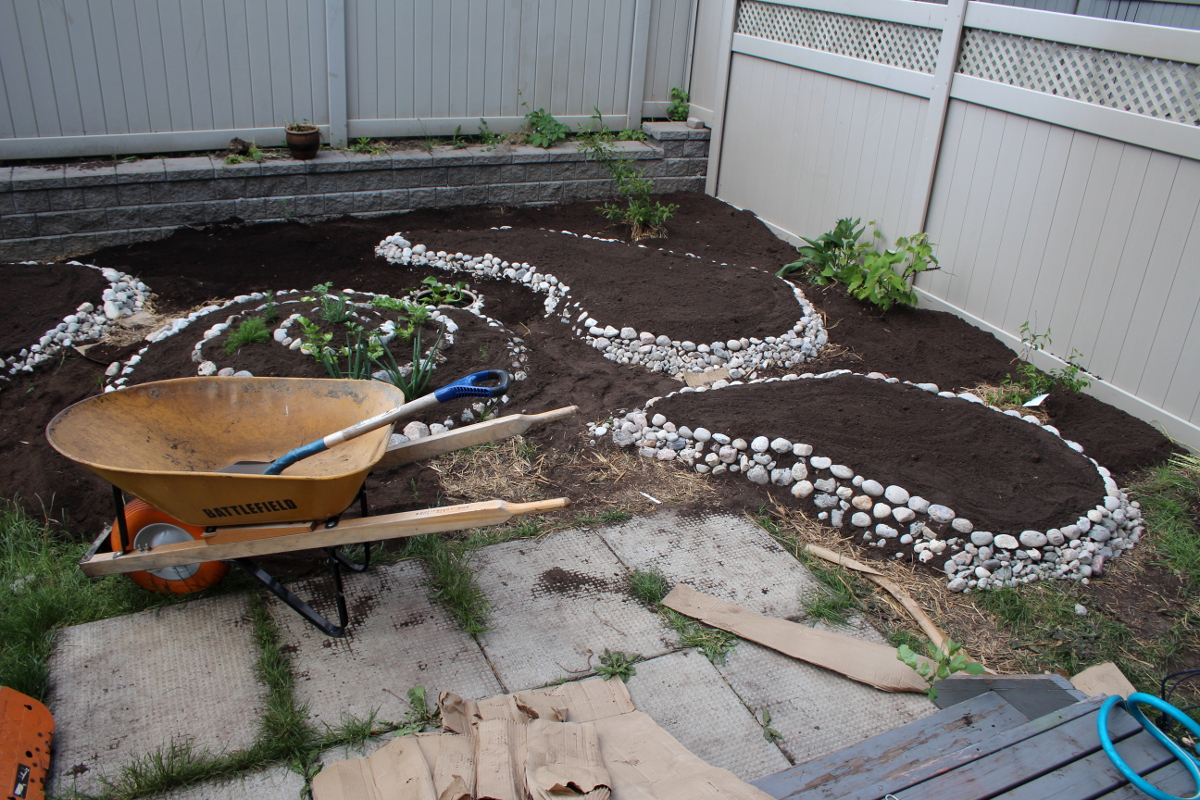
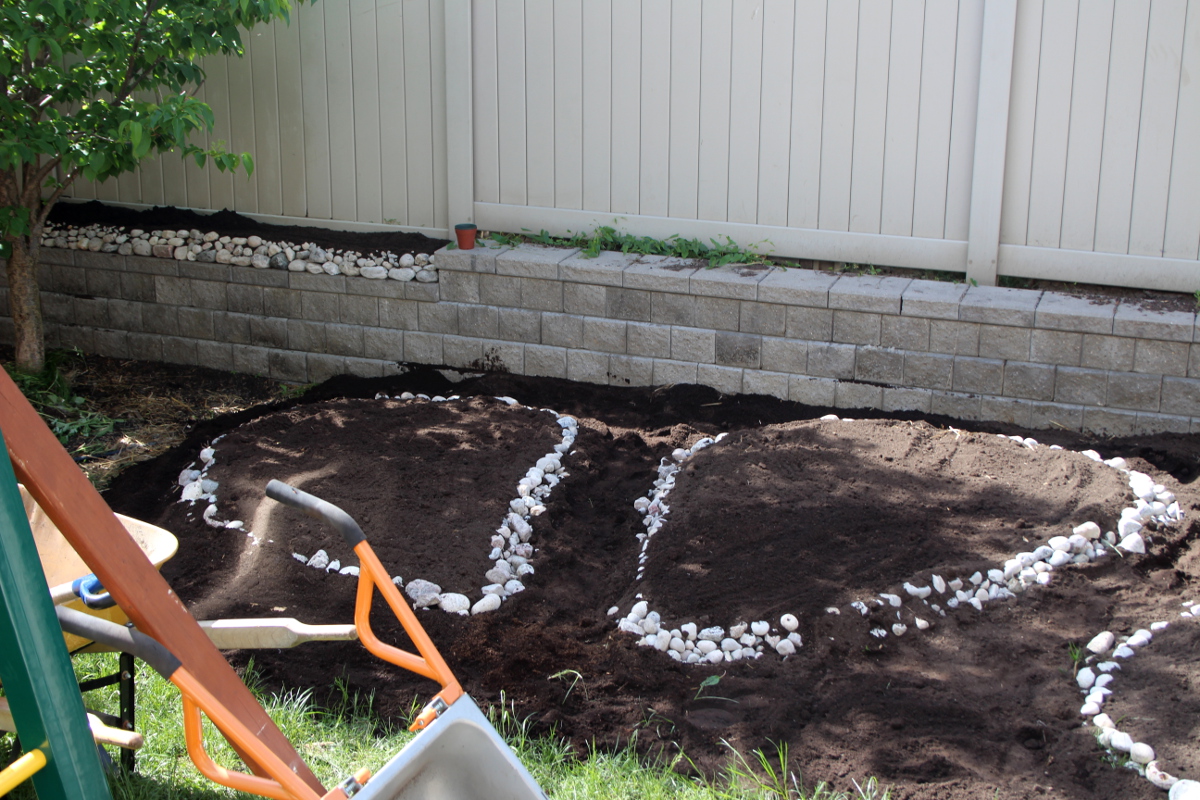
Then the building of raised beds commenced. River rocks and soil had to be brought from the front driveway, over the river bed, along a narrow passage between houses, into the back yard. The whole process took about one and a half days, and made for a wonderful workout, in fresh air and warm sun.
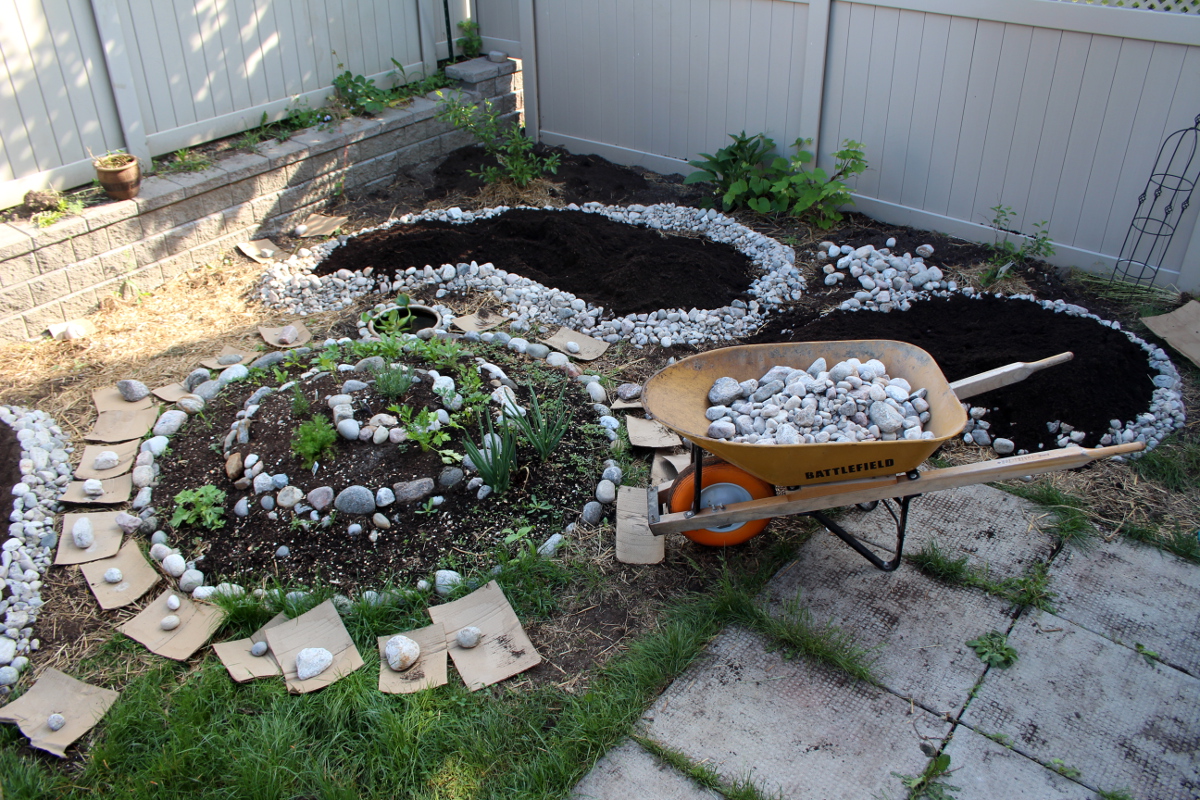
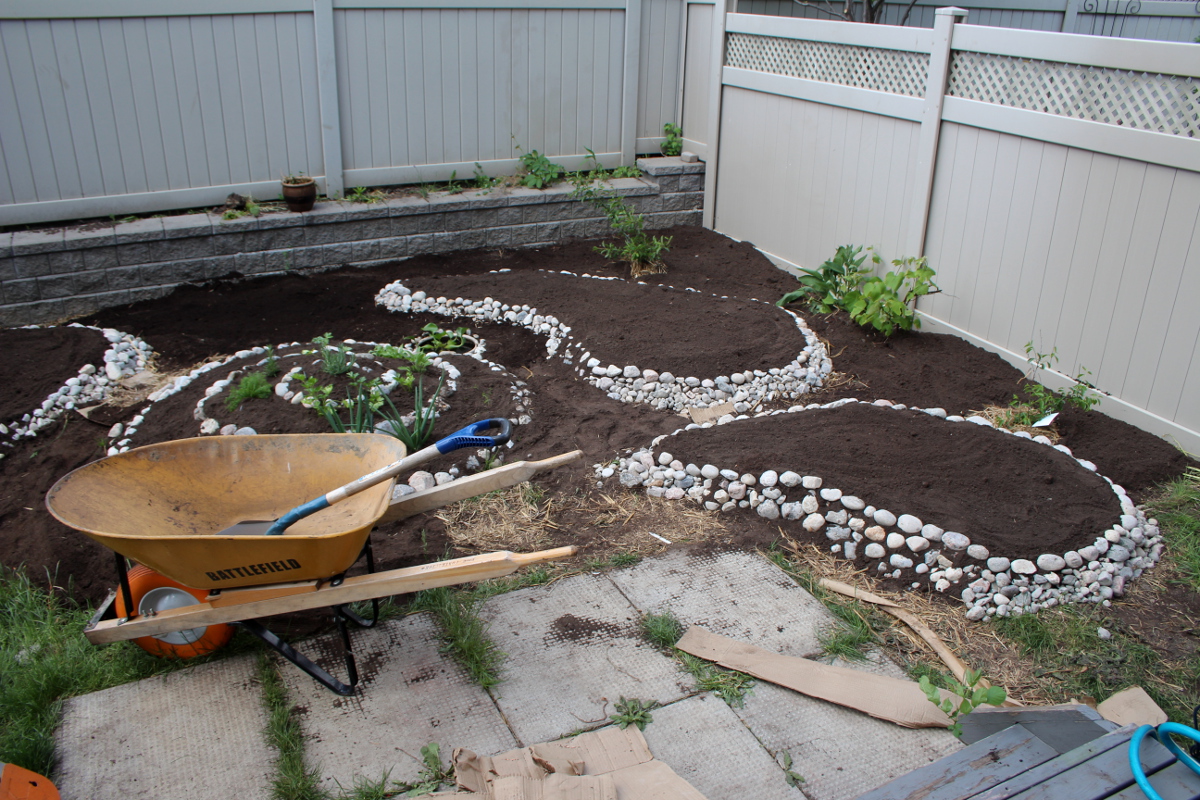
The rocks were piled into teardrop shapes, and the soil was placed inside the borders. Then soil had to be smoothed out evenly and pressed into the sides to help hold the rock borders up. Alternating soil and rock placement, the beds were slowly brought up to the desired height.
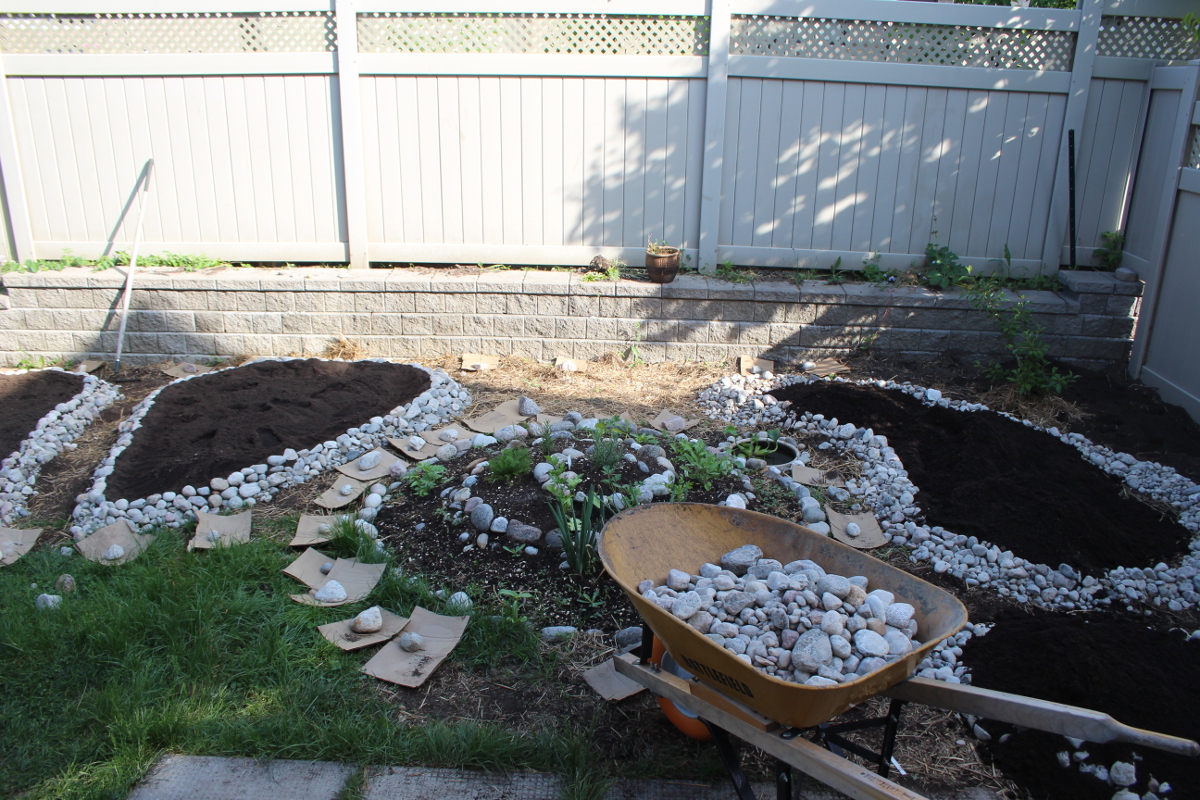
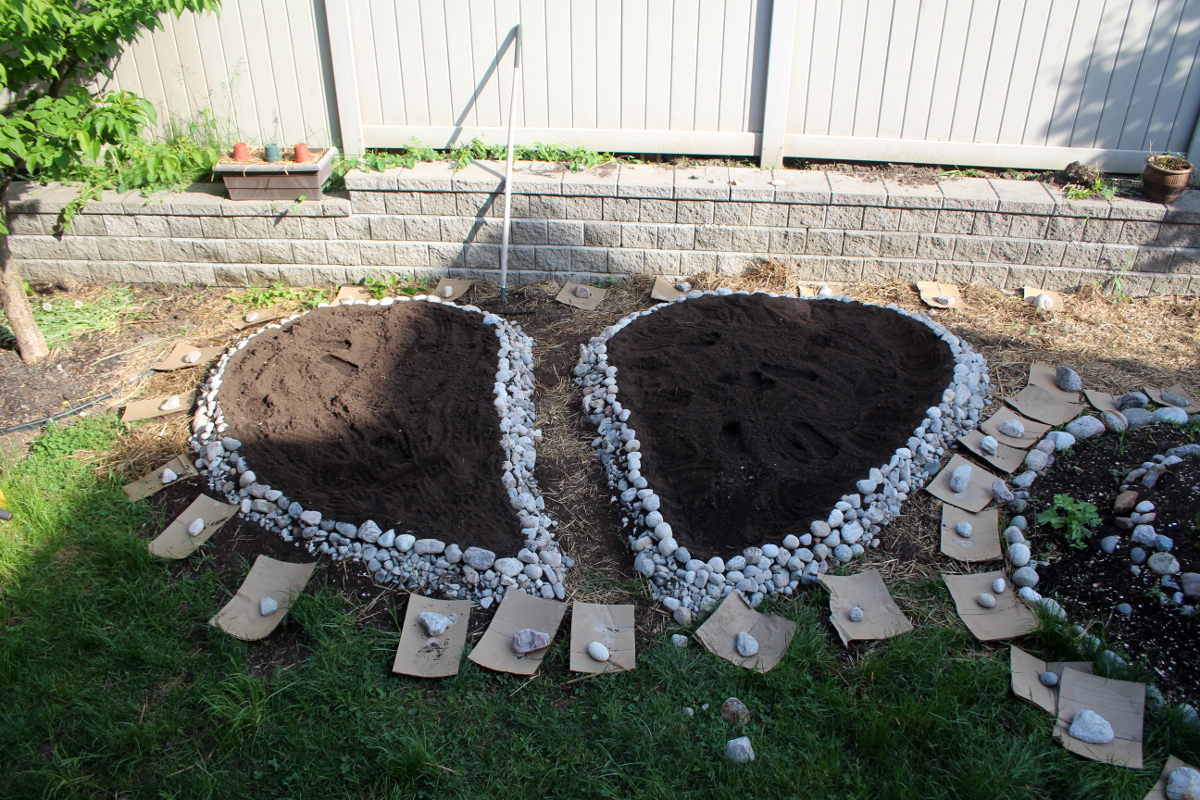
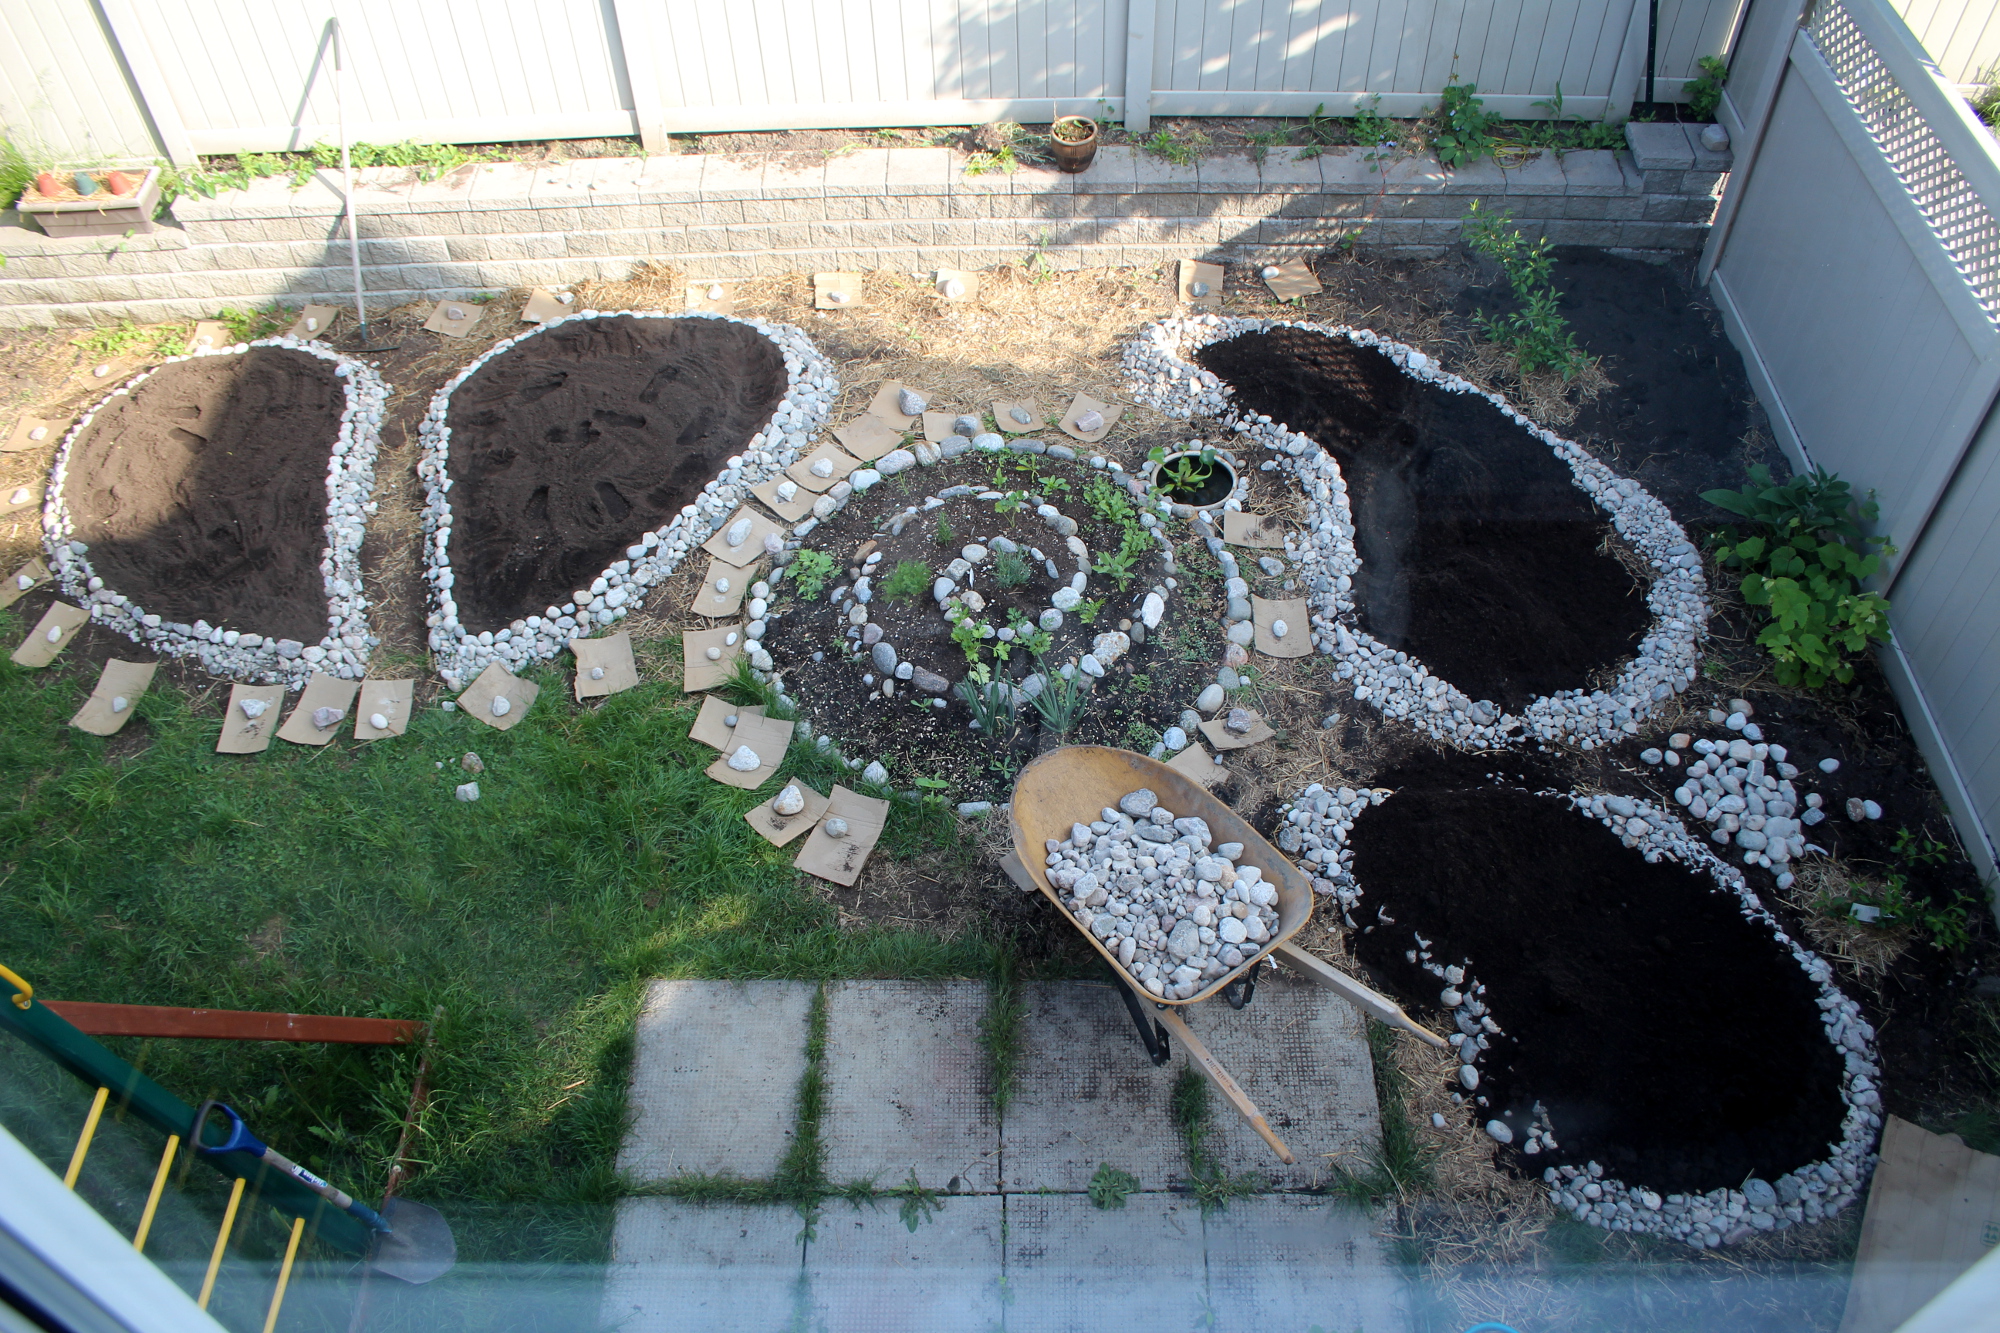
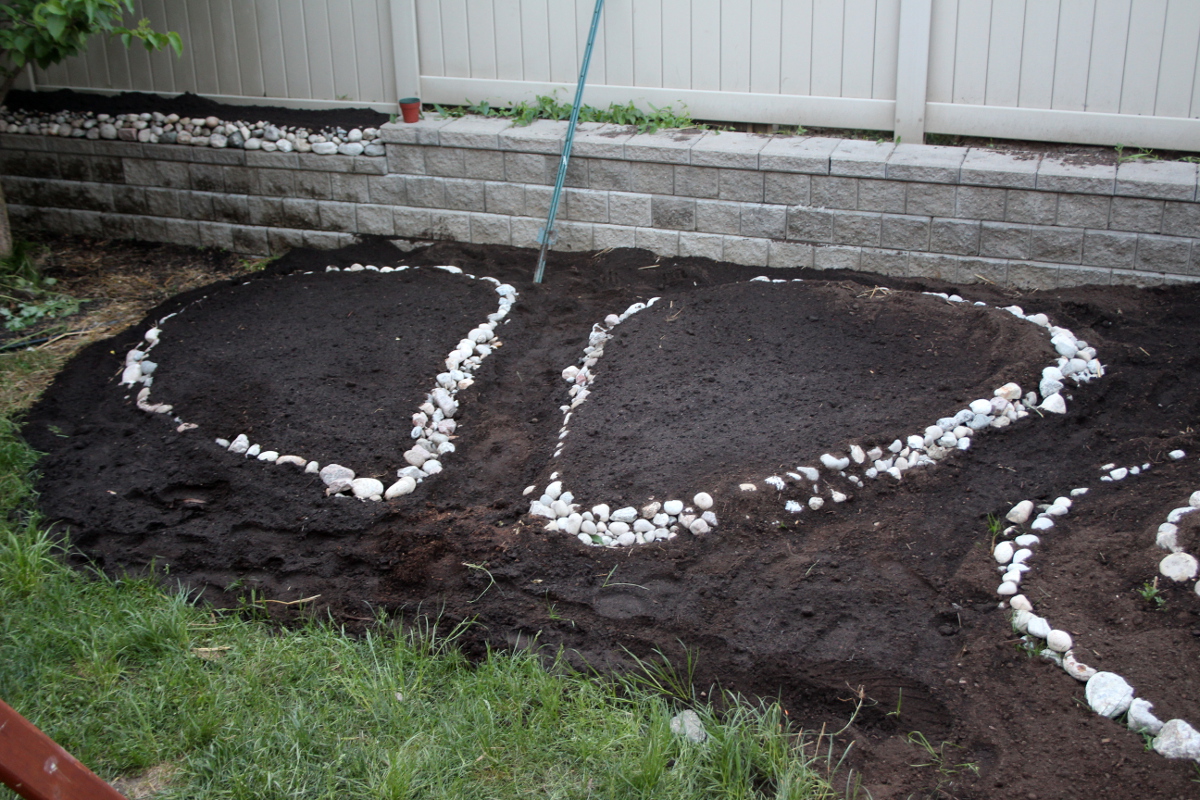
Once all the beds were filled in, I brought in the soil to fill in the spaces between, leaving the cardboard in place to prevent light from reaching the grass underneath.

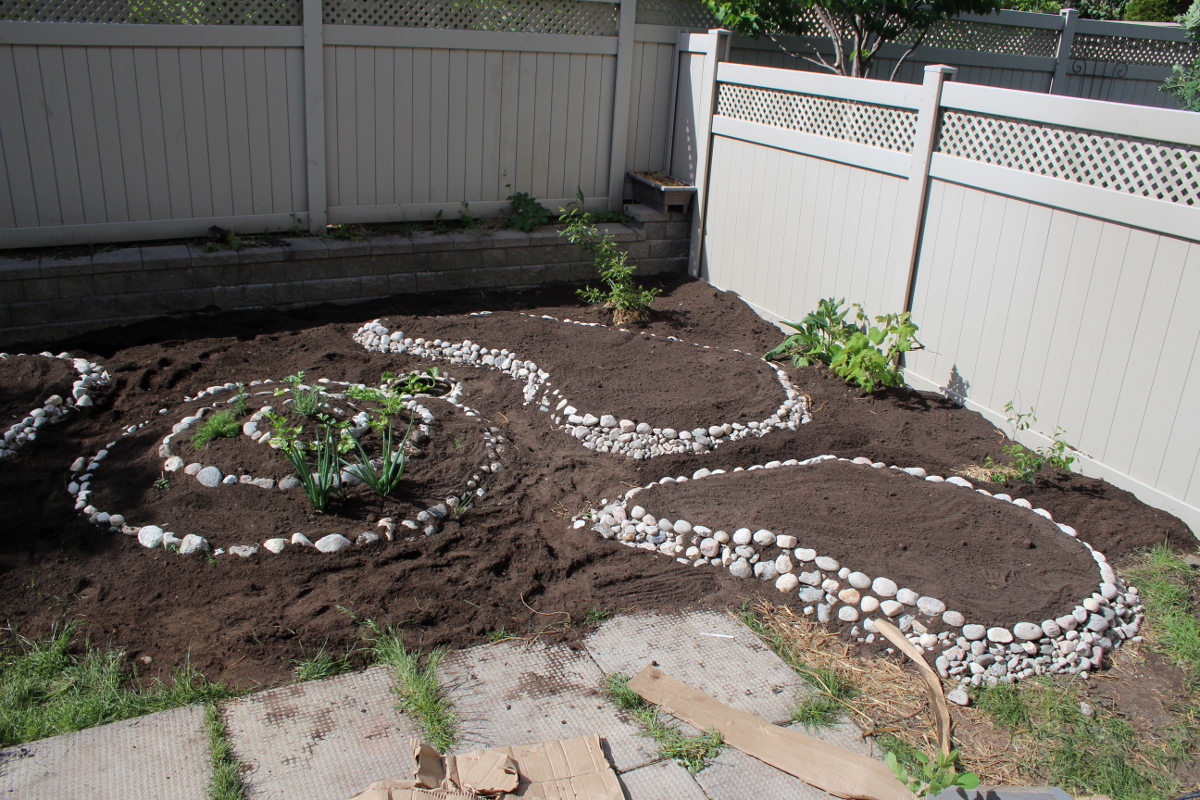
I’ve watered the soil, so it can settle, and the next day brought more in.
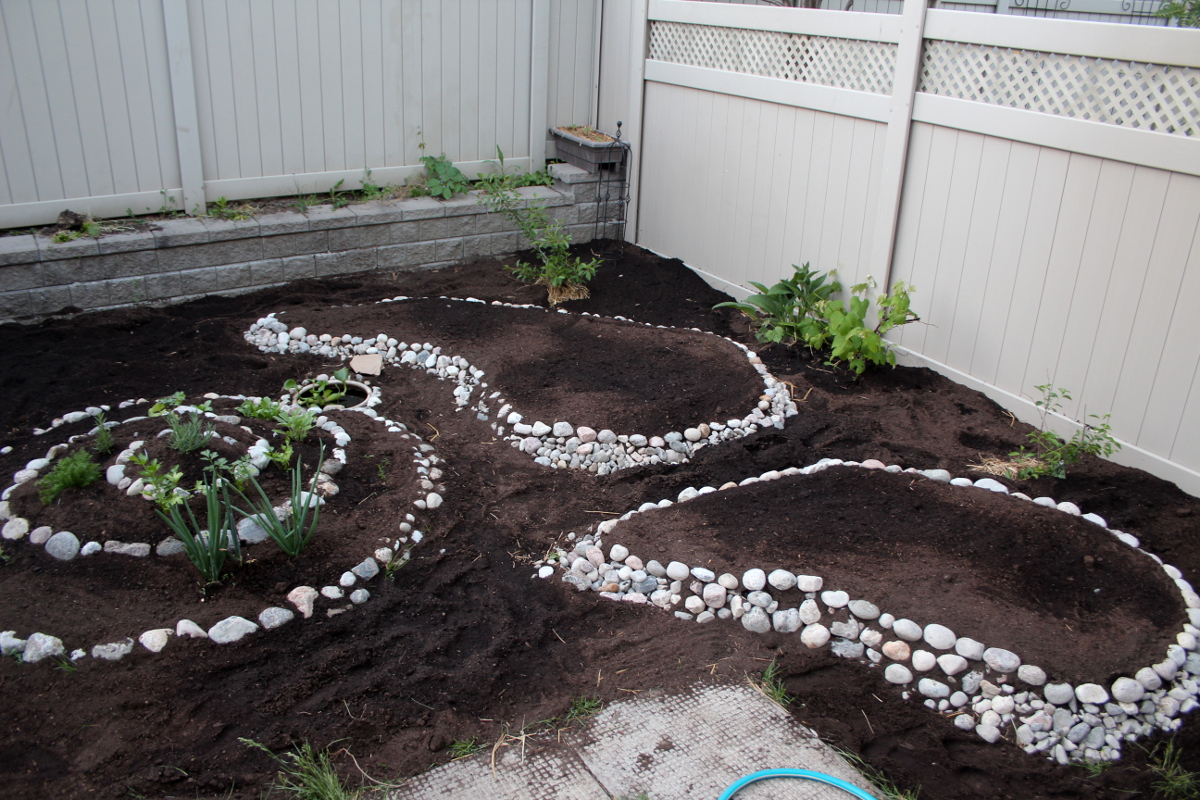
Gavin from Edible Landscaping Ottawa was building three long boxes to be put up against the fence. I’ve decided to add more planting space for shade-loving plants along the fence behind the tree, so I’ve built a smaller raised bed edged with river rocks. In the opposite corner of the fence, there is another small area, enough for a single plant, which I have also made into a raised bed and planted a black cherry tomato there.
I’ve also put up a trellis in the corner, so that scarlet runner beans could climb it.
Some of my herbs were already planted in the herb spiral, and we’ve got a water hyacinth for the small pond.
Then, when all the beds were ready, I’ve started planting. Since this was an evening after work, most of the planting was done after children were asleep, meaning I was planting by starlight, until about 1 a.m. This was the most serene, peaceful experience. Even in low light, I had little trouble placing all of the plants, since I’ve plotted their placement in advance on a paper map.
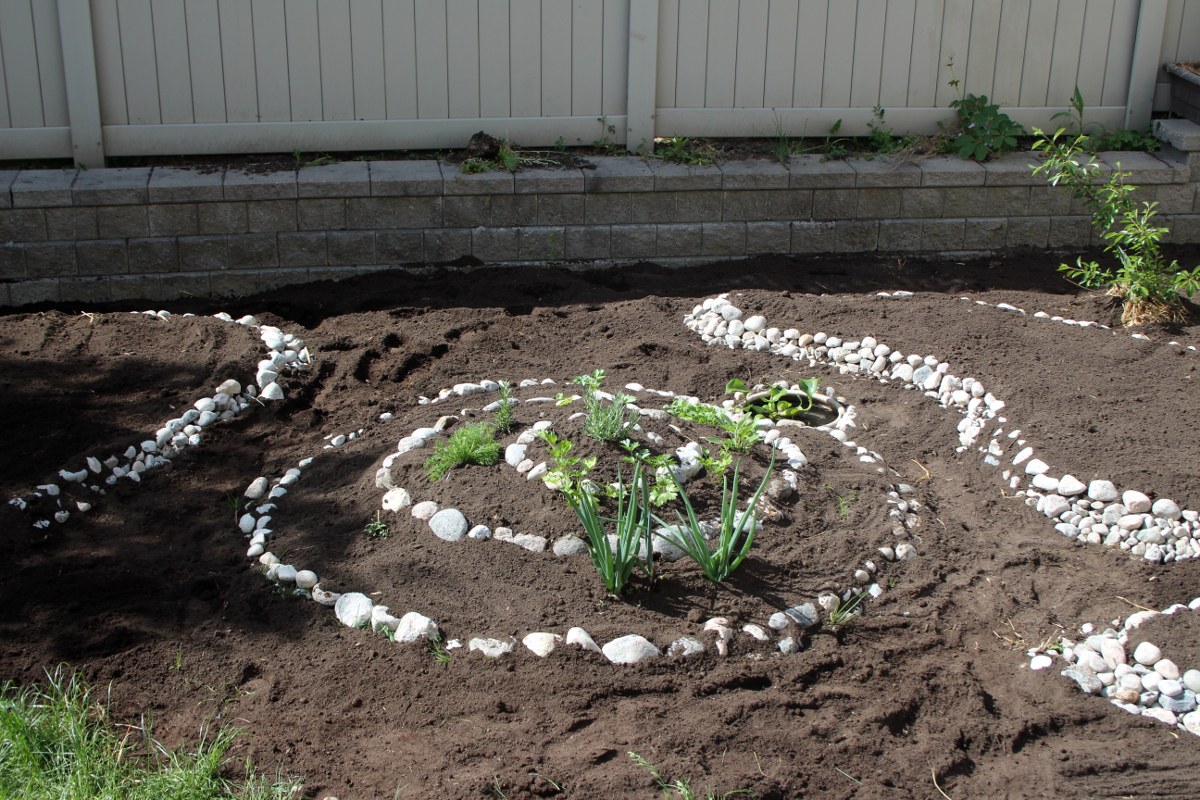
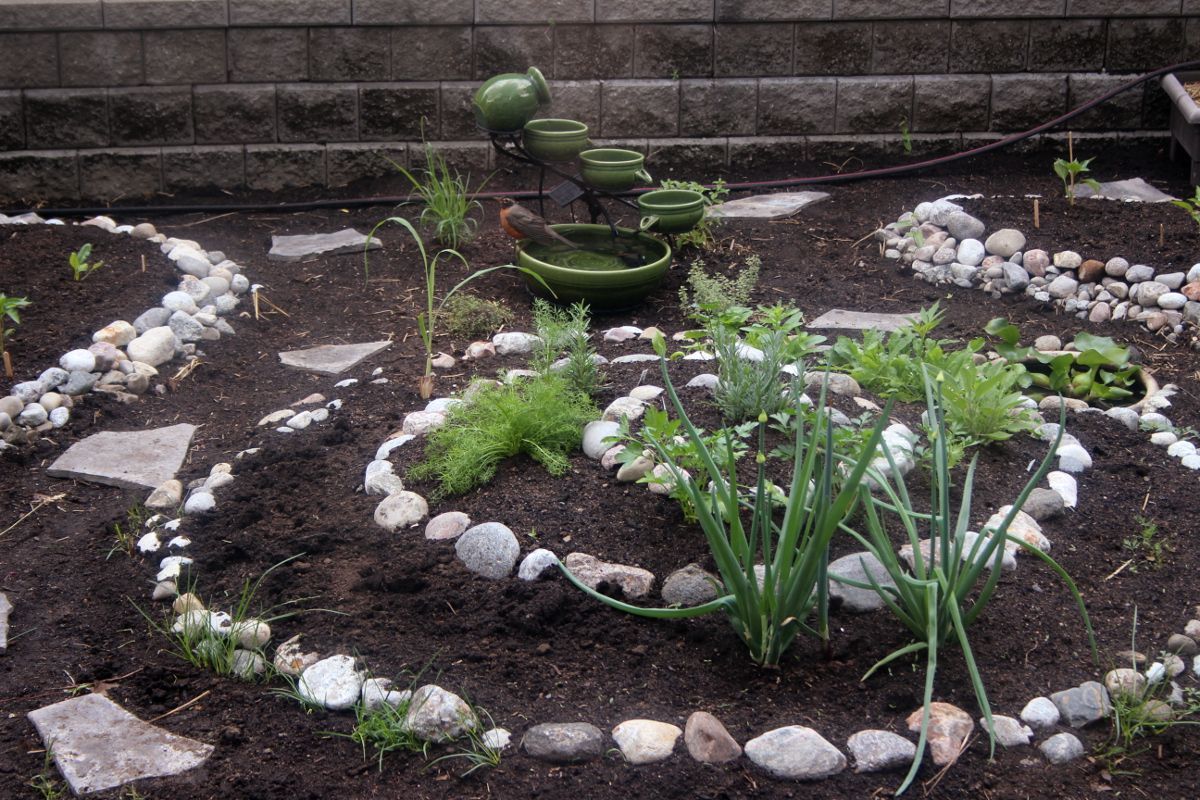
Behind the spiral, I’ve set up our solar-powered fountain which birds love so much, and around it I’ve planted lemongrass, lemon verbena, and two types of thyme.
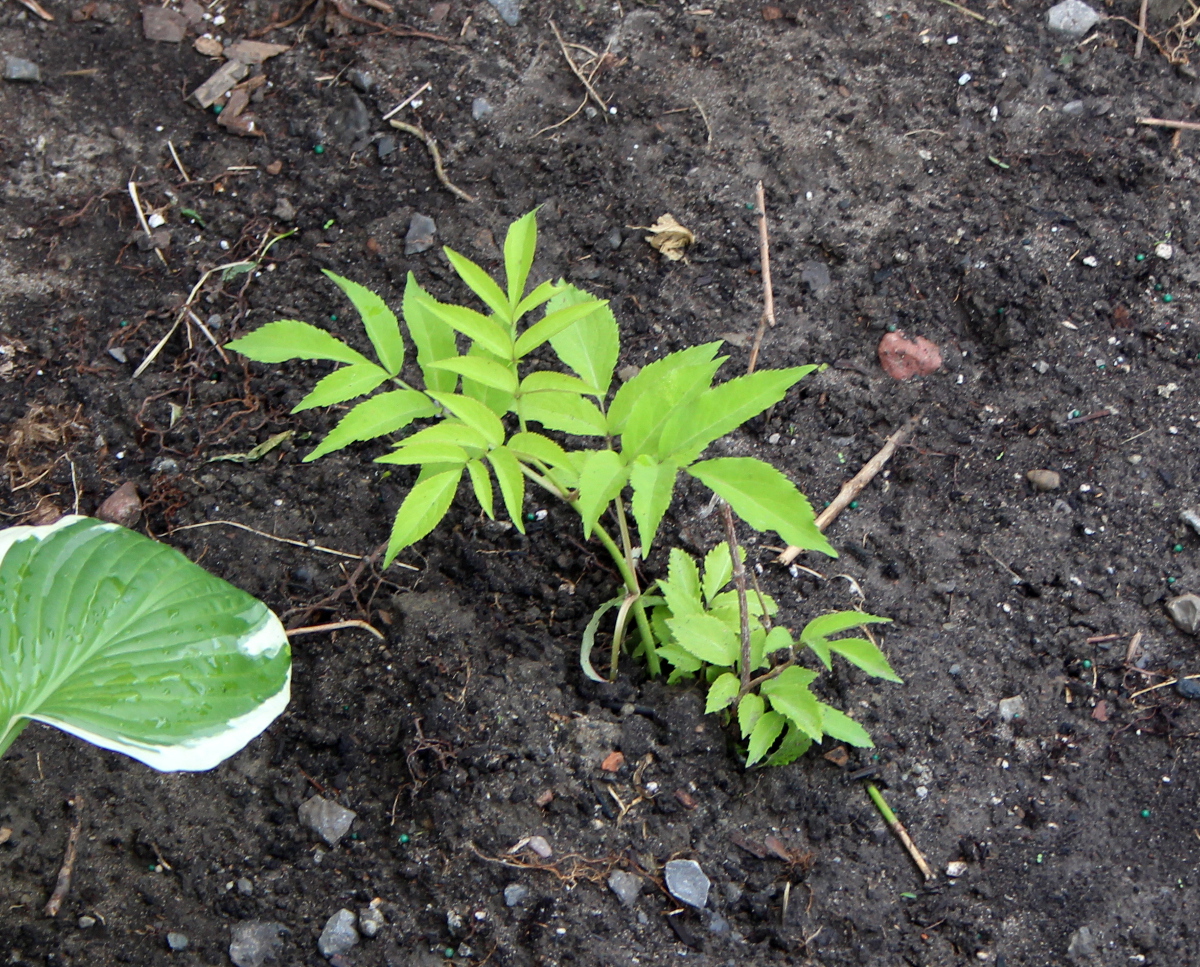
Later on that week, we’ve decided to remove another large ornamental bush behind the play structure, and plant an elderberry bush in its place.
I’ve also sourced some broken flagstones, to line the paths between the beds. Later on, we are considering planting a cover crop, to suppress the grass between the rocks.
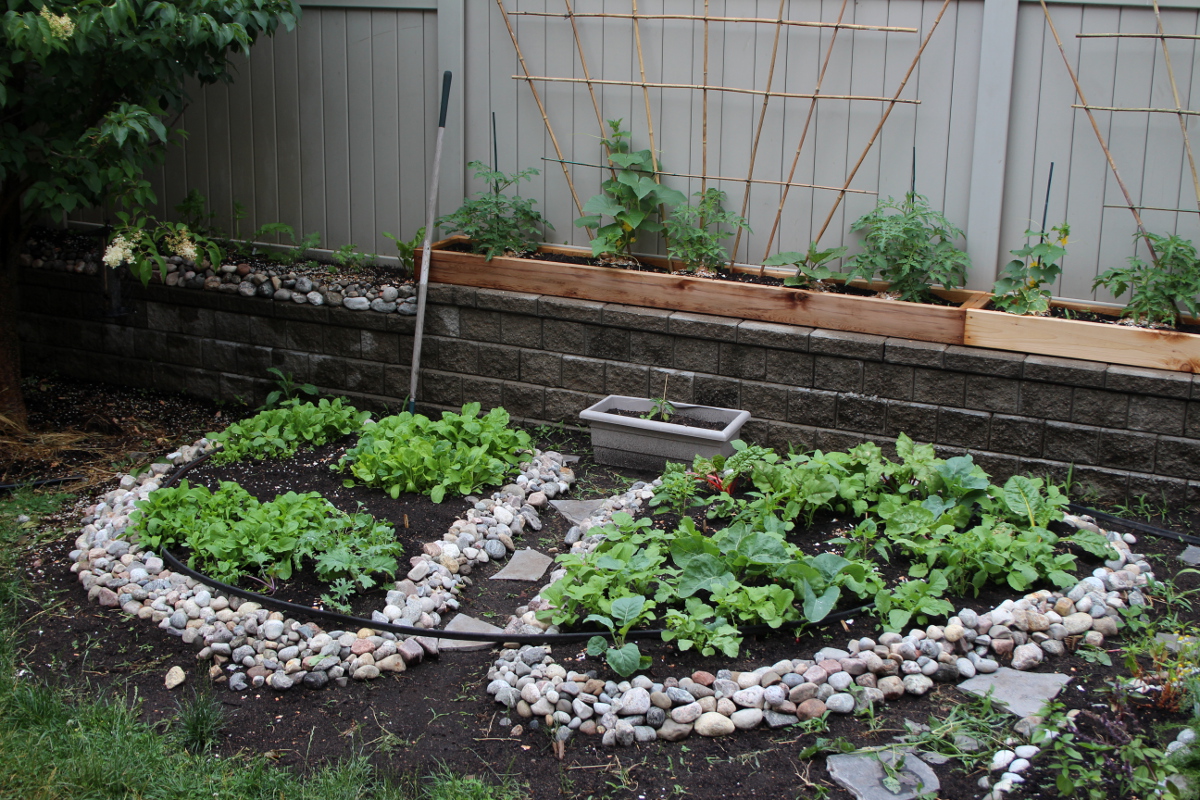
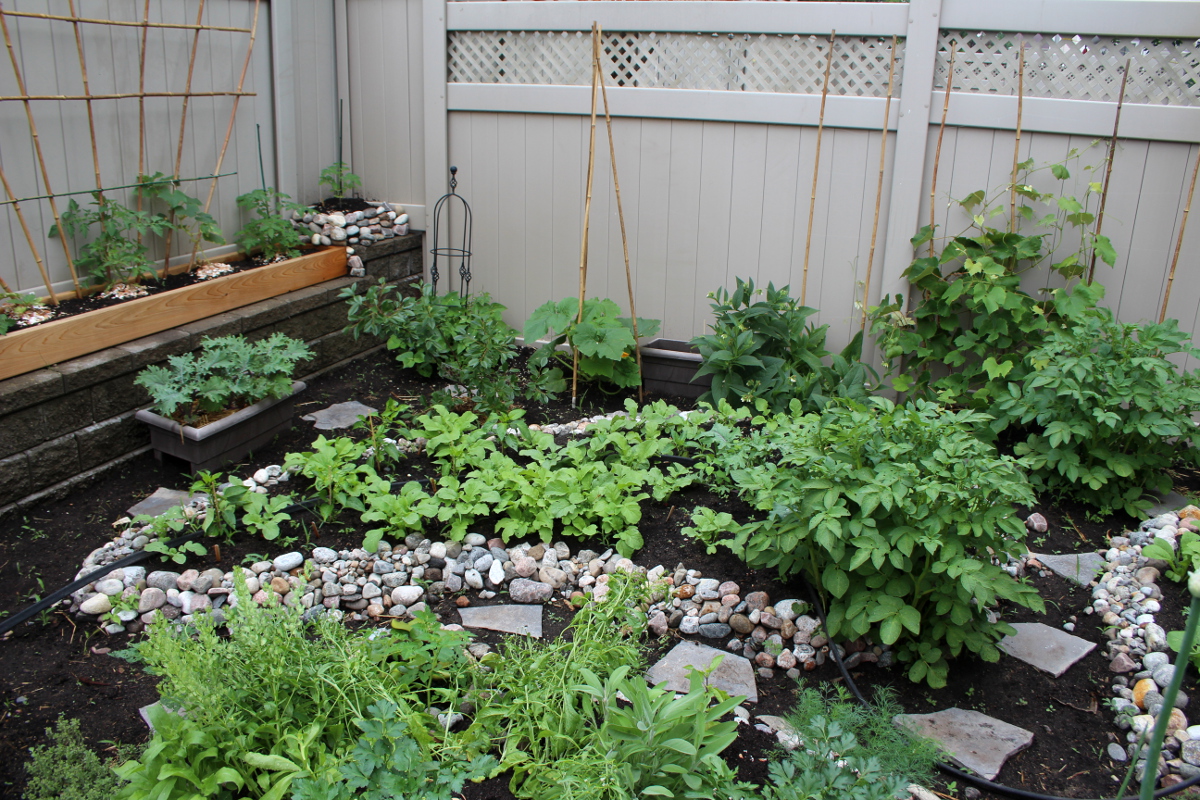
About a month after my initial planting, the garden was wonderfully green.
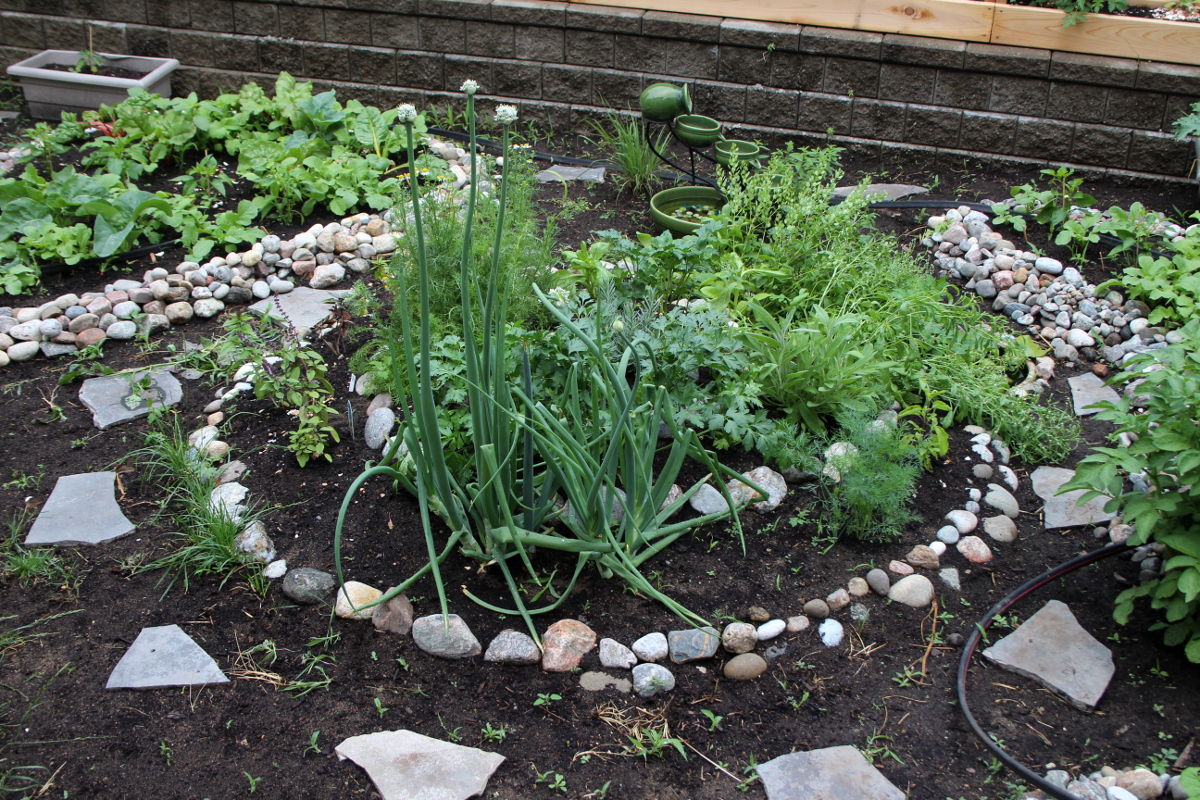
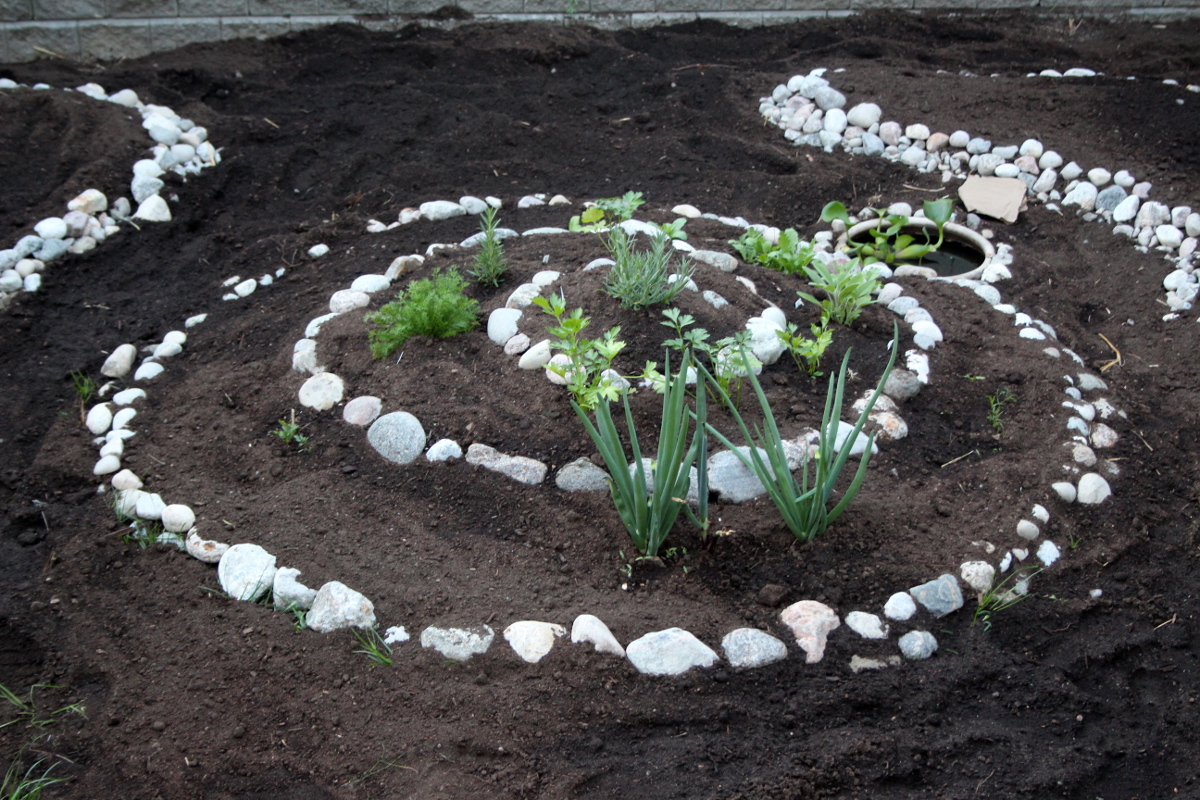
The onions were the first thing planted in the spring, and they are happily blooming in the herb spiral.

Some things, like cress, have sprouted from last year’s seeds without any involvement on my part. I also have a random tomato seedling sprouting here and there, but as I would rather not have a tomato forest again this year, I gently usher them out. Two large ones, that insisted on growing in the herb spiral, I have replanted into pots.
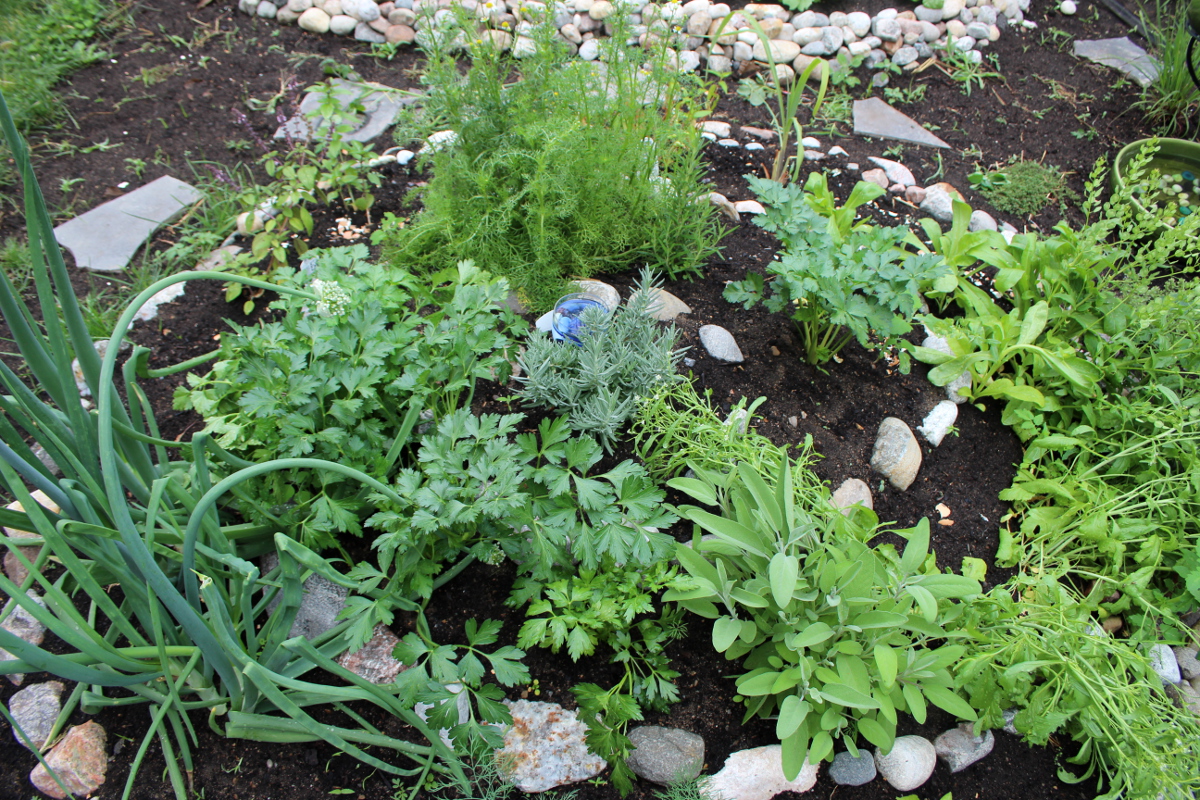
The blue ornament, barely visible in the picture below, was created out of a broken blue wine glass and some rocks, sea glass, and beads, topped with water. It sparkles in the sun and attracts curious creatures that sometimes also get interested in consuming delicious bugs nearby.
In the meantime, peonies planted by the previous owners, were delighting us with their blooms:

The remaining tree is a Japanese lilac, which blossoms in June, after most North-American varieties have finished blooming, and has a very sweet smell to the flowers.

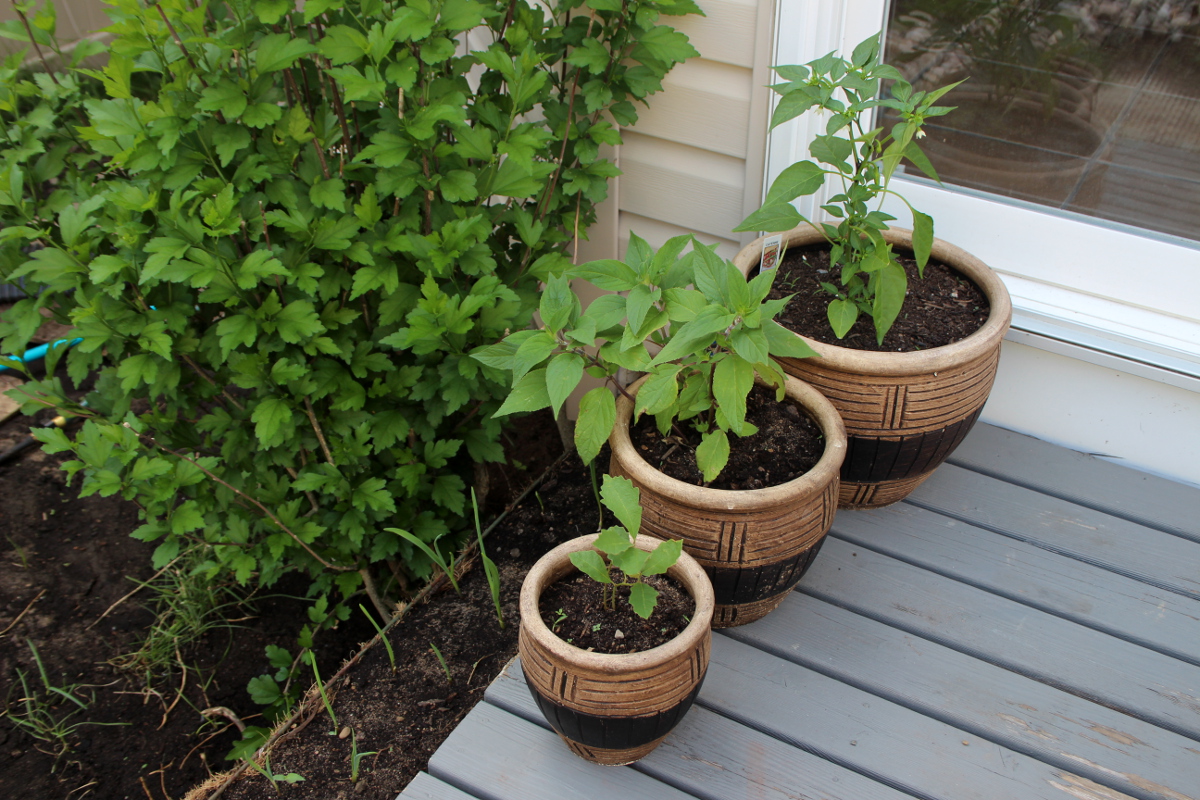
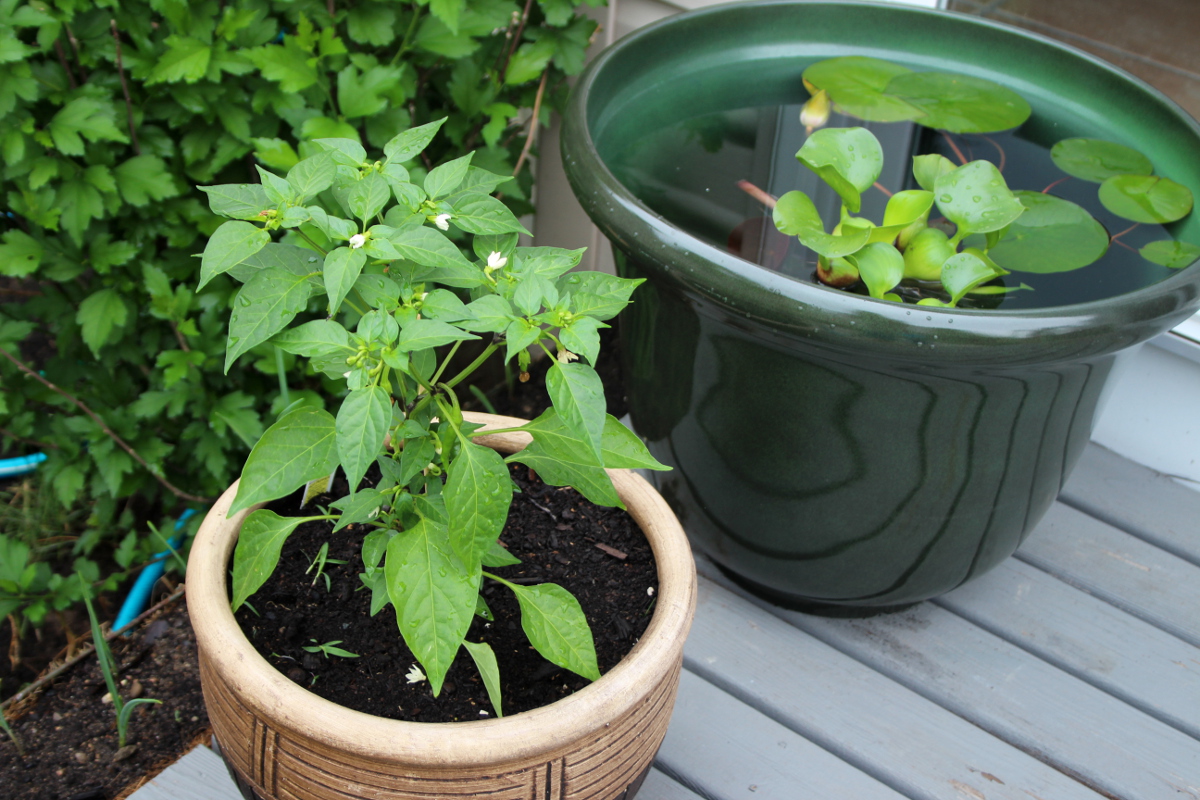
Along the porch, I have lined an old metal shelf with coconut fiber, added soil and planted a row of garlic, which has happily sprouted. And in the pots, there are cayenne peppers, pineapple sage, and either a hazelnut or an acorn we have found sprouted in the garden. The squirrels bring us many treasures.
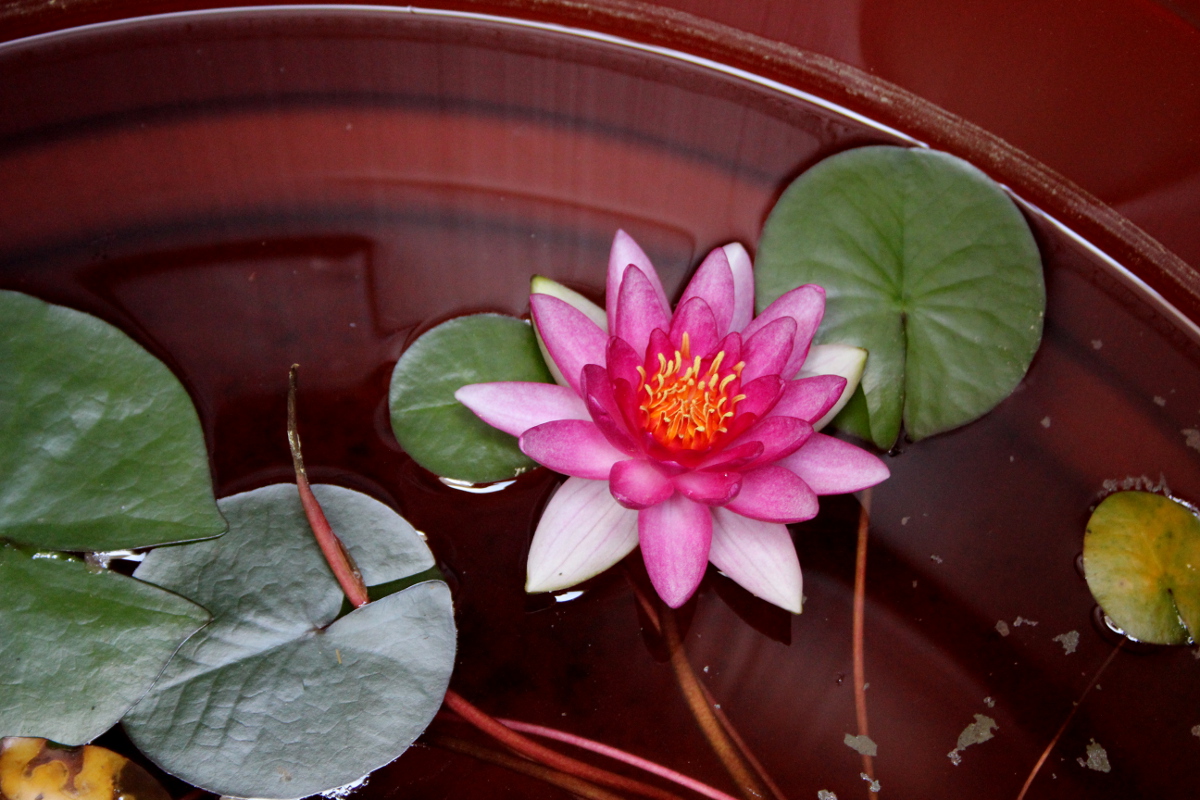
As part of the remodeling, we’ve installed two rain barrels, and have added goldfish, a water hyacinth, and a lily to them. The lily was here temporarily as it counts on a more or less constant water level, being planted in a pot placed at the bottom of the water-filled container.
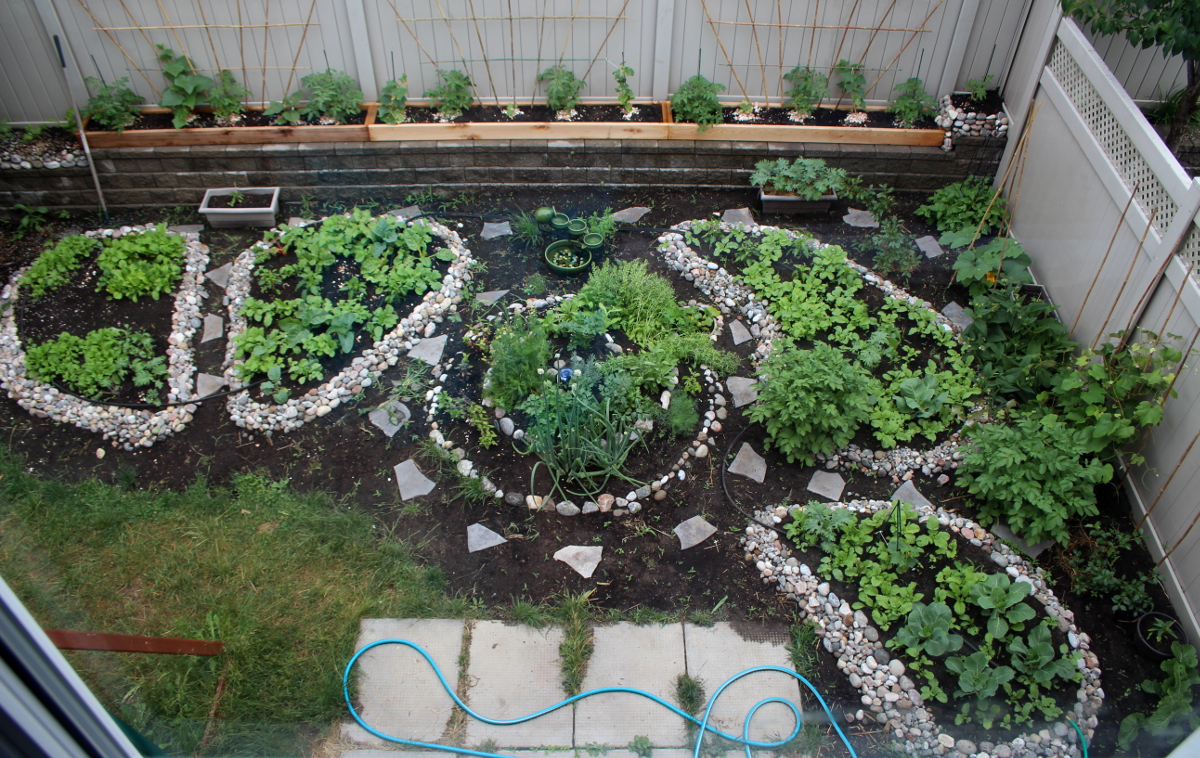
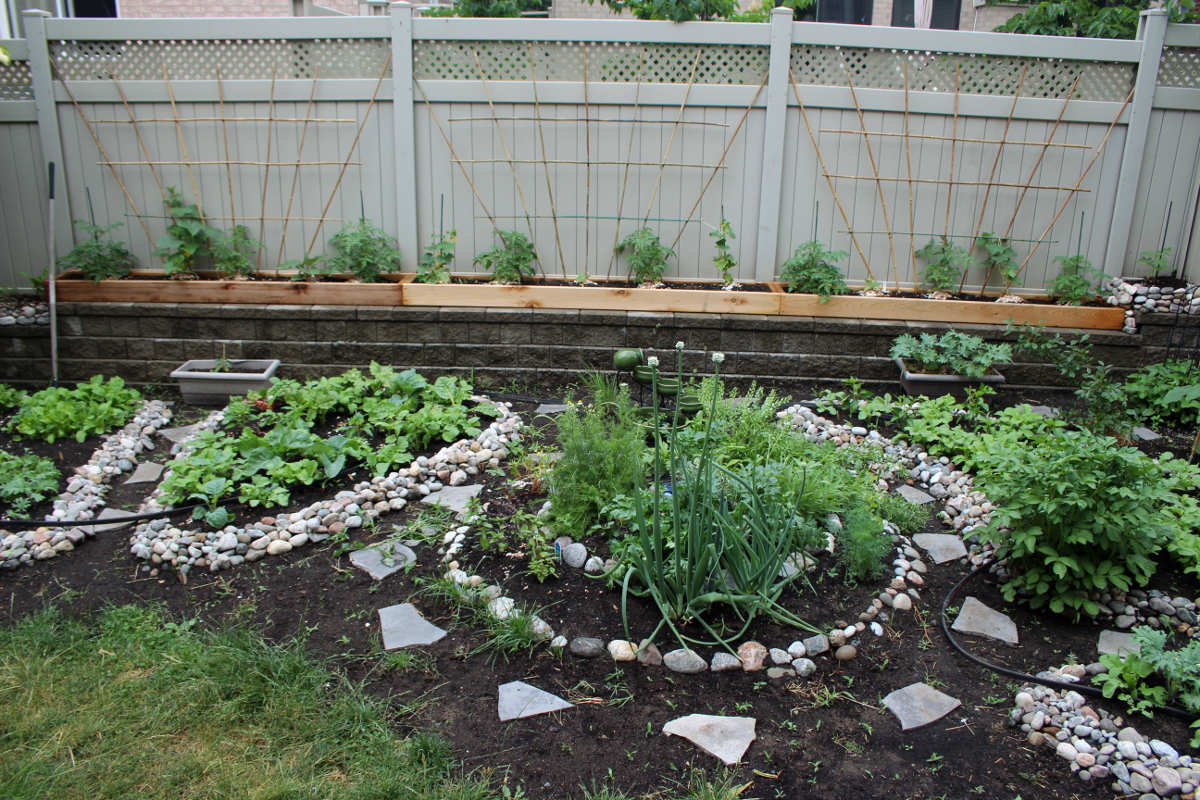
This is a view from above. I’ve built trellises for the grapes (on the side) and the pumpkin (close to the top right corner), and for the tomatoes, eggplants, and cucumbers growing along the fence. I’ve also added crushed eggshells to the soil, to discourage slugs and to add minerals.
After I’ve offered my extra seedlings to people, there were a few left over, and so I’ve planted them in a few pots I’ve placed around the garden.
I’ve staked tomatoes and cucumbers, to give them extra support before they can reach a trellis.

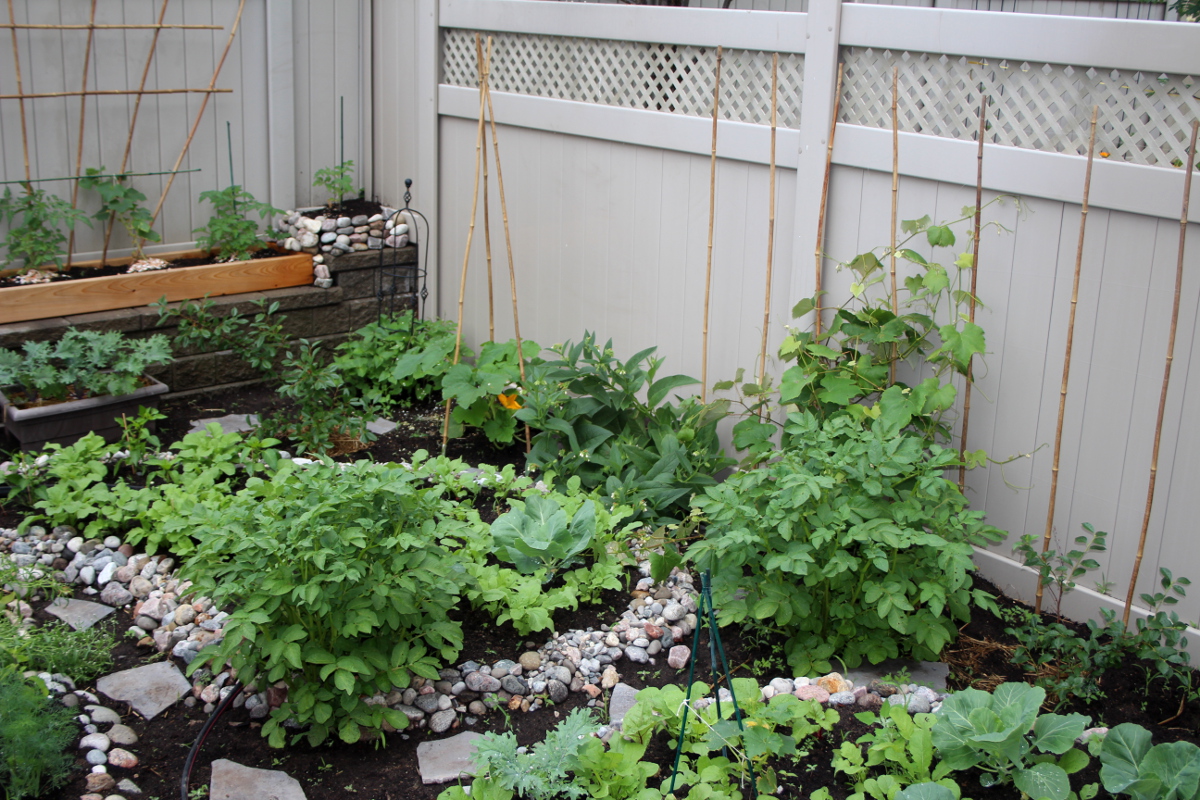
Without my intention, surprise potatoes from last year have happily sprouted two large bushes, one right through the wall of one of the garden beds. I’ve decided to leave them there until harvest. As one of my friends put it, the best potatoes are surprise potatoes.
The grapes took to the trellis with pleasure, which has also freed the comfrey, as it was no longer getting entangled by grape vines that had nowhere to climb.

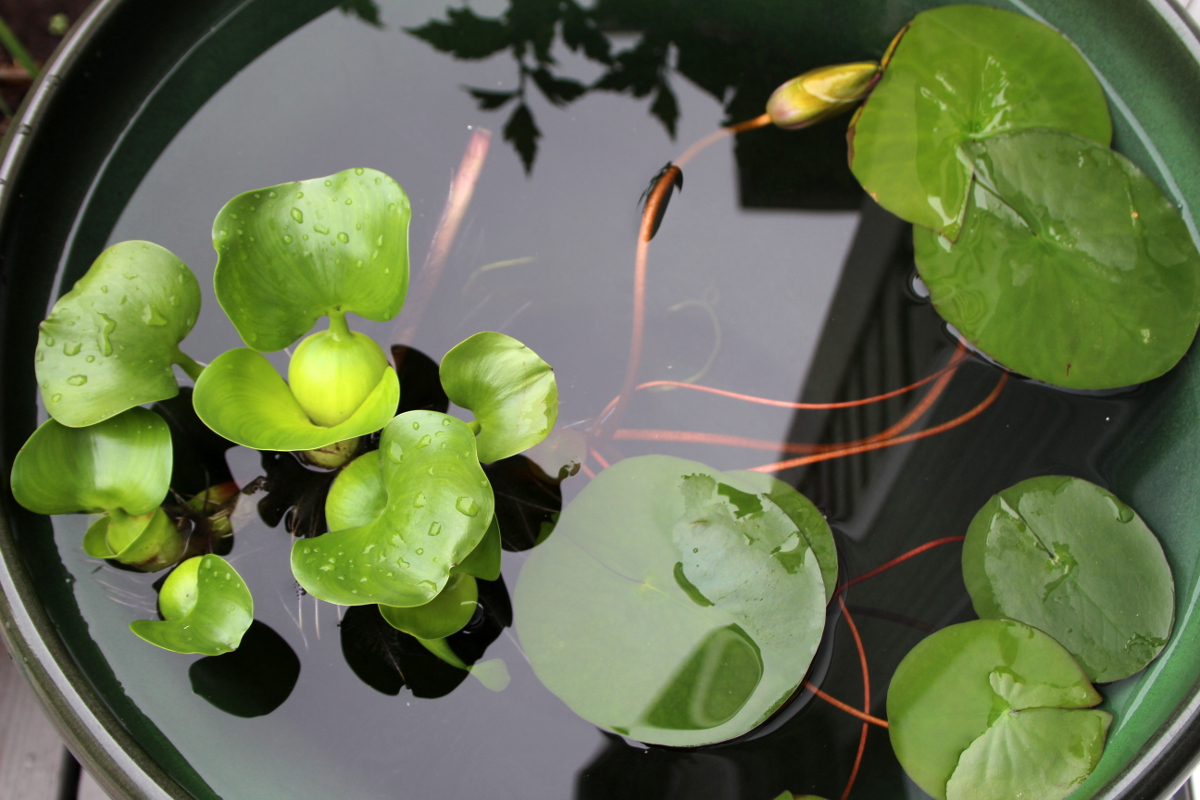
We have later acquired a large pot into which the water lily was migrated since it’s of a more suitable height. As my water hyacinths keep propagating, I’ve placed one here as well. Two goldfish now call this new pond home.
It’s been a significant transformation for my garden and a lot of work, even though, being a labour of love, it does not feel like the effort was significant. When we are truly excited about a project, we find energy, time, tools, and processes to achieve the desired result.
Here is a video of progress from the first planting (taken in the rain) to the growth a month later:
I love looking out of my kitchen window at all the greenery. I love stepping out on the porch and seeing all the buzzing life in the garden. It’s a wonderfully calming experience to sit outside on a sunny day, feel the breeze on my face, listen to the soft tinkling of the water in the fountain, watching the goldfish among the leaves of the water lily, and feeling the warm rays of the sun.
My youngest keeps asking to go outside all the time, rain or shine, and loves poking around among the greens. My oldest likes examining flowers and leaves with me, learning how vines climb and fruit form, helping me collect greens, herbs, and radishes for dinner. And they both love picking fresh berries from the berry patch and strawberry containers. The garden is a truly wonderful place that keeps on gifting us new experiences every day.
This is gorgeous, Jenya! WONDERFUL work – and thank-you so much for the great directions. You have worked very hard and it is a real inspiration! Thanks for sharing.
I am not tired to repeat – WHAT A WONDERFUL GARDEN!
Would like to see it from YOUR kitchen window.