


Before my son’s fourth birthday, I searched around for Waldorf-style play silks and found, to my astonishment, that they cost about $15/piece. As I wanted to get him a few silks in different colours, this seemed an exorbitant expense, so I have set out to find a way to make those myself. By the time the supplies have arrived, his birthday was over and I was swamped with getting back to work while taking care of the baby who’s been ill on and off, and trying to recover my system after a drive crashed and took with it not only data but two operating systems as well. This past weekend, I have decided to undertake the silk dyeing project in hopes to get my son excited about making our own toys and to create something that my upset and exhausted from illness baby would enjoy as well. The silks were a success.
Silks
The online instructions differed in amounts of ingredients needed, so after reading everything I could find, I have decided to improvise, and it worked out well. You can get the white 8mm scarves at Dharma Trading Co. I had’t ordered from them before and they have sent me a gift of a while silk 8″ by 54″ scarf with my first order which I thought was a very nice gesture. I bought seven 35″ by 35″ silk shawls and have left the narrower scarf white, to get eight colours in total. With shipping, the order cost me around $50.
Colour
To my astonishment, I was unable to find powdered Kool-Aid in any variety of colours. Normally I wouldn’t touch this stuff with a ten-foot pole, but all the online tutorials called for it and it did seem to present a variety of colours. Surprisingly, now that I actually needed some, I could not find any! Not even at Wal-mart that had an entire isle called “Powedered drinks”! Trying to find some at Loblaws, I have asked a clerk for help. “What do you need it for?”, he asked, and I had to hold my tongue to not say I was planning to start a cult. It ended up residing in the isle with bottled water and only two colours were available. Apparently, since Kool-Aid switched to making liquid concoctions, the powdered stuff is hard to come by. I found a dealer on e-Bay and got an assortment pack of 20 different ones. I have considered using the liquid variant, but reasoned that I would not need an entire bottle, and there is no way I’d be ingesting any of the remainder, so that would have been a waste of money.
In the variety pack the shades of red prevailed, but I was able to come by groups of seven different colours, picking two or three similar colour packets for each shawl. The pack contained only one purple and only one orange, so the two packets are picked up from Loblaws ended up filling that gap.
Containers
The more even you want your colour to absorb, the larger the container you’d want, to the maximum of the width and length of the size of the fabric. As an extreme, think of a bath tub filled with water enough for the fully-unfolded silk to lay flat and be submerged. This is a scenario to achieve the most uniform colour. However, as you can imagine, a bath tub would require quite a few packets of Kool-Aid to achieve a vibrant colour, a long time to boil and change water for each colour, and involve attempts to remove the stains from tub walls after the fact.
Thus our choices are whatever the kitchen provides, preferably metal or glass so it does not stain (although one of my metal bowls has acquired a faint purple tinge), and the larger the better. If you can keep several containers going in parallel, it will cut down on your dyeing time. The smaller the container, the harder it is to get all parts of the fabric exposed to a colour evenly, so be prepared for some tie-dye like variations. I found it didn’t take away from the lovely colours that resulted.
Vinegar
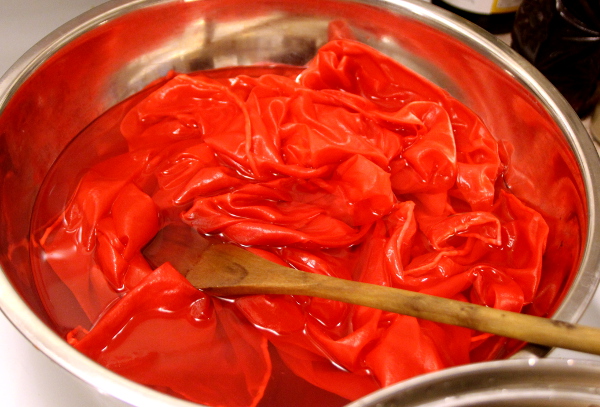
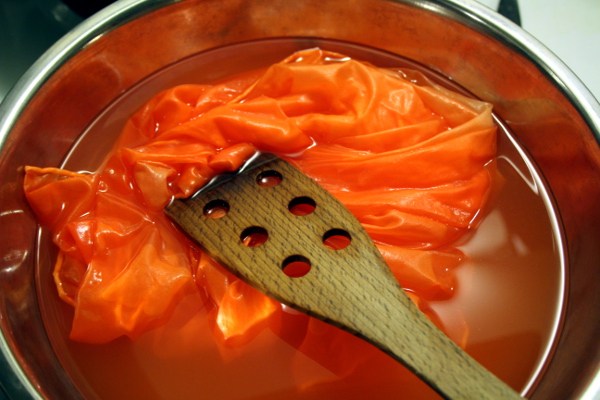
Vinegar is used to get the colour absorbed well. Some tutorials stated that 2 cups of vinegar are needed for each shawl, yet when I pulled out all the vinegar I had in the house, it was not enough. I ended up putting a cup into each and all the colour got absorbed beautifully. In fact, I have run out of vinegar towards the end and had to split the last cup between two pieces of fabric. The corresponding orange and red shawls came out vibrant anyway. I did soak all the shawls in water with 3 cups of vinegar prior to dyeing each separately, as one tutorial indicated, so I suggest getting lots of vinegar, accounting for 3 cups for the initial soak and a cup for each colour.
Water
Keep the kettle going and a large pot on the stove. As a kettle boiled, I would pour it either into the tubs with the colour that I was preparing, or into a pot of boiling water on the stove if all the receptacles were already containing a dyeing piece of fabric. Have your sink clear so you can rinse the coloured silks and free up containers for the next colour.
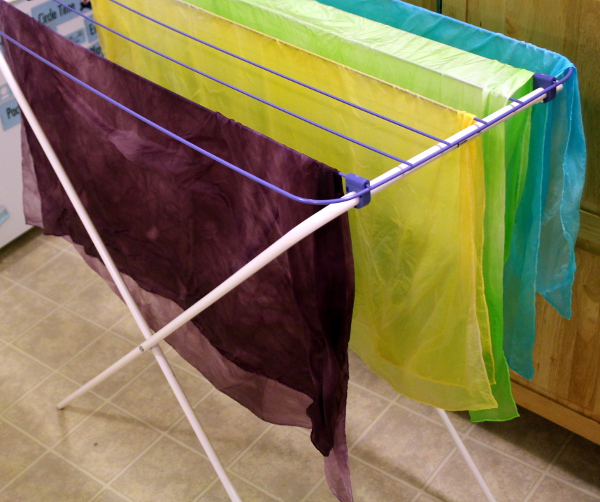
Place to dry the silks
I have pulled out a small foldable drying rack from downstairs. Presumably you can hang the fabric anywhere to dry as once all the colour has absorbed it should not stain, and this was the most practical solution for me.
Gloves and large wooden spoons
I suggest wearing gloves while mixing the colour and rinsing the coloured silks (and be prepared to inhale quite a bit of artificial flavour). I got my fingertips blue while mixing, but it washed off in a day or so. I found wooden spoons good for swirling the fabric around in the metal bowls while trying to get all the parts of the silk exposed to the dye as evenly as possible. I didn’t want to use metal to avoid potential tears from sharp edges.
So, here are the steps I used:
Step 1. Soak all the unfolded silks in a pot with cold water and 3 cups of white vinegar while you get things set up. Be sure to unfold each scarf or shawl before dyeing it — it’s easiest to do before soaking, while they are dry.
Ingredients (for one piece of silk fabric):
- 2-3 Kool-Aid packets of same or similar colour
- 1 cup white vinegar
- 3-4 cups of boiling hot water, adjust quantity to fully submerge the fabric in whatever container you are using
- a deep bowl, preferably metal or glass
Step 2. Empty Kool-Aid packets into the container, add vinegar and hot water, stir to dissolve.
Step 3. Submerge the silk in the mixture, spreading and swirling it around.
Step 4.Wait until all the colour is leached from the water into the silk – the water should be almost transparent.
Step 5. Dump the water out, rinse the silk under cold water, wring it, smooth it out and hang to dry.
Repeat steps 2 to 6 for however many silks you wish to dye.
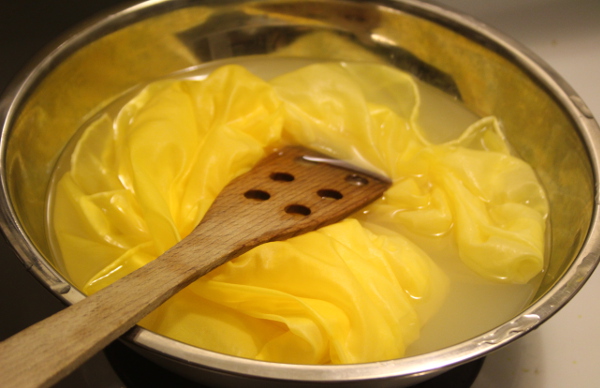
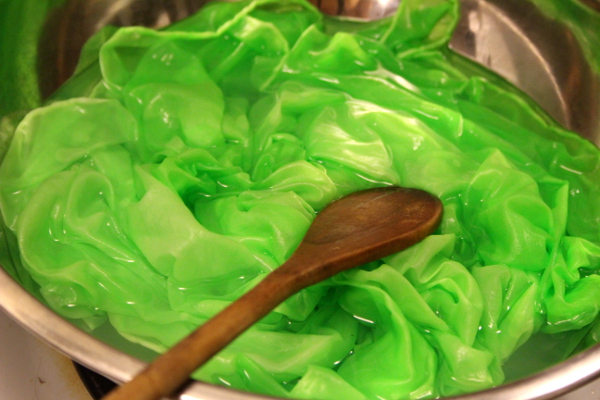
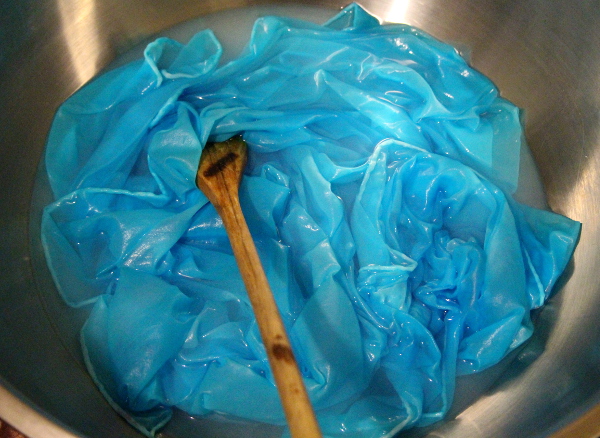
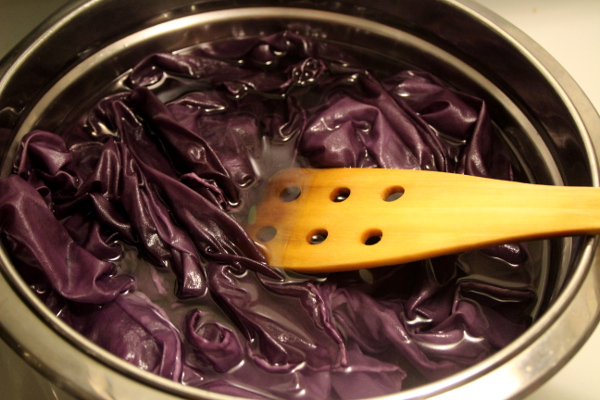
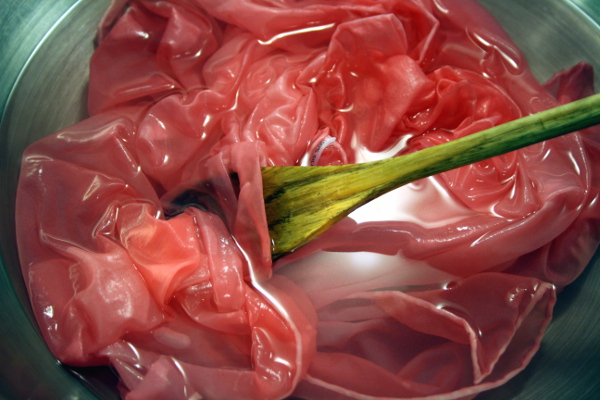
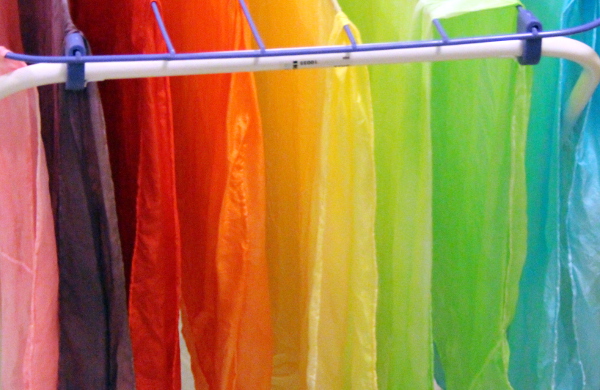
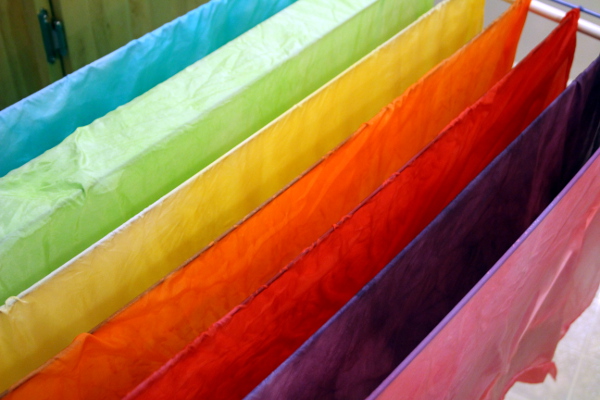
The dyeing itself was not difficult or very time-consuming. I had four bowls going in parallel, so I only needed to do two batches for 7 scarves. The blue, green, and orange came out very vibrant. Yellow and pink resulted in softer shades. (The pink photo did not come out so well as my camera decided to die at that time, and I had to switch to a toy one.) The red is bright and reminds me of a Soviet pioneer tie (oh, the childhood memories). The purple is a little too uneven, but that’s just because it was dyed in the smallest bowl. I’m not a huge fan of this shade – perhaps next time I would mix blue and red to see if a move vibrant colour would result.
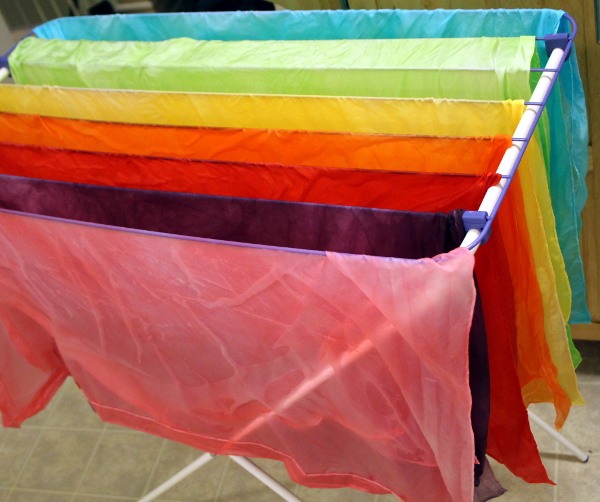
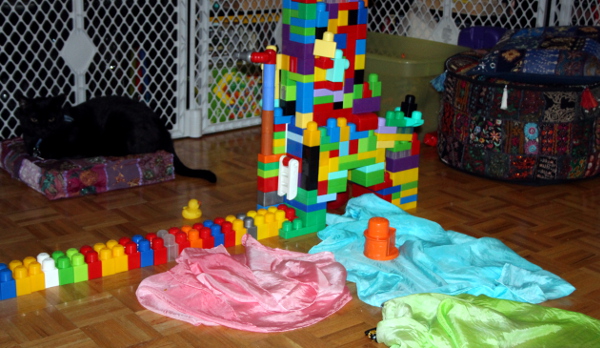
The silks came out lovely. My son enjoyed watching the process and couldn’t wait until they were dry so he could play with them. The baby loved them too — it’s her favourite game these days to pull every piece of fabric over her head and settle it on her shoulders like a cape. She’s also been draping the coloured silk over her head, pulling it off in a peek-a-boo manner and giggling profusely.
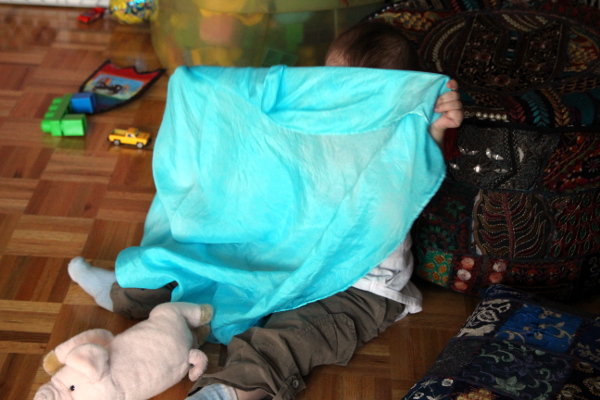
Only a couple of days later the blue shawl has become a river with a bridge across it, the green — a forest, and the pink — a flower meadow. These silks do make great toys.
I would participate in this game with the same excitement as kids,
but in my dreams I would sew something from my favourite fabric – silk.
Pingback: Make move less stressful for kids - Fingering Zen