It has been a while since I’ve posted an update to Fingering Zen. The main reason being – I birthed a baby. Since that makes three, it’s quite lively here over the past couple of months. And now that summer finally appears to have graced us with its warmth, there are lots of things happening outdoors, which means I’m rarely at the keyboard.
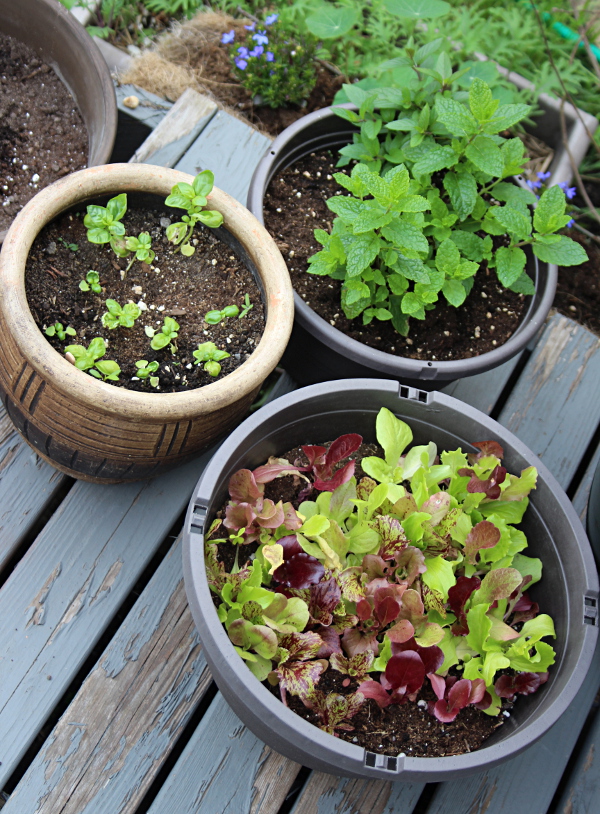
My garden is in bloom, and lots of veggies and herbs have been planted. Having a little one attached to me pretty much around the clock means that I have to find 15 minute windows of time here and there to take care of the garden. This is what we’ve done in the garden when children are playing and the baby is carried by me or my partner:
– Pull a few weeds while playing with children outside — I showed them what to pull and engaged them in the process.
– Plant a few seedlings — it might seem like it would take forever, but I’ve planted a garden bed or two in 15 minutes. Kids have helped by bringing me plants and taking away empty plant pots.
– Seed a bed — it doesn’t take long to make a few channels, drop some seeds into them, cover and water. My kids like to put the seeds into the ground and then watch them grow.
– Stake plants — I stake tomatoes and peppers, and initially cucumbers and squashes.
– Set up irrigation — it took about 3 sessions of 15 minutes to re-create our hose setup from last year: rain barrels with a hose, and a splitter with two drip hoses snaked throughout the garden and a hose with a nozzle we use to water potted plants, the herb spiral and other stand-alone plants. Children loved help us test the setup by turning the water on and splashing around in all its wet glory.
– Water plants — my kids love directing the spray hose, turning on the dripping hoses and moving the rain barrel hose from bed to bed.
– Make a trellis or two — I still need to do this as it’s early in the season.
– Gather herbs and salad leaves with children — great to teach them what’s edible and what is not. This actually made my 3-year-old want to taste lettuce and pronounce that “hm, it’s not bad!”
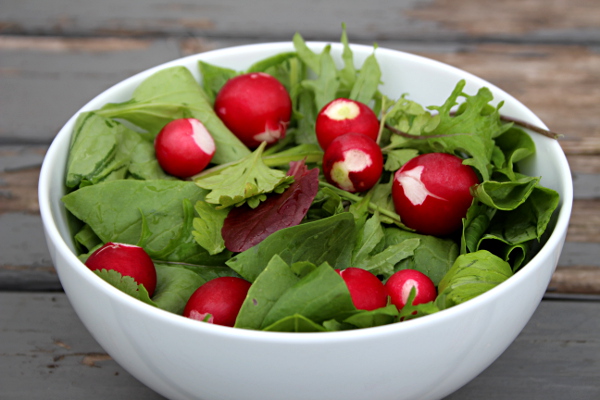
I’ve just sampled my first salad, comprised of young kale, bok choy, arugula, lettuce and a few sprigs of parsley, cilantro, and basil, topped with radishes picked from what used to be our front lawn.
We spend a lot of time in the garden in the evenings — eat our dinner outside, play games, note plants that have grown, flowers that have bloomed, keep an eye on which plants have been nibbled on by local fauna. Kids can now point out certain plants, know how to recognize stinging nettle and comfrey, so they can avoid being stung and pricked. They also now watch out for ripening fruit and excitedly tell me about their discoveries.
I feel this summer bursting with potential. May it bring us many a warm lovely day.
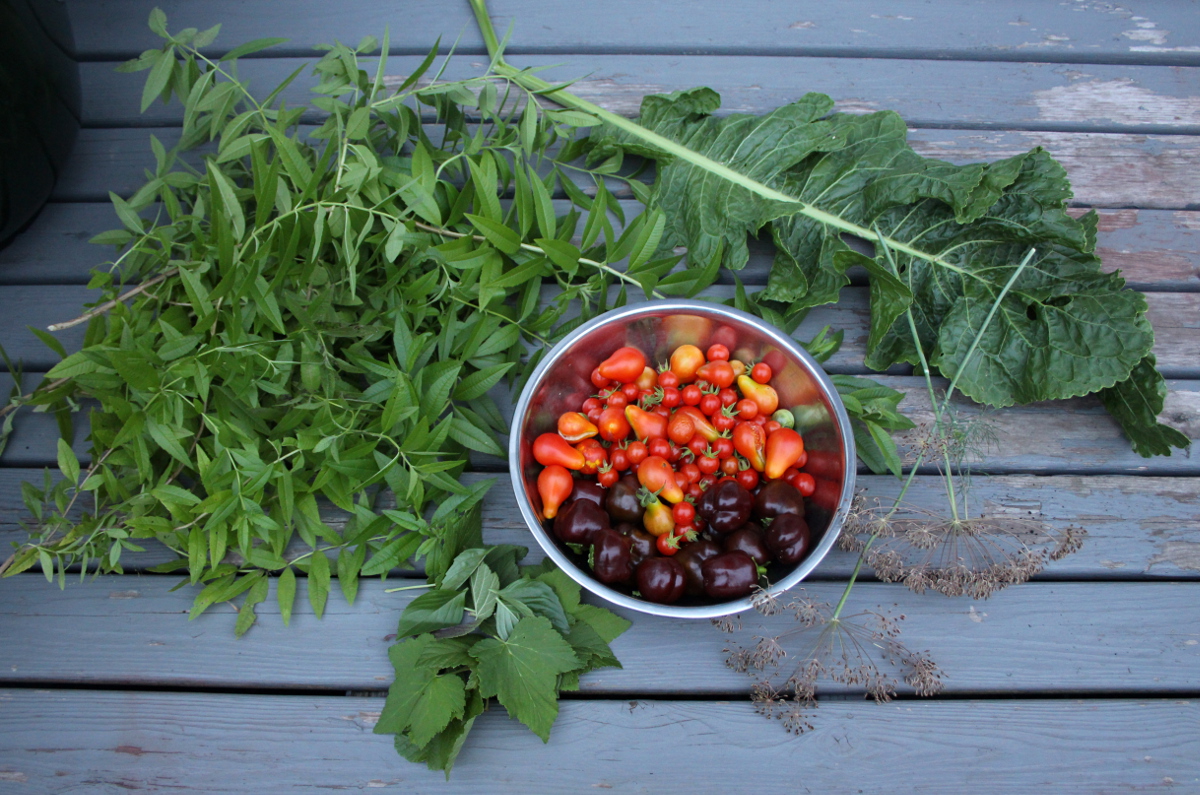
With a bountiful garden, comes a need to harvest. It takes planning and time to start plants (especially from seed), harden them off, transplant them into the garden, weed, water, feed the soil, trellis. When things are finally lush and green, we tend to sigh with relief and let the garden grow. Soon however, we need to consider harvesting. After all, that’s the primary reason for growing edibles.
Cherry tomatoes, mini chocolate peppers, lemon verbena, horseradish, dill, and black currant leaves for pickling
With many plants, the more you harvest, the more harvest there will be. Herbs, greens, fruiting plants put out more growth and fruit after harvest. In the earlier years, mots of my harvesting happened at the end of the growing season, often in several grandiose batches that required hours of processing. This year, I’m determined to harvest frequently and in small quantities. It’s much easier to manage, the freshly-picked produce is the most delicious and nutrient-rich, and I’m encouraging plants to produce more.
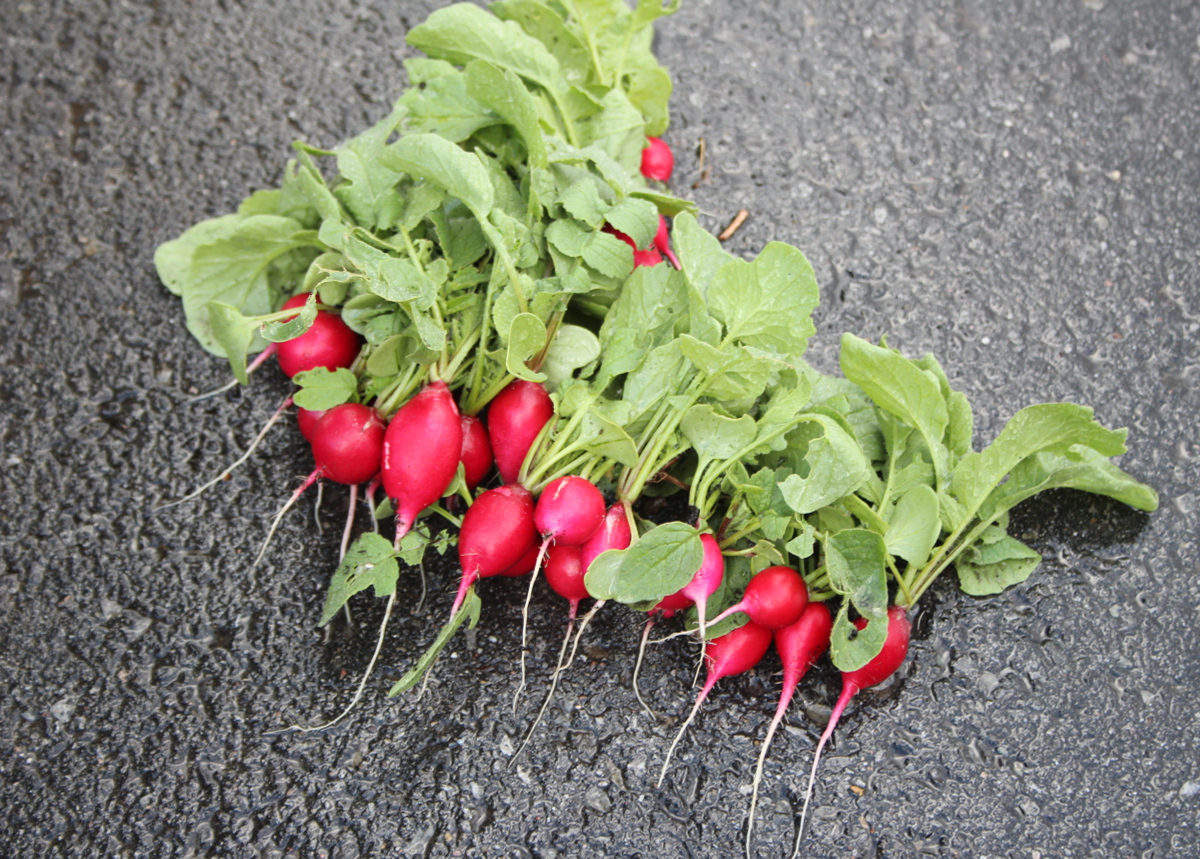
Radishes pulled out of what used to be my front lawn
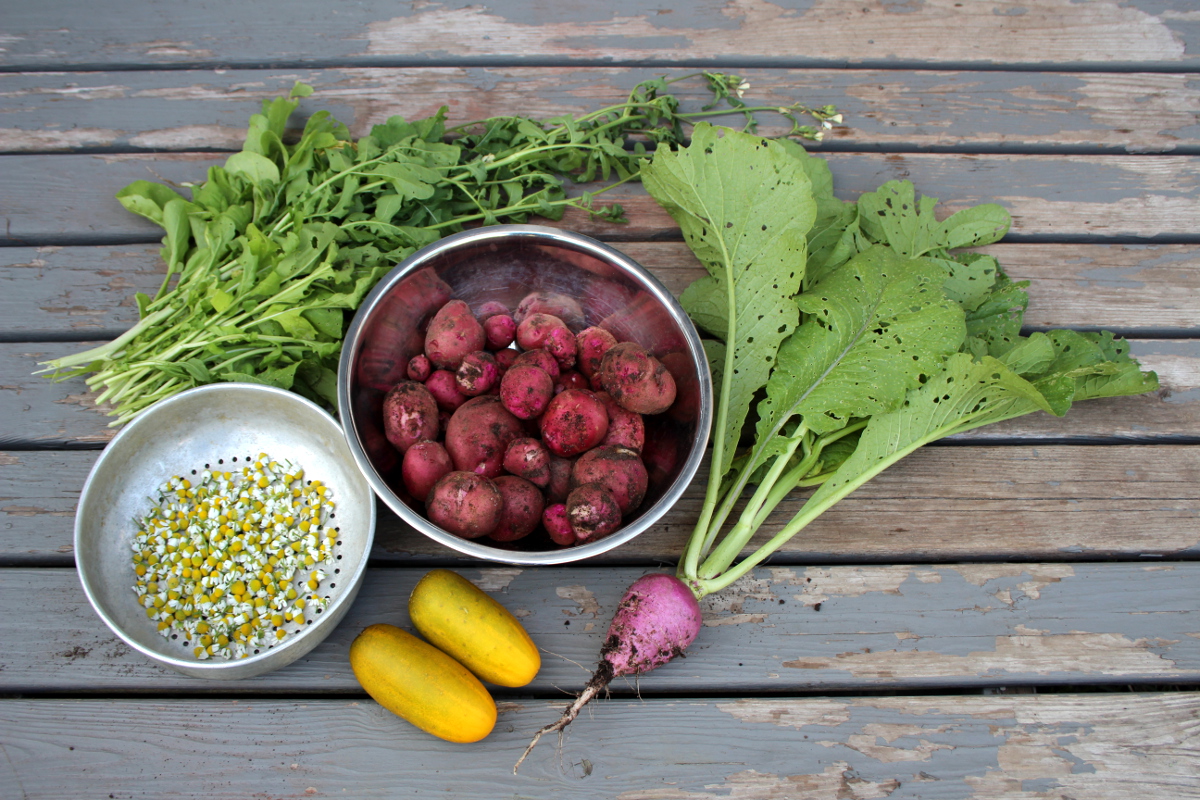
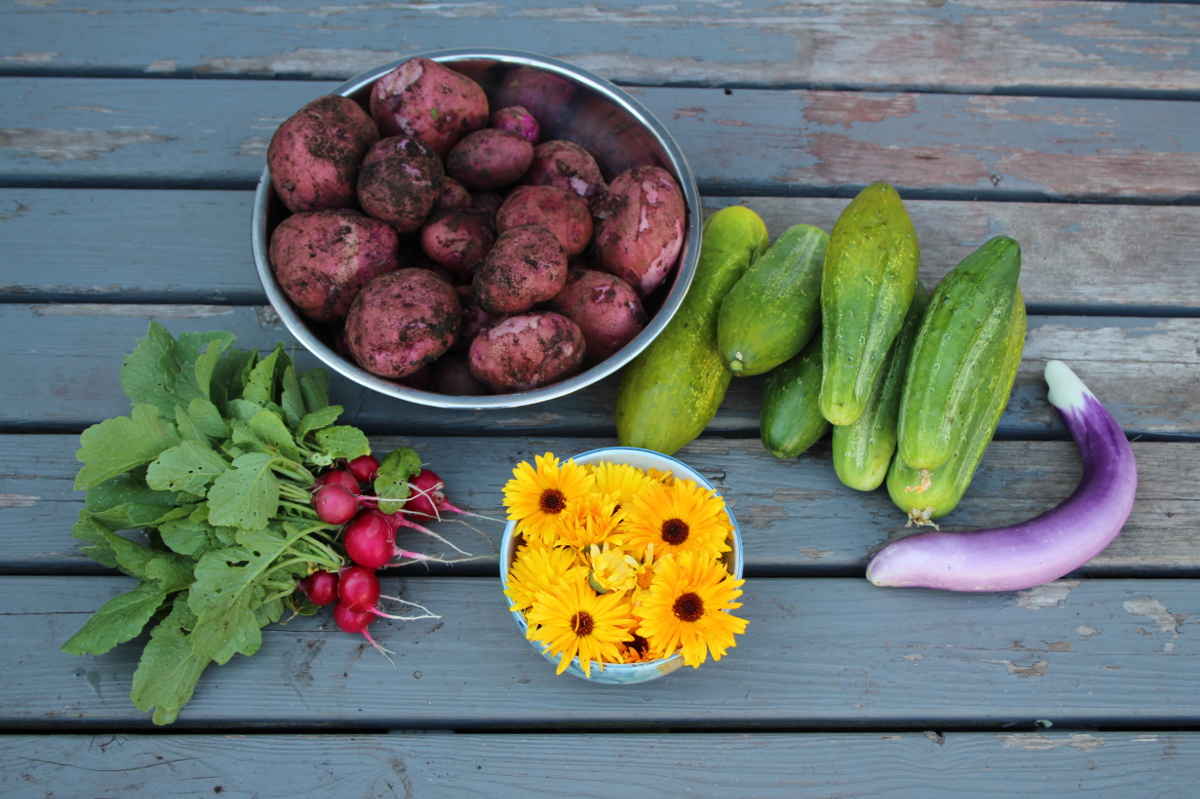
Surprise potatoes, arugula, cucumbers, chamomile and a giant radish
I’ve been picking chamomile and calendula flowers, greens, potatoes, cucumbers, radishes, and now tomatoes and eggplants are ripening.
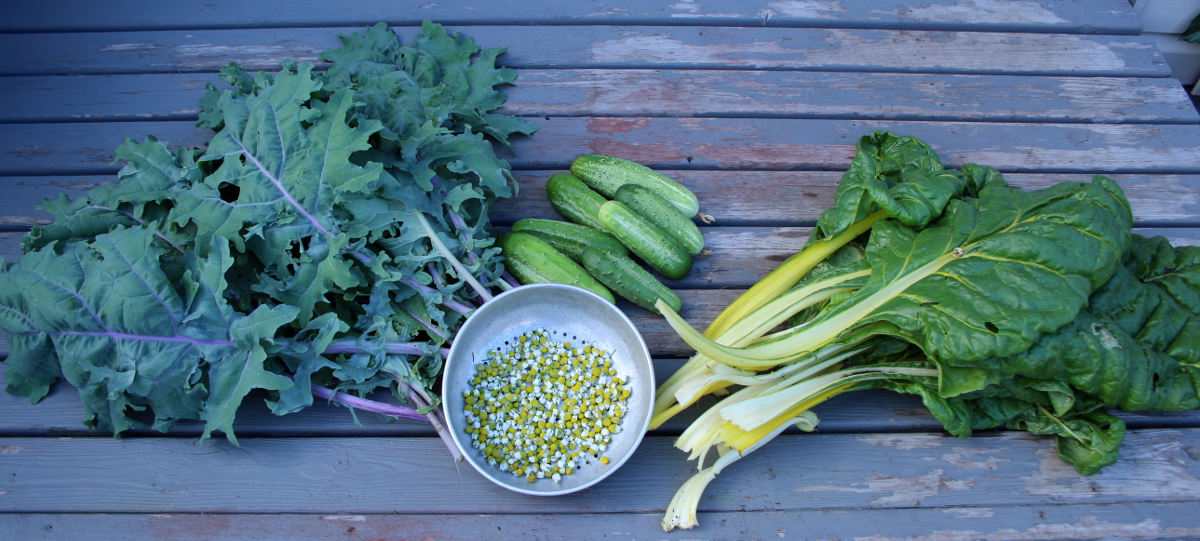
Kale, chard, cucumbers, and chamomile
Surprise potatoes, radishes, calendula, cucumbers, and an eggplant
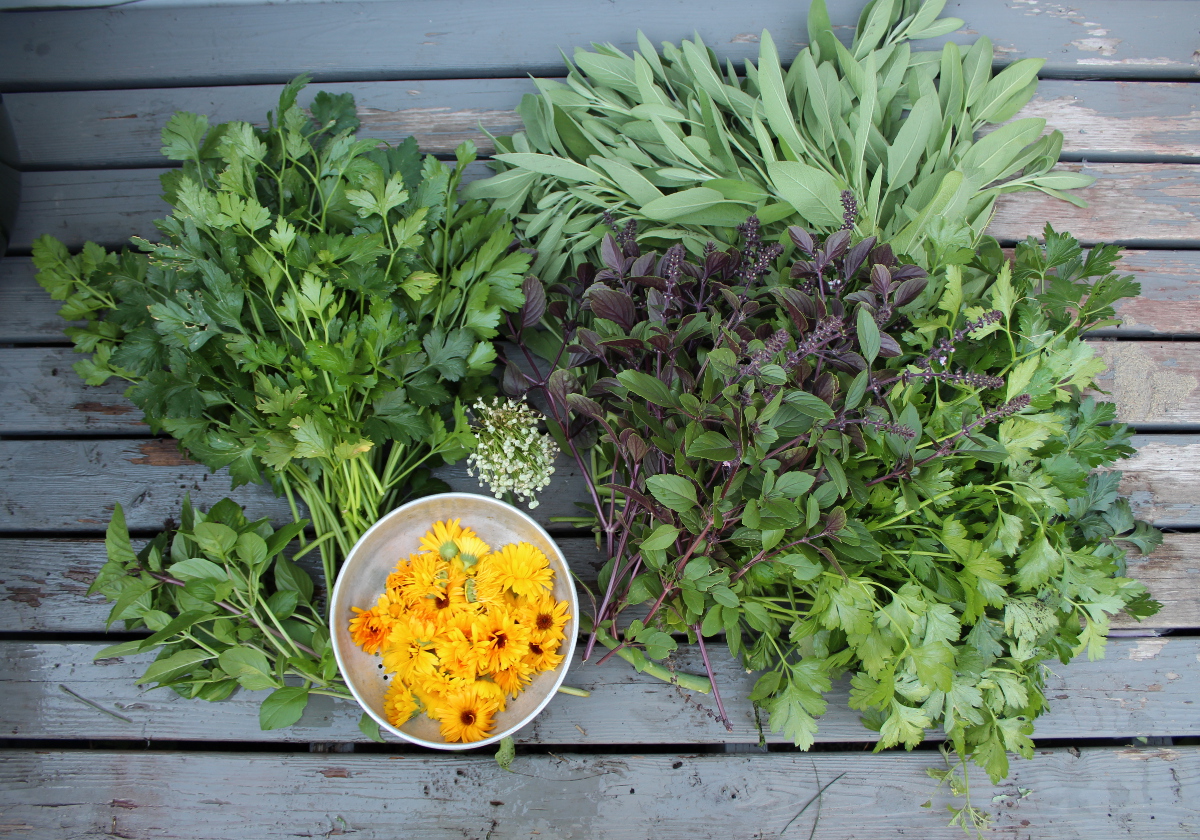
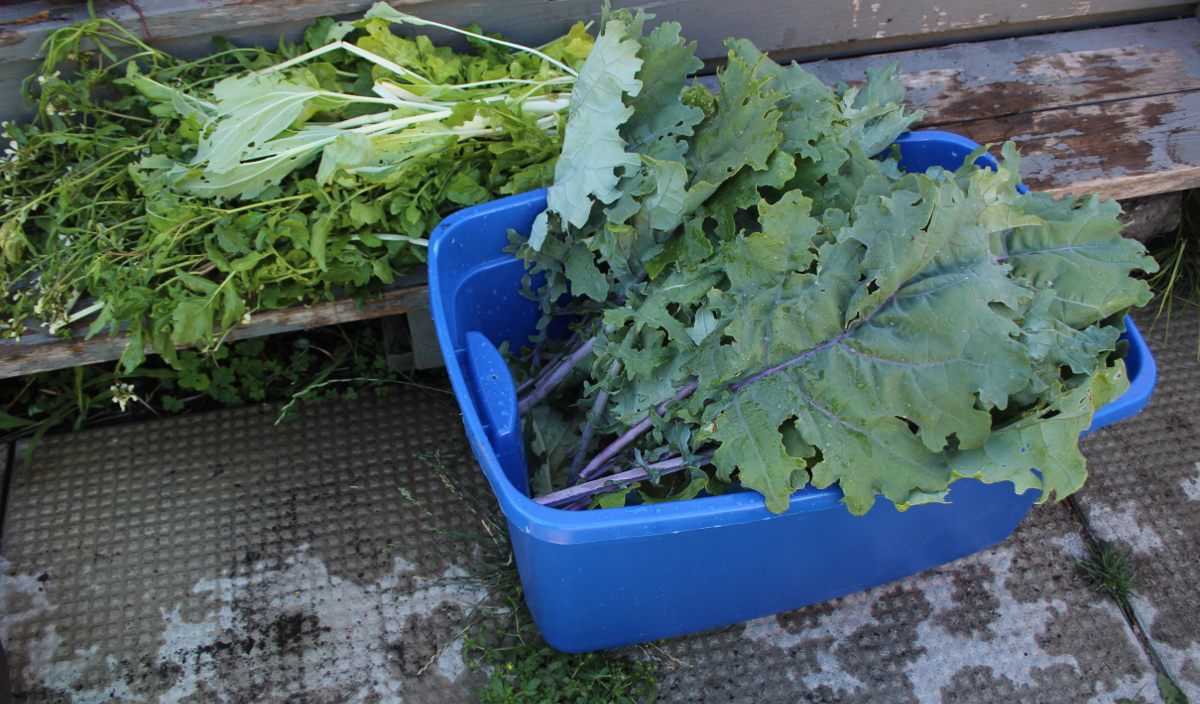
The only two large batches I’ve harvested to simplify processing, were the herbs from the spiral (because I let it go without harvesting for a few weeks) and greens (kale, arugula, and Swiss chard).
Calendula, basil, parsley, sage, onion seeds
Arugula and kale
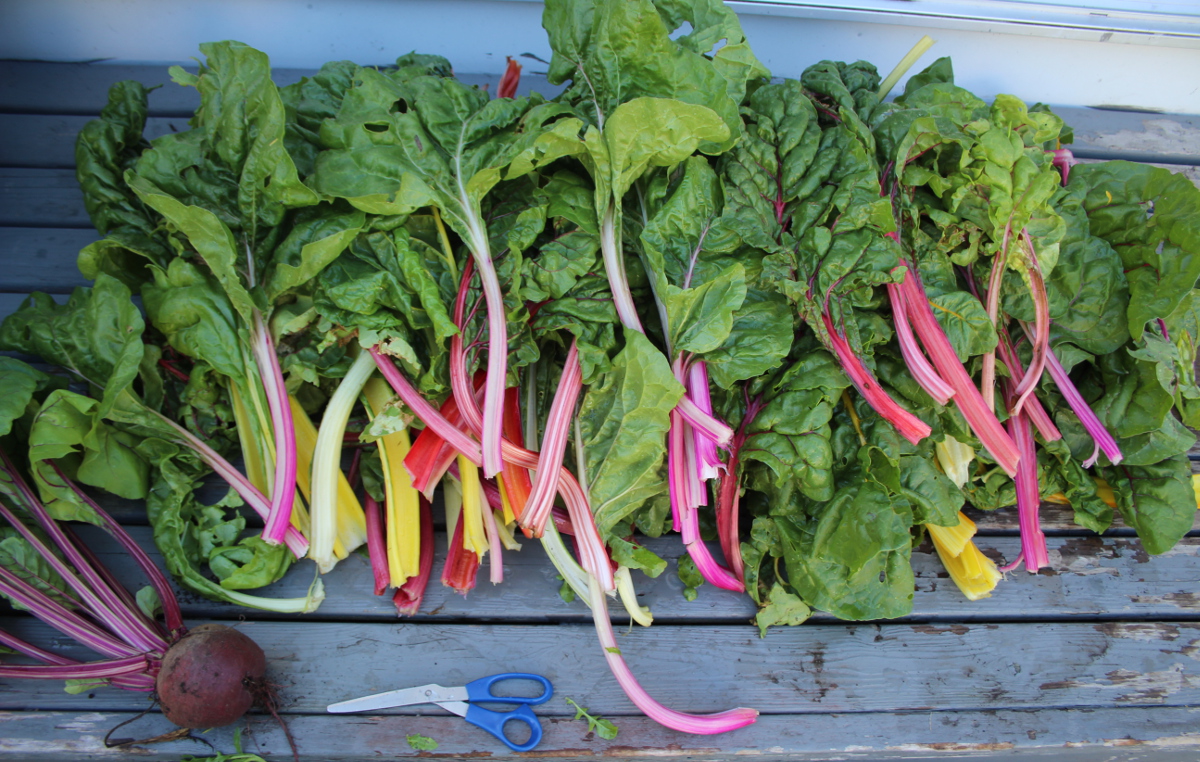
Swiss chard and beets
I wanted lots of basil, parsley, and sage to preserve them in oil for winter and to encourage the plants to put out new growth. Arugula was used in goat cheese pesto with basil and parsley.
Kale I’ve blanched and frozen in ice-cube containers. Swiss chard was separated into stems and leaves, chopped up and frozen. Both of these were easier to do in large batches.
I’m making calendula oil and steeping chamomile tea. I’m putting fresh cucumber slices in kids’ lunches, making low-salt pickles, and throwing together salads with radishes, cucumbers, and greens.
I’ve made beet salad and haddock in beet and carrot marinade.
Chopped up beets for marinade
Beet, carrot, and onion marinade for haddock
Harvesting lets me find branches that need tying up, weeds that are craftily hiding in foliage, plants in pots that need relocating to catch more sunlight, irregularities in leaf colour or insect activity. Harvesting gives me more opportunities to connect to the garden, to ground myself, and breathe deeply.
Sweet peas in bloom
I love hunting for hidden treasures in the vines and plucking green fragrant herb leaves. The kids go outside after supper for a dessert of a few raspberries and black currants. We watch unfolding blooms of water hyacinths, hibiscus, calendula, and lavender, watch the tiny goldfish dart among the water lily leaves, and inhale the aroma of basil and lemon verbena.
With our fast-paced life, many of us tend to skip or delay meals, resulting in feeling depleted and exhausted. Often, it also makes us reach for less-than-optimal snack and meal options. Women who are pregnant or breastfeeding (which often also comes coupled with shortage of sleep) especially need to be getting a well-balanced nutritional intake daily.
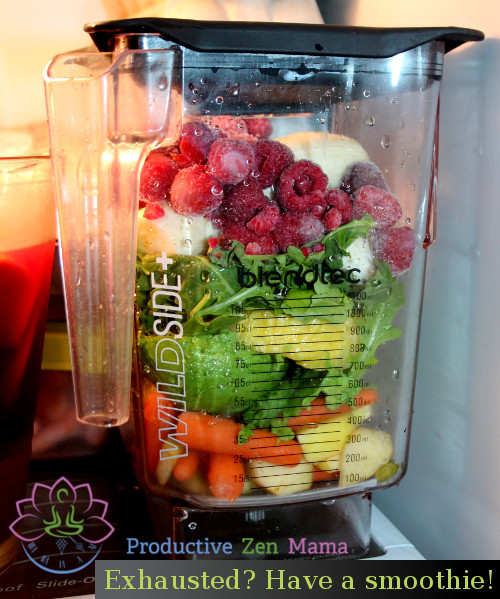
Fortunately, there is an easy addition to daily meals that provides additional nutrient-rich foods your body needs: smoothies.
People get overwhelmed when considering making a smoothie, but the truth is – once you get the routine down, it’s easy:
– Include some healthy fat. I love avocadoes for the texture, taste, and nutrition. Coconut oil is another option – just consider that it will crystalize if you are using some frozen ingredients alongside it.
– Add greens: spinach, arugula, kale, beet greens, collards, chard, or whatever else you have around. I just step outside into the garden and pluck a few leaves.
– Include berries for antioxidants – anything you have around is good – frozen/fresh raspberries, blueberries, strawberries, blackberries, cherries, currants, etc.
– You can add an apple, pear or banana to sweeten the smoothie if you like. Don’t put too much in though, fructose is still a sugar and not great in large quantities.
– Use water for a plain smoothie or coconut/almond milk for a more creamy consistency.
– Blend and enjoy.
You can experiment by varying the ingredients. Add ground flax seeds, pumpkin, chia or hemp seeds for a protein boost. Make a creamy smoothie by using coconut or almond milk with cocoa, some greens, and seeds. Avocado pairs nicely with pineapple for a tropical variation.
Some practical tips I’ve arrived at:
– Prepare the smoothie the night before – combine all the ingredients except for water (and perhaps chia seeds as they will thicken overnight) and put the blender jar into the fridge. In the morning, just grab the jar, add water and seeds, and blend.
– Rinse/soak the blender jar, lid, and spatula right after you pour the smoothie out. That way you can wash it easily later.
– Use up kids’ lunch leftovers. My kids get a variety of fruit and vegetables for lunch and sometimes not all of it gets finished. I throw the leftovers into the next day’s smoothie in the evening, when I’m making their next day’s lunches. Any fruit, berries, carrots, cucumbers can be saved from being thrown out by making them a part of a delicious smoothie.
– If you are making a smoothie for one person, you might end up with more than you can pour out into a tall glass. No worries, stick the blender jar with the rest into the fridge, and keep refilling your glass. I find that the smoothie does not survive longer than a few hours in the fridge, so when I’m working from home, I just seep it throughout the morning.
It’s a morning ritual for us now: I blend a smoothie in the morning, my youngest child fetches the straws for everyone, I pour it into glasses for the kids and my partner and into a wide-mouth stainless steel water bottle for me, to drink on the way to work, and we all enjoy a smoothie as part of our breakfast.
Smoothies are a great way to ensure we get enough nutrients and keep up our energy throughout the day.
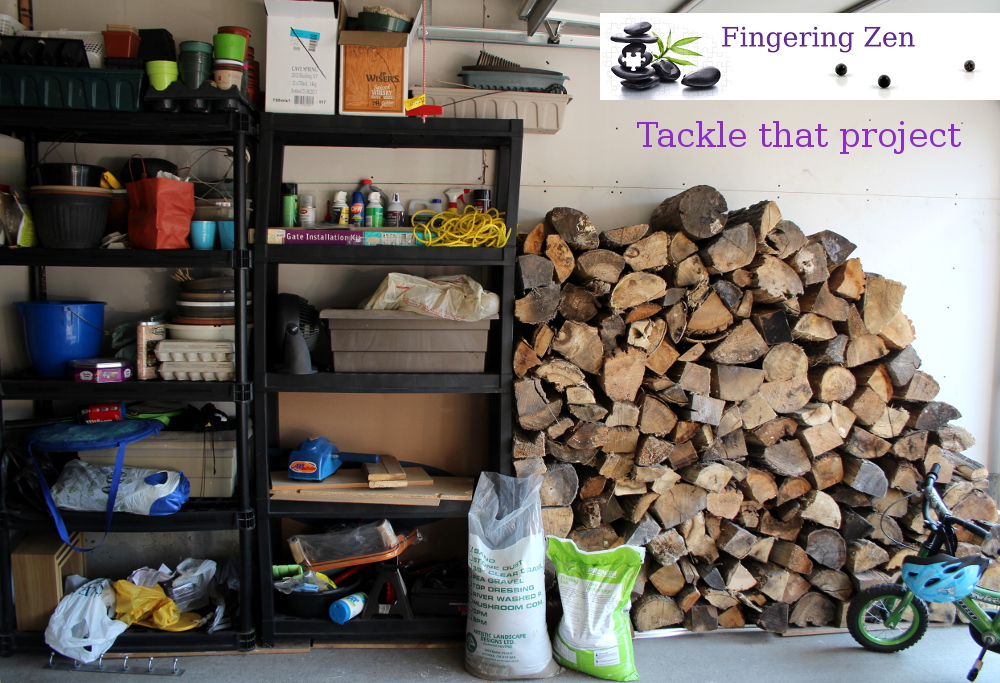
Once a year, our neighbourhood hosts a garage sale. This year we decided to participate. We had a few things to sell, and kids just got a toy cash register for a gift, so this was a perfect opportunity to teach them about counting money, offering items for sale, and bargaining.
It takes more than laying things out on the driveway to create a good experience for everyone involved, maximize your sales, and, most importantly, have fun.
Here’s how to host a successful garage sale
1. Think what you have to offer and get it ready. Find the items the day before and prepare them for sale. Make sure everything is clean and works, put batteries into gadgets that need them.
2. Have change at hand. Get more than you are likely to need – it’s better to have lots of change left over than to run out and lose a sale. My kids had lots of fun learning about different coins and sorting them into the cash register compartments.
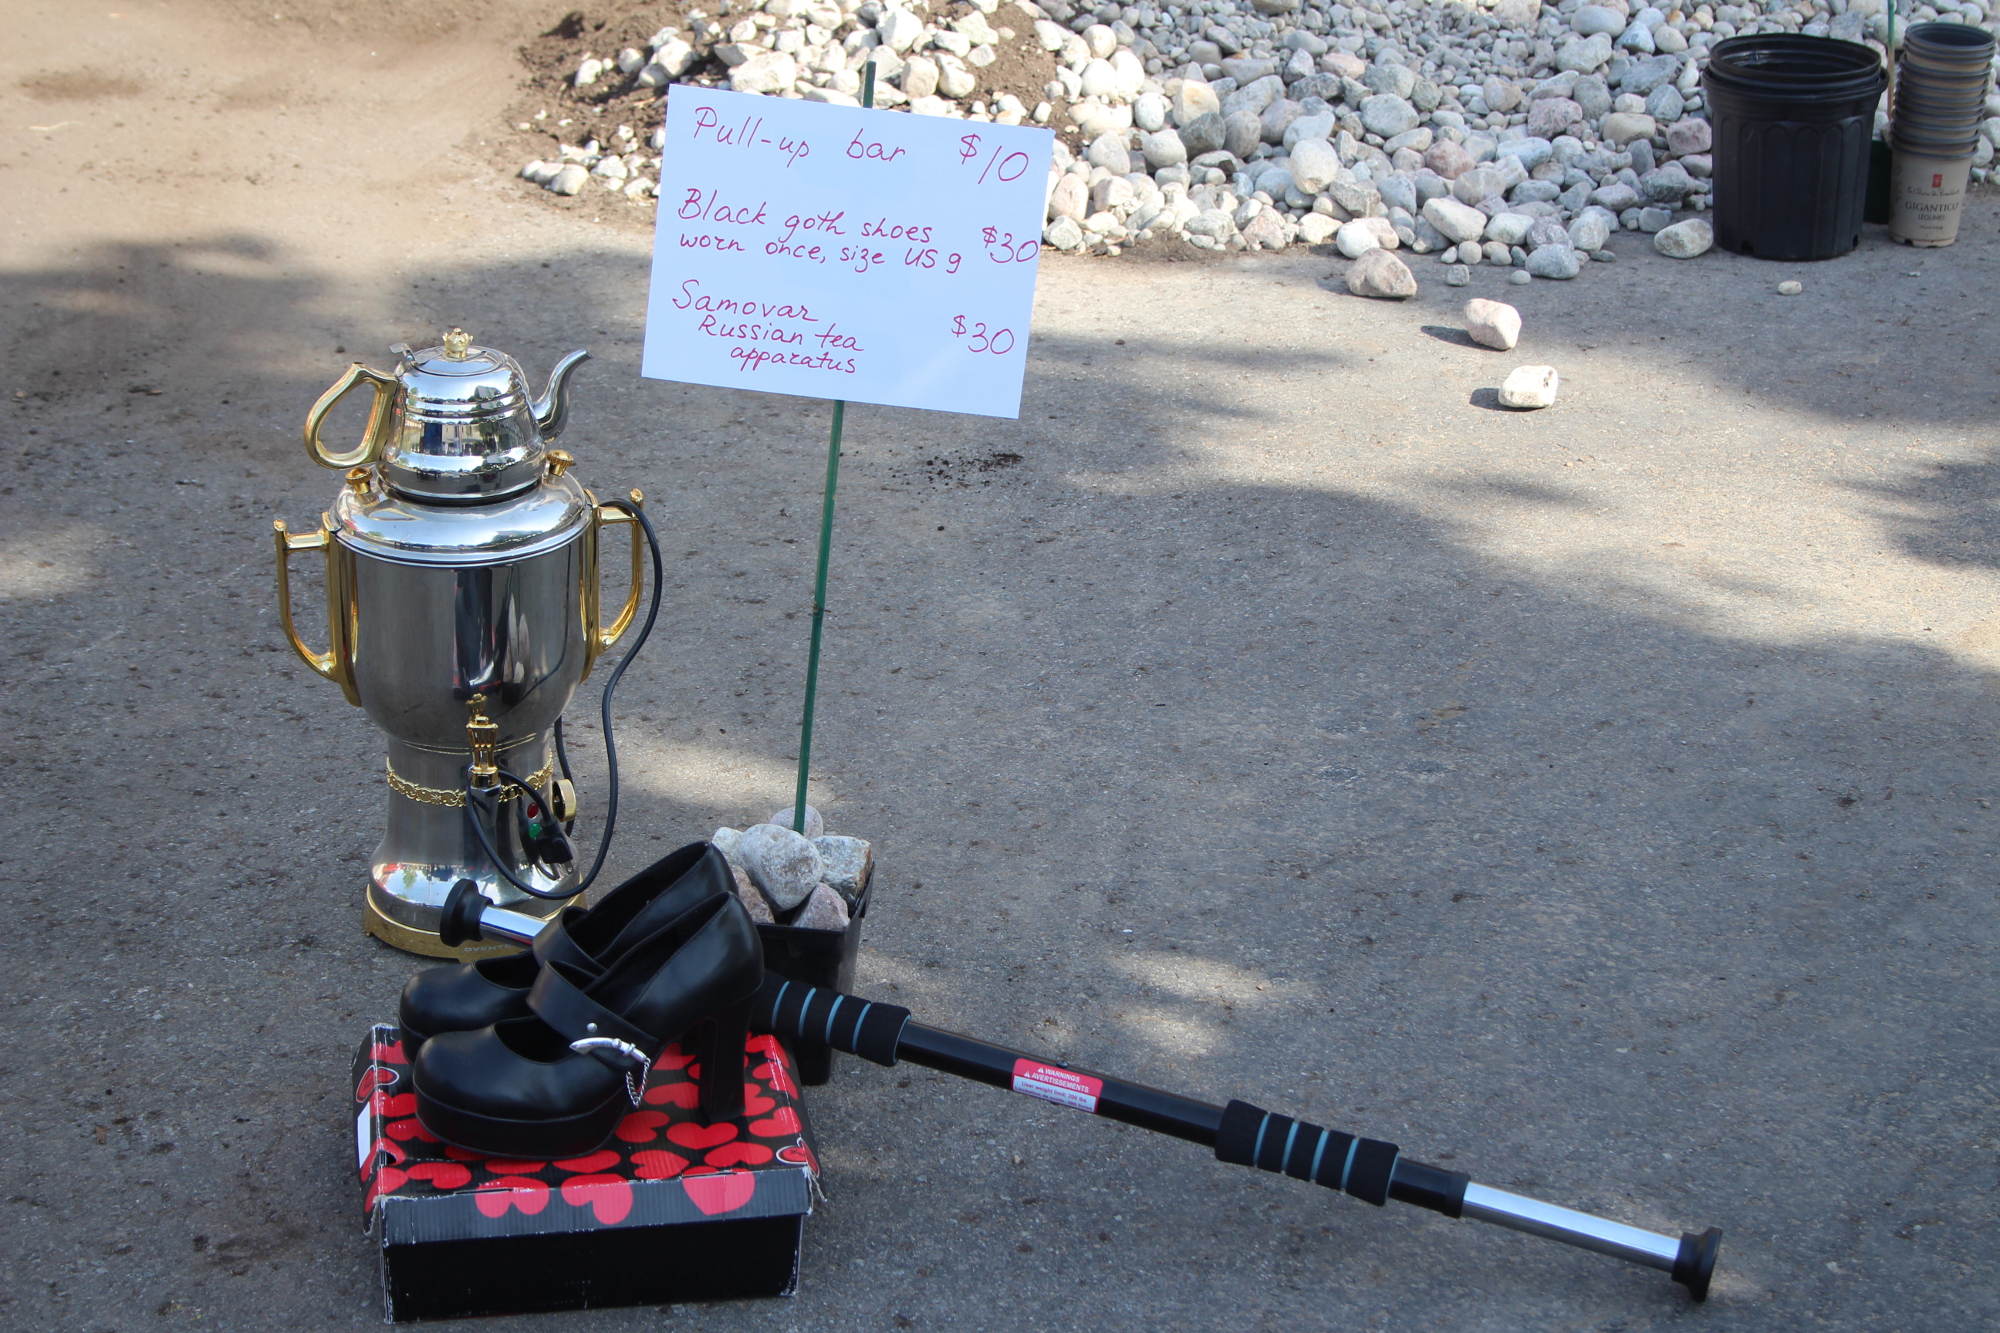
3. Clearly price the items and prepare signs ahead of time. Suggest discounted multiple pricing – people are tempted by bargains. Place the prices close to the road – many people simply drive by to see whether anything interests them, so it’s good to let them quickly scan the items you have to offer and their price.
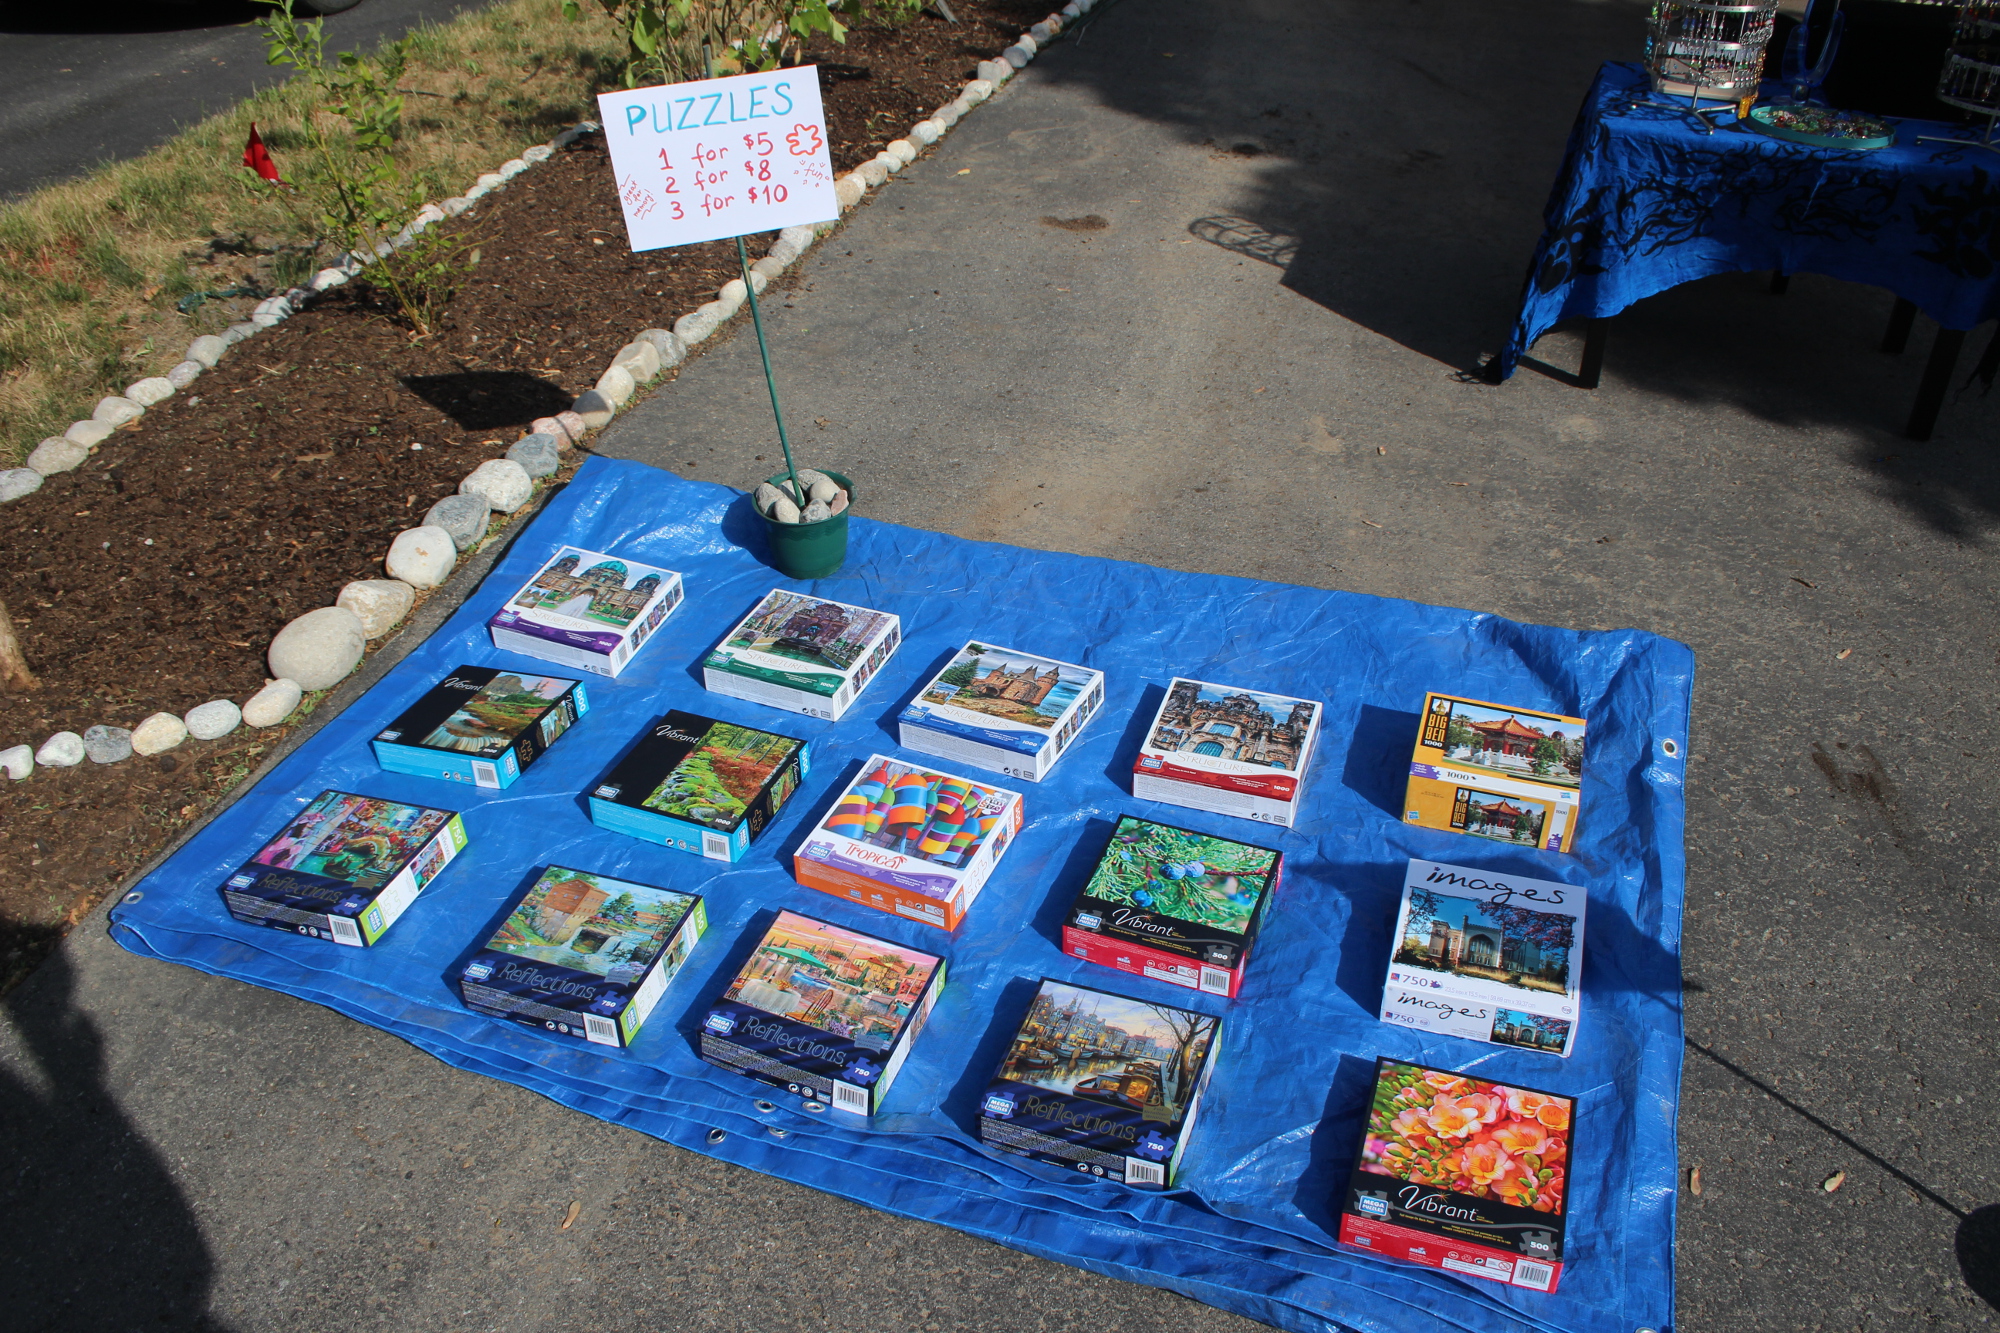
4. Group several items together – it’s easier to browse groups than individual items spread out all over the driveway. Group related items separate from the others. For instance, I had several jigsaw puzzles, so they formed their own group.
5. Protect fragile things and those that get dirty easily. I’ve placed the puzzle boxes on a tarp instead of putting them directly on the pavement, to prevent them from getting scratched and dirty.
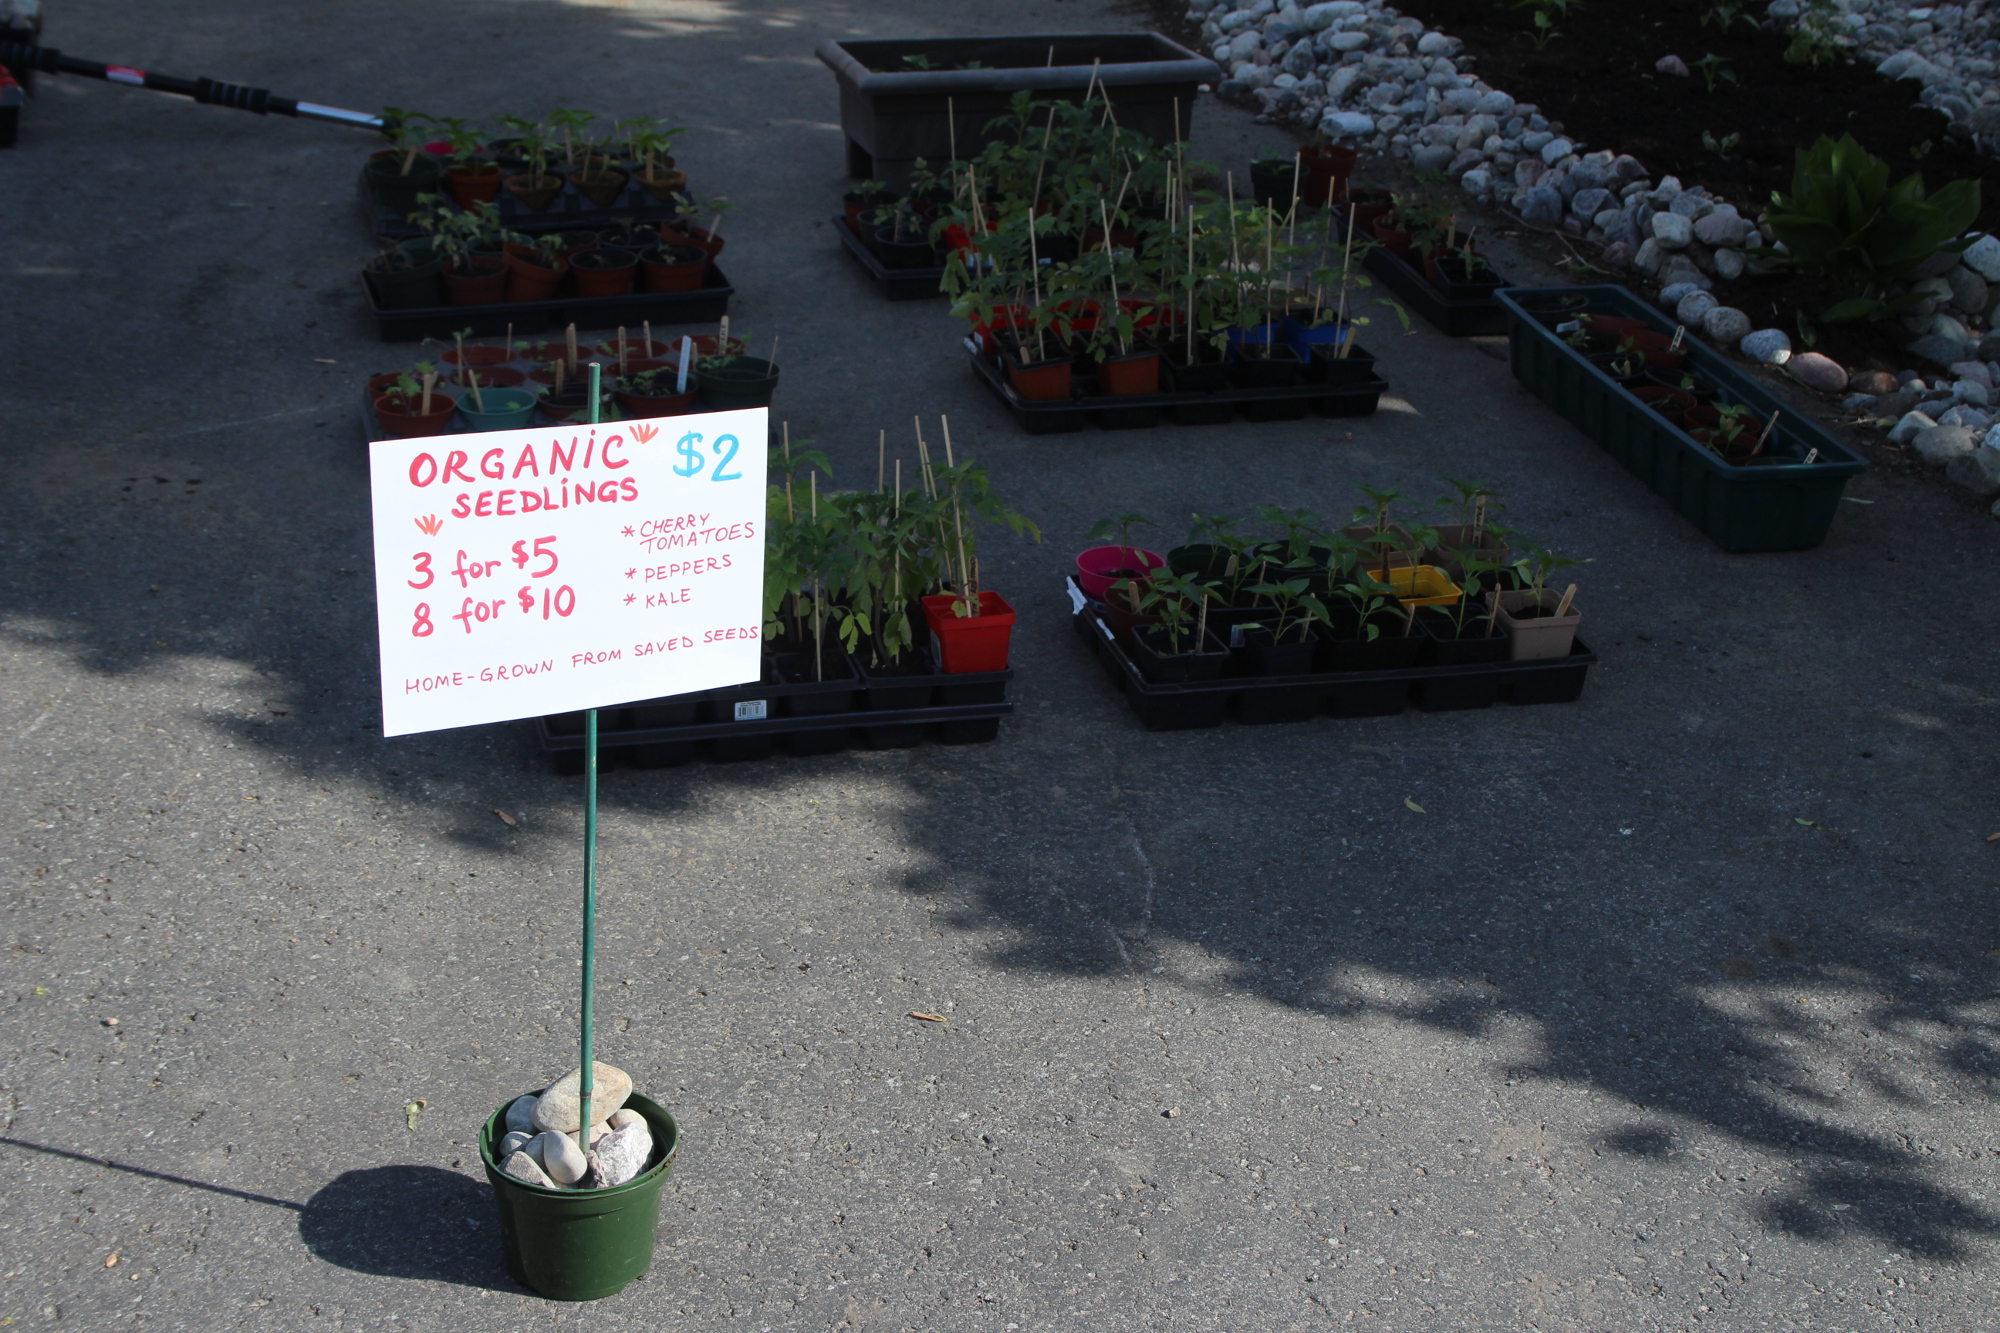
6. Think outside of the box – people are not interested only in furniture, books, appliances, and electronics. I had lots of seeds left over, grown by me from saved seeds. Lots of people are interested in organic seedlings, but don’t think of going to an organic garden centre, so here was an opportunity for them to pick up some kale, tomatoes, or bell peppers. I had a hose handy and watered the seedlings throughout the day.
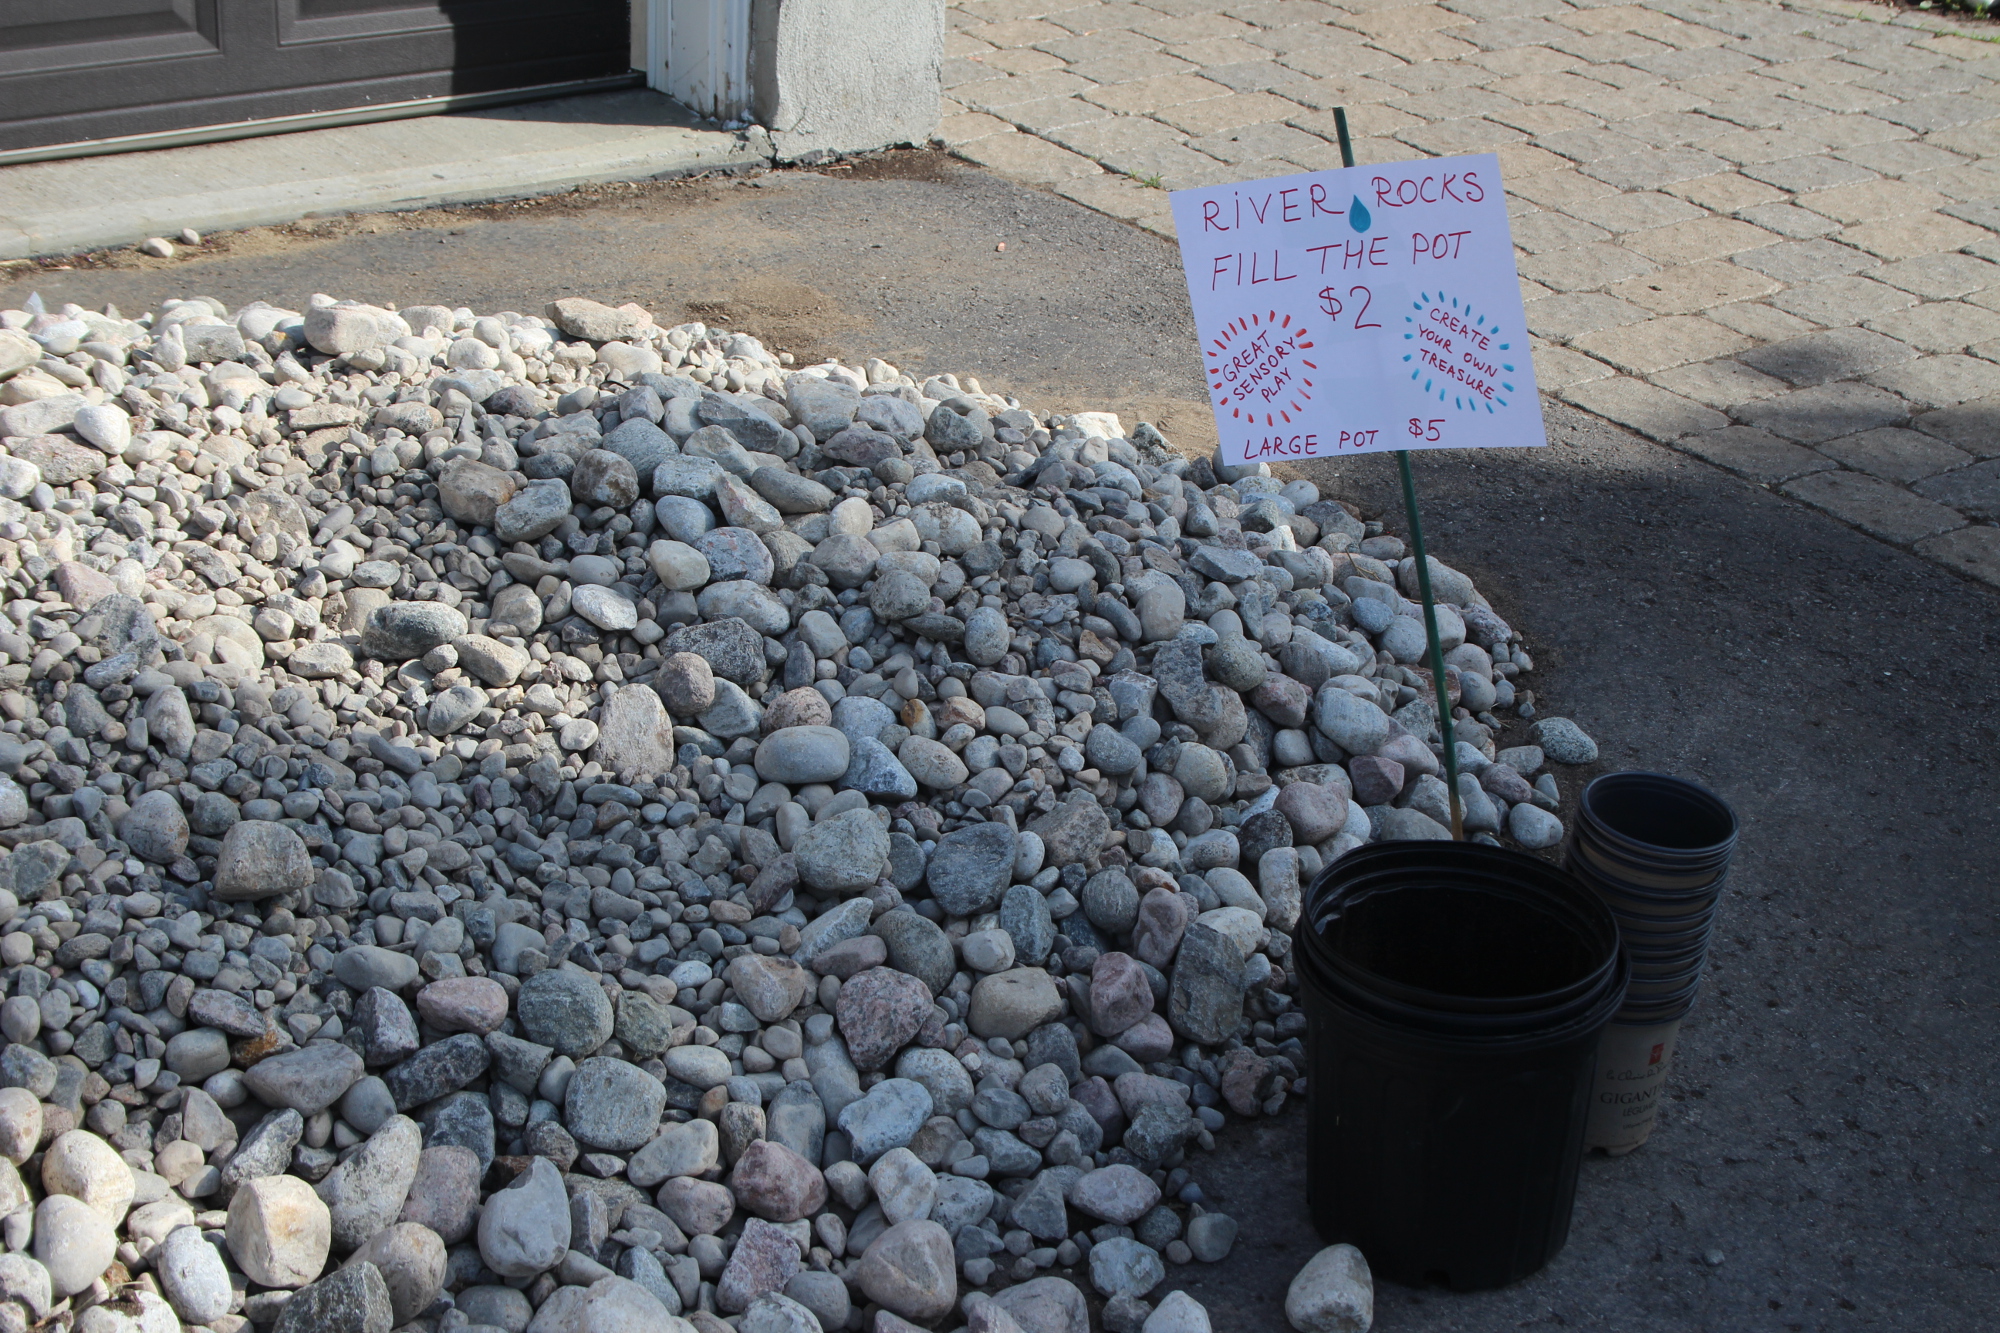
7. Be creative. We had a large pile of river rocks on our driveway, since the sale took place during our edible landscaping project. We knew we had more rocks than we needed, so I added them to the sale. After all, I’ve often looked for river rocks to build a pond border, create a centerpiece, decorate the garden, or paint.
I’ve also used the rocks themselves to hold my price signs up, and it worked really well on a windy day.
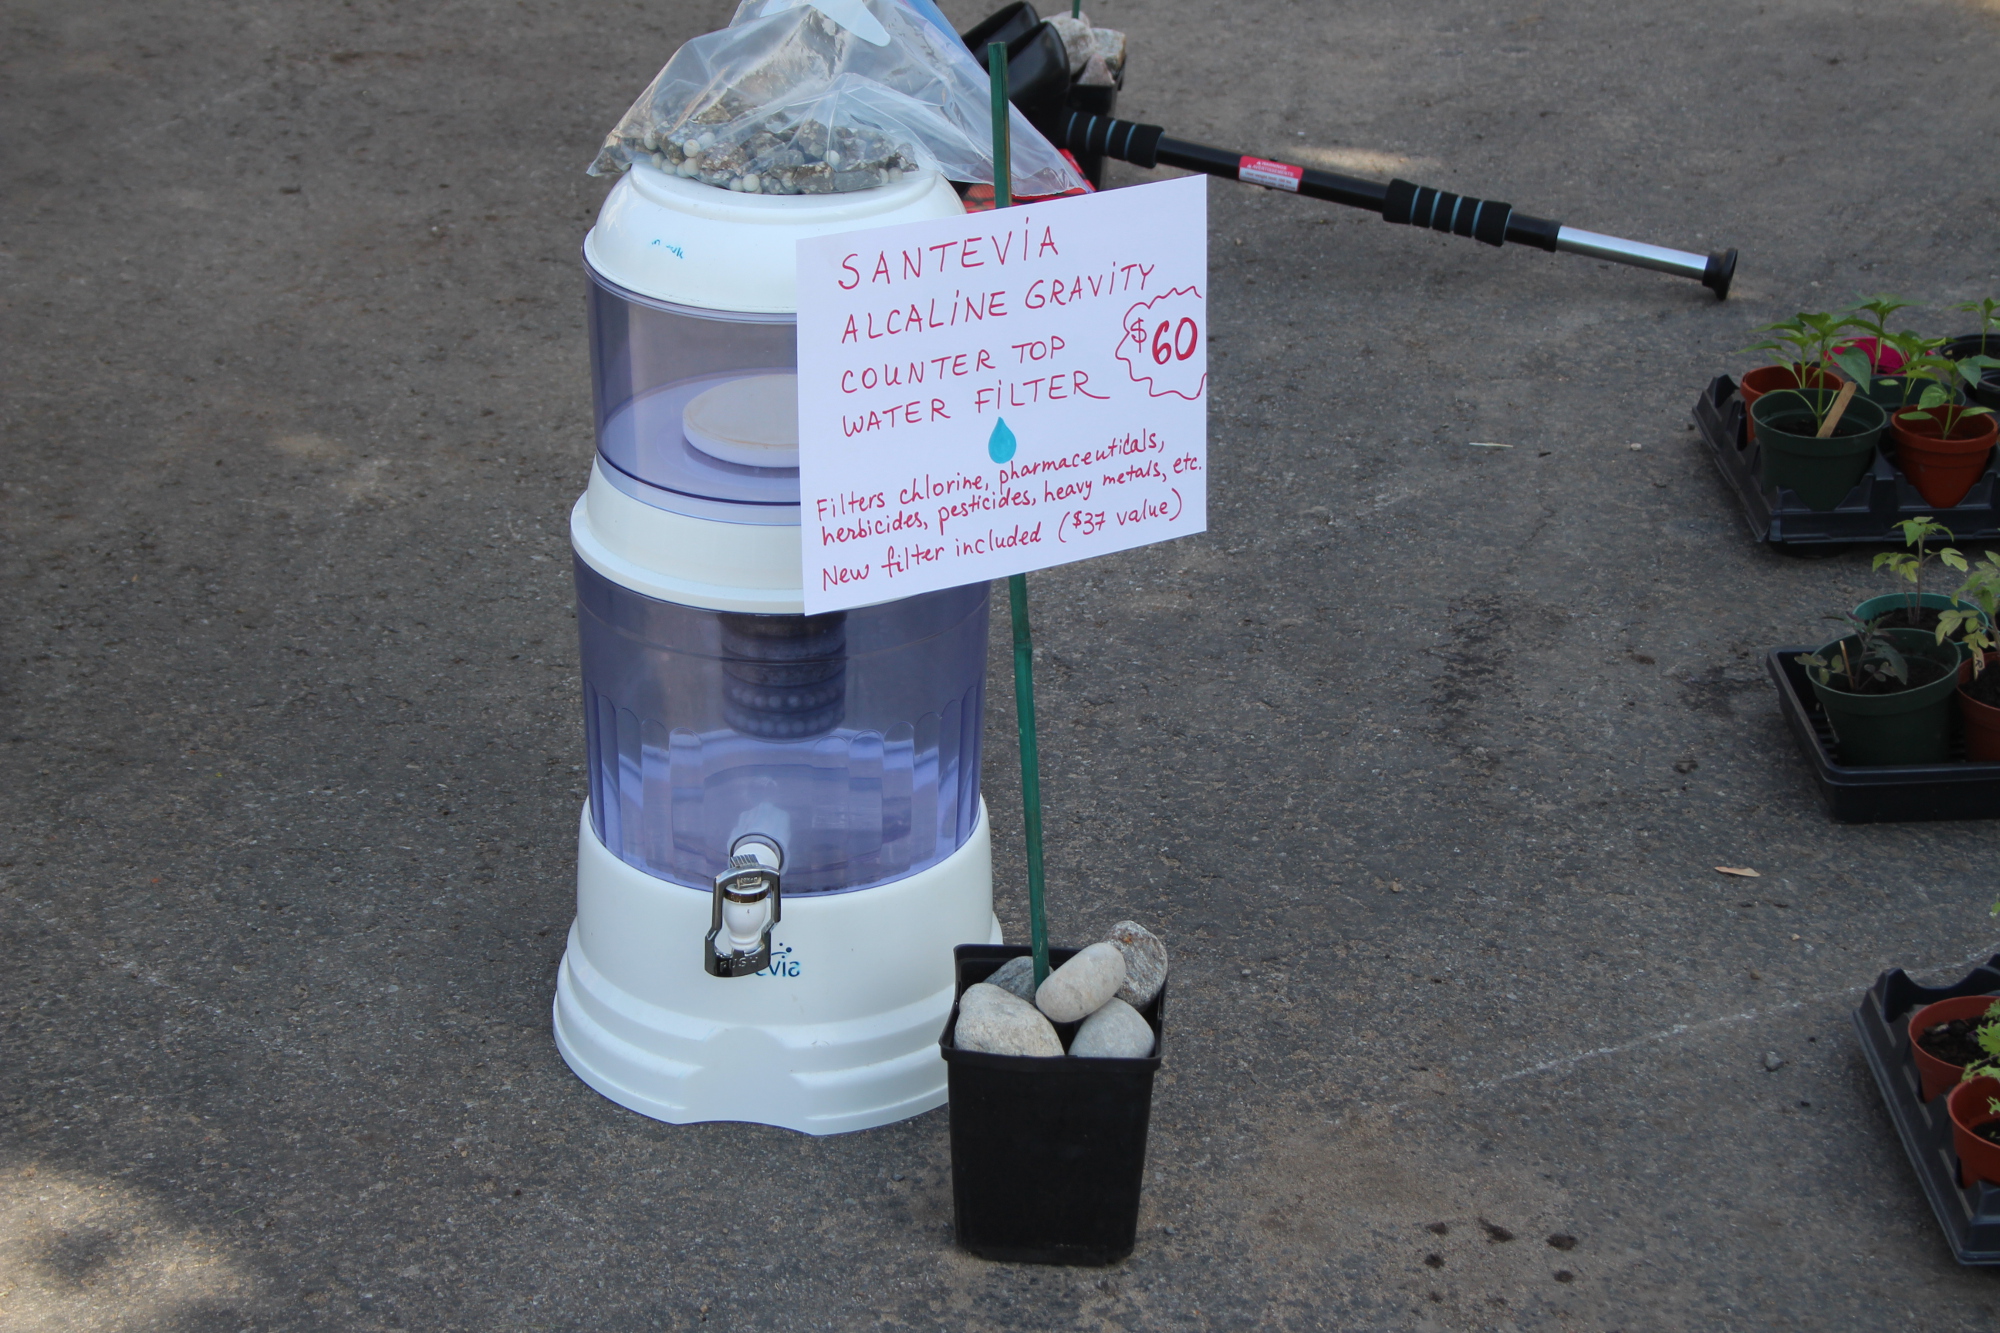
8. Write down answers to most common questions buyers might ask right on the price label, as to what a thing is, what it does, and why it’s great. For instance, I’ve spelled out a few of the major contaminants the Santevia water filter system would remove and mentioned that it has a new filter.
9. Set up before starting time and stay open until closing. It’s very frustrating to plan on coming to a garage sale, only to discover that it closed before we arrived, earlier than the schedule indicated.
10. Advertise. Even though the neighbourhood association advertises the entire sale, put your specific items online. I took these photos after everything was set up on the driveway, and posted them to kijiji and Facebook, with the invitation to come to my specific street address as part of a larger neighbourhood garage sale. This way, you can reach more people. People who were coming anyway, will come to your place if they see what they need in the ad. People who might be interested in one of your items, will have another incentive to come if they know there is more than one garage sale happening nearby. Don’t forget to remove the postings after the sale is over.
11. Greet everyone. Smile and wish people a good morning. No one wants to buy from a grumpy hermit, and you might get some sunny vibes back.
12. Be present to answer questions the buyers might have, but don’t crowd the people who just wish to browse.
13. Be prepared to bargain. I wasn’t, and was a bit overpowered by the onslaught of two ladies who were interested in the samovar, and bargained with ferocity reminiscent of a Russian bazaar.
14. Involve your kids. They might like to play store. If they don’t feel up to it (my oldest was quite impatient when people did not buy anything for an entire 10 minutes), have an alternate plan. We played word games outside, drew with chalk on the driveway, played with rocks and coins. When the kids got tired and went to have lunch, I used the time when no one came by to finish building the rock borders in the front garden and water the plants.
15. If you are so inclined, and if the sale goes past a mealtime, have refreshments and/or snacks for sale. Avoid sweets — last thing parents need is a tantrum from a child insisting on getting another sugar-bomb. Think fresh and healthy.
Above all, have fun. I wasn’t counting on selling much. Yet, at the end of the day, the samovar, five puzzles, and eighteen seedlings found a new home, and I was able to pay for garden stepping stones with the money I raised during the garage sale. More importantly though, we had a fun time with kids that morning and spent lots of time outside enjoying our front garden and each other’s company.
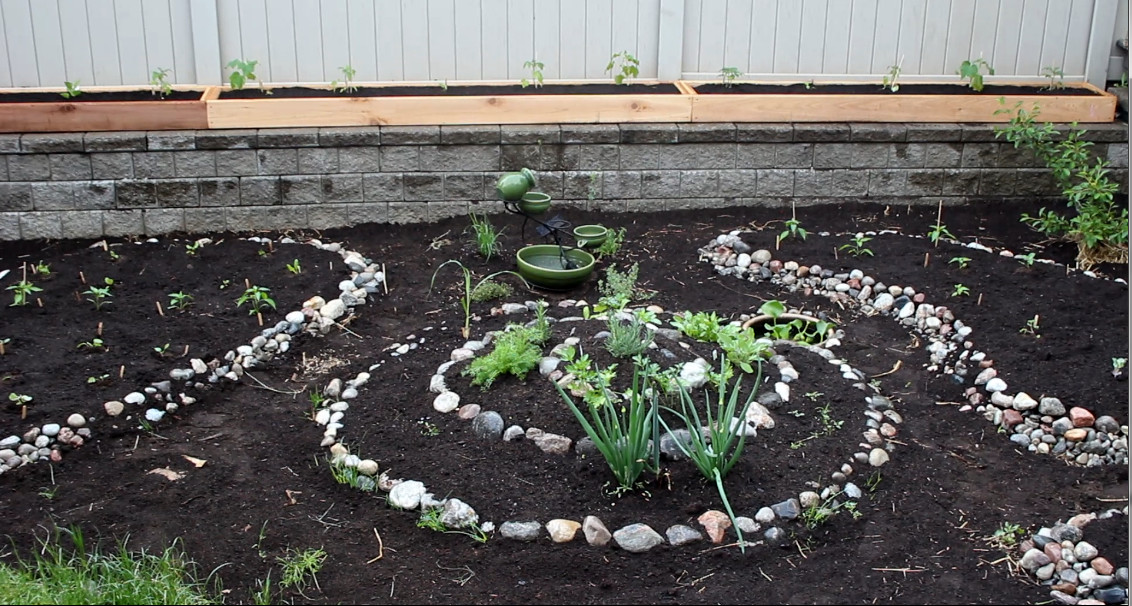
We spend lots of time in the kitchen, which has a splendid view of our back yard. Last year, when we just moved to our new place in May, we brought in a few yards of good soil and planted all the seedlings I’ve started at the old place all over the yard. The only back yard project for which we had time was an herb spiral with a small pond. With three trees and a play structure taking up space, most of the garden filled with a tomato forest, and harvest was quite a challenge. This year, as part of my edible landscaping project, I’ve decided to shape the back garden to maximize planting spaces, make the best use of the sunny areas and have an easier time during harvest.
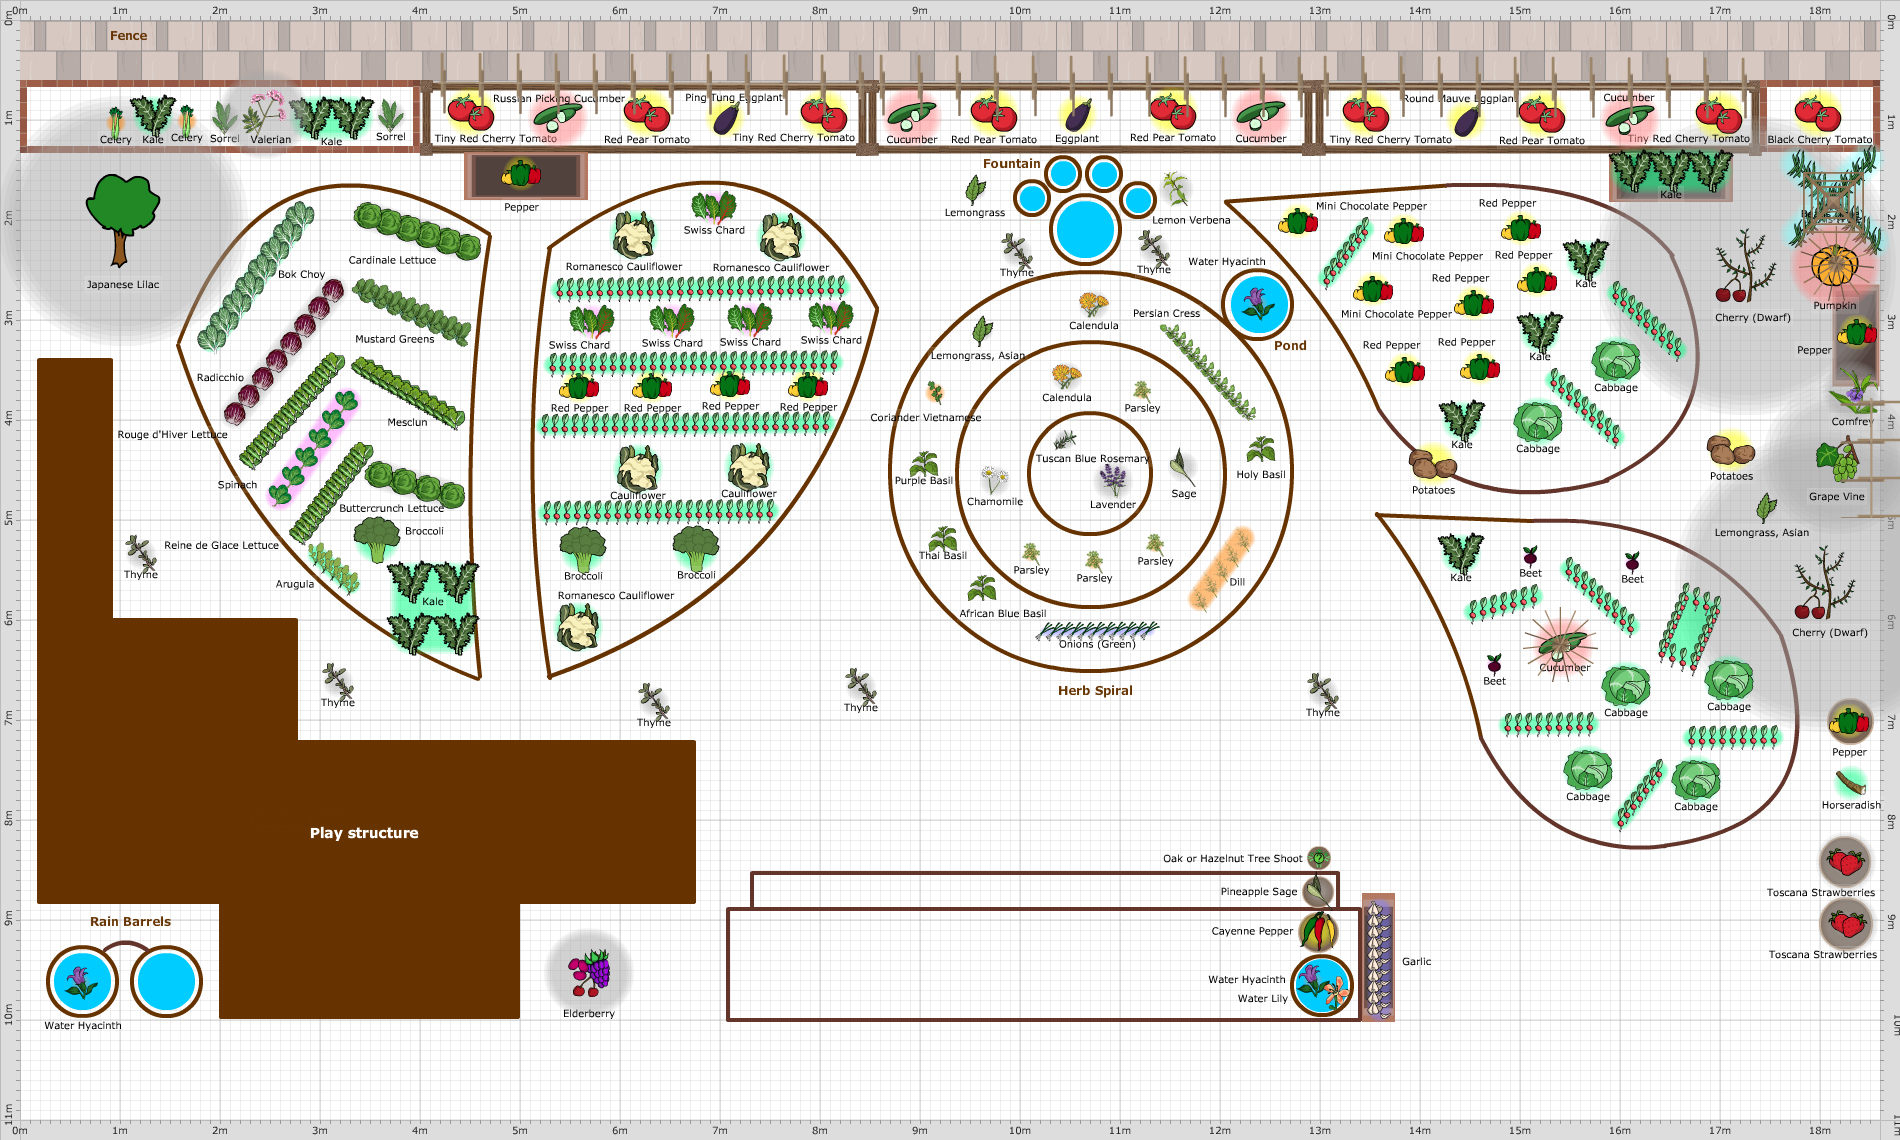
That meant removing two trees (the third one is at the bottom of a play structure slide, so whatever would be planted there would likely be trampled during play), building raised beds (we have very tough rocky clay soil), bringing in good soil and compost mix, and using trellises to maximize vertical space. Aesthetically, I prefer curves to straight lines and right angles, and thus the following plan was born:
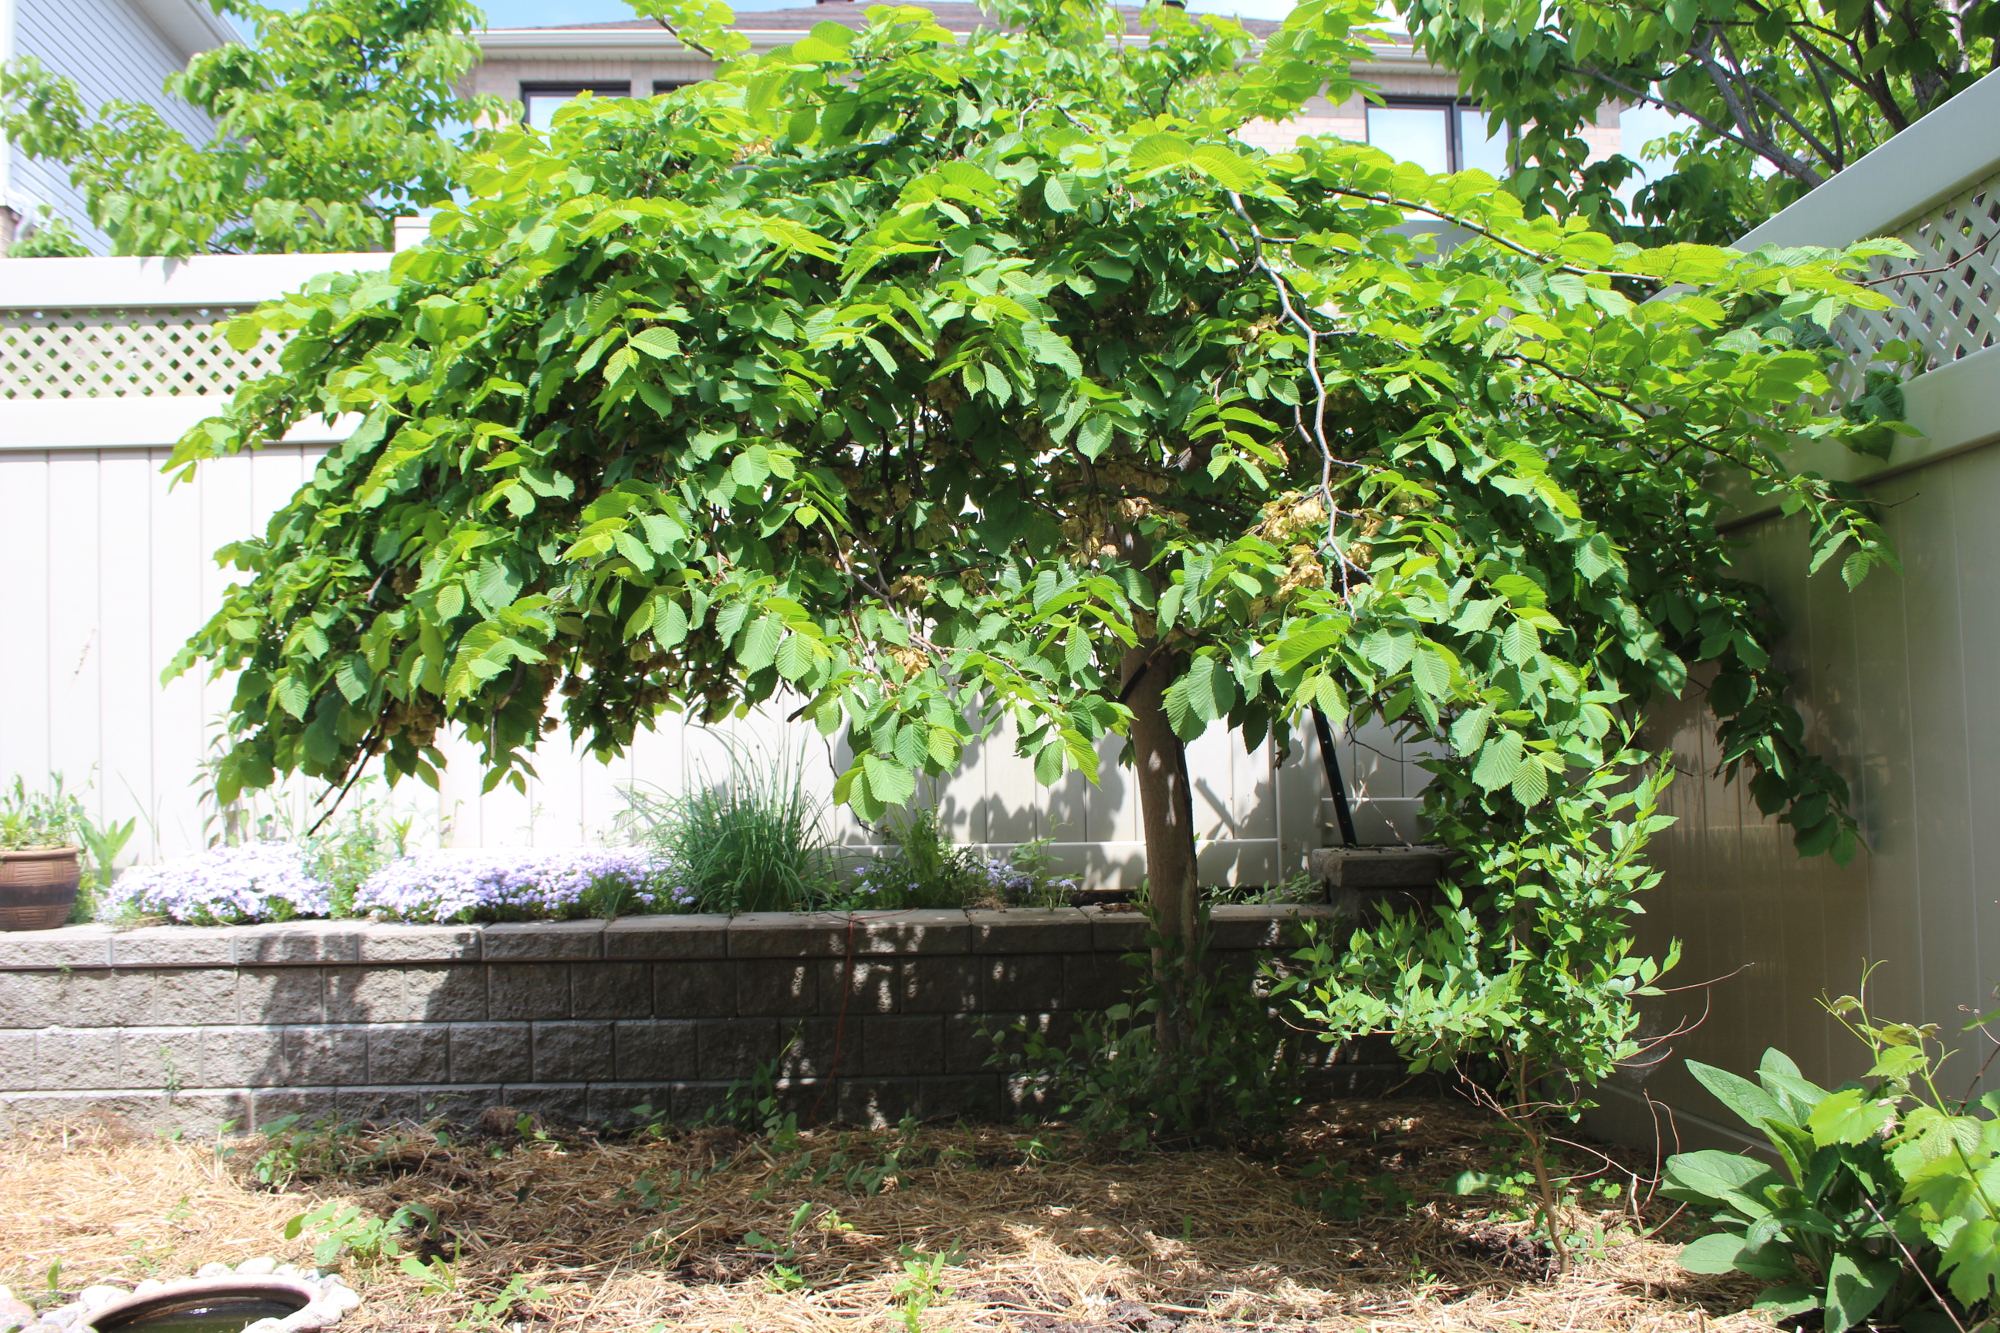
We love the herb spiral, so it is here to stay. The first major challenge was removing the corner weeping elm tree. We really wanted it to live, so we posted ads online to invite people to come and take it.
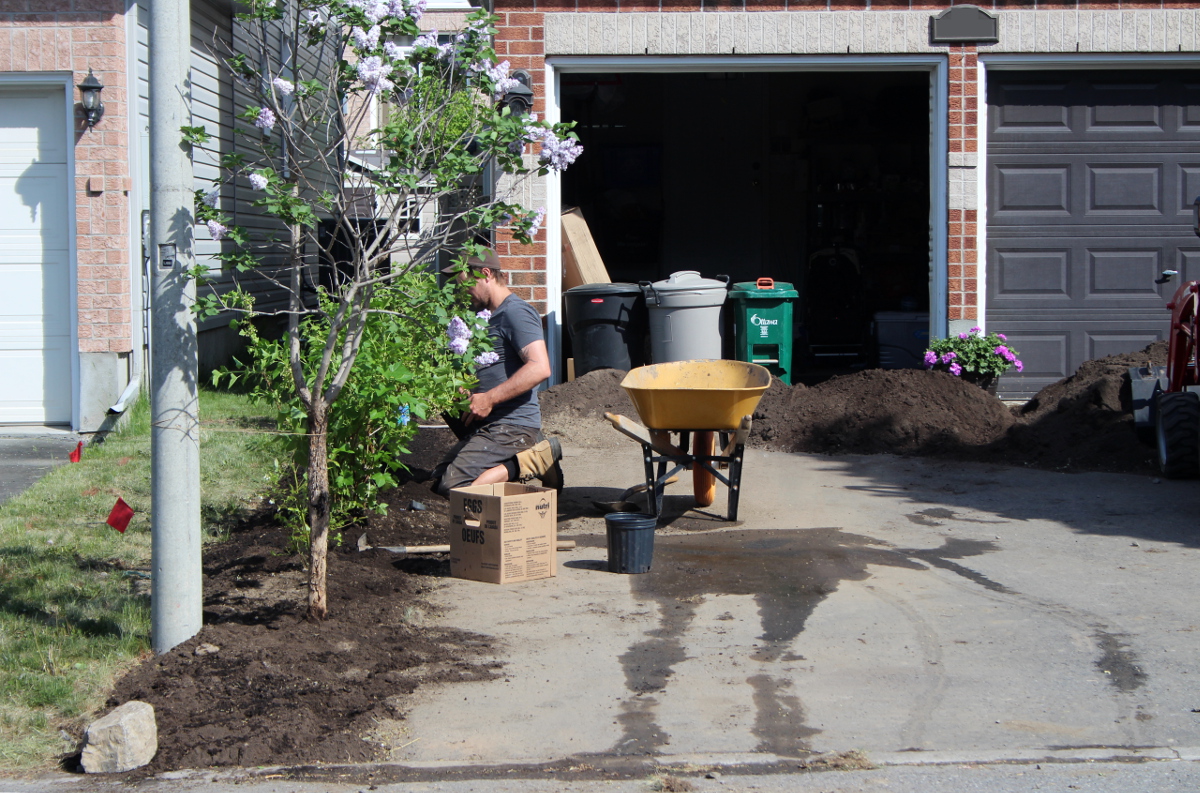
Here is the back yard before we started, with the weeping elm and the lilac tree (just visible at the right edge of the photo) still in place.
The weeping elm was dug up, and we had quite a challenge removing it from the garden, since it was heavy and the garden gate was too narrow. It took a wheelbarrow and four adults to carry and guide the branches out of the gate, and a trailer to transport it away, hopefully to a continued existence.
The lilac-coloured mini-phlox that used to grow along the back fence, together with some chives, got replanted into the front yard river bed. The lilac tree ended up crowning a row of bushes in the front.
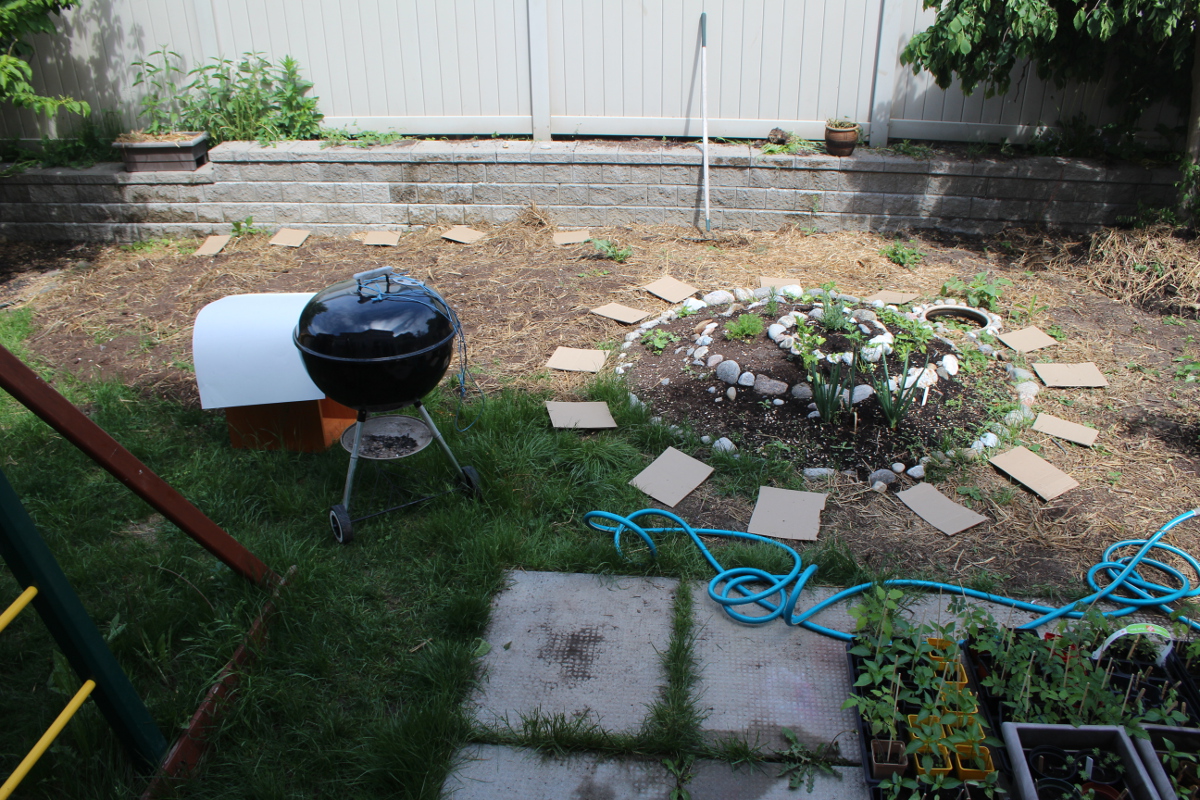
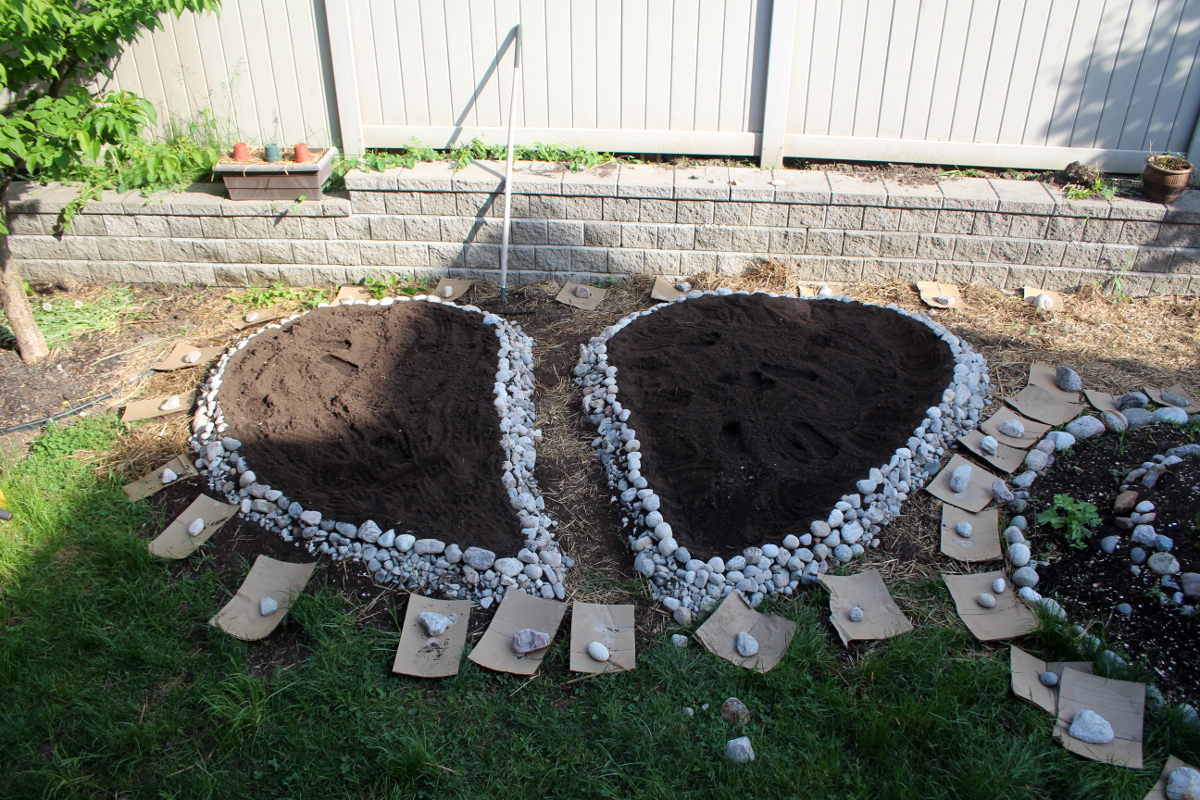
We’ve cut up a large cardboard box salvaged at a road side into squares, and have placed them around the spiral and between raised beds, to indicate where the paths will be. Behind the barbeque, there is a large sheet of white paper which served as my dynamic garden plan. I’ve updated it as I went, with garden bed placement, paths, trellises, and plants once they were in place. Later, I’ve converted it into a digital copy linked above.
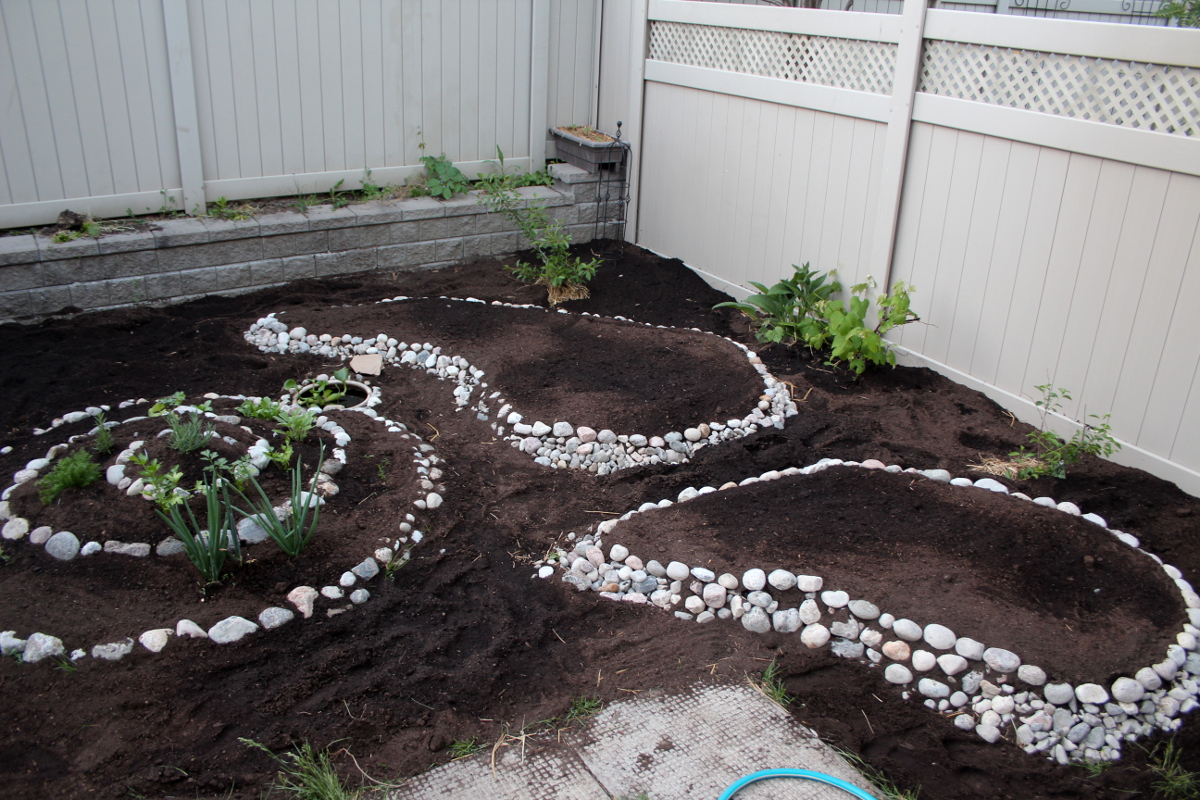
The squares had to be held up with rocks against the wind. We have also planted two small cherry trees in place of the trees we’ve removed. Grapes and comfrey were left to grow at the side fence, since they are very happy there.
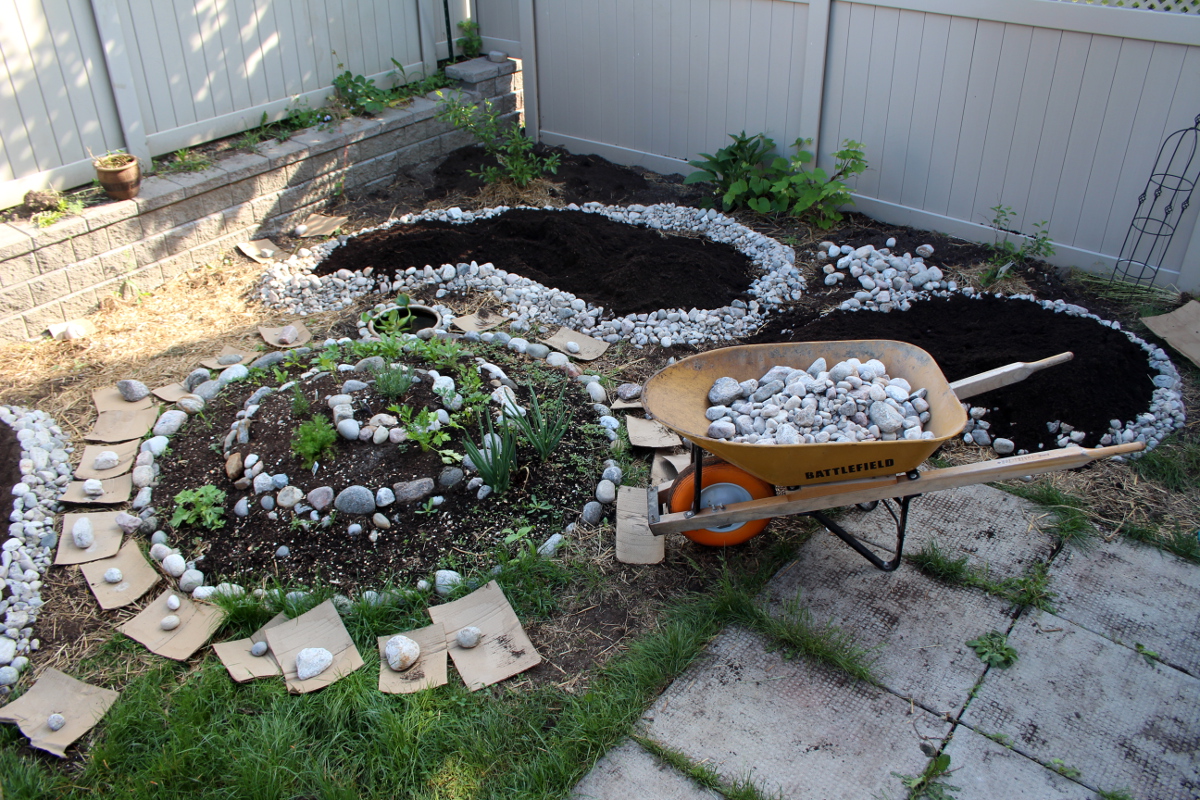
Then the building of raised beds commenced. River rocks and soil had to be brought from the front driveway, over the river bed, along a narrow passage between houses, into the back yard. The whole process took about one and a half days, and made for a wonderful workout, in fresh air and warm sun.
The rocks were piled into teardrop shapes, and the soil was placed inside the borders. Then soil had to be smoothed out evenly and pressed into the sides to help hold the rock borders up. Alternating soil and rock placement, the beds were slowly brought up to the desired height.
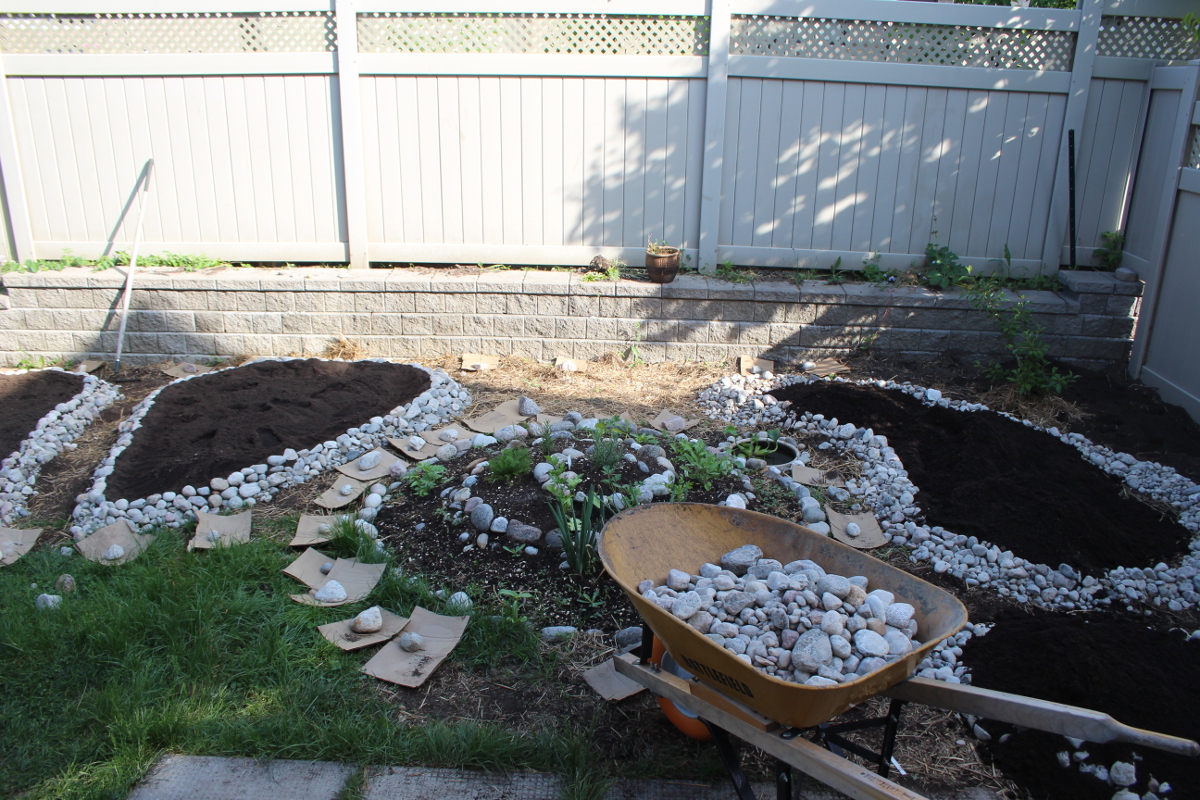
Once all the beds were filled in, I brought in the soil to fill in the spaces between, leaving the cardboard in place to prevent light from reaching the grass underneath.
I’ve watered the soil, so it can settle, and the next day brought more in.
Gavin from Edible Landscaping Ottawa was building three long boxes to be put up against the fence. I’ve decided to add more planting space for shade-loving plants along the fence behind the tree, so I’ve built a smaller raised bed edged with river rocks. In the opposite corner of the fence, there is another small area, enough for a single plant, which I have also made into a raised bed and planted a black cherry tomato there.
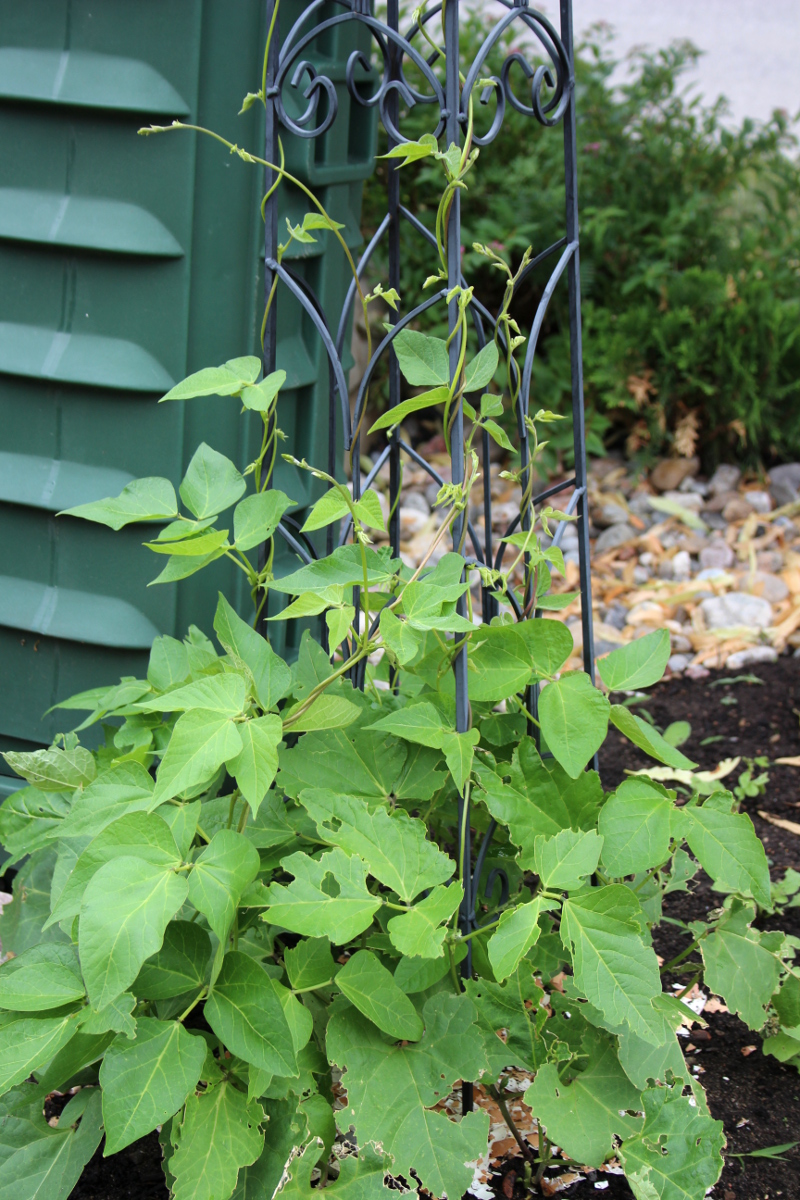
I’ve also put up a trellis in the corner, so that scarlet runner beans could climb it.
Some of my herbs were already planted in the herb spiral, and we’ve got a water hyacinth for the small pond.
Then, when all the beds were ready, I’ve started planting. Since this was an evening after work, most of the planting was done after children were asleep, meaning I was planting by starlight, until about 1 a.m. This was the most serene, peaceful experience. Even in low light, I had little trouble placing all of the plants, since I’ve plotted their placement in advance on a paper map.
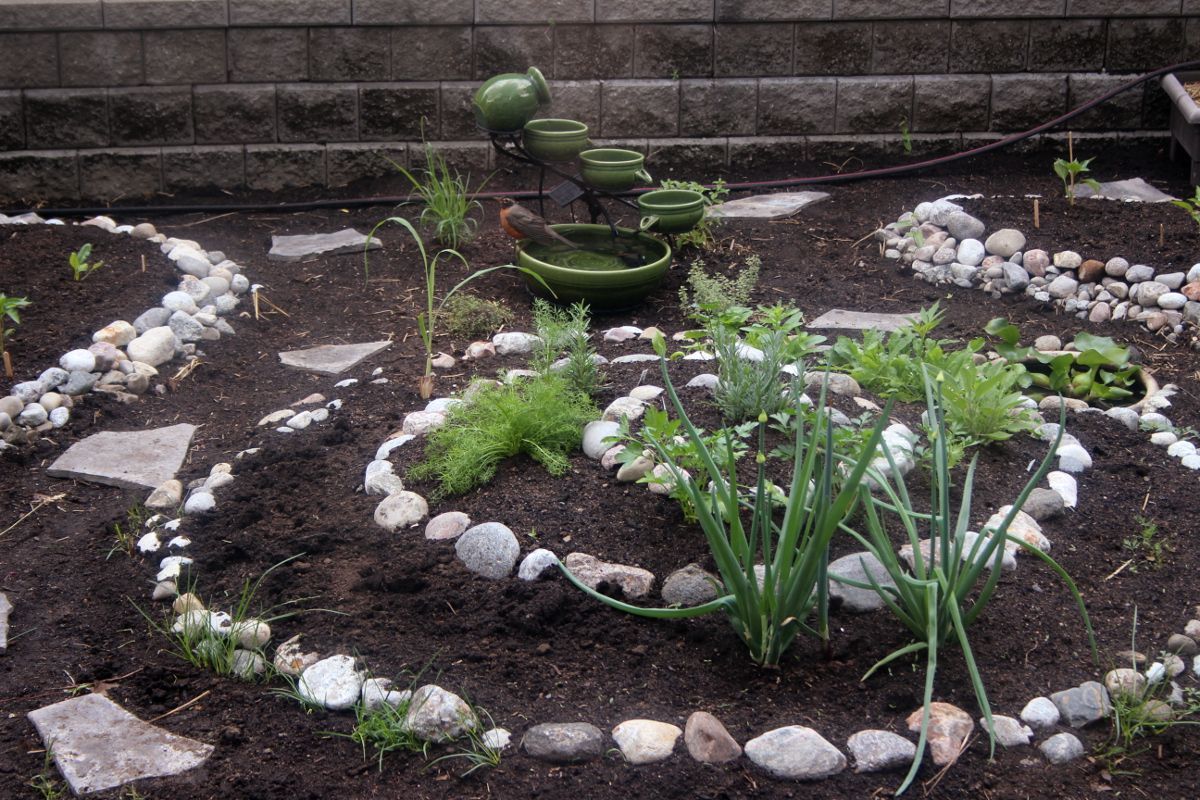
Behind the spiral, I’ve set up our solar-powered fountain which birds love so much, and around it I’ve planted lemongrass, lemon verbena, and two types of thyme.
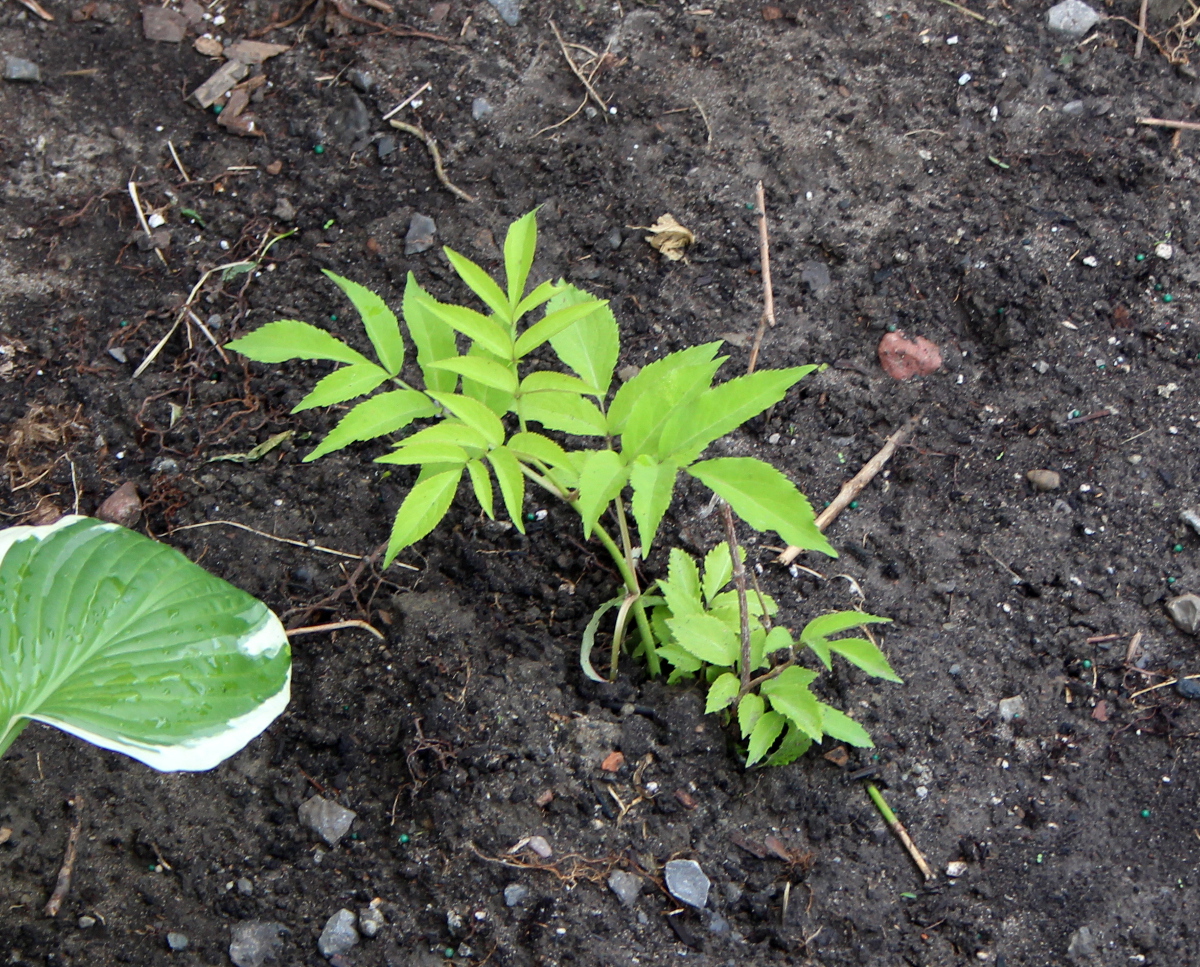
Later on that week, we’ve decided to remove another large ornamental bush behind the play structure, and plant an elderberry bush in its place.
I’ve also sourced some broken flagstones, to line the paths between the beds. Later on, we are considering planting a cover crop, to suppress the grass between the rocks.
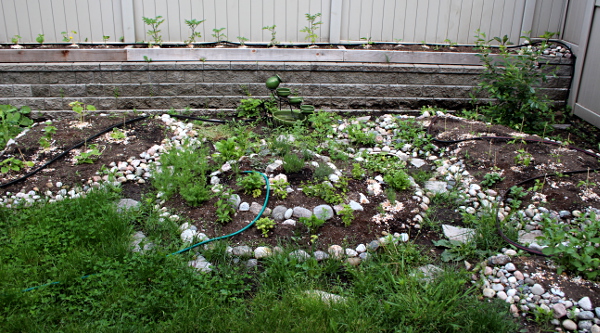
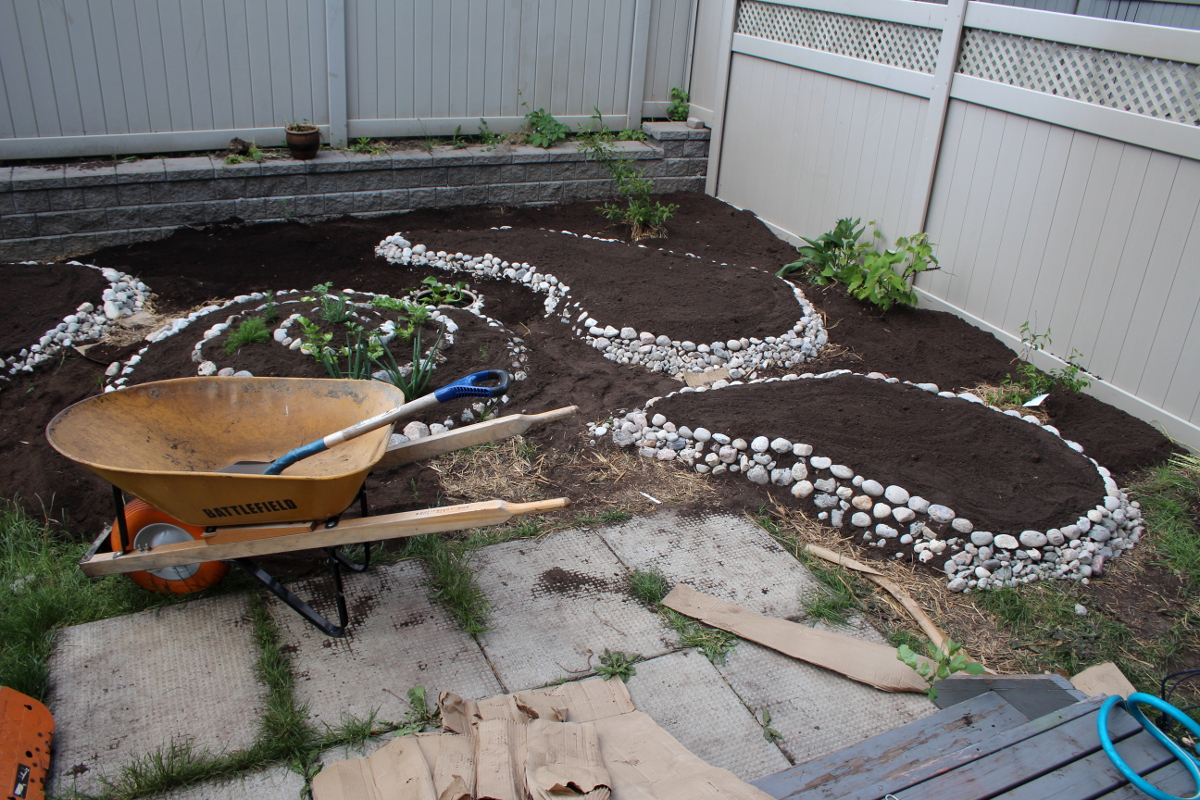
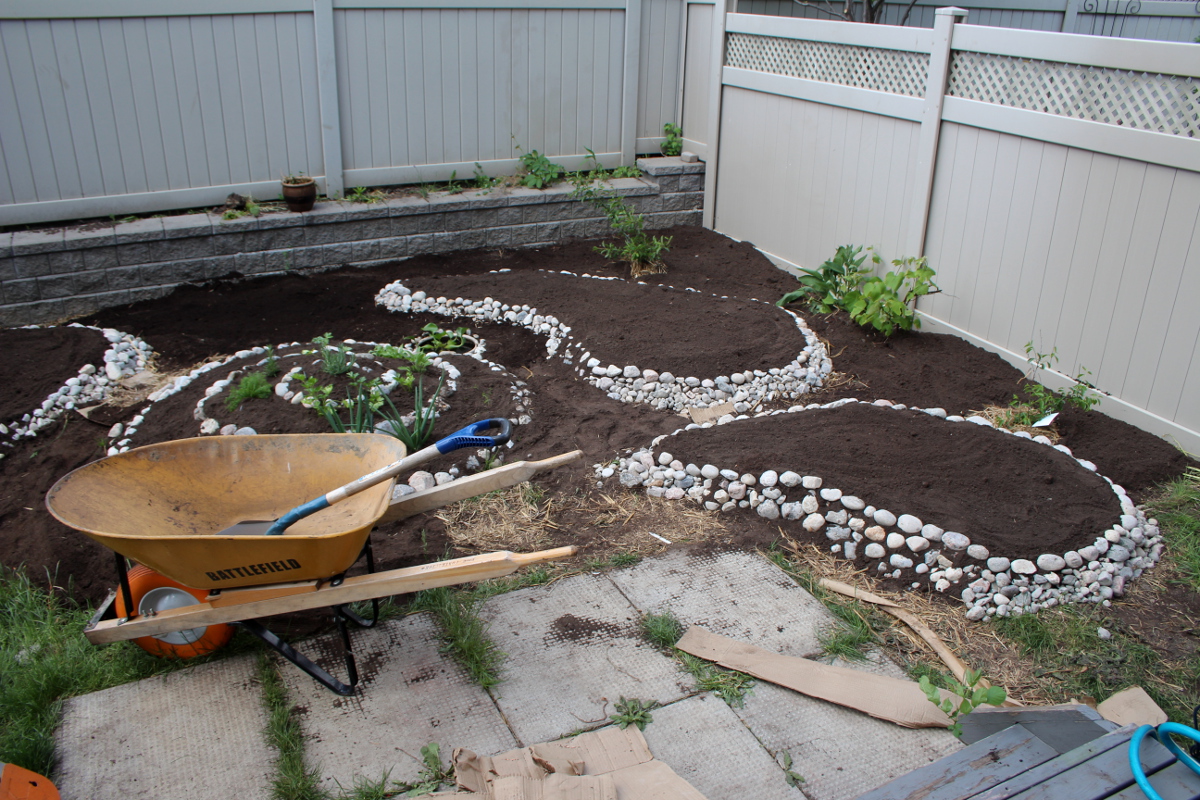
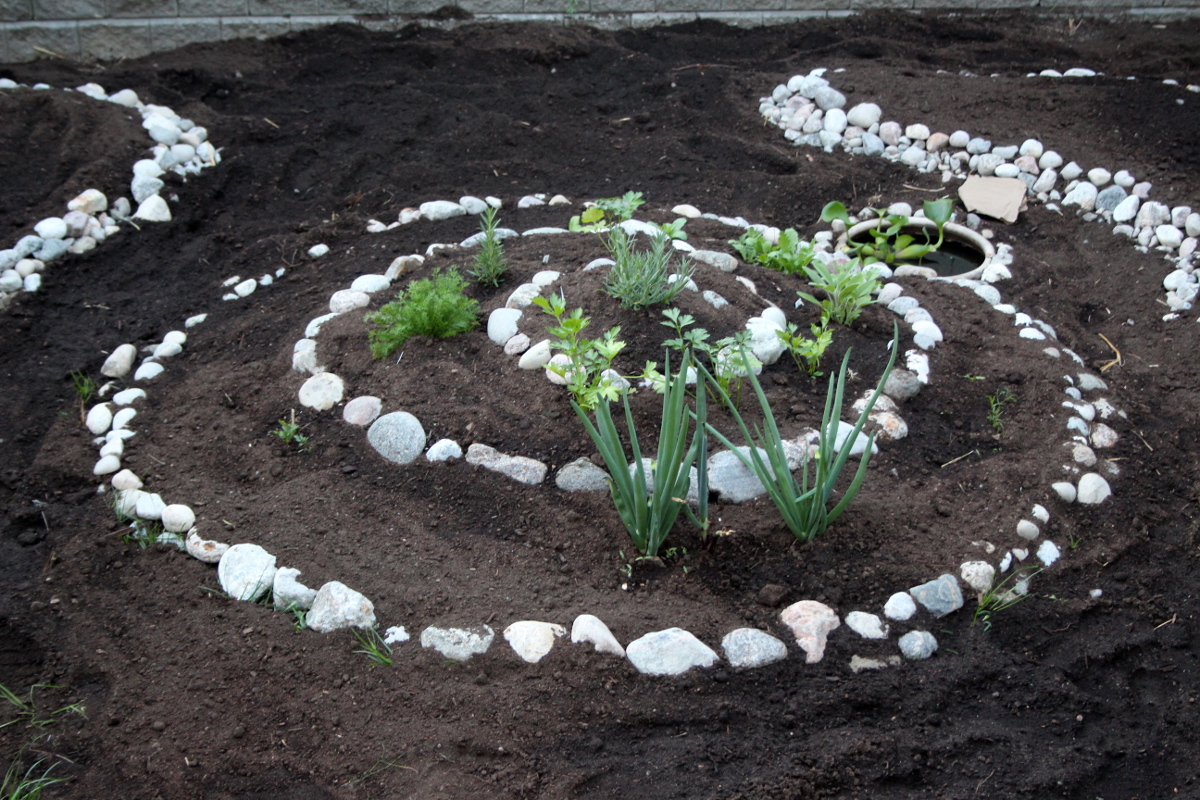
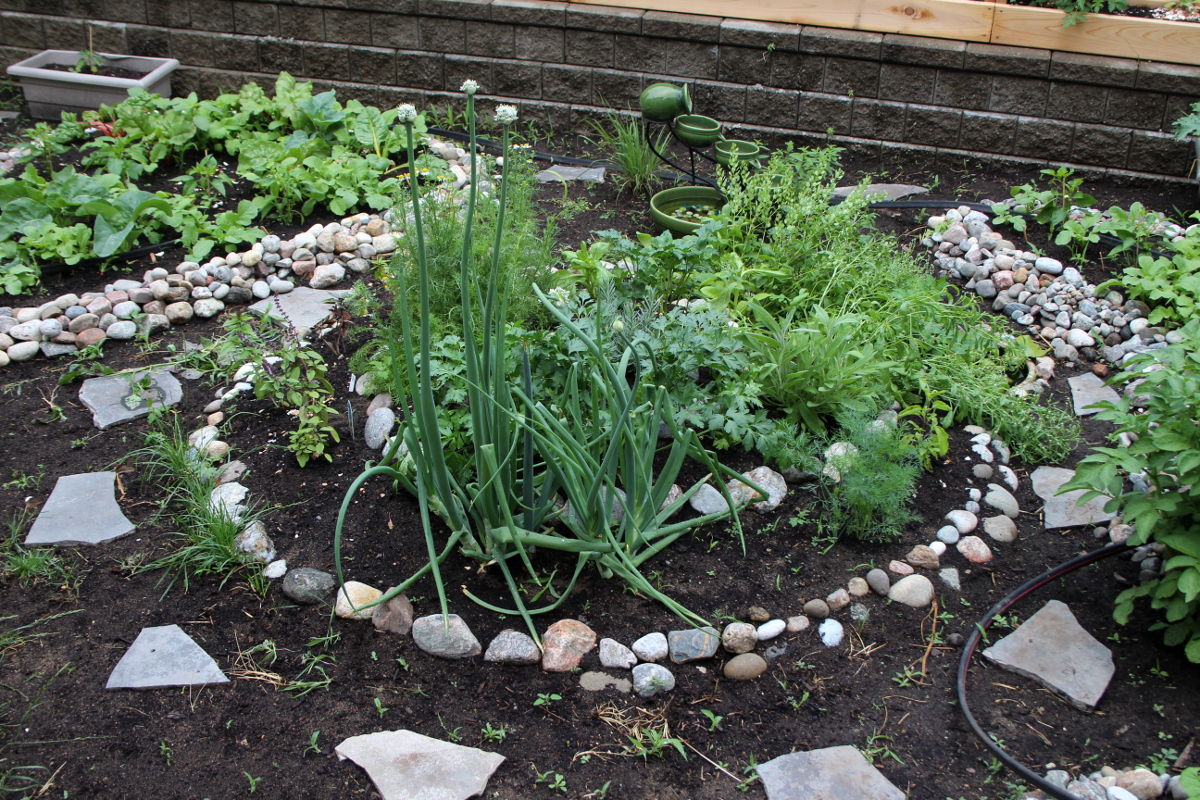
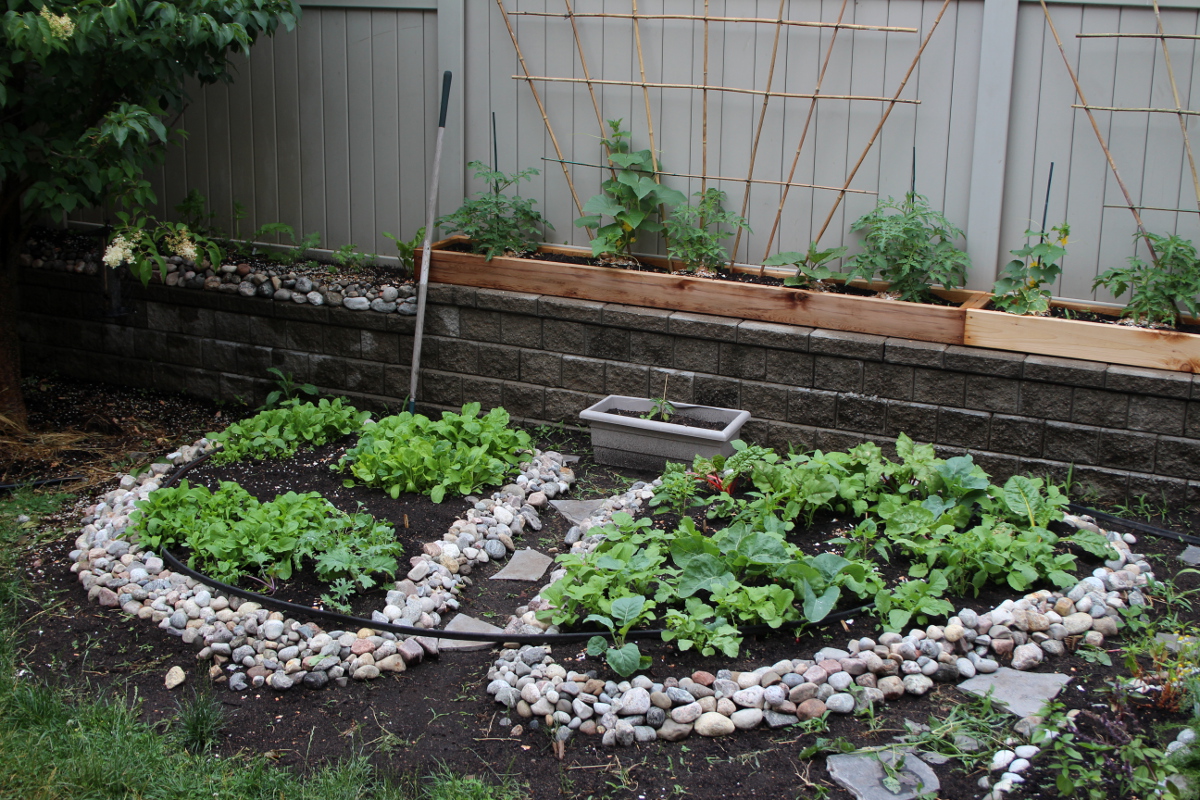
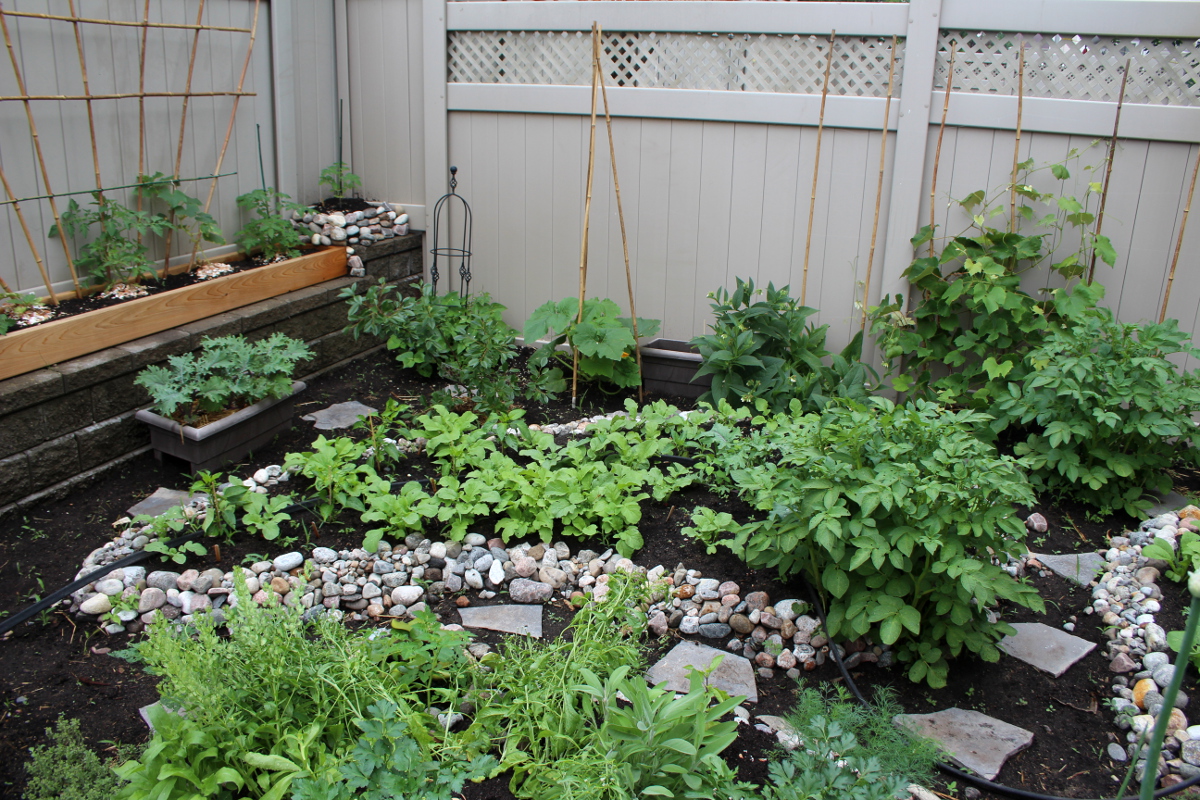
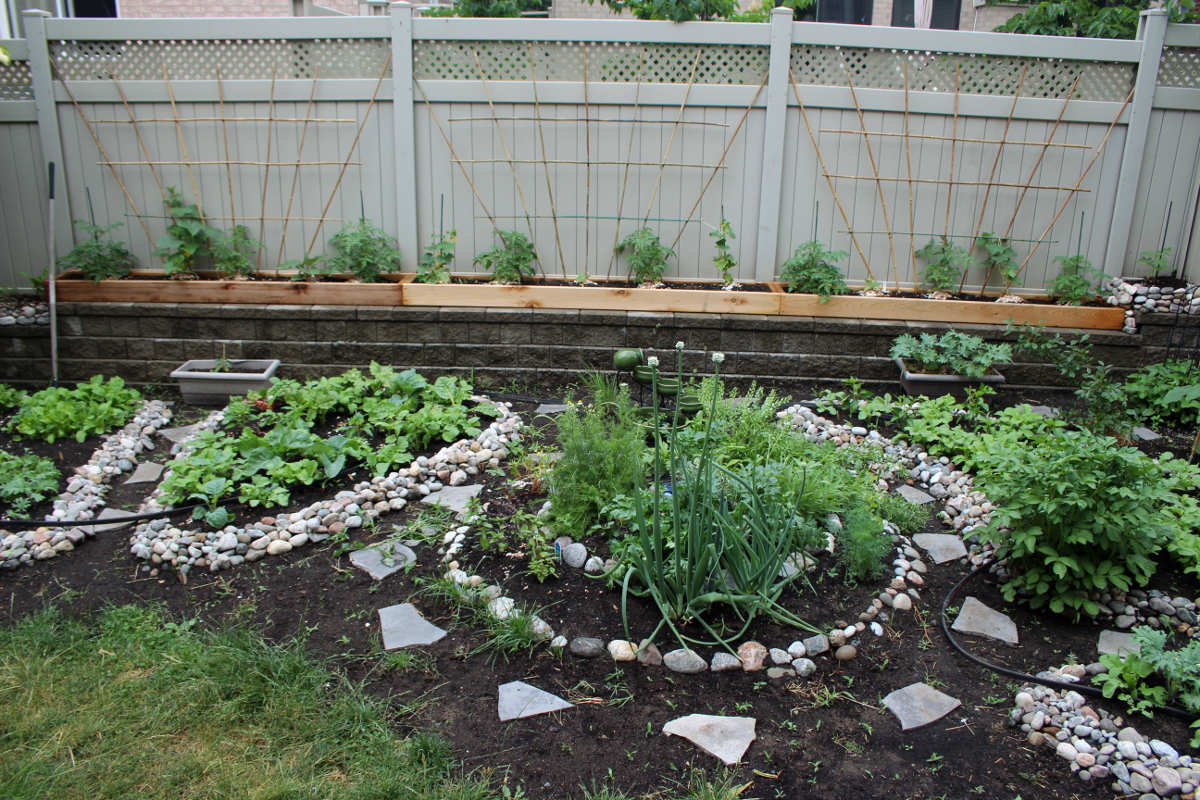
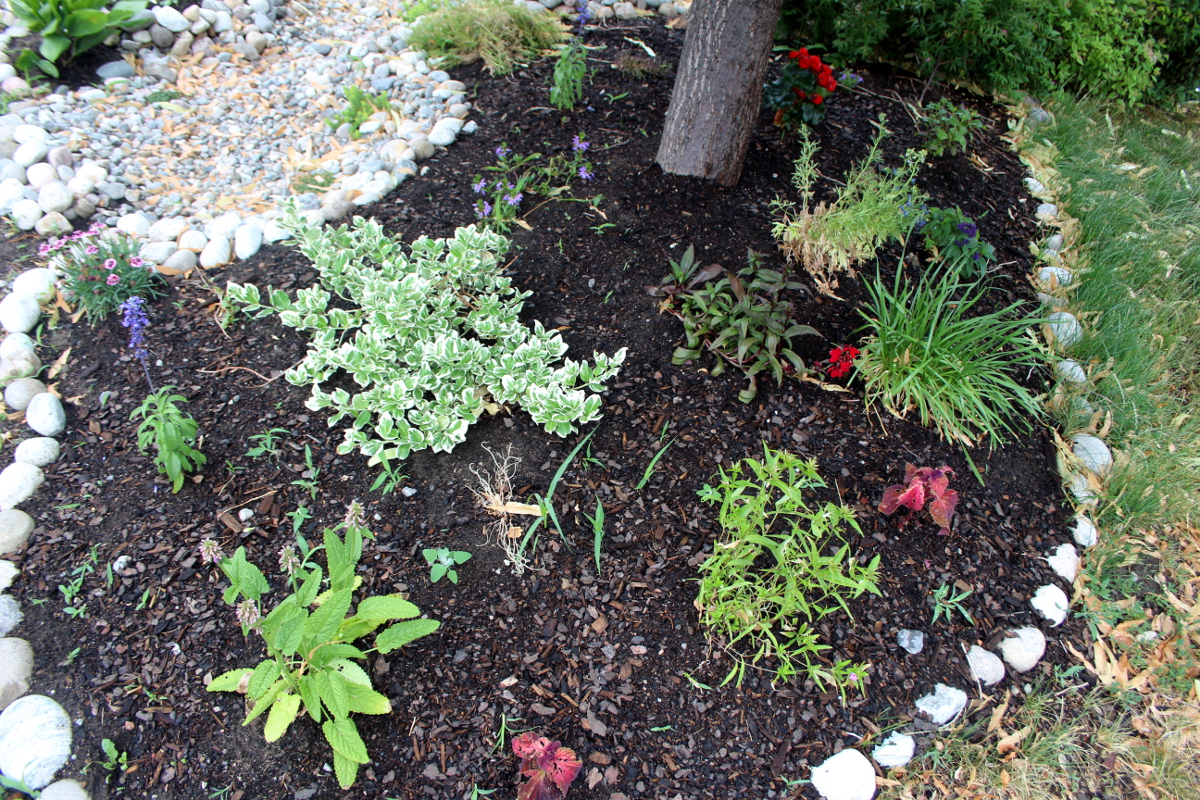
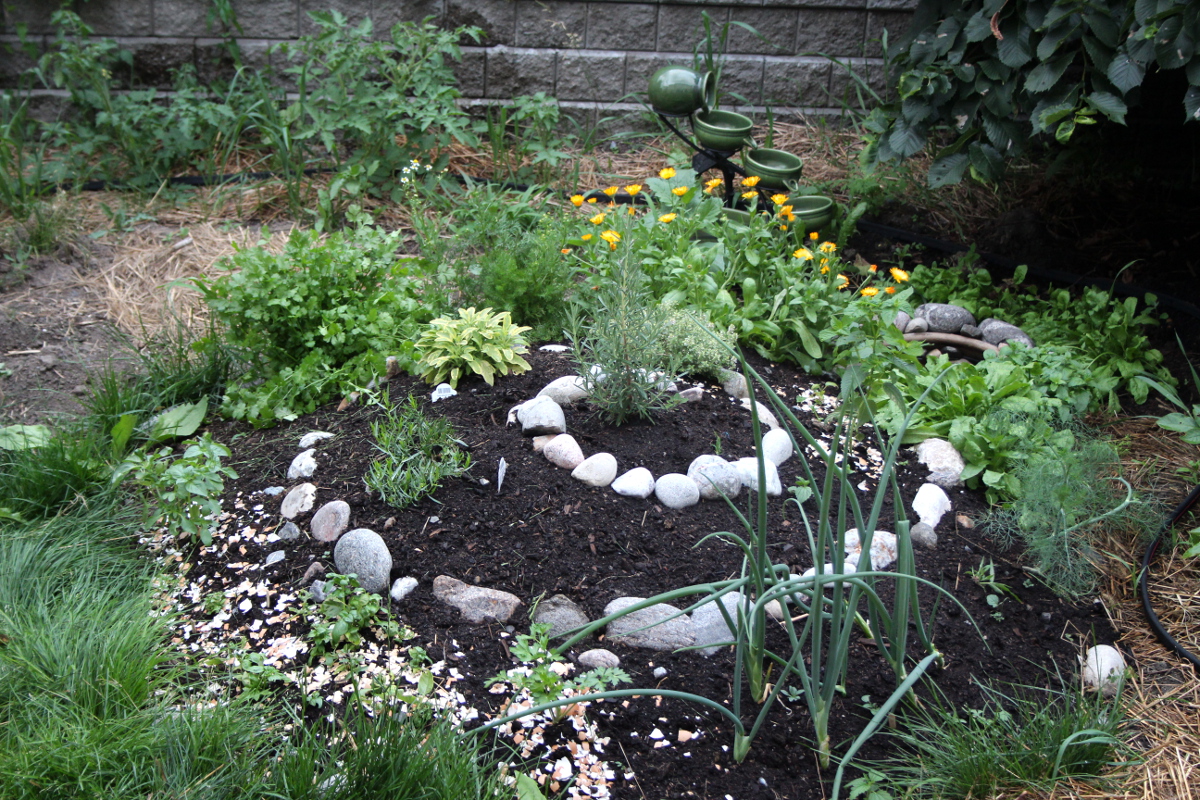
About a month after my initial planting, the garden was wonderfully green.
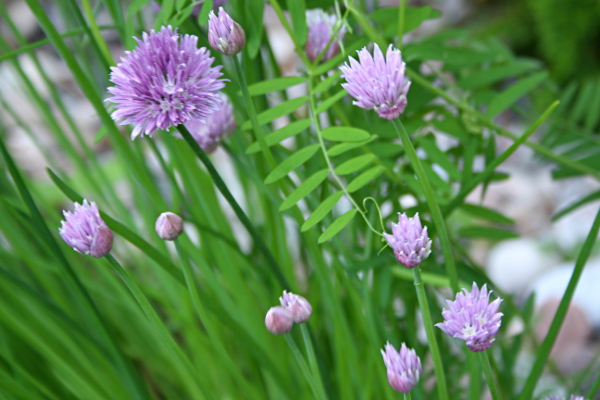
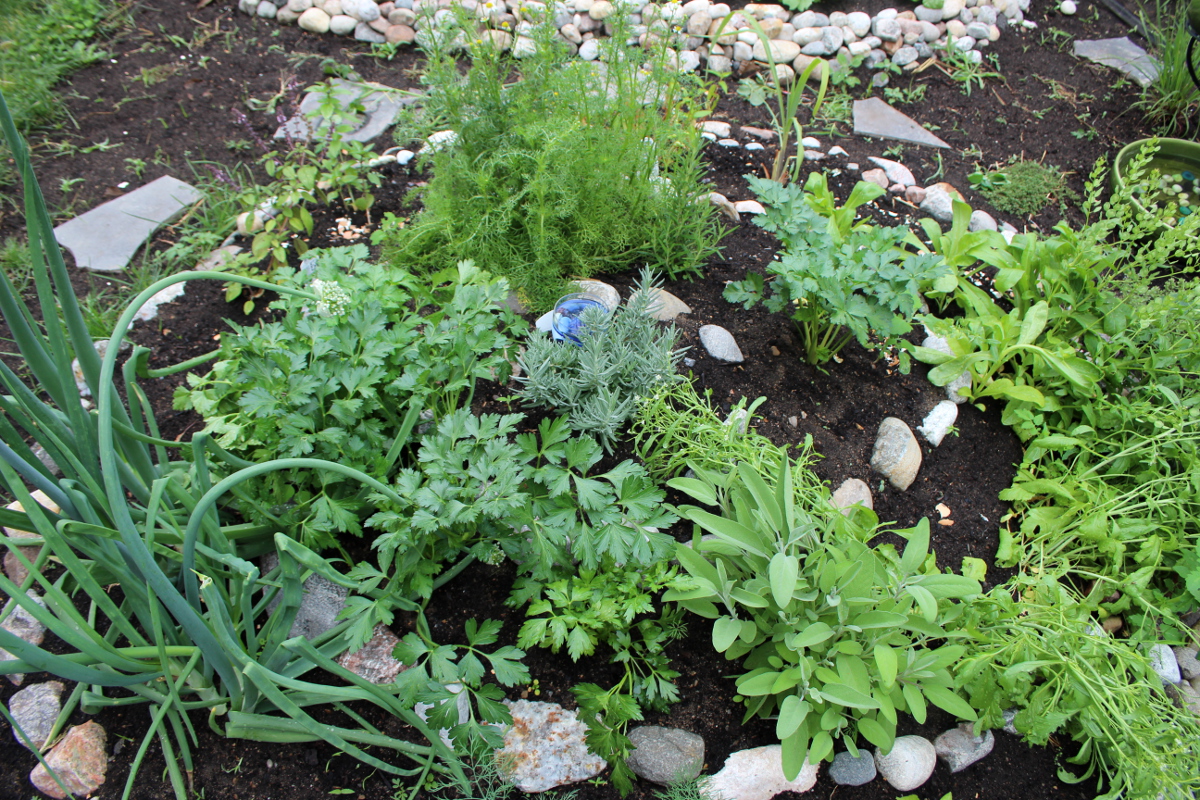
The onions were the first thing planted in the spring, and they are happily blooming in the herb spiral.
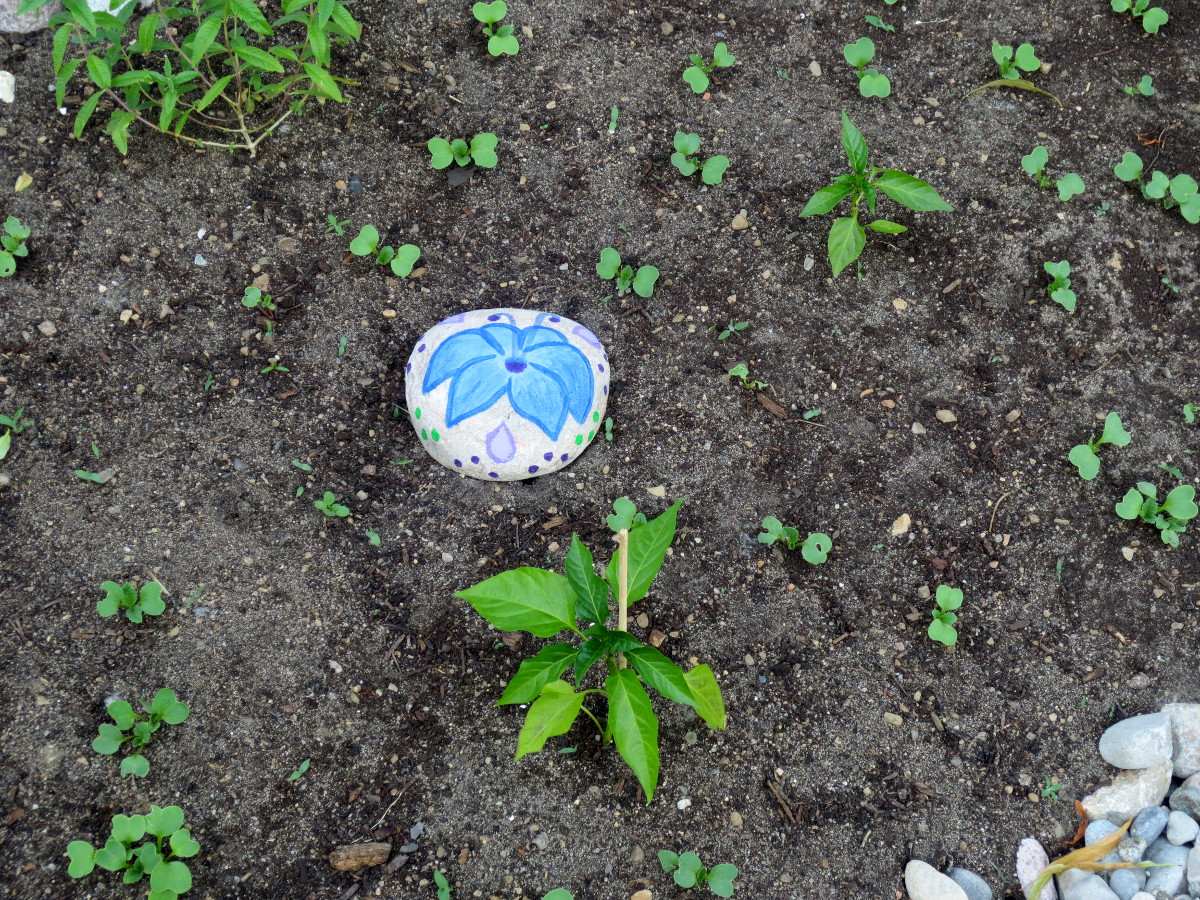
Some things, like cress, have sprouted from last year’s seeds without any involvement on my part. I also have a random tomato seedling sprouting here and there, but as I would rather not have a tomato forest again this year, I gently usher them out. Two large ones, that insisted on growing in the herb spiral, I have replanted into pots.
The blue ornament, barely visible in the picture below, was created out of a broken blue wine glass and some rocks, sea glass, and beads, topped with water. It sparkles in the sun and attracts curious creatures that sometimes also get interested in consuming delicious bugs nearby.
In the meantime, peonies planted by the previous owners, were delighting us with their blooms:
The remaining tree is a Japanese lilac, which blossoms in June, after most North-American varieties have finished blooming, and has a very sweet smell to the flowers.
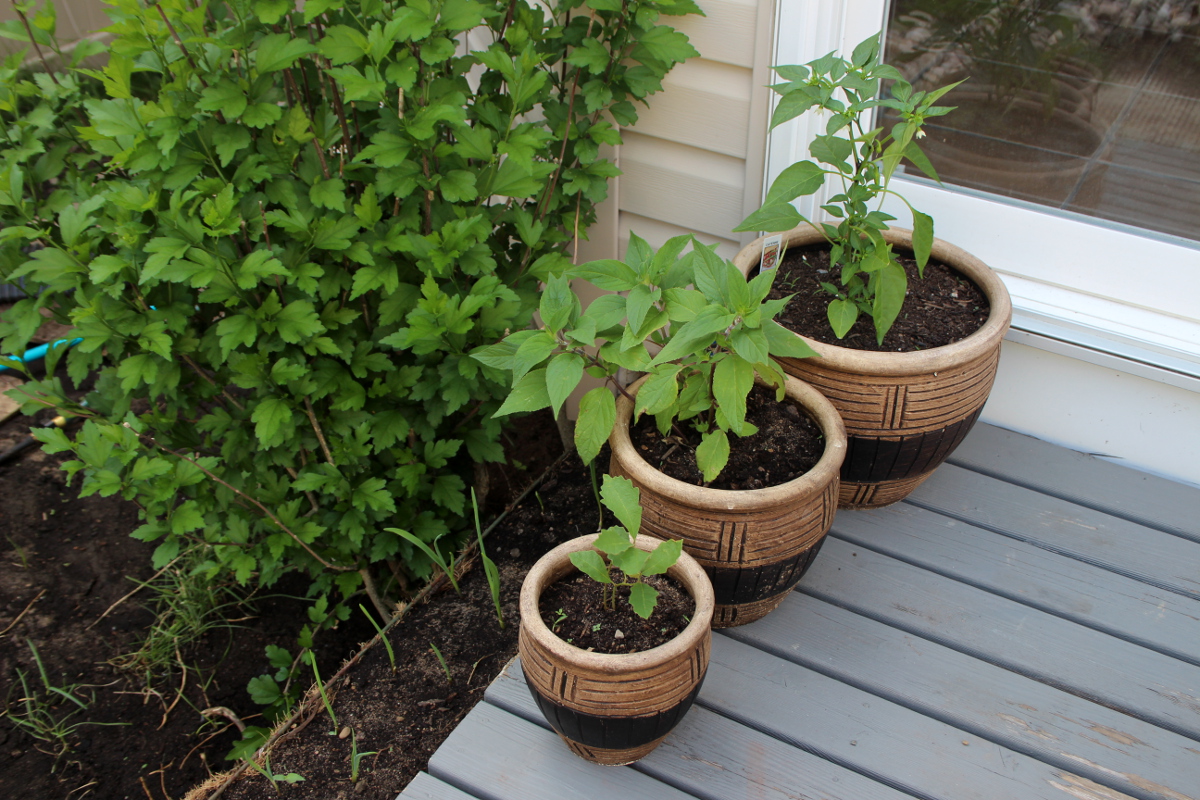
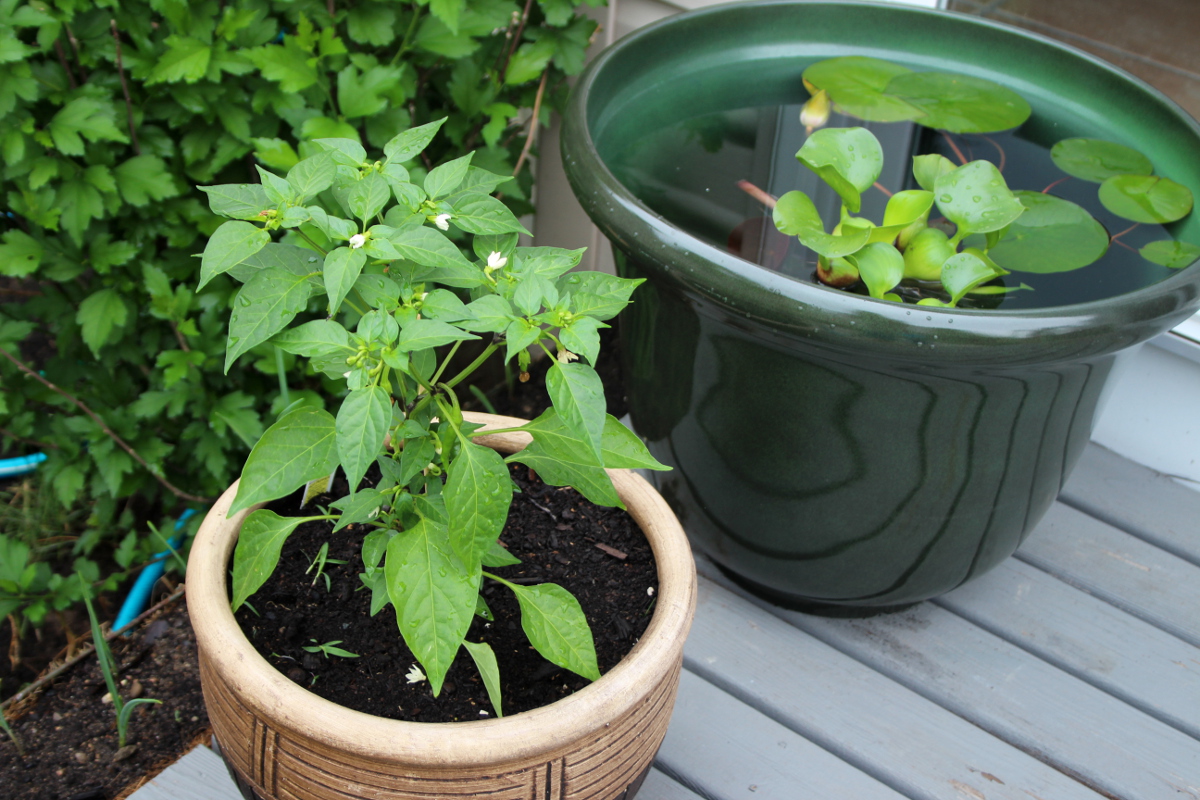
Along the porch, I have lined an old metal shelf with coconut fiber, added soil and planted a row of garlic, which has happily sprouted. And in the pots, there are cayenne peppers, pineapple sage, and either a hazelnut or an acorn we have found sprouted in the garden. The squirrels bring us many treasures.
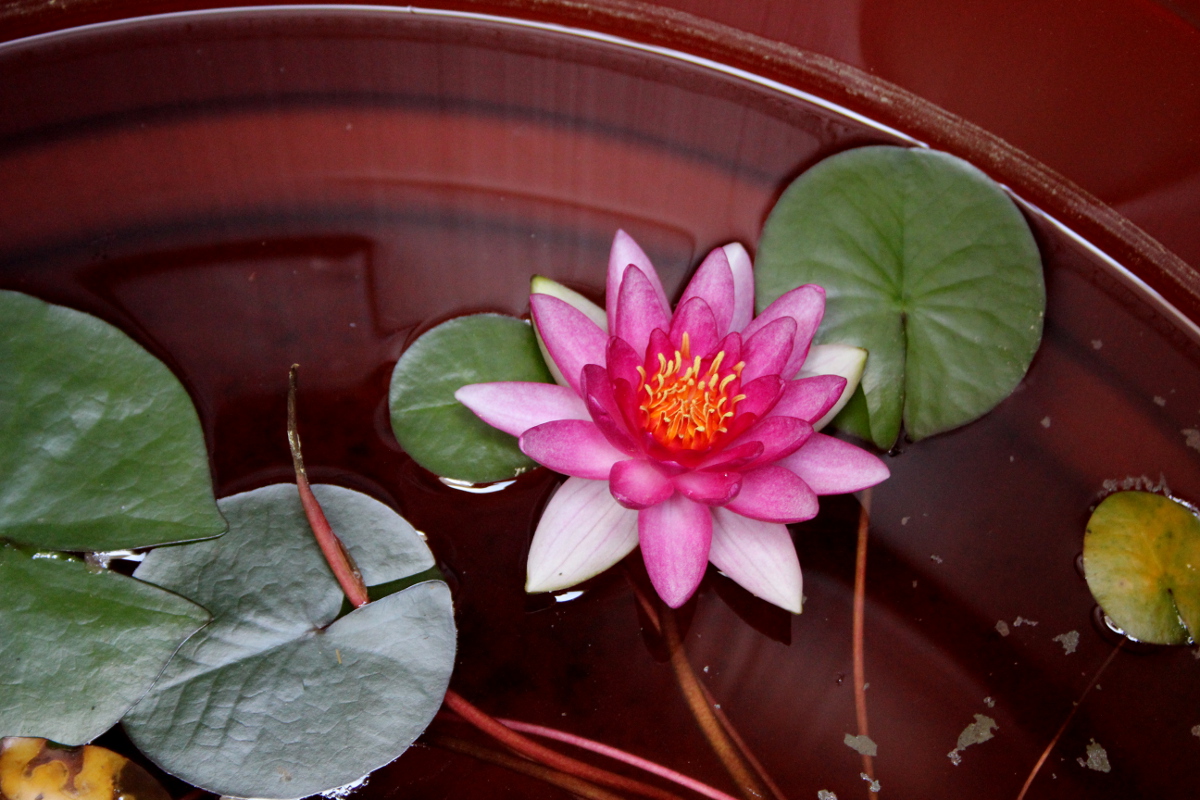
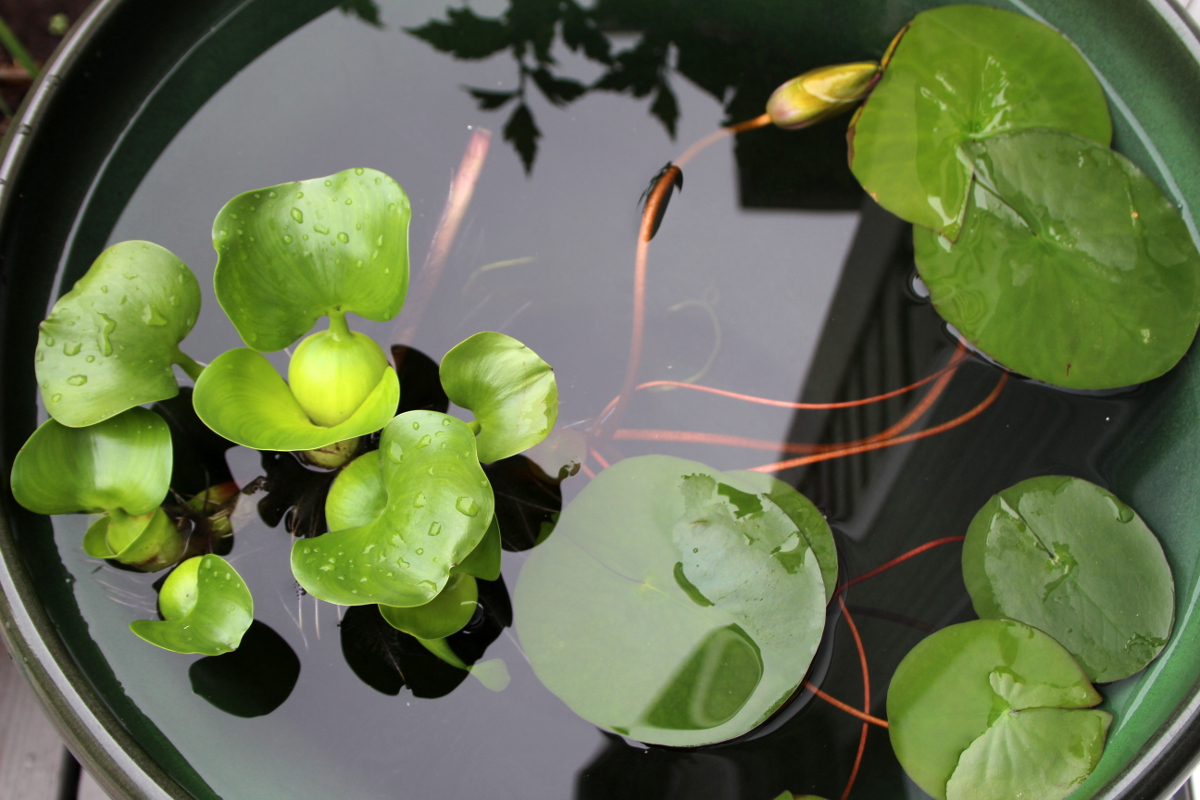
As part of the remodeling, we’ve installed two rain barrels, and have added goldfish, a water hyacinth, and a lily to them. The lily was here temporarily as it counts on a more or less constant water level, being planted in a pot placed at the bottom of the water-filled container.
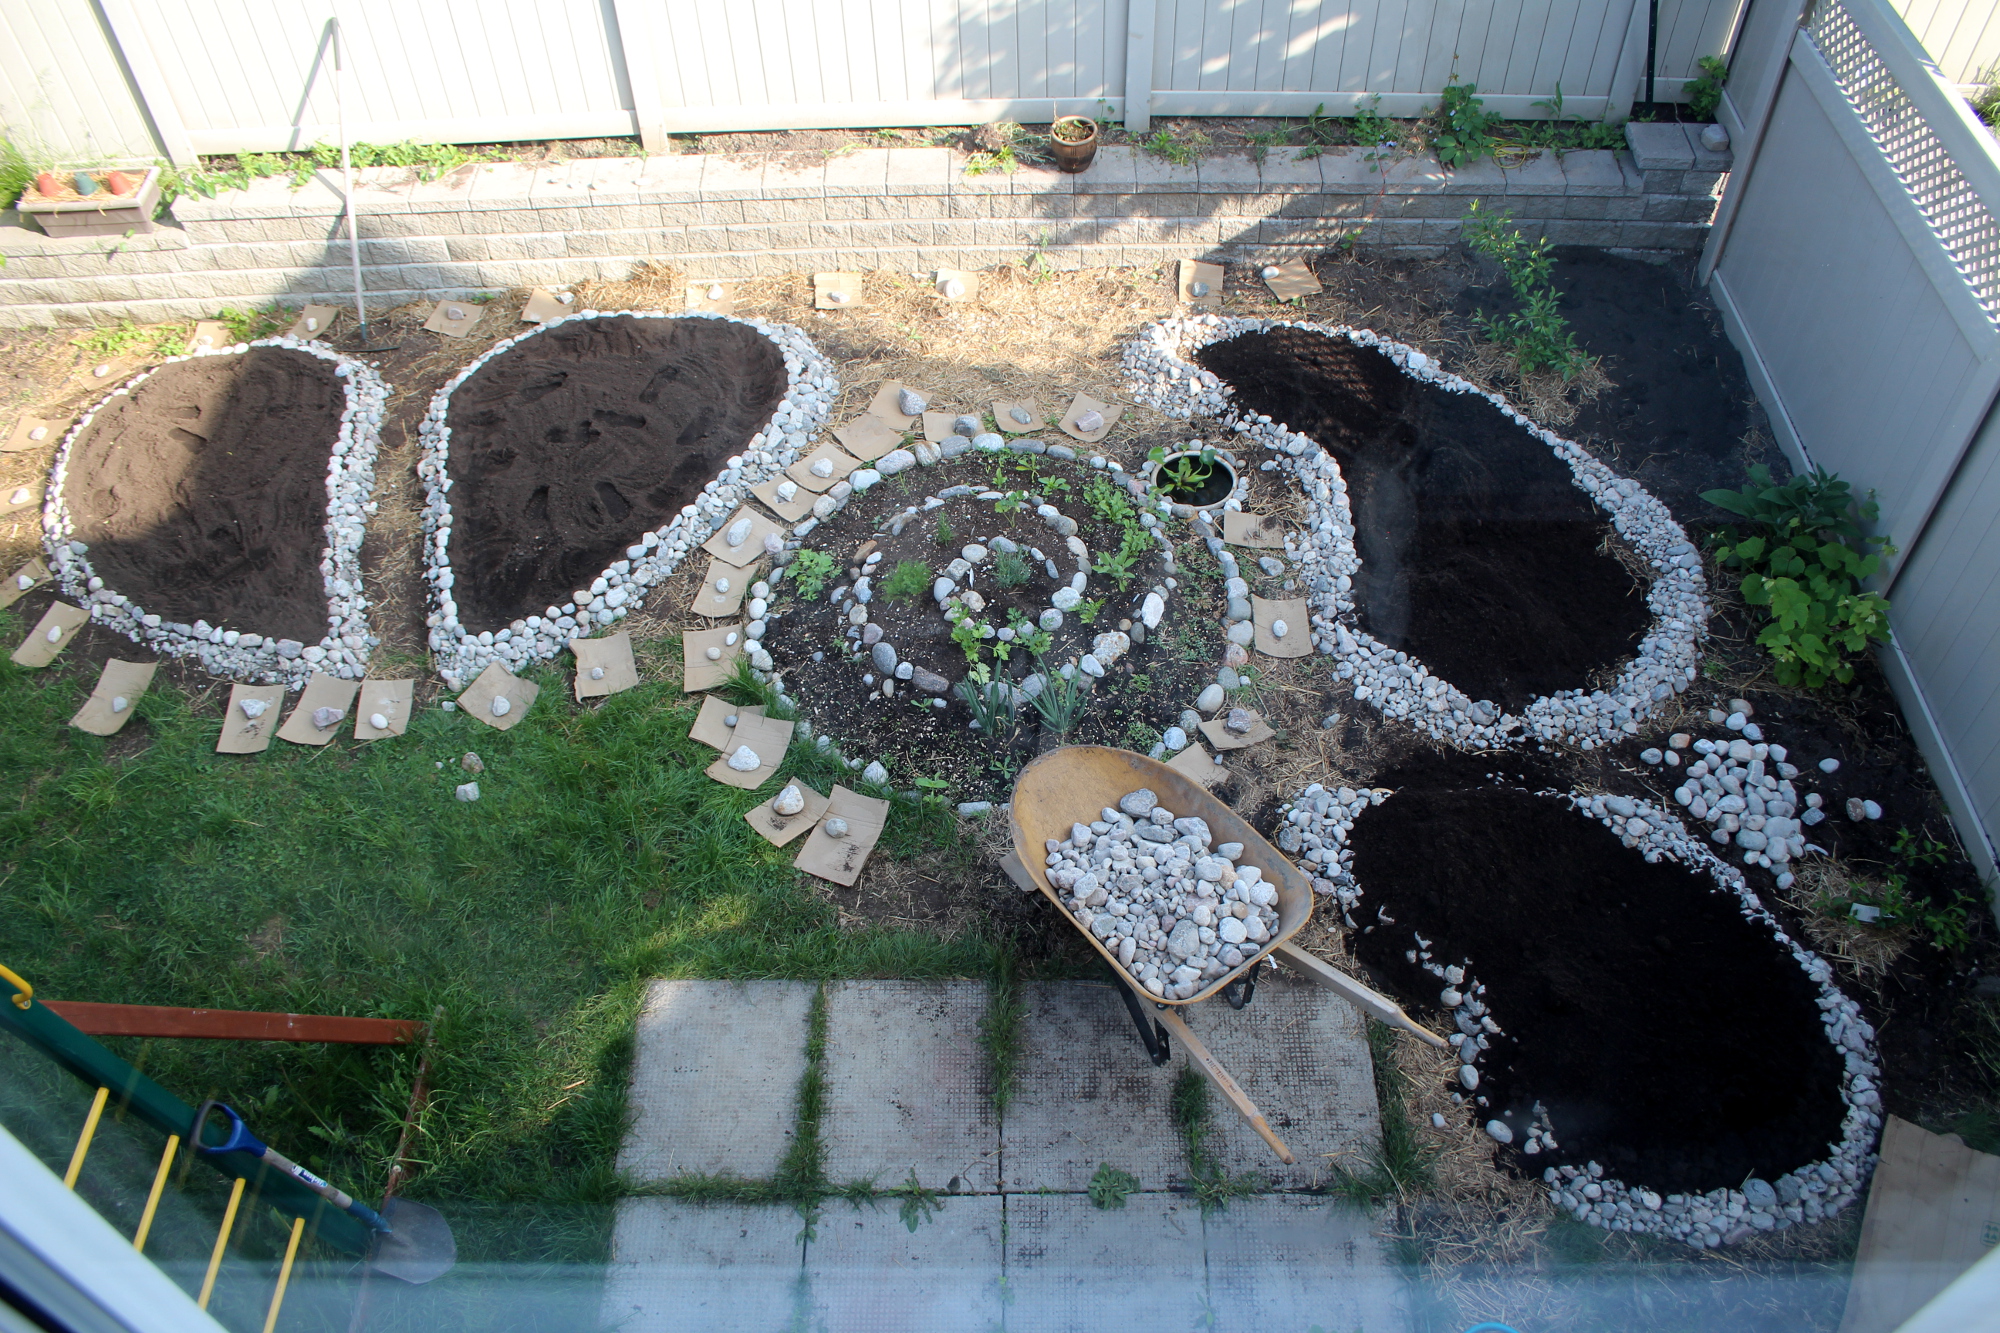
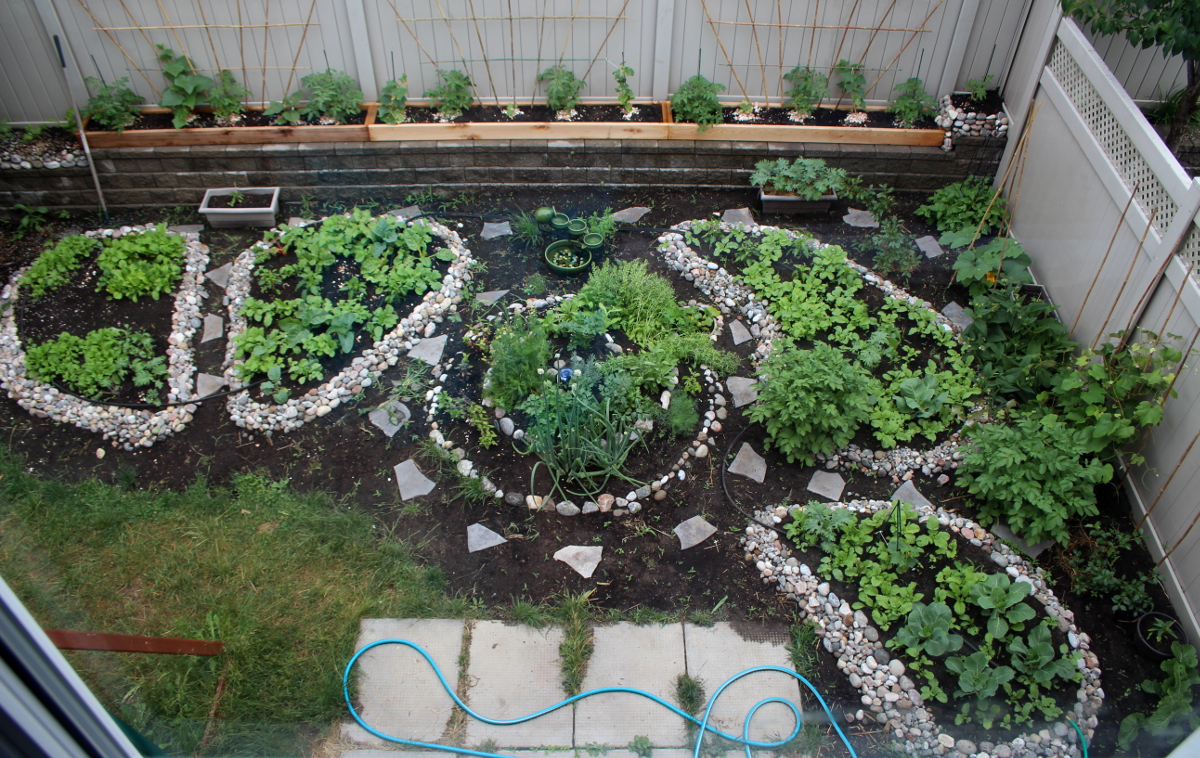
This is a view from above. I’ve built trellises for the grapes (on the side) and the pumpkin (close to the top right corner), and for the tomatoes, eggplants, and cucumbers growing along the fence. I’ve also added crushed eggshells to the soil, to discourage slugs and to add minerals.
After I’ve offered my extra seedlings to people, there were a few left over, and so I’ve planted them in a few pots I’ve placed around the garden.
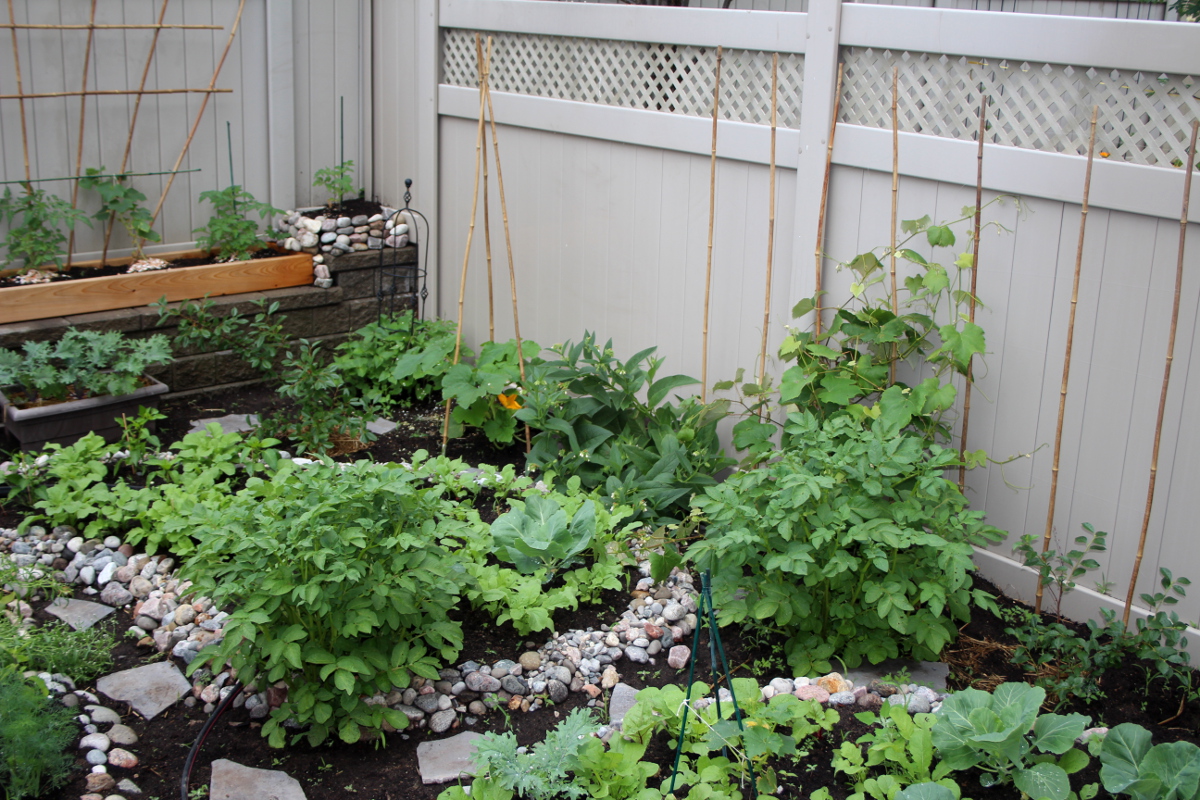
I’ve staked tomatoes and cucumbers, to give them extra support before they can reach a trellis.
Without my intention, surprise potatoes from last year have happily sprouted two large bushes, one right through the wall of one of the garden beds. I’ve decided to leave them there until harvest. As one of my friends put it, the best potatoes are surprise potatoes.
The grapes took to the trellis with pleasure, which has also freed the comfrey, as it was no longer getting entangled by grape vines that had nowhere to climb.
We have later acquired a large pot into which the water lily was migrated since it’s of a more suitable height. As my water hyacinths keep propagating, I’ve placed one here as well. Two goldfish now call this new pond home.
It’s been a significant transformation for my garden and a lot of work, even though, being a labour of love, it does not feel like the effort was significant. When we are truly excited about a project, we find energy, time, tools, and processes to achieve the desired result.
Here is a video of progress from the first planting (taken in the rain) to the growth a month later:
I love looking out of my kitchen window at all the greenery. I love stepping out on the porch and seeing all the buzzing life in the garden. It’s a wonderfully calming experience to sit outside on a sunny day, feel the breeze on my face, listen to the soft tinkling of the water in the fountain, watching the goldfish among the leaves of the water lily, and feeling the warm rays of the sun.
My youngest keeps asking to go outside all the time, rain or shine, and loves poking around among the greens. My oldest likes examining flowers and leaves with me, learning how vines climb and fruit form, helping me collect greens, herbs, and radishes for dinner. And they both love picking fresh berries from the berry patch and strawberry containers. The garden is a truly wonderful place that keeps on gifting us new experiences every day.
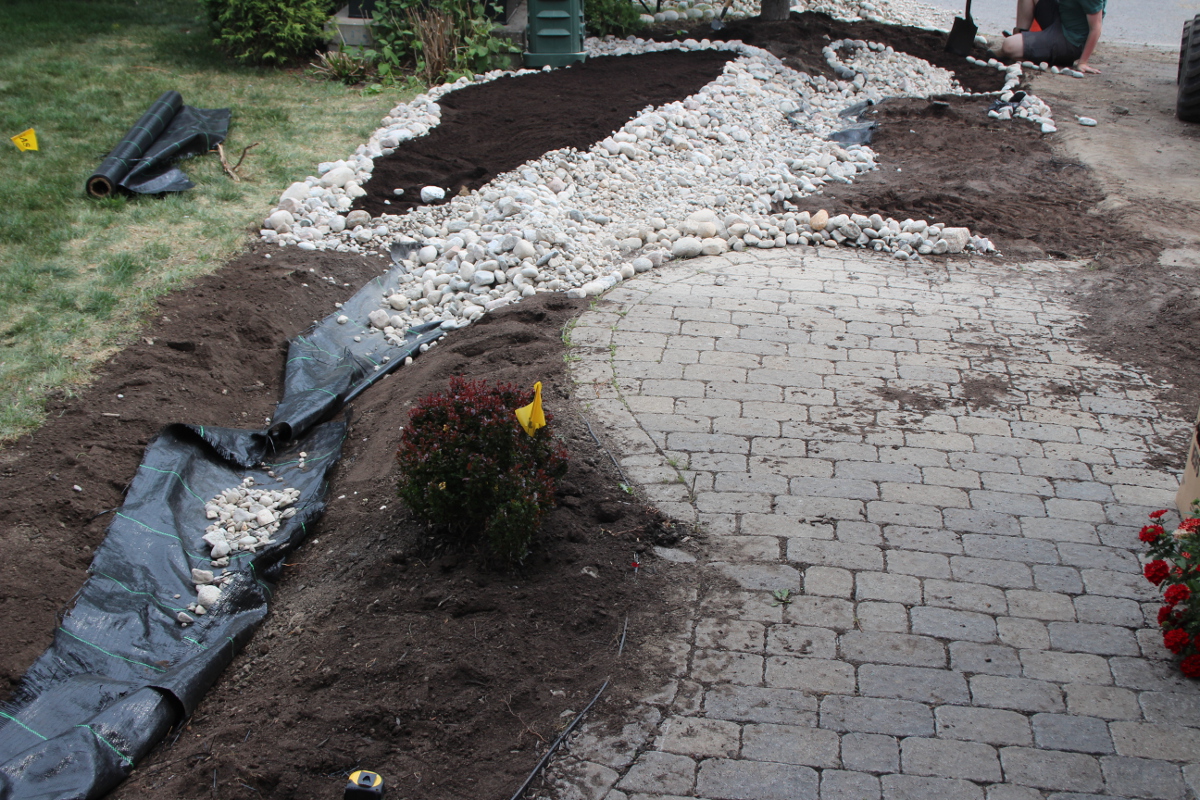
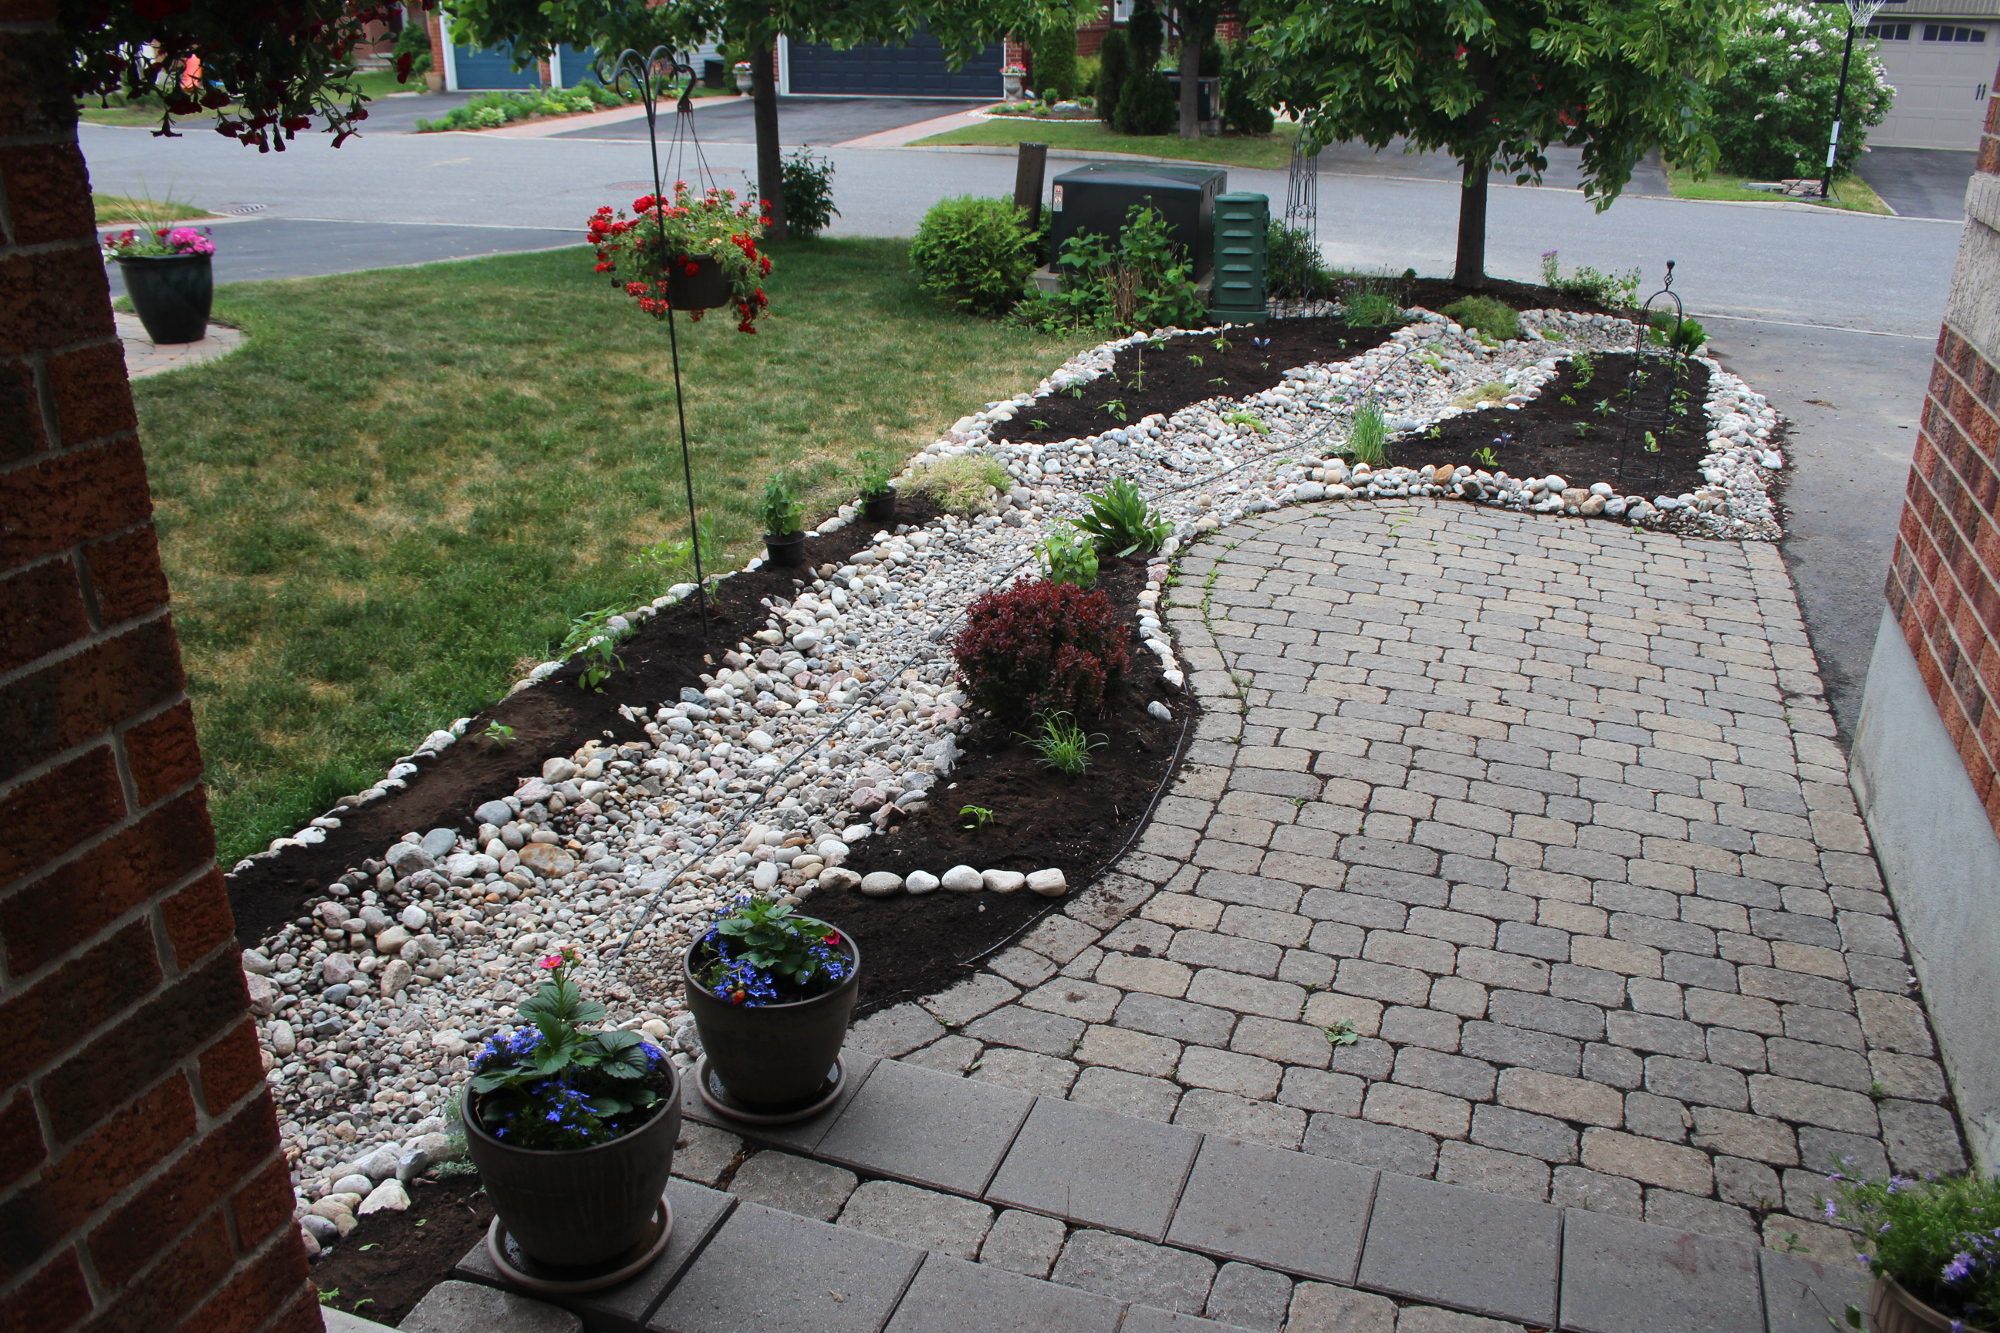
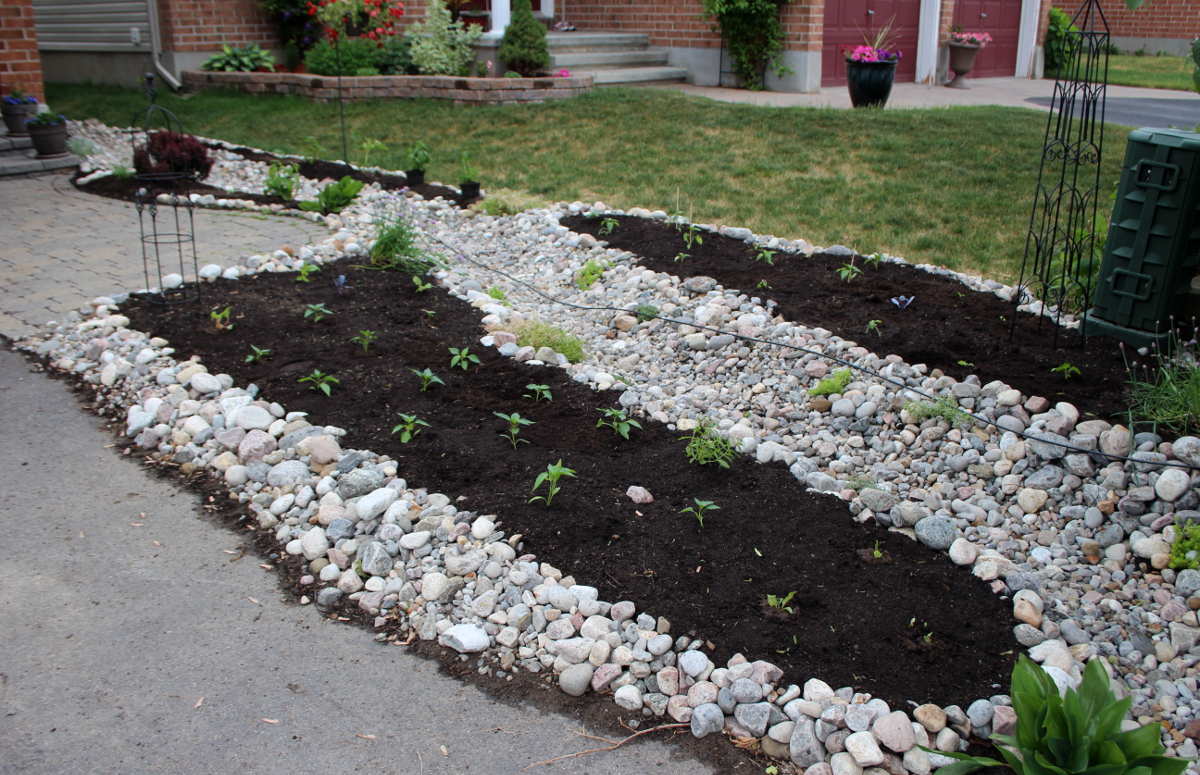
From the first time I’ve considered my edible landscaping project, I’ve been set on using natural materials – rocks and wood – instead of plastics and rubber, to create an oasis that one might encounter in nature. One day, I was looking for instructions on building raised garden beds with river rock borders, when I stumbled upon the following image:
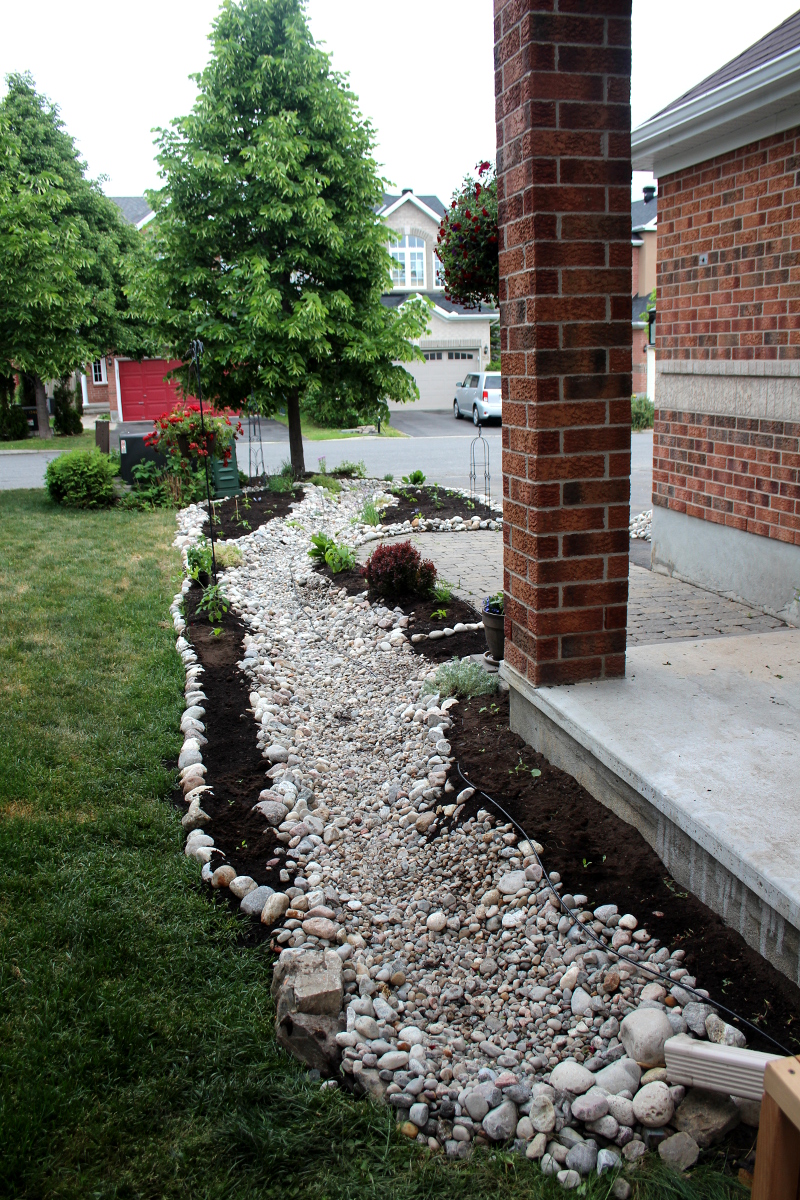
It caught my breath, so beautiful was seeing a flowing river in the middle of an ordinary city lawn, with plants growing among the rocks. It’s almost as if a rift opened in the lawn with a glimpse of a forest spring. I love combining aesthetics with functionality, and from that point on, I was inspired to implement this idea. It would work beautifully with a garden bed on each side. Thus my edible landscaping project has changed shape to incorporate a dry river bed as the central element.
For a timeline view of the project, you can read about my edible landscaping journey and specifically the front yard. This post will focus on the front yard design with a dry river bed and highlight the steps and tips to create a dry river bed. You’ll notice that some of the photos are out of order, as I try to illustrate each feature of the river bed, and the photos were taken at different times in the span of the first month during and after the construction.
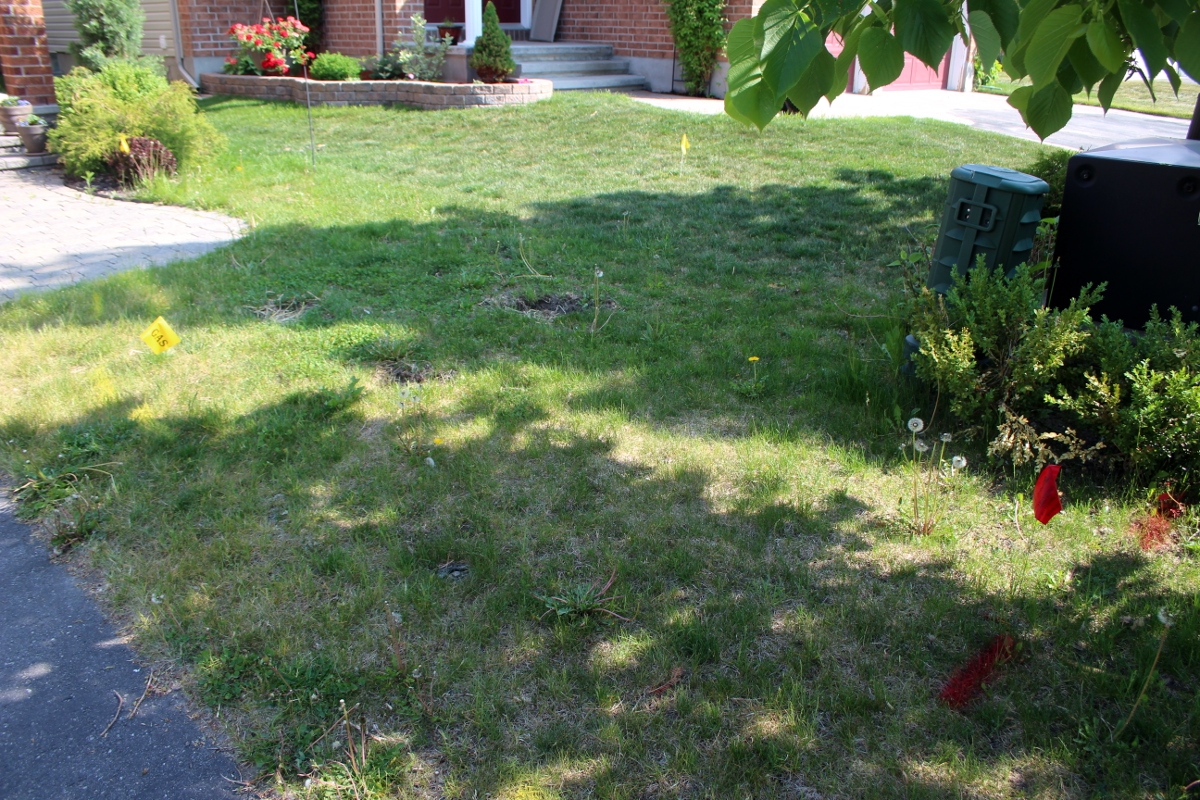
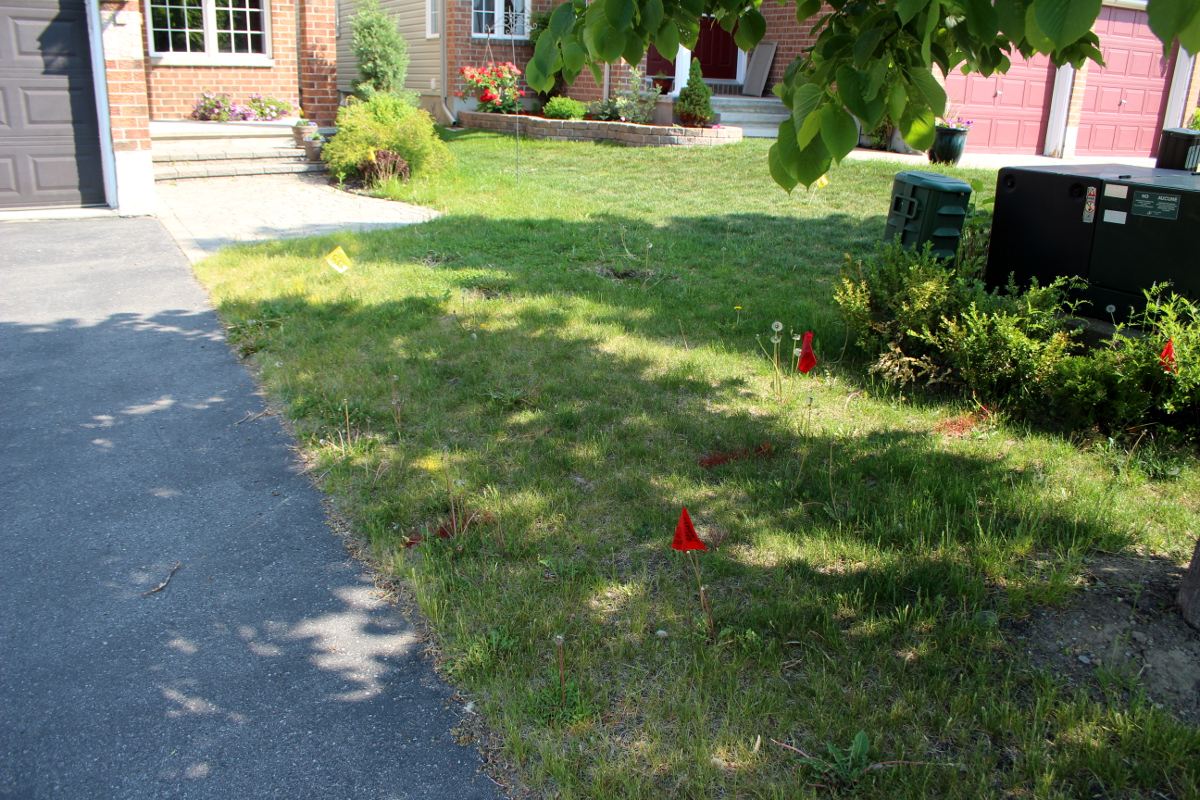
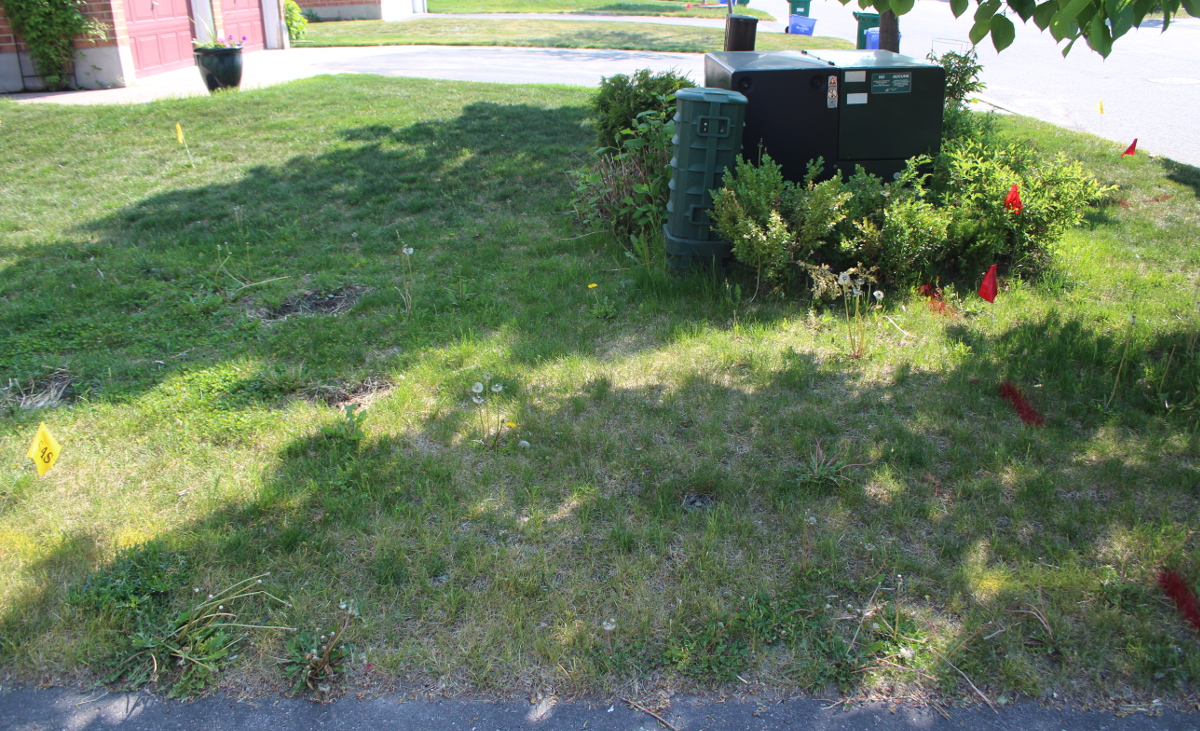
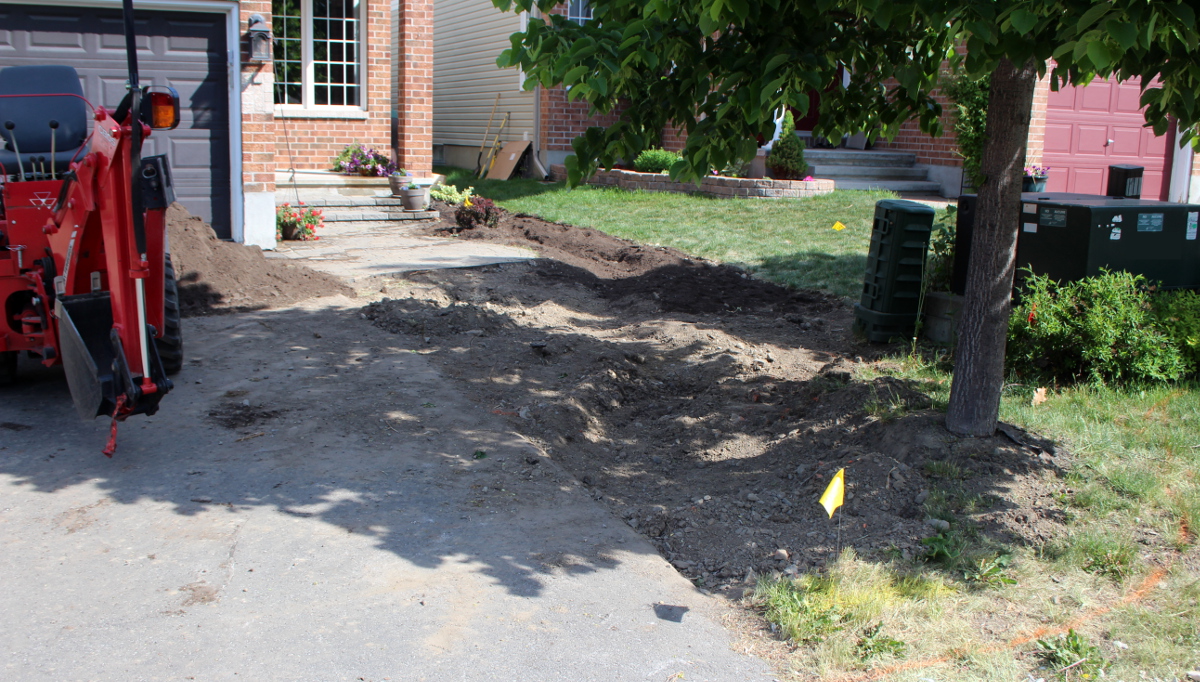
First, get the utility companies to mark where the cables and pipes lie, so you can plan the design around them and avoid hitting them while digging. This includes gas, electricity, phone, internet, water and any other services you are using. Most municipalities or states/provinces have a number to call or a site to visit to request a locate. The companies come by within a given period of time (for us it was a week) and mark the utility lines with spray paint and flags.
Secondly, plan where all the major landscaping elements are going to go. Plan the water path. For us it is coming from the roof spout, snaking through the ground between two garden beds, and ending in a small circular pond-like structure. Plan how the water is going to drain once it’s run the course of the “river” and ensure the exiting water will not be washing out the soil as it flows out. Plan the shape and size of the garden beds. Remember that you should be able to reach every spot inside the garden bed without stepping on the soil (otherwise you are going to disturb the soil and compact it, possibly damaging plant roots). If the bed comes out too big, consider splitting it into two or placing a stepping stone in the middle of the bed.
Consider that you will have to walk on the river bed in order to reach the inside of your garden beds. Walking on rocks does wonders for all those underutilized muscles in our feet, but it might take some time to get used to it. I walk barefoot on the bed rocks, so does my two-year old. My five-year old finds it easier while wearing shoes. Walking on such a varied terrain (with the slope and texture differing from step to step) is also an exercise in balance. I find it pleasantly challenging after hours of time spent sitting during the day.
If for some reason you cannot walk on the river bed itself, make sure the garden beds are narrow enough to be reached from the other side and plan where the paths are going to be.
Think where the prime planting spaces are. We have full sun in most areas of the front yard, which is where I planned to plant vegetables, herbs, and (on the other side of the driveway) blueberry and currant bushes. That’s where the largest garden beds should be. Reserve spaces under trees and where taller plants and structures create shade for greens and more delicate ornamentals. Consider using space closest to the road for non-edibles, since there is higher traffic in those areas of people and animals, as well as higher levels of traffic pollution.
Here is our plan. It was first drawn on a large poster-size sheet of paper, and later I have transferred it into the Garden Planner format, albeit not to scale. The plan pictures our porch, the river bed going horizontally along the porch and then sloping down to the round pond, with garden beds framing it on both sides and a pathways near the porch (stepping stone) and near the pea trellis, where the bed starts sloping down. Avoid right angles and mimic nature so that the water flows in a smooth, curvy path.
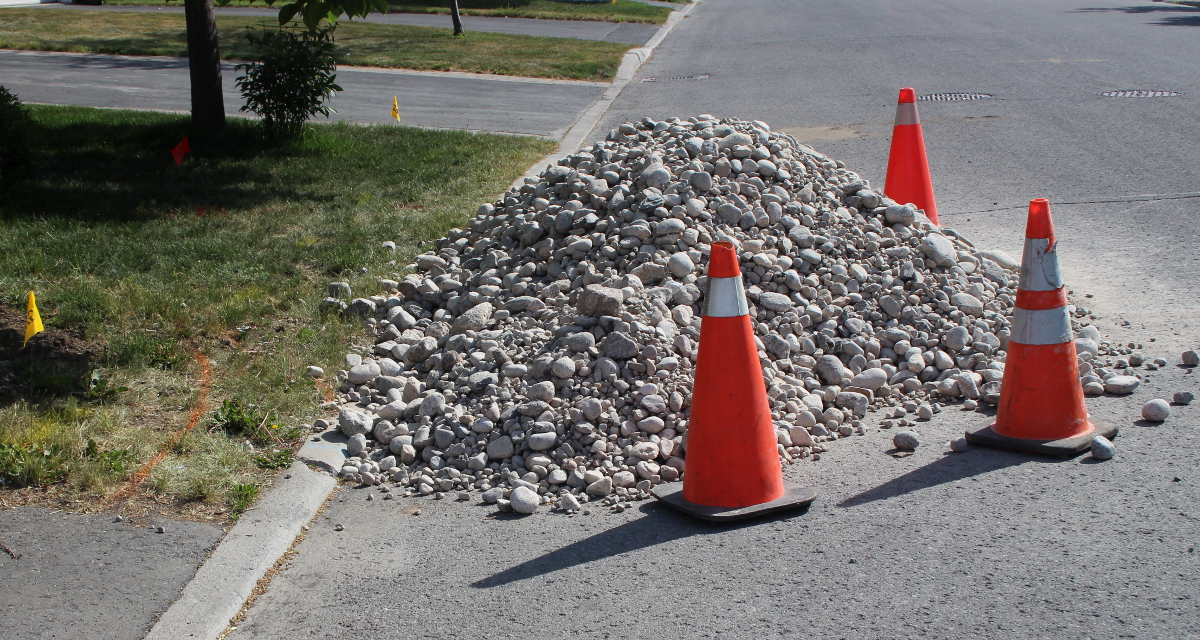
Once you are sure of your plan, source the materials. We needed soil and river rocks. The amount will depend on the size of your space. Since we used soil and river rocks in both the front and back yard, we got lots. We chose to have the rocks of mixed sizes, to create a natural look for the bed. Make sure to get good soil and compost, without toxic additives – after all, you are growing food, and your plants will soak up all of their nutrients from whatever soil you give them. We sourced top soil already mixed with compost from Greely Sand.
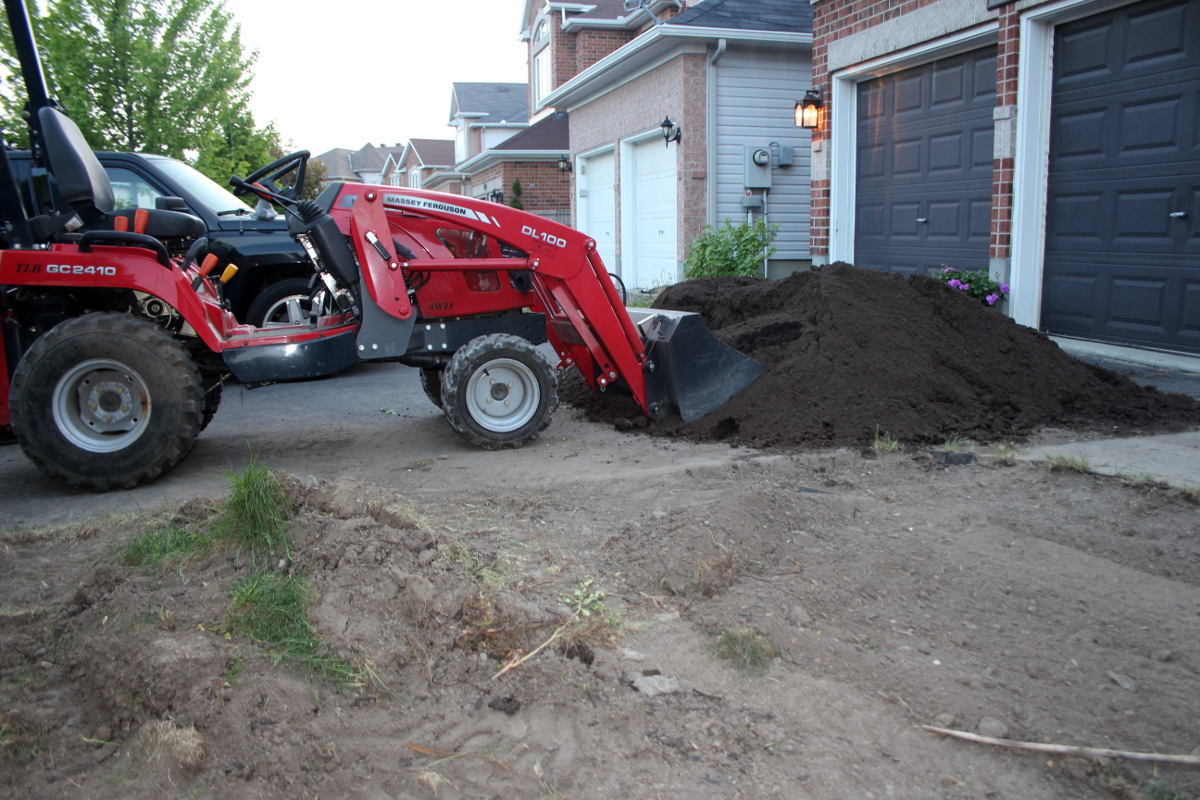
Next, it’s time to dig. For a large project like ours, we needed an excavator, since hand-digging our hard clay soil full of rocks was near impossible.
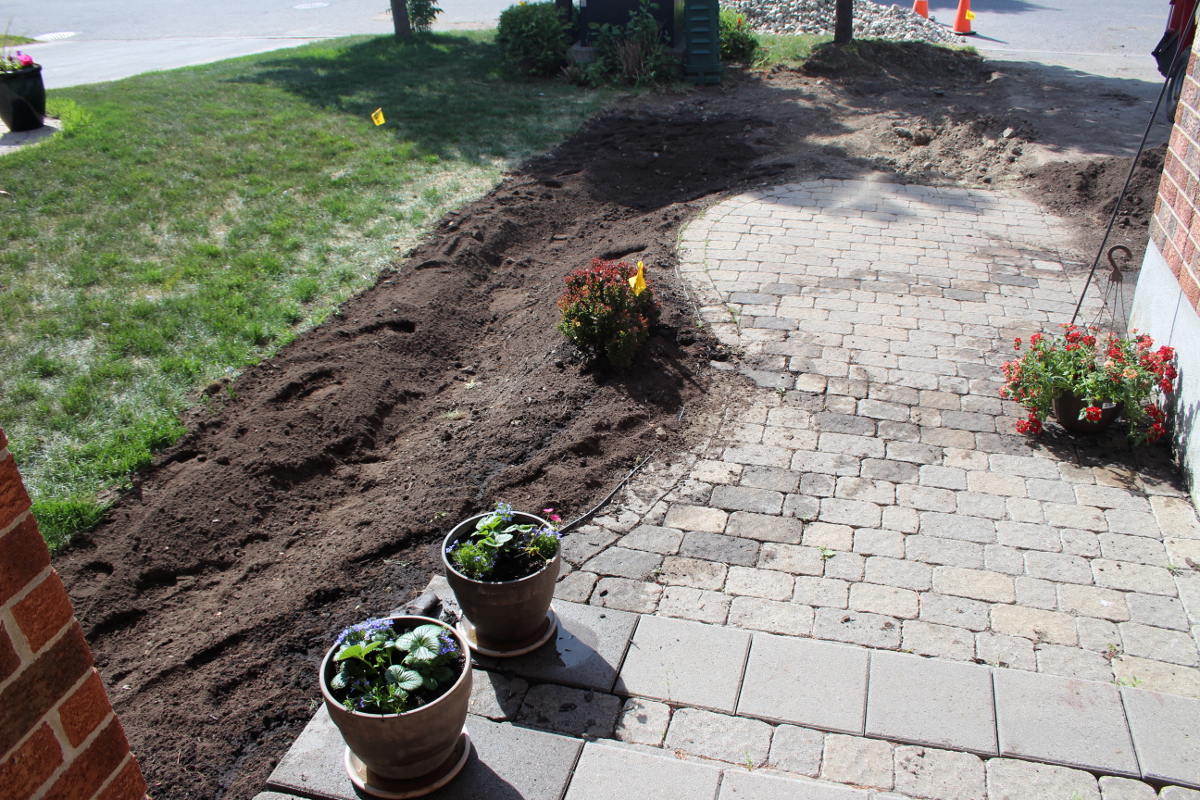
First, strip the top layer of soil, deep enough to remove all the grass roots and to accommodate the depth of soil needed for plants to grow. This will be the lowest level of ground around the bed.
Next, create a deeper trench: dig deeper in the middle of the river bed, with the soil on the sides rising up. Vary the elevation, so that landscape looks more like a natural terrain and the water can flow easily.
Once the digging is complete, add good soil to the river bed, padding the sides where the beds will be and providing enough soil for plants that shall grow among the rocks.
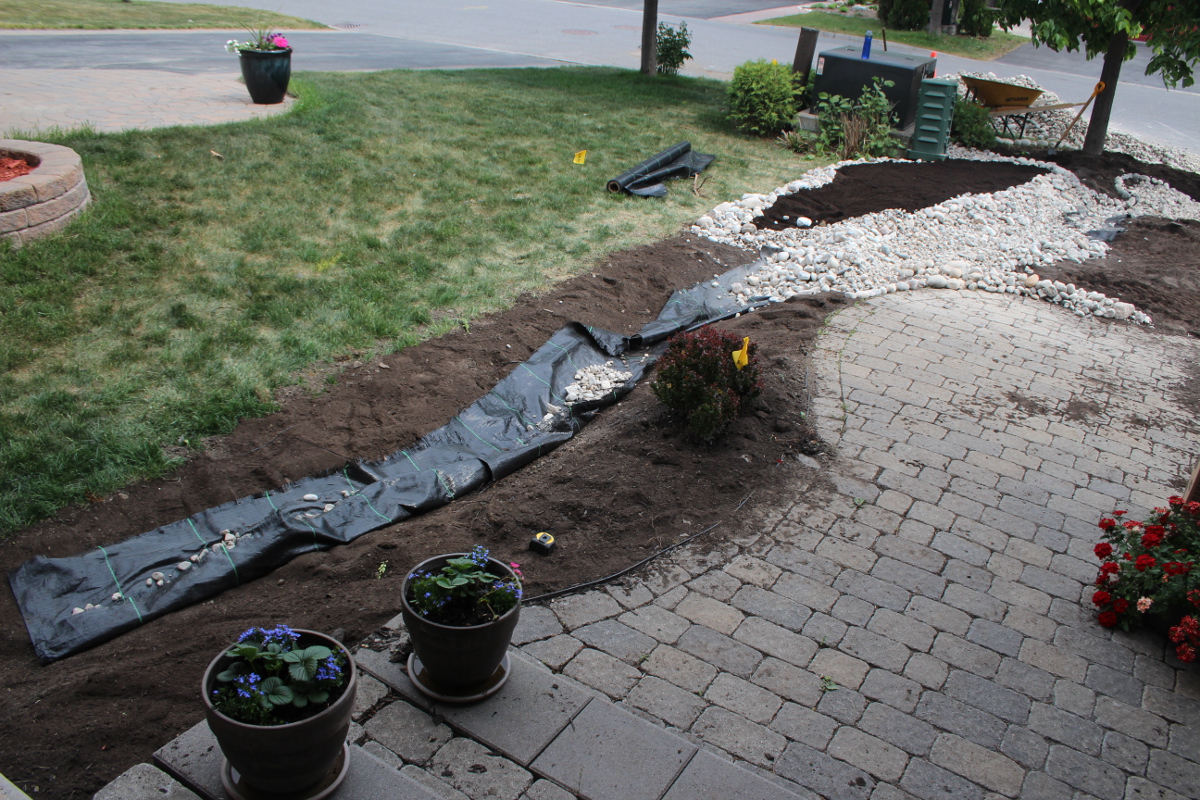
Put down landscaping fabric to cover the bottom and part of the way up the sides of the river bed. We left the pond without a cover, as we wanted the water to slowly sip out and not be forced out washing away the soil on the sides.
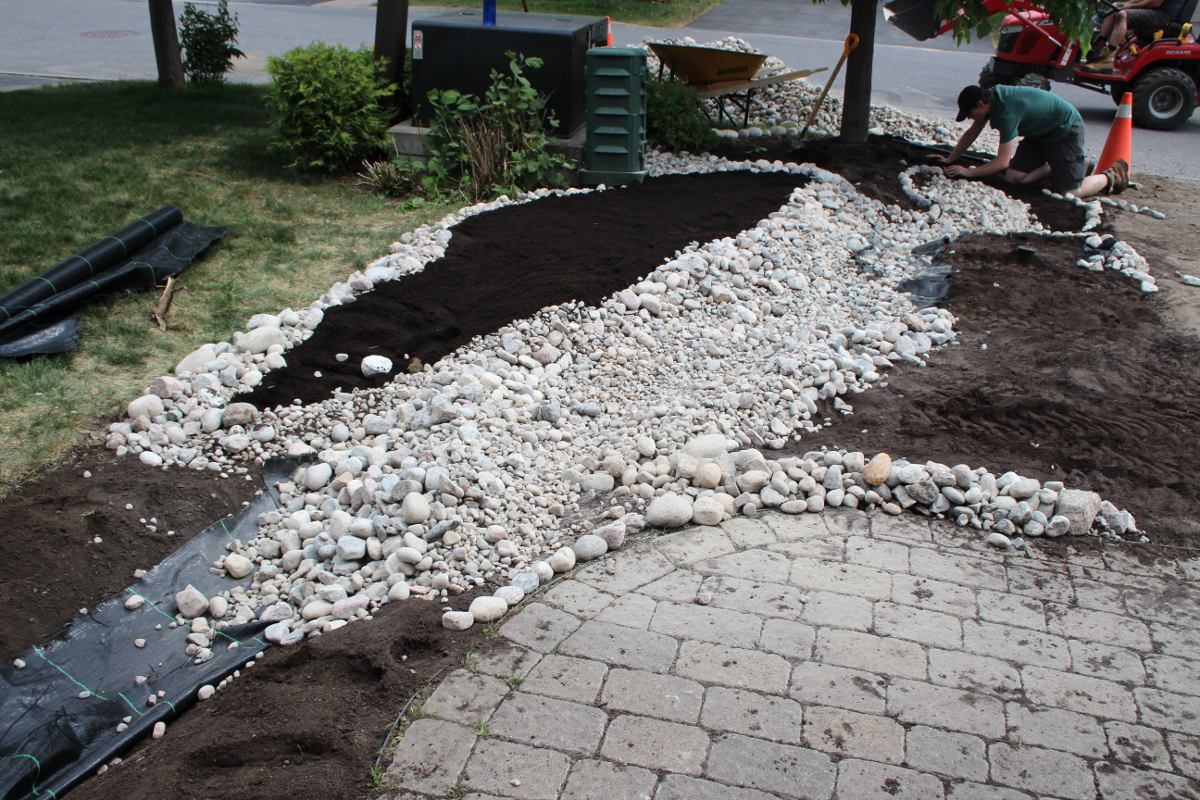
Dump the river rocks in. I found it helpful to first take a few rocks and outline the shapes of the beds first, to guide the construction. We had to use machinery to lift and carry the rocks or it would have taken a lot longer. Dump the rocks in a border around the garden beds and inside the river bed. Add the soil into the garden beds. Alternate soil and rocks so that they support each other, until the garden beds reach the height you need.
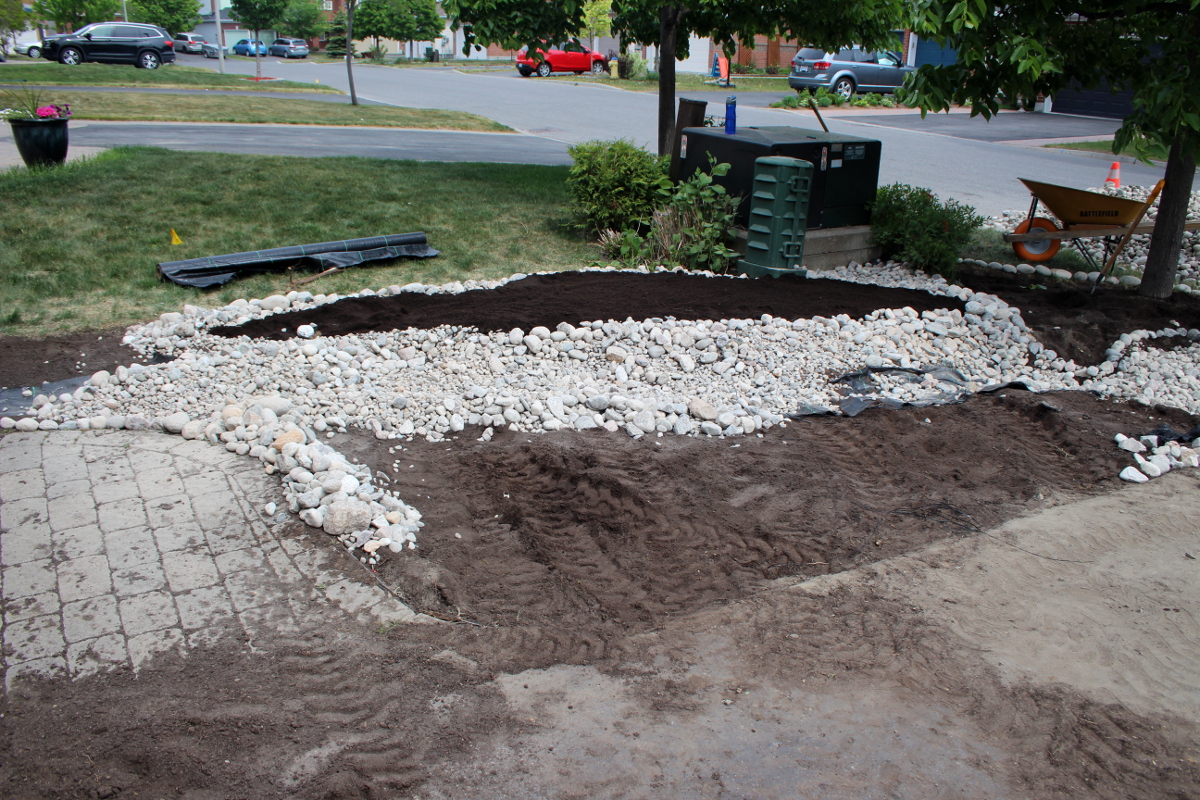
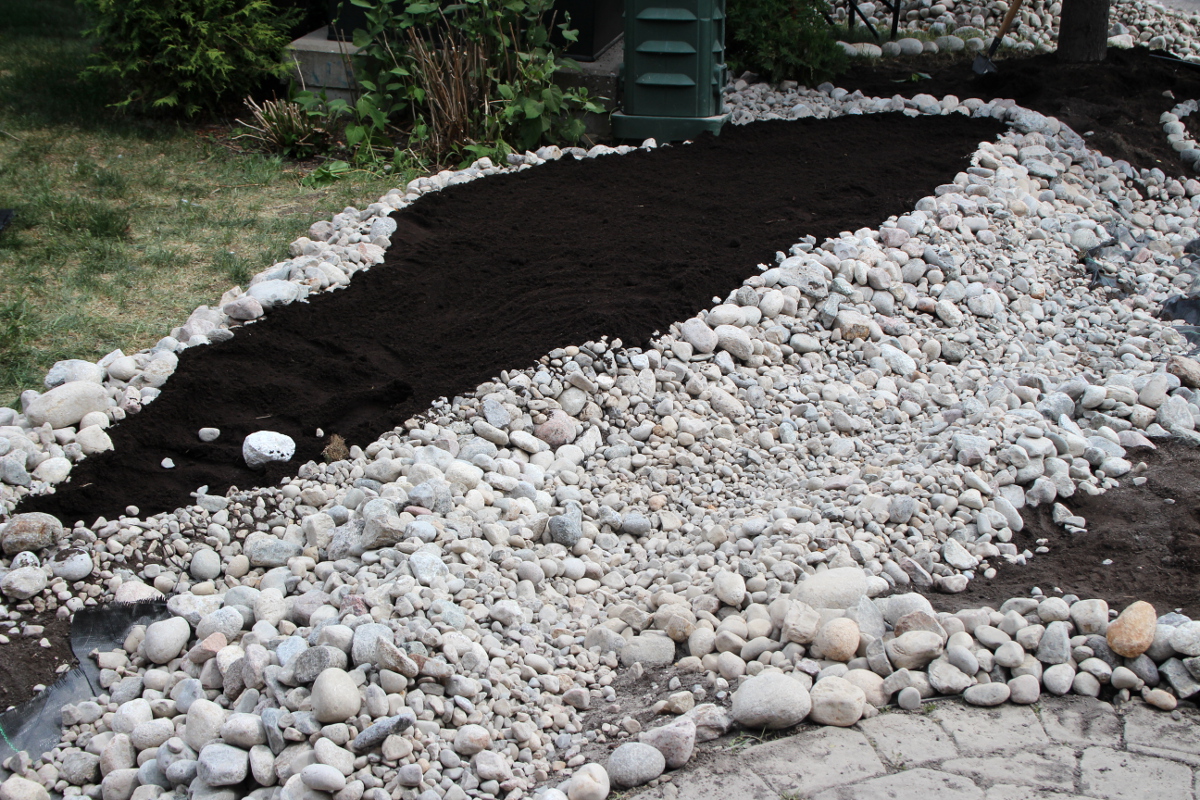
Then rearrange the river rocks so that the smallest are at the bottom and the medium to largest are on the sides, to mimic the natural look of a river bed. This needs to be done by hand. Shape the garden bed and river bed borders by hand, to smooth out the curves and achieve a natural look.
Shape the end of the water path. We have created a round pond-like area, with smaller rocks on the bottom and larger rocks around to create a more sturdy border with a path for the water to exit.
Build the borders to your beds with larger rocks, to prevent soil from washing up and to visually split up the large beds into smaller areas. Get your children to help out by picking the rocks of whatever size you need and building borders with you. Playing with rocks is fun.
Use small spaces for an accent – here a lily of the valley is planted in a small bordered space, creating a smaller rounded area next to the circular pond.
Place a few larger rocks near the spout so that the water doesn’t hit the small rocks at the bottom hard and wash them out.
Now it’s time to decorate the plain river bed.
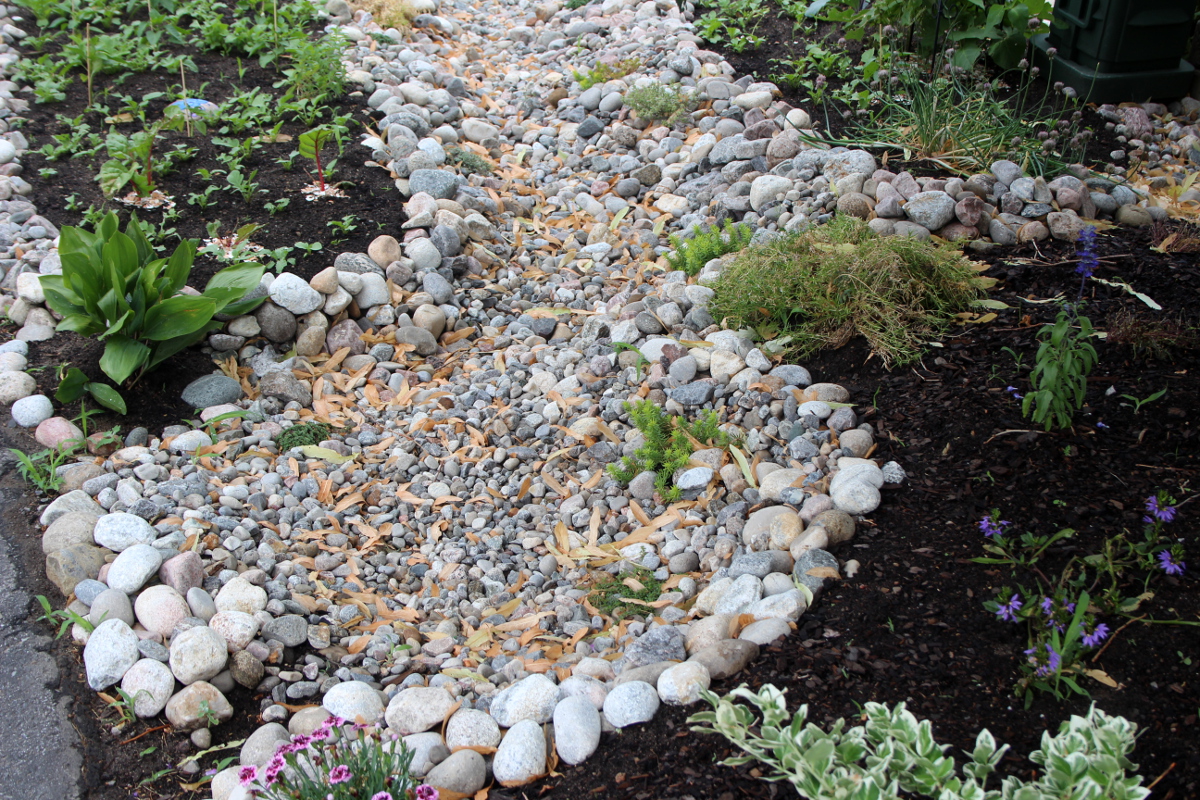
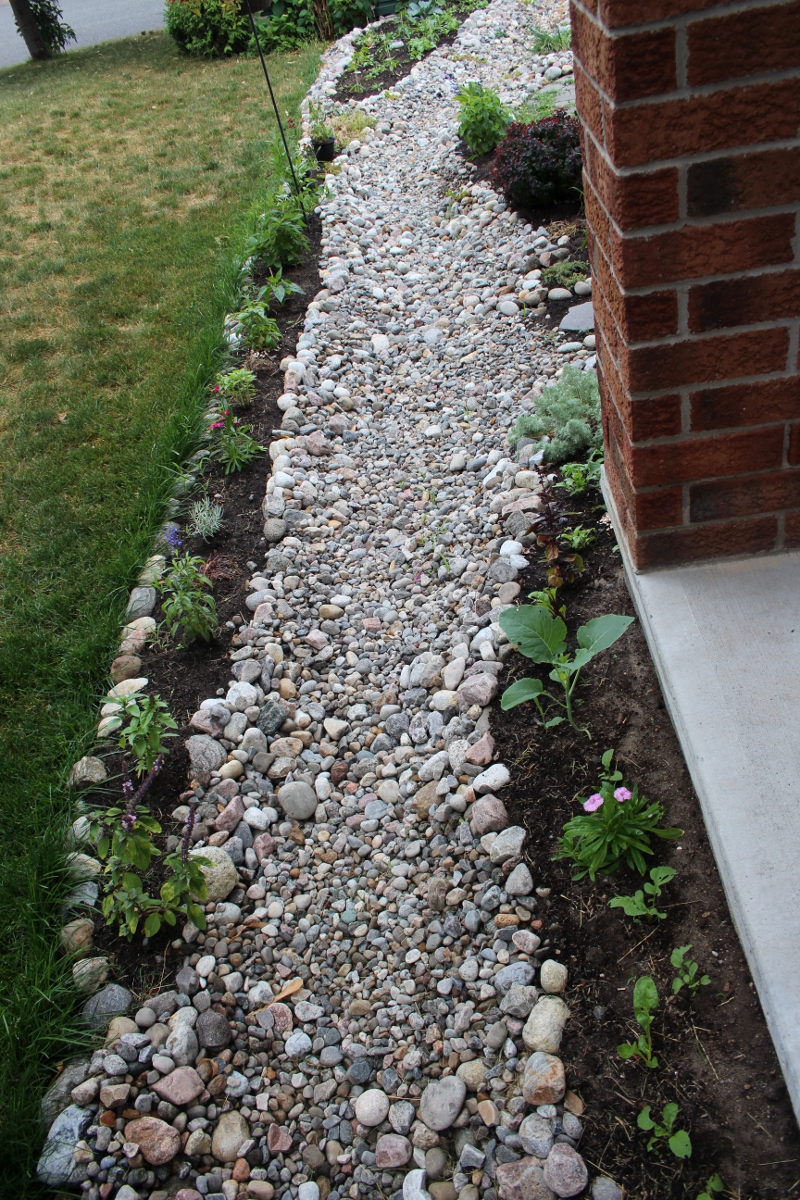
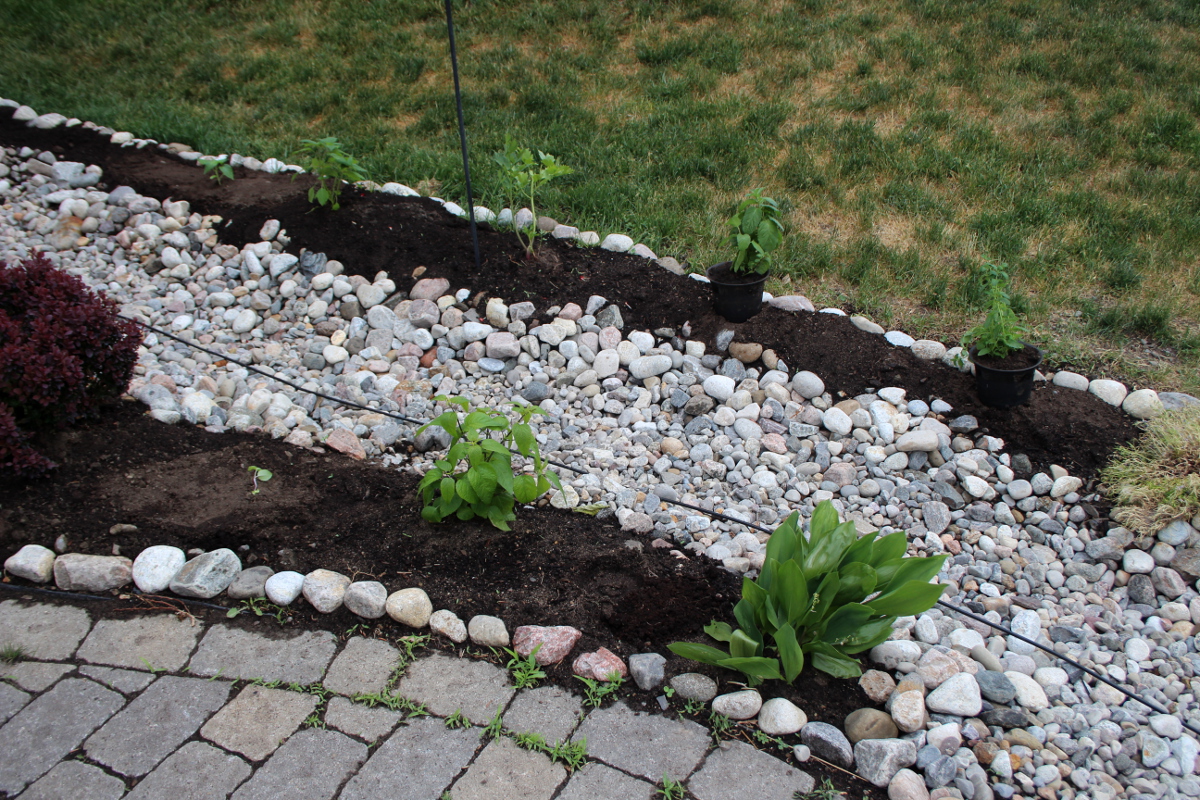
Plant larger plants (herbs and ornamentals) around the sides of the river bed: we have chives, basil, lemon verbena, lemongrass, lovage, mint, salvia, dianthus, lily of the valley, and mini phlox framing the rocks.
Consider planting Swiss chard, beets, and kale as ornamental plants – their foliage is both beautiful and delicious.
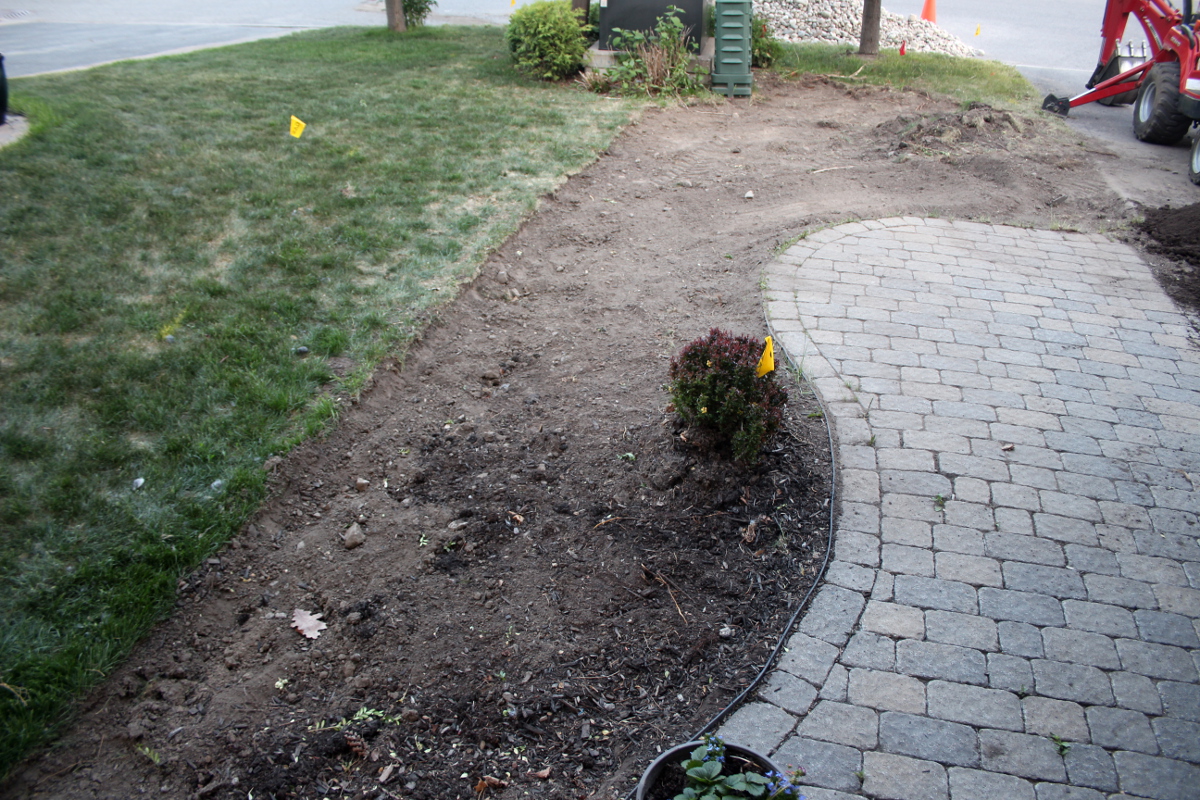
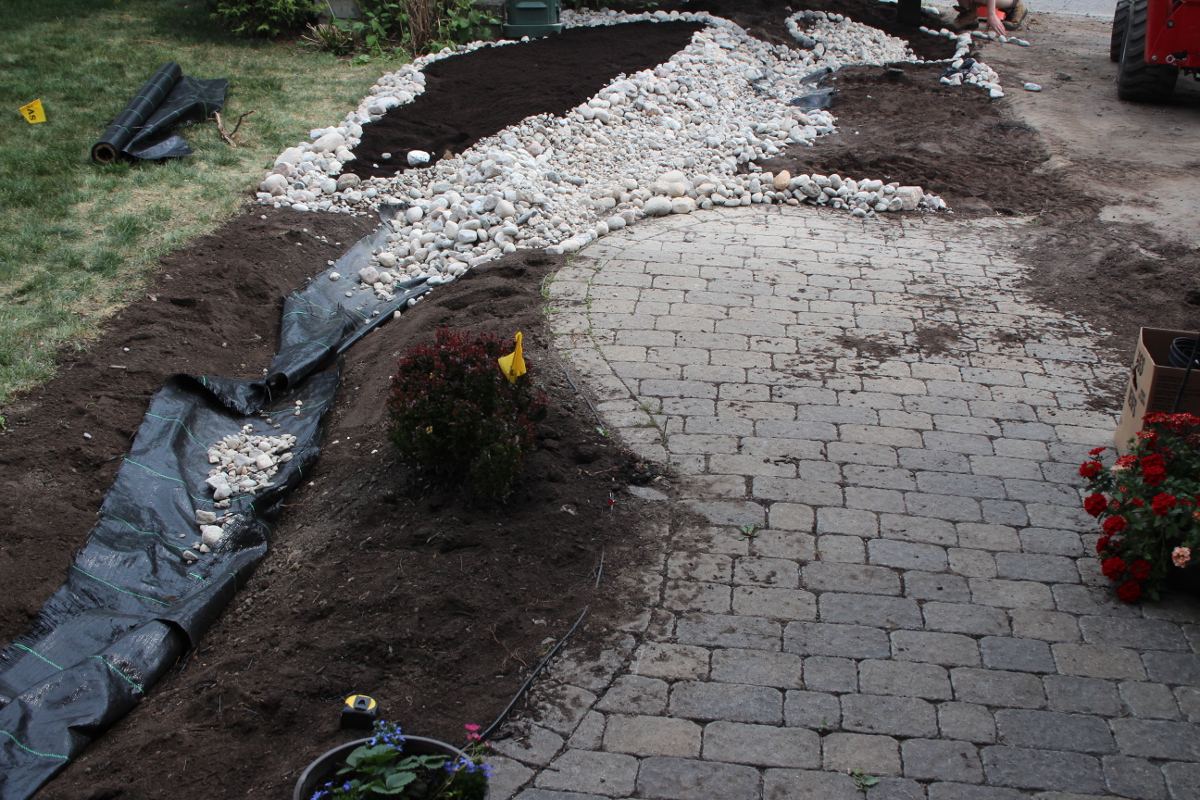
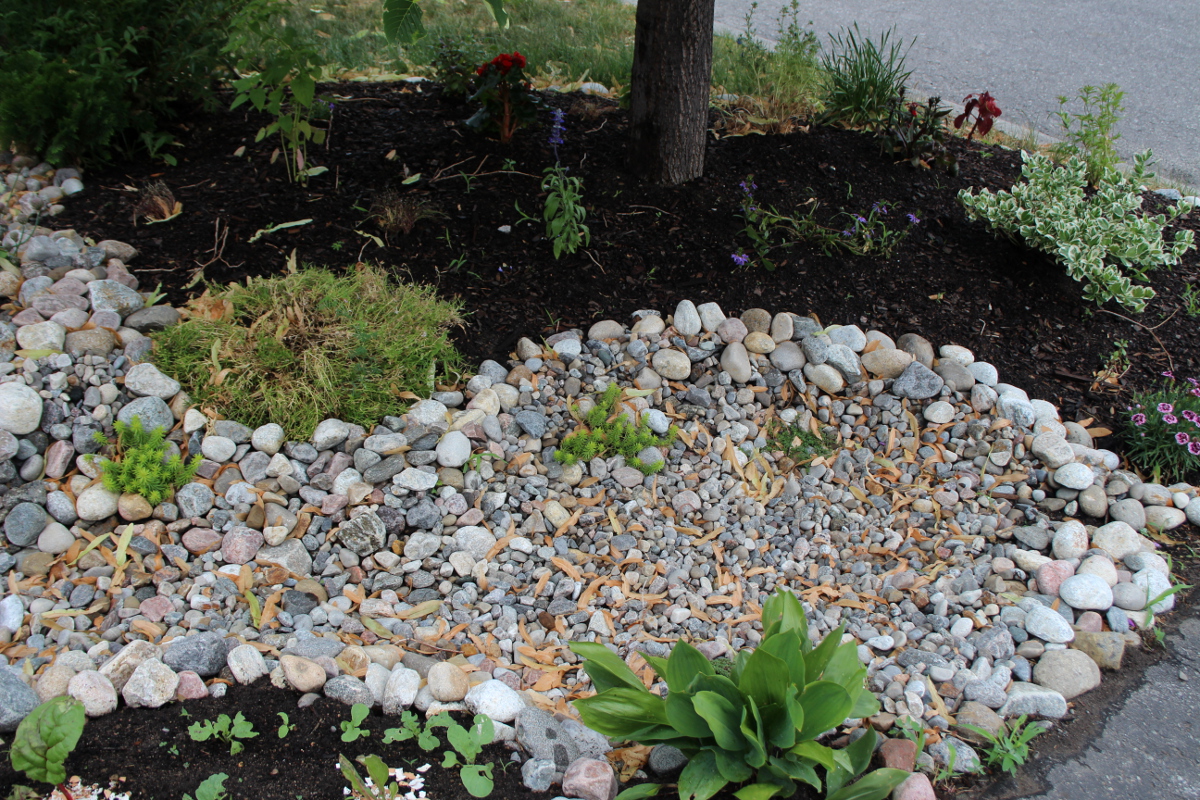
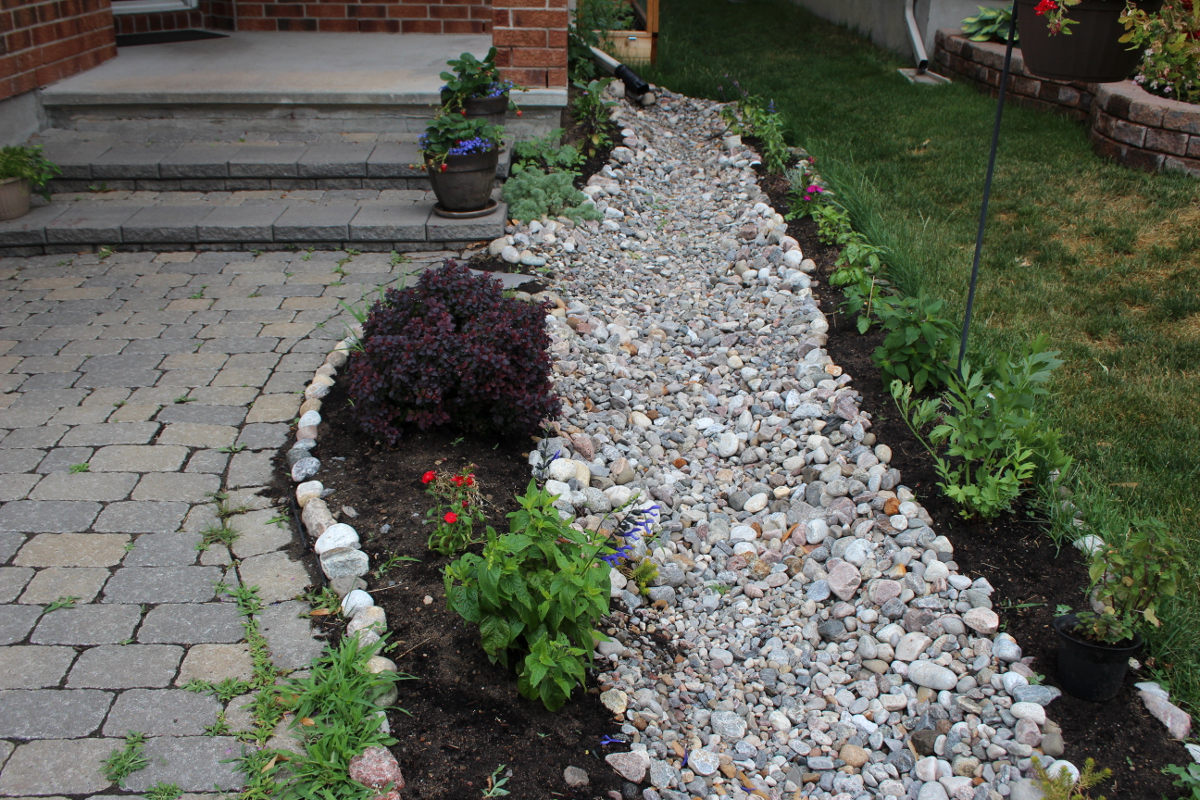
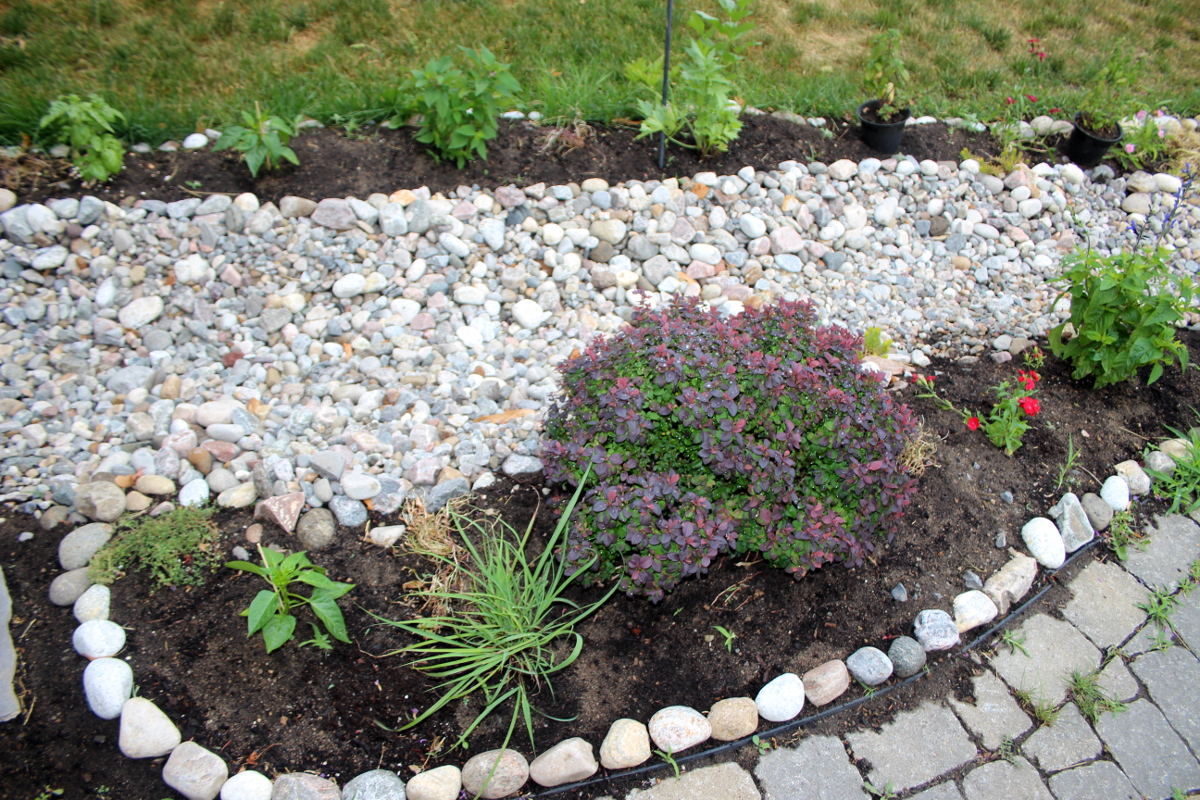
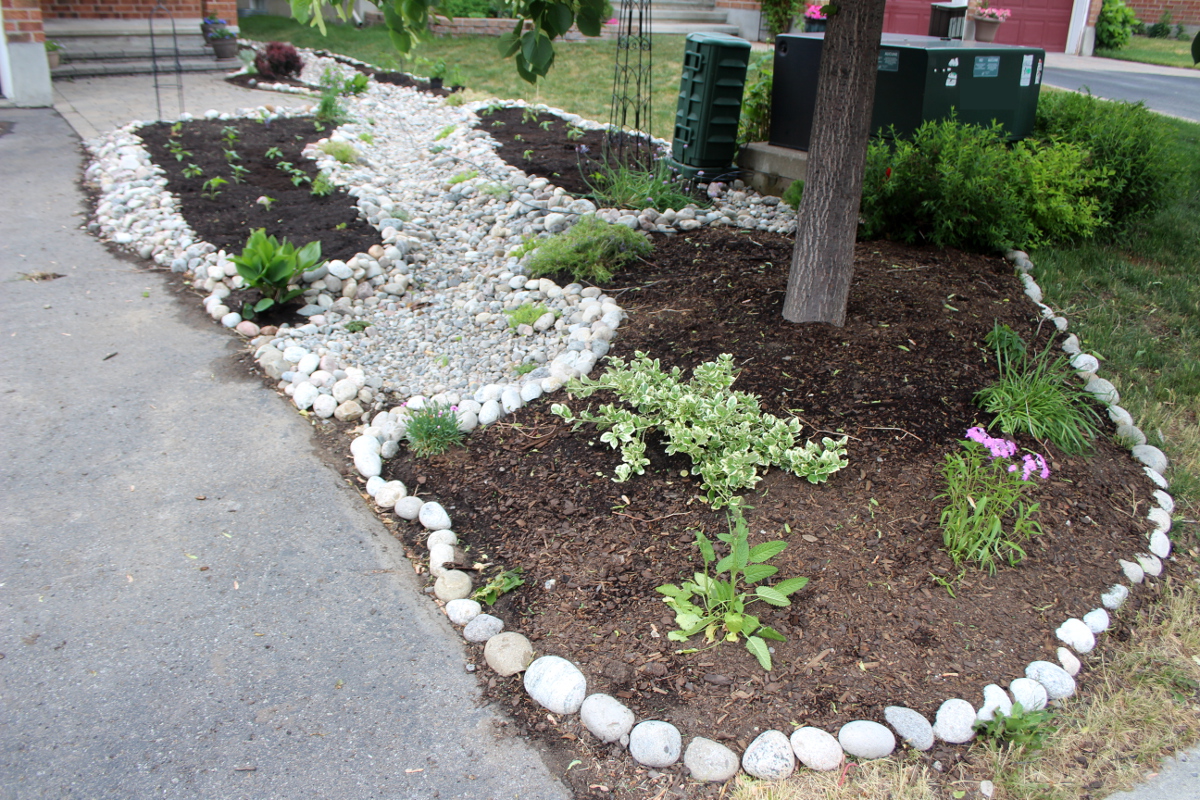
Use larger bushes to strengthen the curves – here the purple leaf bush contrasts with the white rock border, bringing attention to the curve separating the pavement stones from the garden bed.
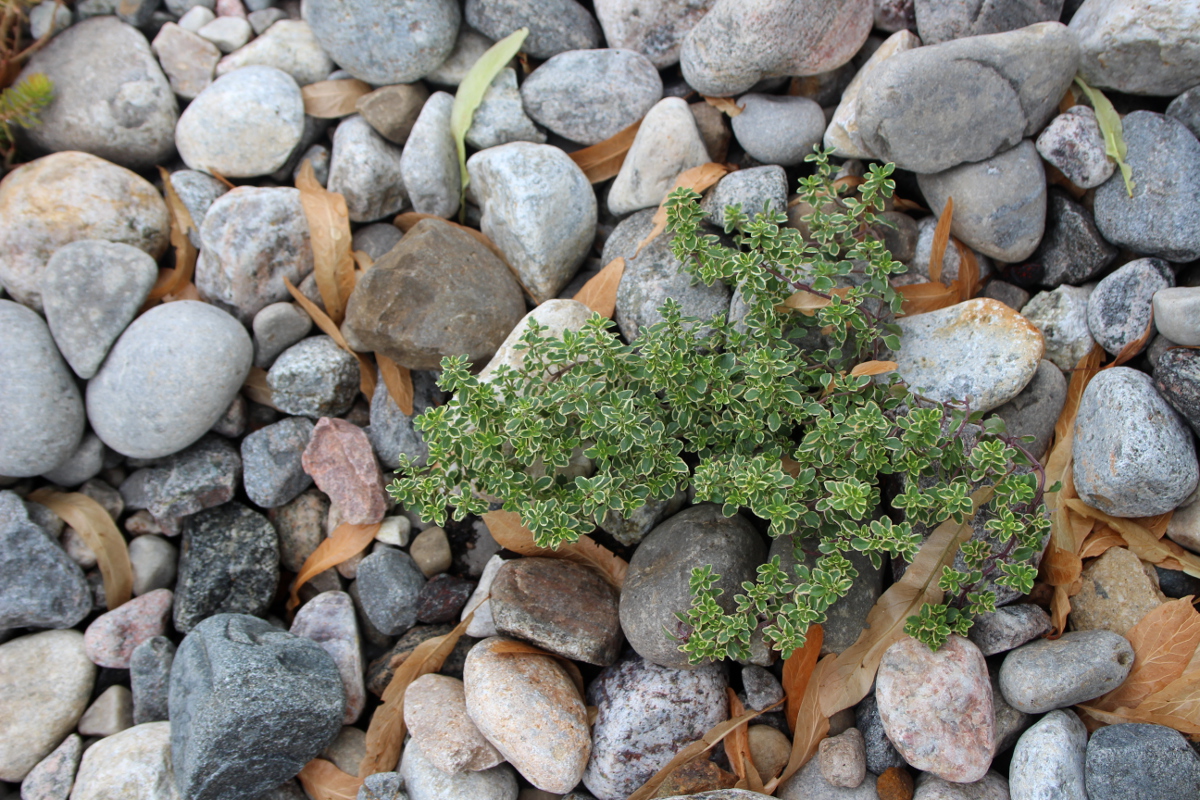
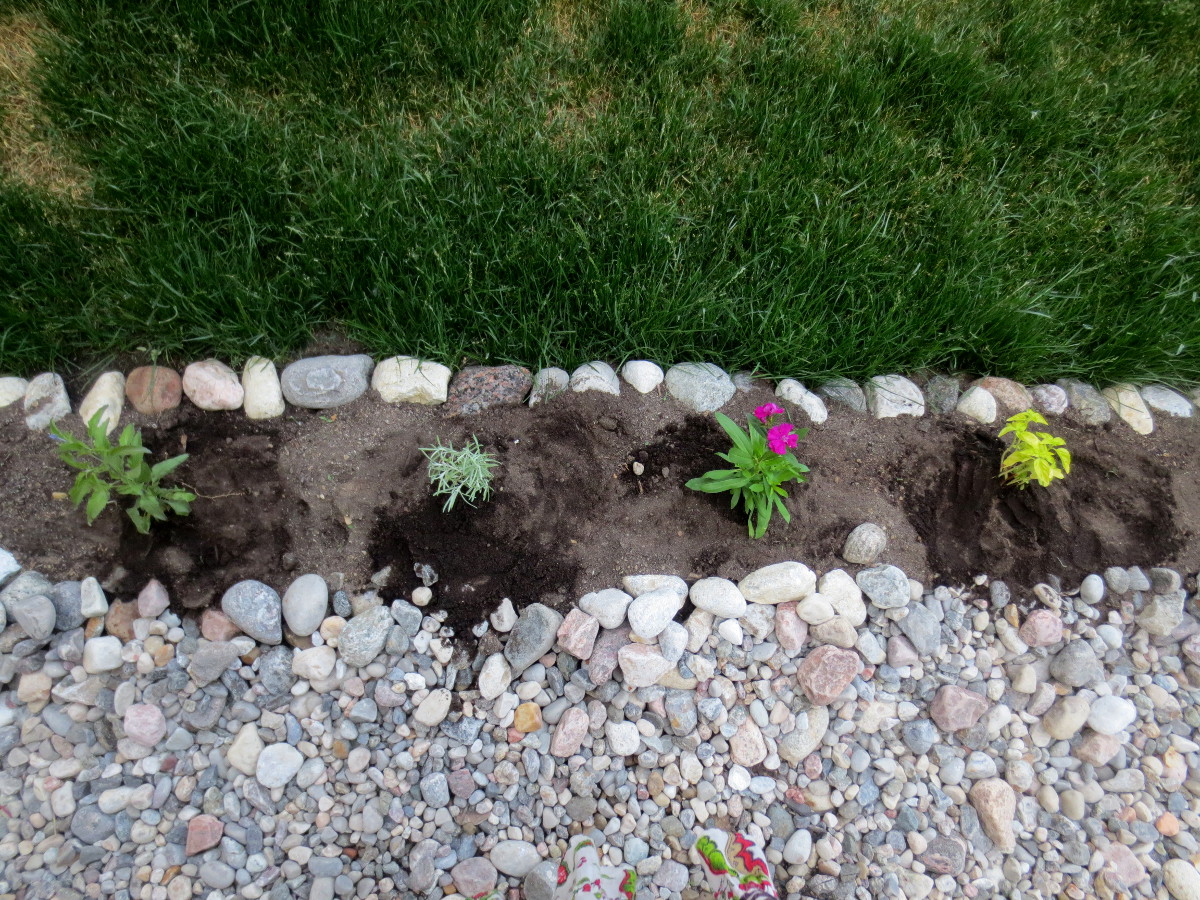
To create a more natural look, plant some thyme or other small creeping plants between rocks. Add some soil if needed and once planted, pack the soil with rocks all around, so it does not get washed off. In our case, the river bed is often dry and very hot, so whatever you plant in between rocks must be very heat resistant (heat reflects off the rocks) and be hardy enough to survive if the rain does not come for a while.
Add a few accent pieces. Vertical trellises and topiaries are a wonderful way to bring another dimension to the garden. Scarlet runner beans make for a beautiful display when they are blooming. You can also hang a blooming basket from a shepherd’s hook or plant a small tree (be carefull in selecting one though – many “dwarf” trees still grow quite tall, and their roots needs space).
Use components in groups of three. In our design, there are two topiaries and a shepher’s hook creating a visual triangle. There are three mini-phlox plants, accenting the corners where river bed and garden beds join, creating another triangle. It avoids symmetry and creates a more natural look.
The first time it rains, check how the water is flowing, whether there are any spots that need smoothing out or building up. See that the water can exit without damaging any other landscaping elements. Once the rain is over, examine and correct the problem spots if any.
For us, the first run worked very well (even with an incomplete river bed: for a few days, we had a patch without rocks between the spout and the river bed to create a path to the back yard for a wheelbarrow to pass). I had to adjust the rocks in the pond, to ensure that the water can flow freely out onto the driveway instead of the soil. It has worked well since then.
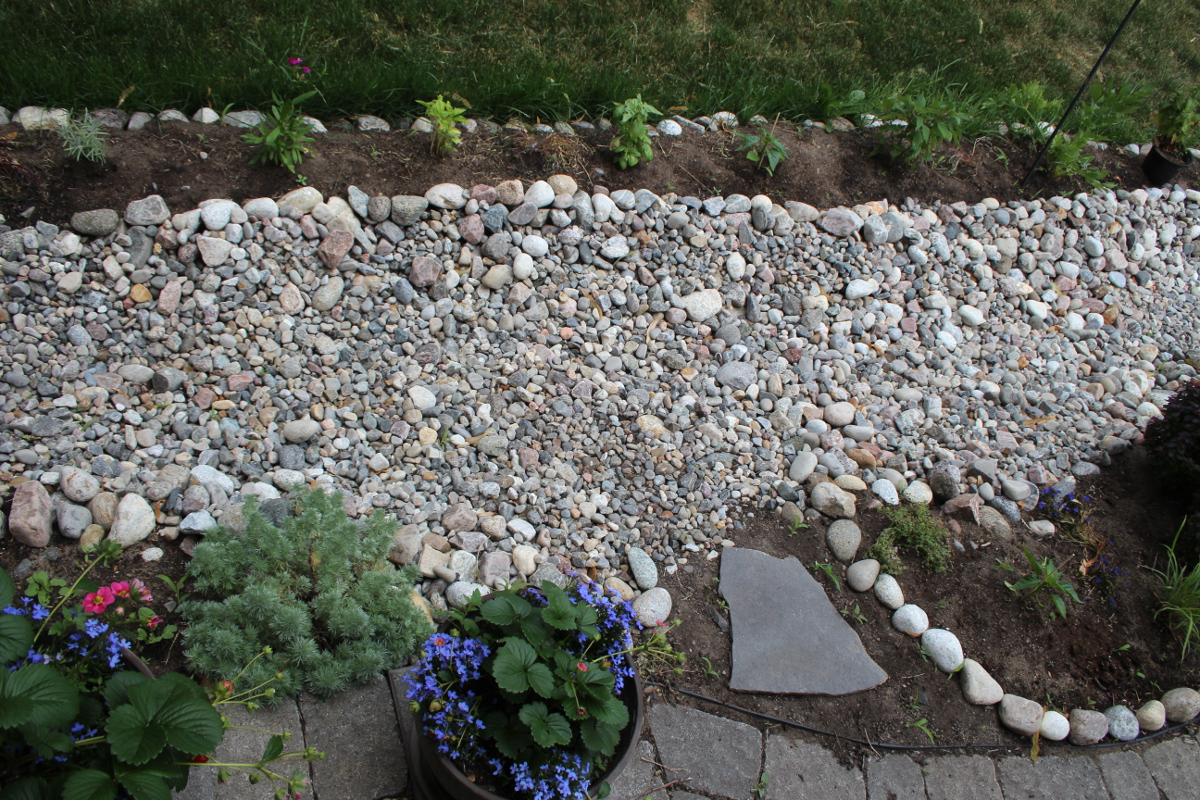
You can see that brown leaves have accumulated in the river bed – those were falling from the tall tree growing above the pond. However, after two or three rainy days, most of the leaves are gone.
Now that all the hard landscaping is done, it’s time to plant the vegetables and herbs. Consider companion planting. Some plants deter pests that would otherwise devastate plants growing next to them. Others fix nutrients needed by their neighbours. Many herbs and flowers attract beneficial insects that help pollinate the flowers, consume other pests, and provide food for birds which in turn also help with critter control. Some plants deter four-pawed mammal guests as well.
Above all, be creative and enjoy this space. It can be a space of wonder and relaxation for you and your family. We all can learn so much by watching plants grow. And water flowing along a rocky river bed during a rain is a wonderful focal point for meditation.
Last week, we went for a walk in an affluent neighbourhood nearby, to explore. After our own edible landscaping project completion, I was curious to see what people do with their front yards, especially those people who have more land to sculpt. To my disappointment, most front yards were lawns, with barely even a flower to be seen. Some even had fake grass, like the synthetic turf they use on some sports fields (this one is beyond me).
Then we went a bit closer to home. Many houses here had landscaping with flowers and lawns. Yet we have found only two houses – both on corner lots – that had extra land on the side and had it landscaped to grow food, with raised beds and trellises. On another corner lot that has a beautiful alpine garden in the front (most of it rocks, trees, and flowers), when looking closely, I have spotted cabbages planted among the poppies.
I’ve lived in a place before that had only a balcony, and I’ve managed to grow plants there in pots. I’ve lived in another place that had a small patch of ground attached to it, covered with patio stones. We removed the stones and created a highly productive garden in that tiny space. Every day, we drive by a second-story apartment that has every inch of the roof-top veranda covered in plants in containers, and the tomatoes I can see from the road are growing beautifully.
People without access to ground level or with access to small spaces do wonders growing food there and having a green oasis to enjoy. It baffles me when home owners who have plenty of land spend quite a bit of time taking care of their lawn (watering, weeding, mowing, even fertilizing it), to get a plain green ornamental carpet. They pass on the opportunity to bring into their lives a green space, full of birds and butterflies, that grows delicious food and is a delight for adults and children.
This year, when I finally had a chance to shape my own space, I’ve decided to not only bring in good soil to grow food, but make the entire front yard into a flowing garden around a dry river bed. I stumbled across a dry river bed design online and fell in love with it:
Given a narrow shape of our front yard, the curved design of the pavement and the existing tall tree near the road, the design was born to have the river bed snake in between the two large garden beds.
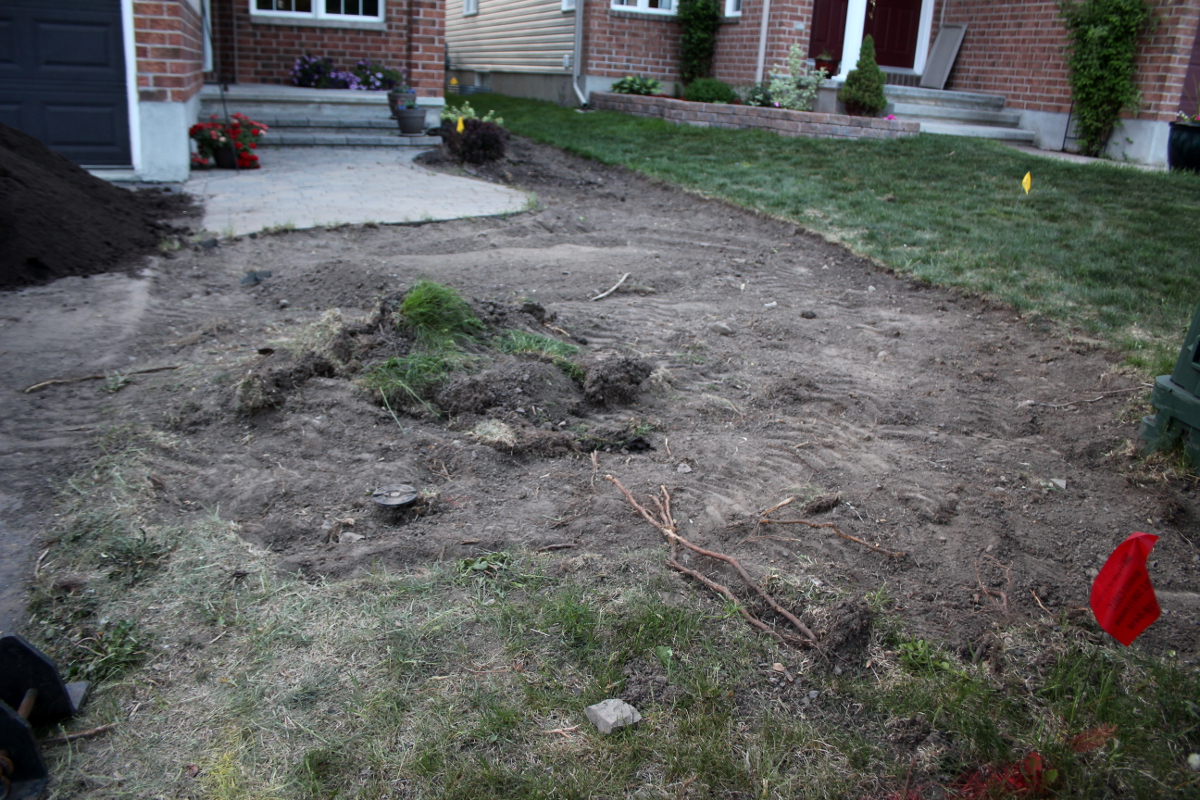
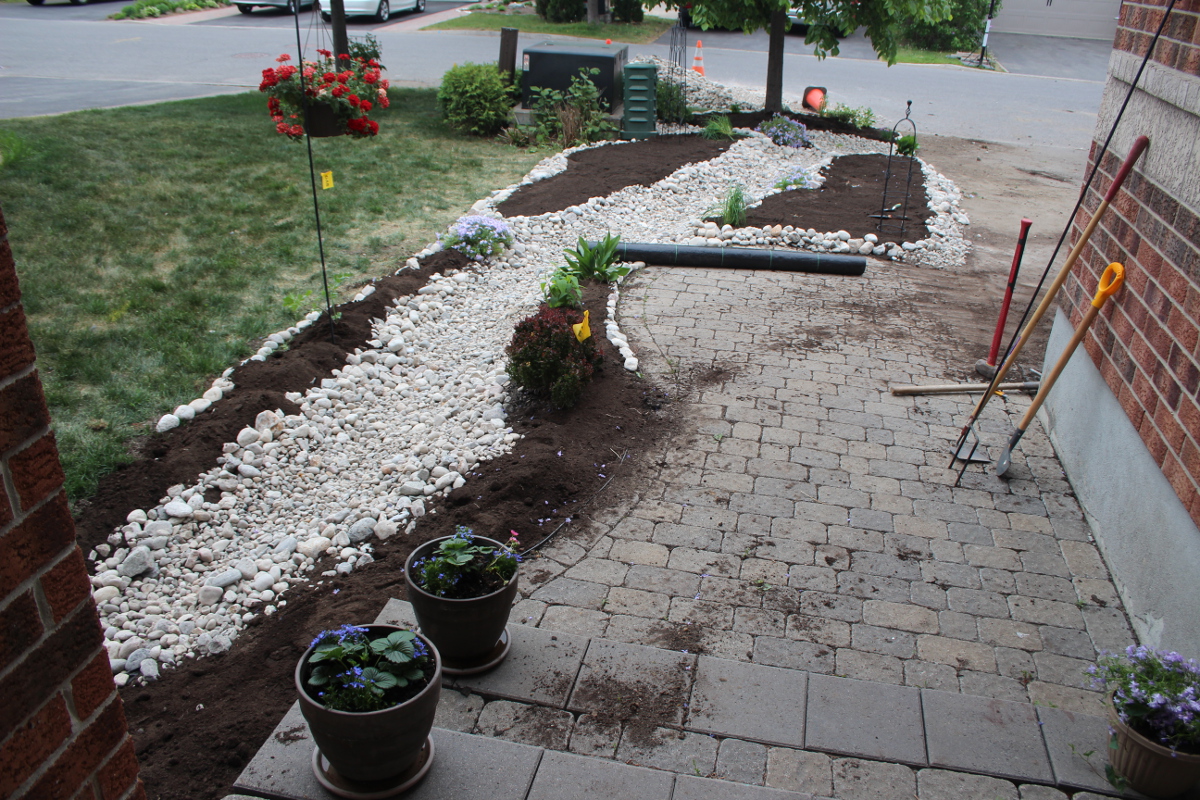
Our canvas was a somewhat dug-up mostly green lawn we were not interested in keeping, planted over a hard rocky clay soil unsuitable for planting:
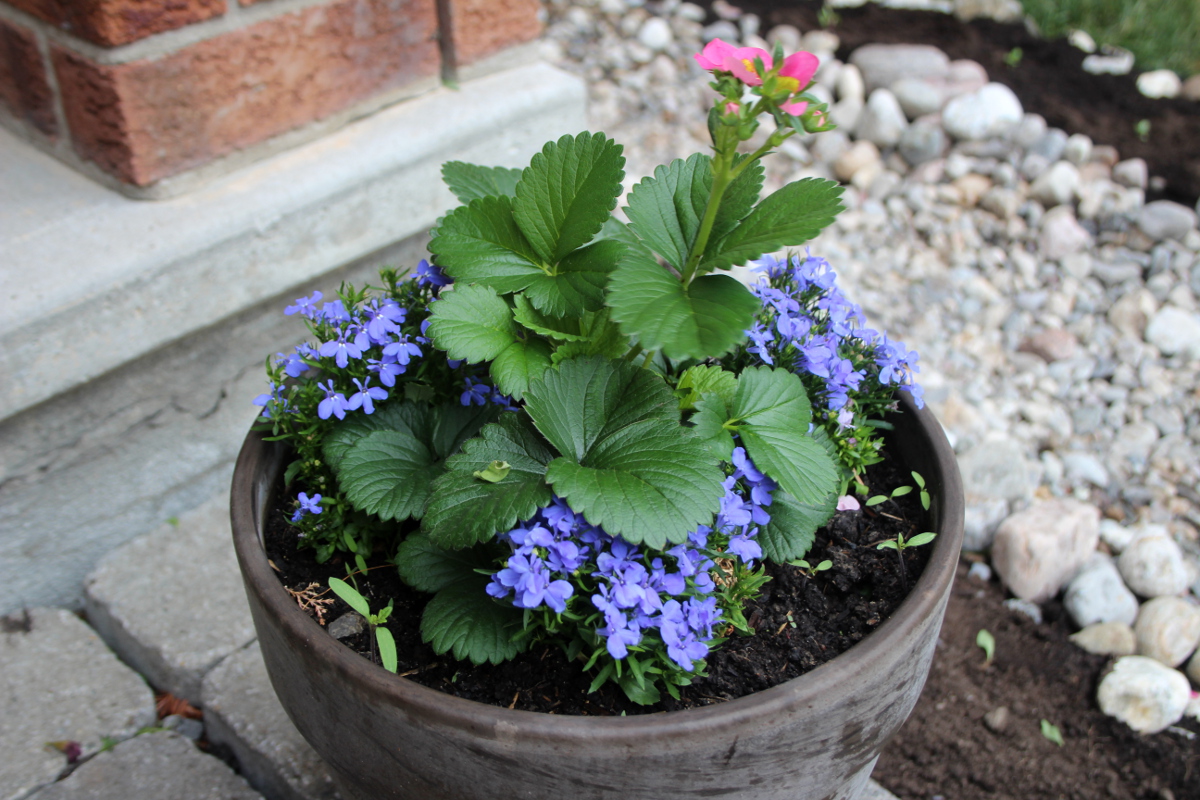
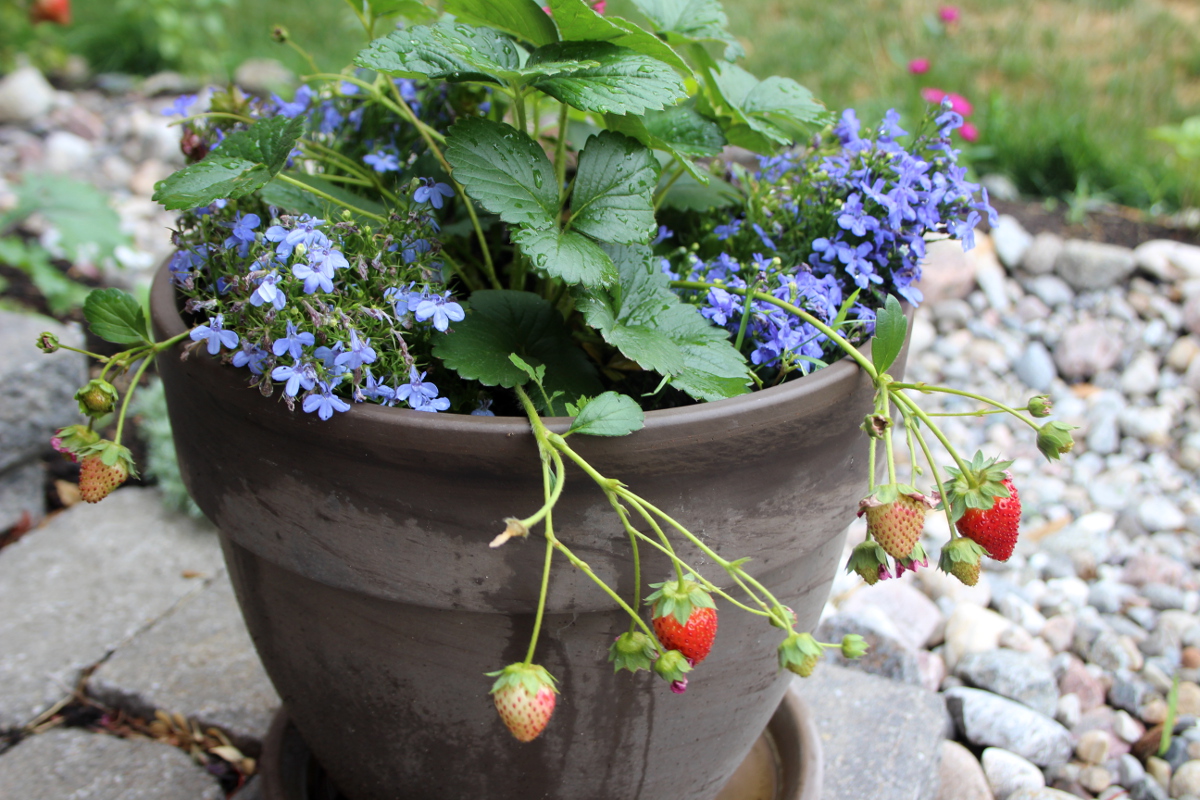
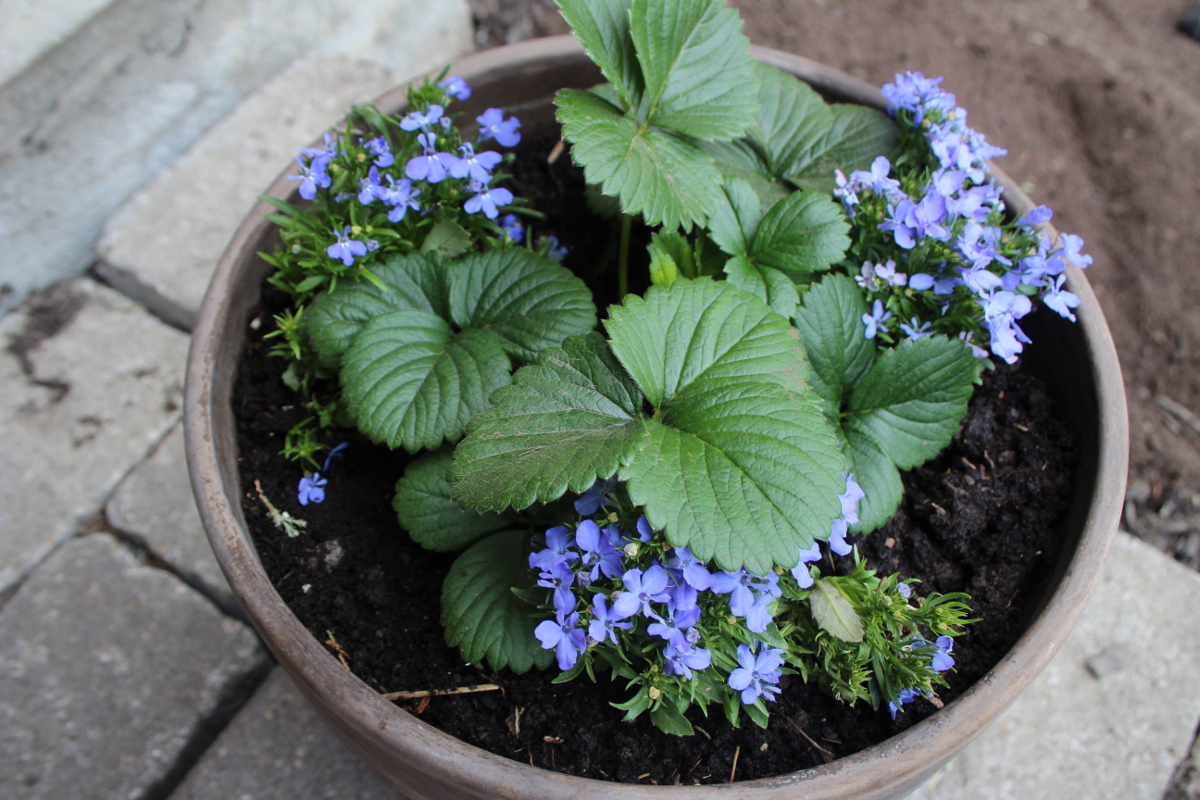
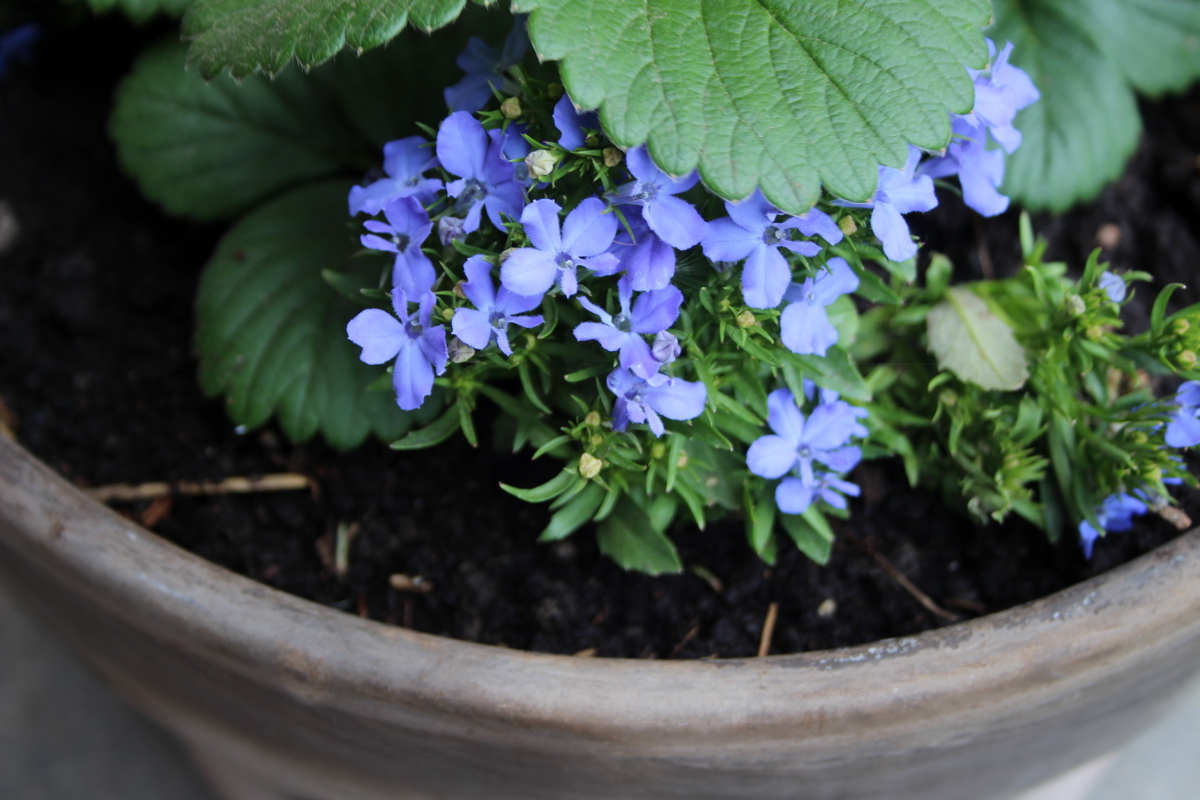
While I was waiting for the stars to align for work to begin, I’ve started seeds and planted strawberries and lobelia in two pots on the front porch.
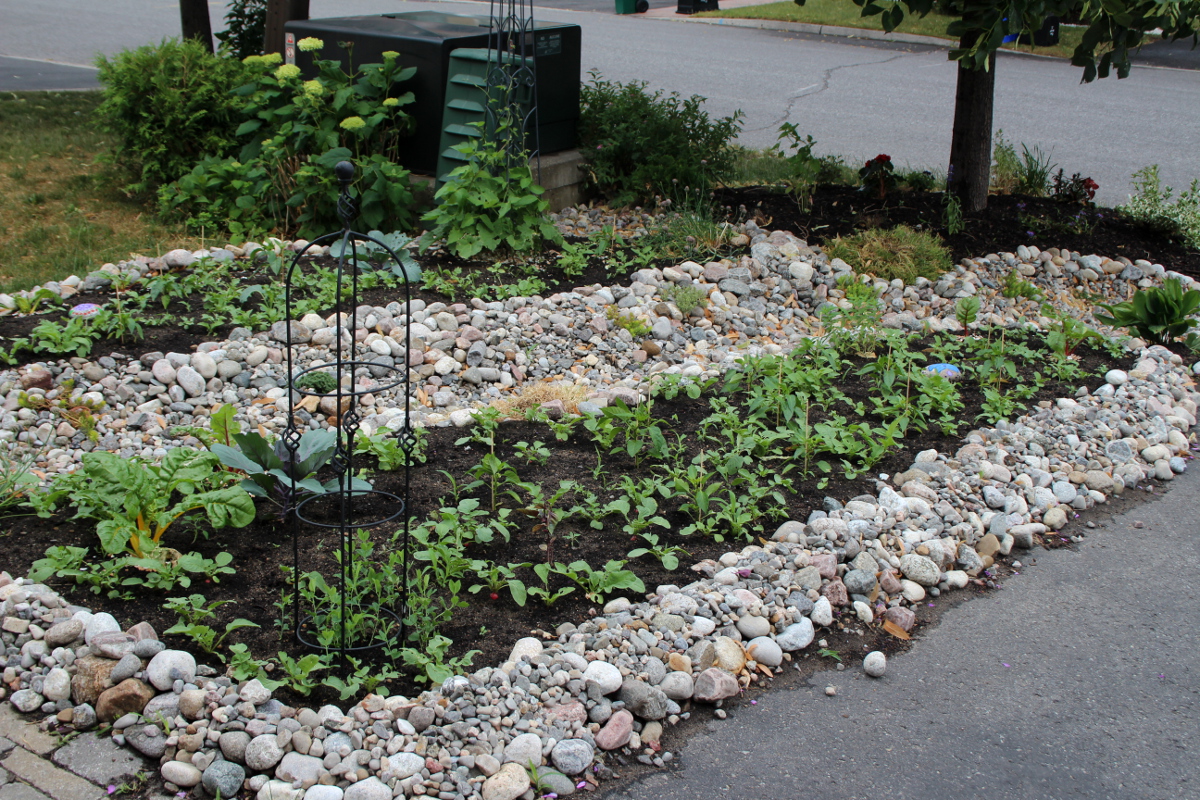
And this was the almost-completed landscaping (a few rock borders still needed to be finished and more planting still remained):
Even in the small spaces on the sides of the river bed, I have planted herbs – salvia, lovage, basil, kari, and placed two pots with mint, so that it doesn’t get a chance to spread its tentacles all through the soil.
I’ve interplanted ornamental flowers with herbs. I love the different shades of green that together with the black of good soil become the backdrop for a variety of colours and shapes that each plant brings.
Even in the narrow space along the porch, I am growing cauliflower, kale, radishes, and herbs.
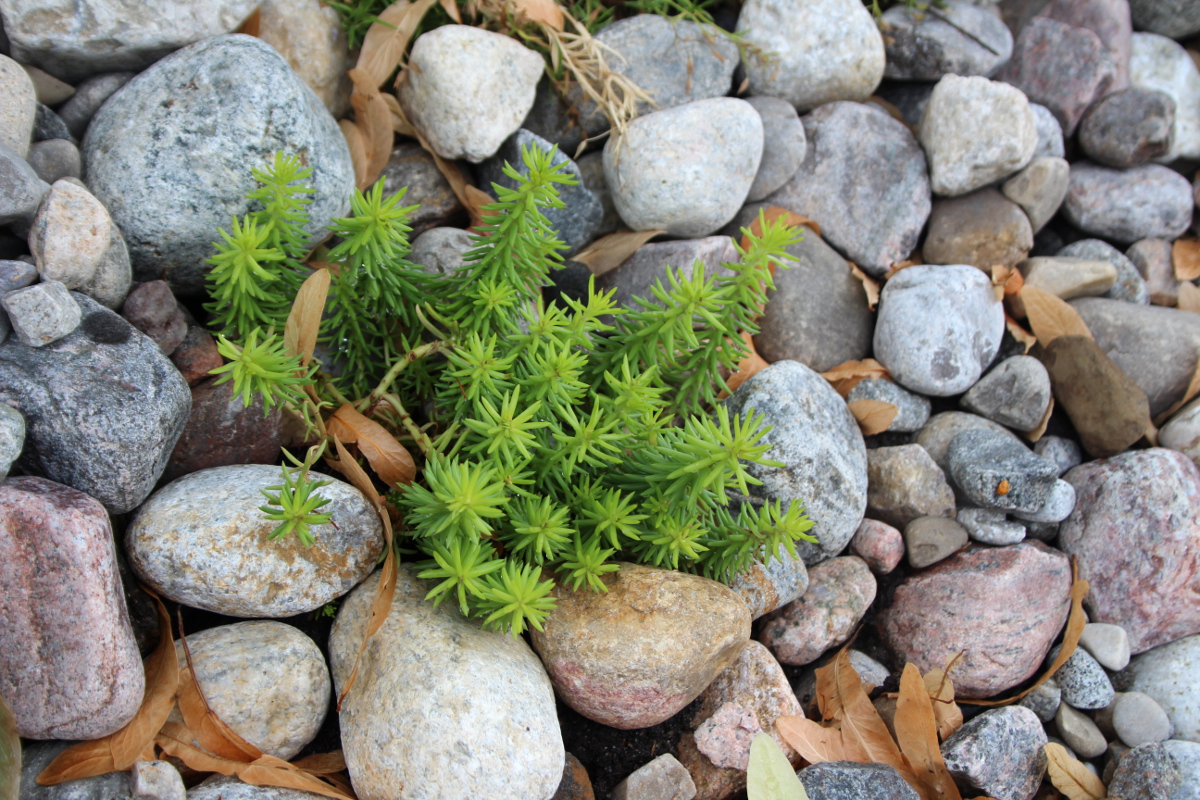
Sedum and thyme bring a splash of vibrant green over the natural texture of the stones.
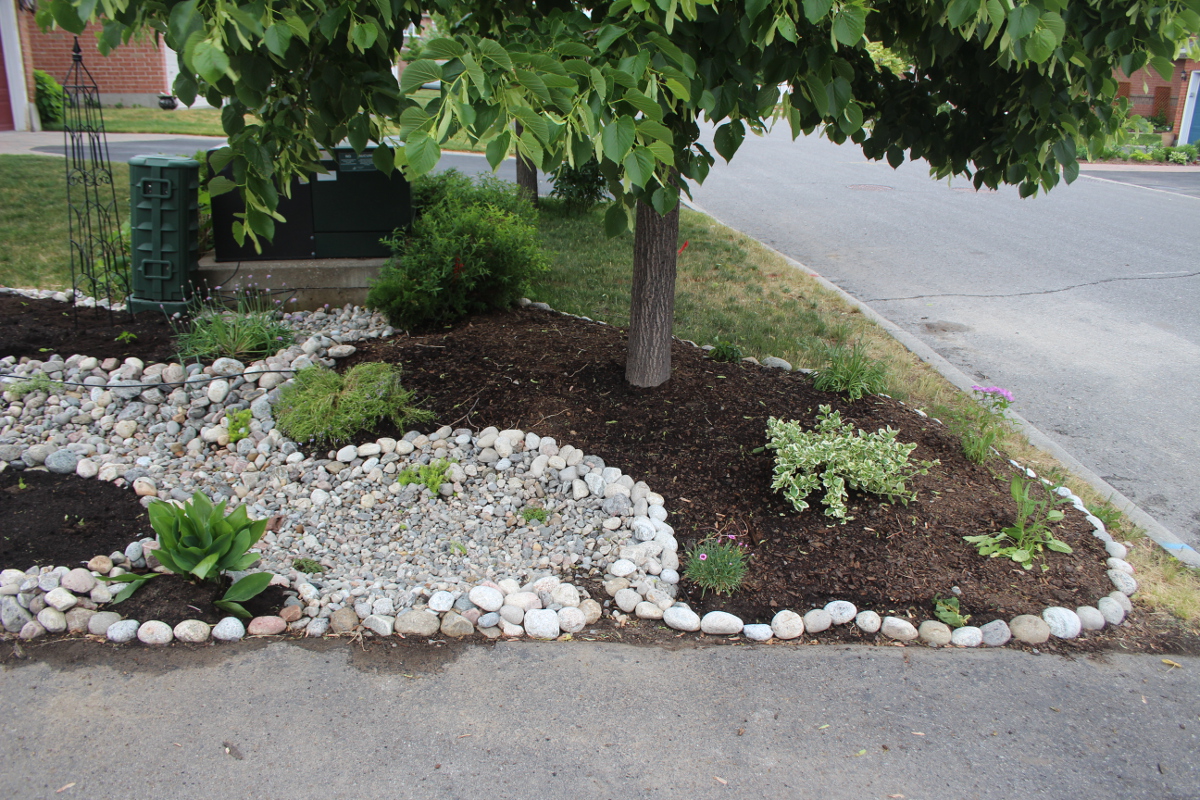
The river bed ends in a small round pond where the water collects during rain and gradulally flows out.
We have built another raised bed around the front tree. Since it’s so close to the road, I’m mostly growing ornamentals there. I will likely be planting tulip, lily, and hyacinth bulbs come fall, and perhaps will replace some of the annual ornamentals with swiss chard and other colourful edibles next year.
Many ornamentals are orange and yellow, yet I prefer the blues, reds and purples, so I have kept the decorative plants to that colour scheme.
Reds make for a bright accent to all the greenery.
I have finished the rock borders and have placed a stepping stone in a place where one can cross the river bed to get to the back yard.
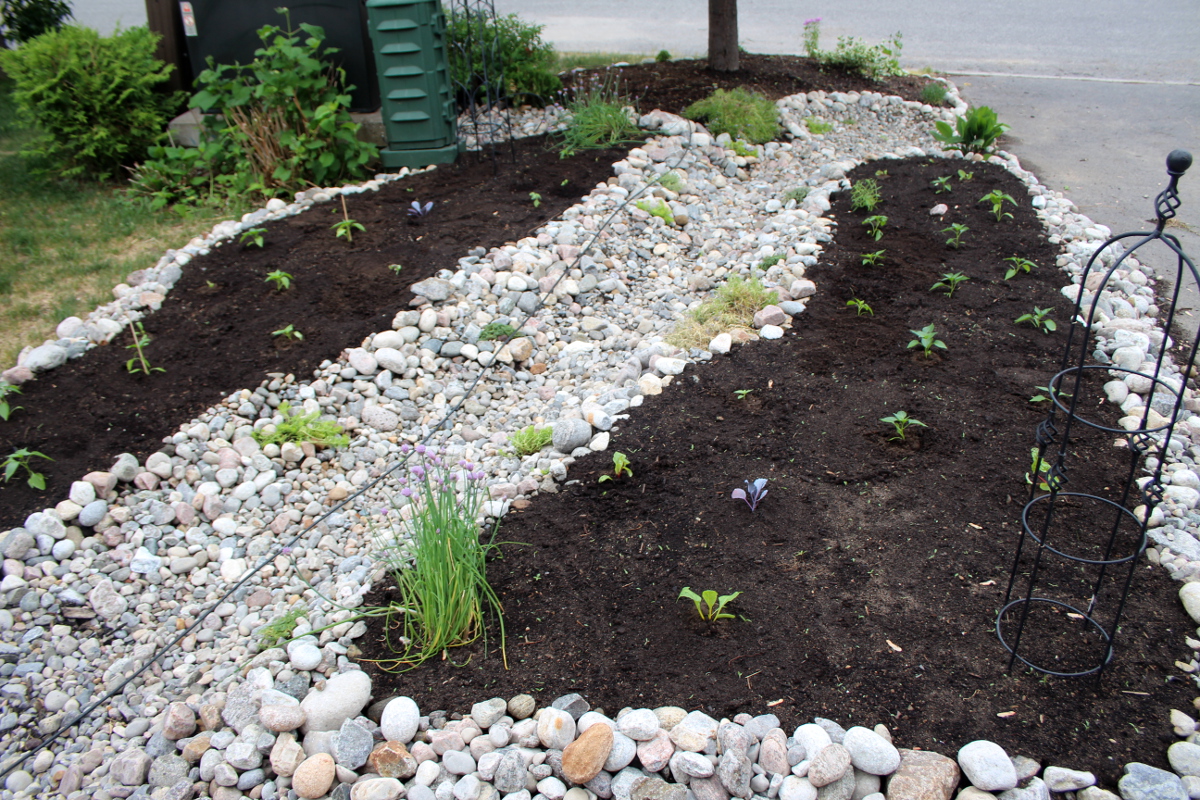
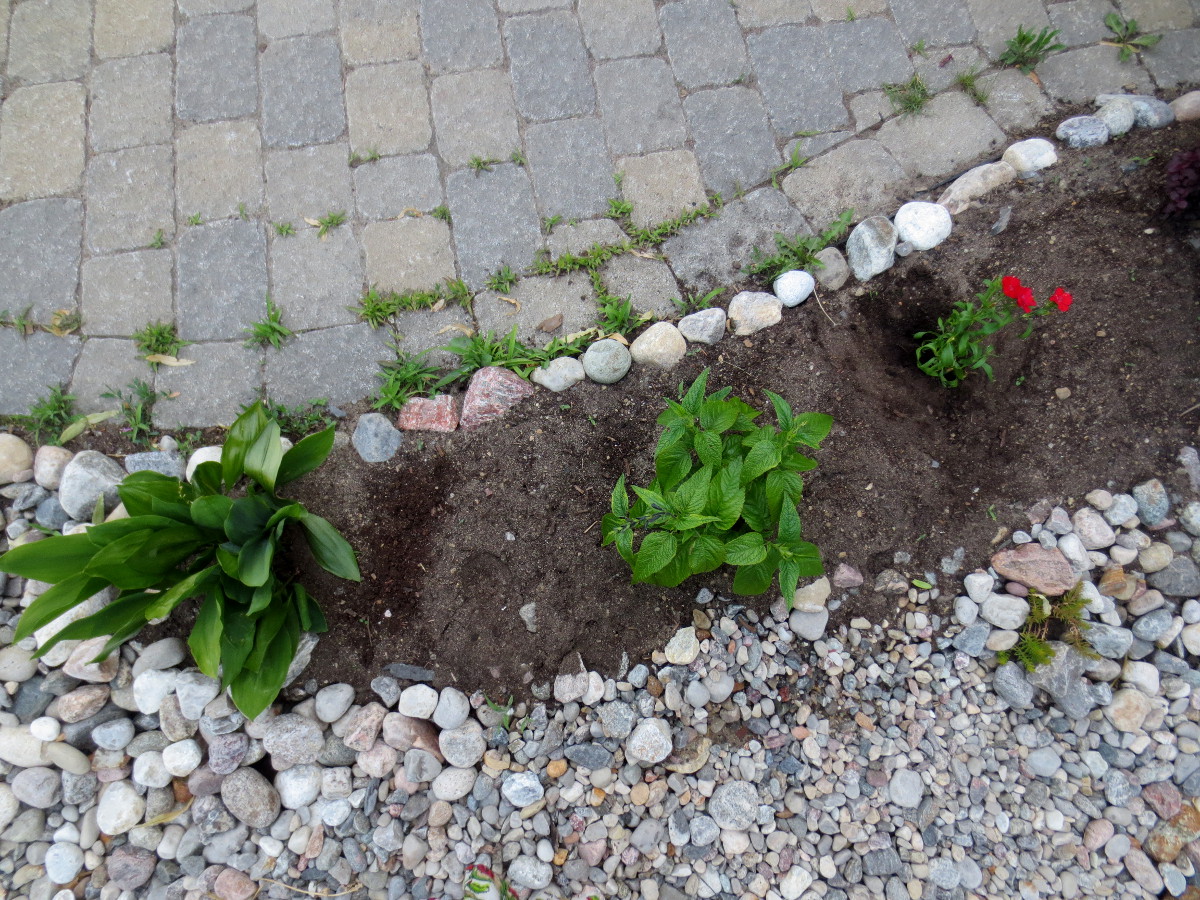
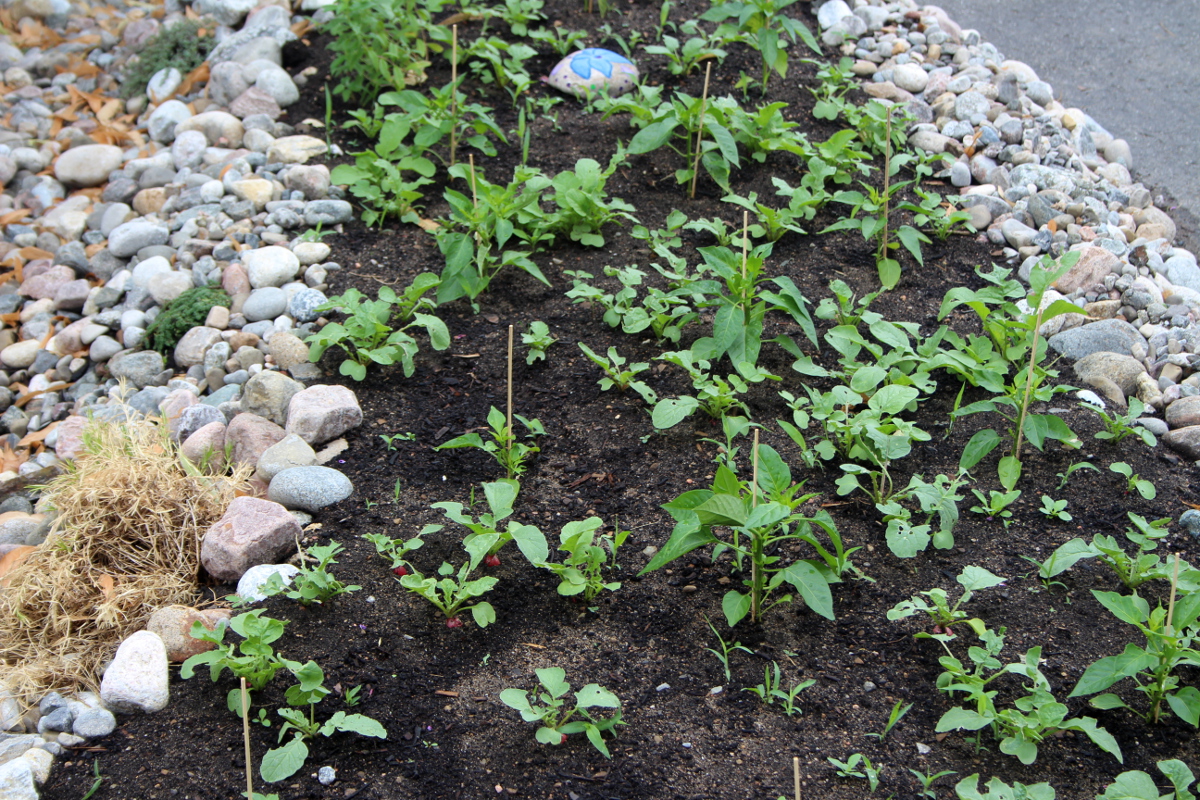
Here are the garden beds short after planting:
One of the garden beds covers our property’s water shut-off valve, so I have painted one of the river rocks to mark that spot. One of my favourite aspects of design is the combination of function and aesthetic.
For a visual balance, I’ve placed another painted rock on the second river bed.
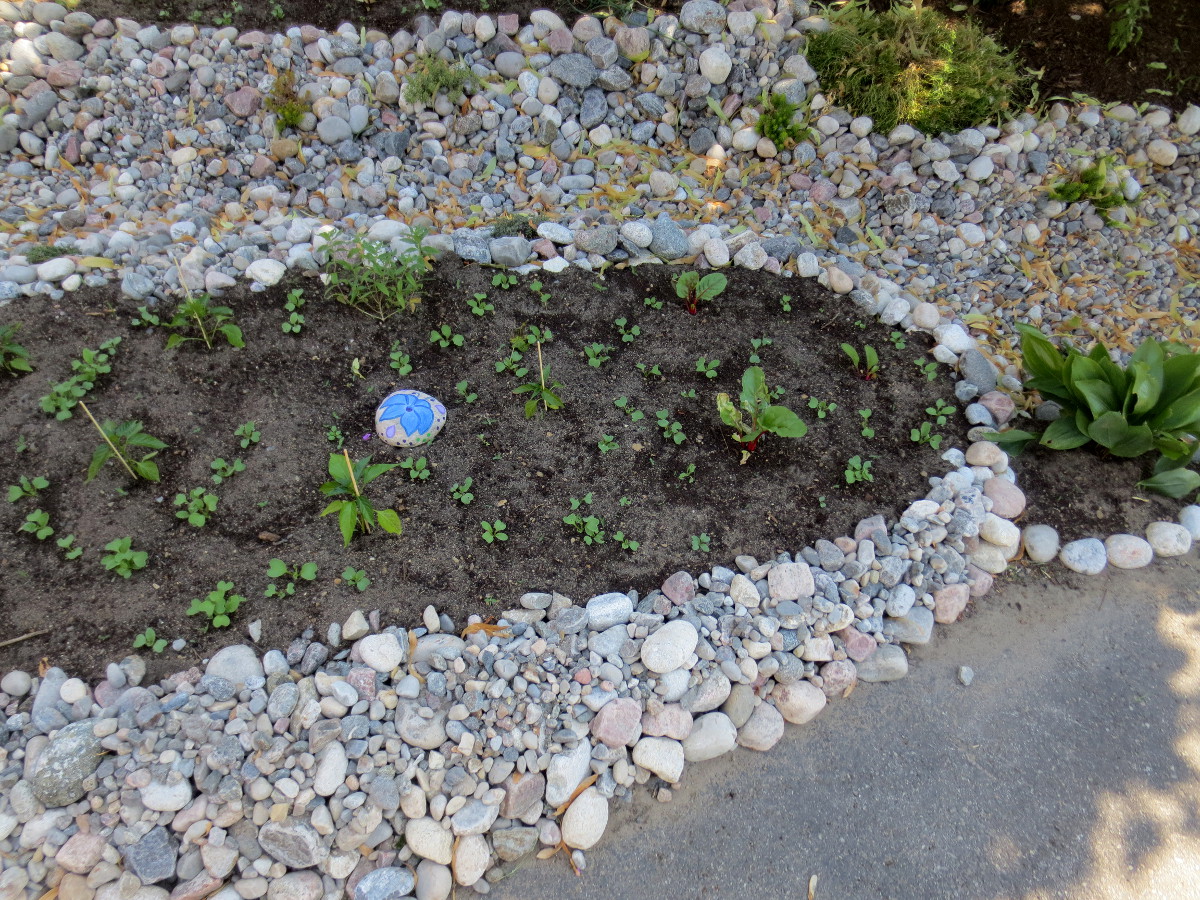
And here are the beds three weeks after planting. Peppers, radishes, and herbs are happily soaking up the sun.
Beans and peas are getting taller. Swiss chard and cabbage are happy in full sun, and it looks like a neighbourhood bunny is frequenting our garden and sampling the greens.
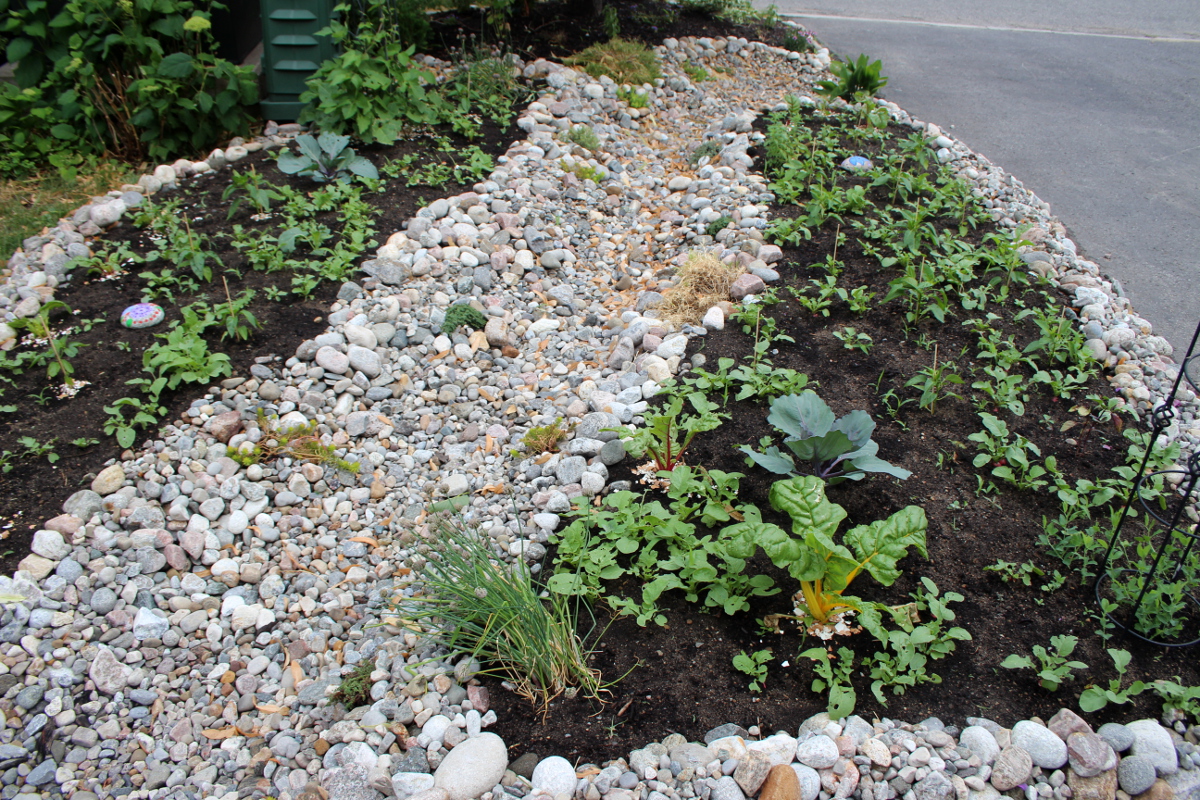
The narrow areas near the house are nourishing plants well:
And it’s a pleasure to walk between the beds on the rocky river bottom.
Sedum and thyme in between the river rocks seem quite happy.
Beans have started to crawl up the trellis, and their scarlet flowers will soon show up:
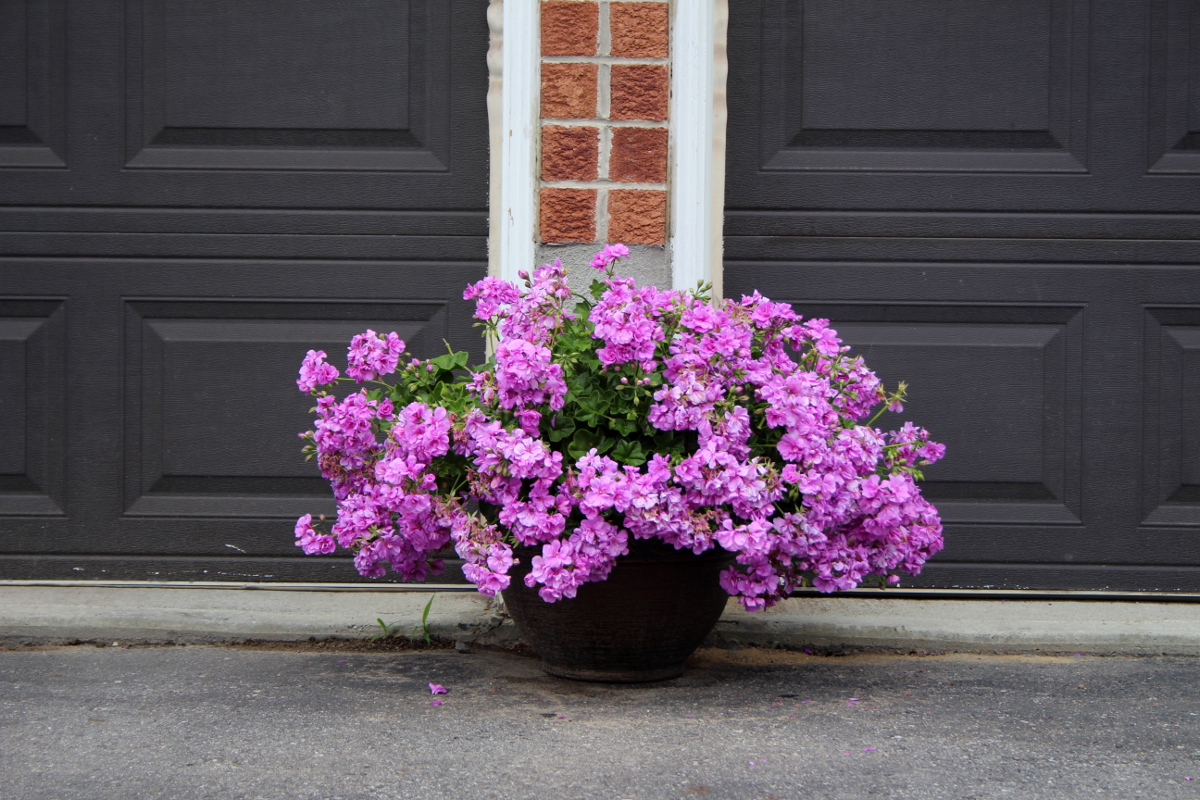
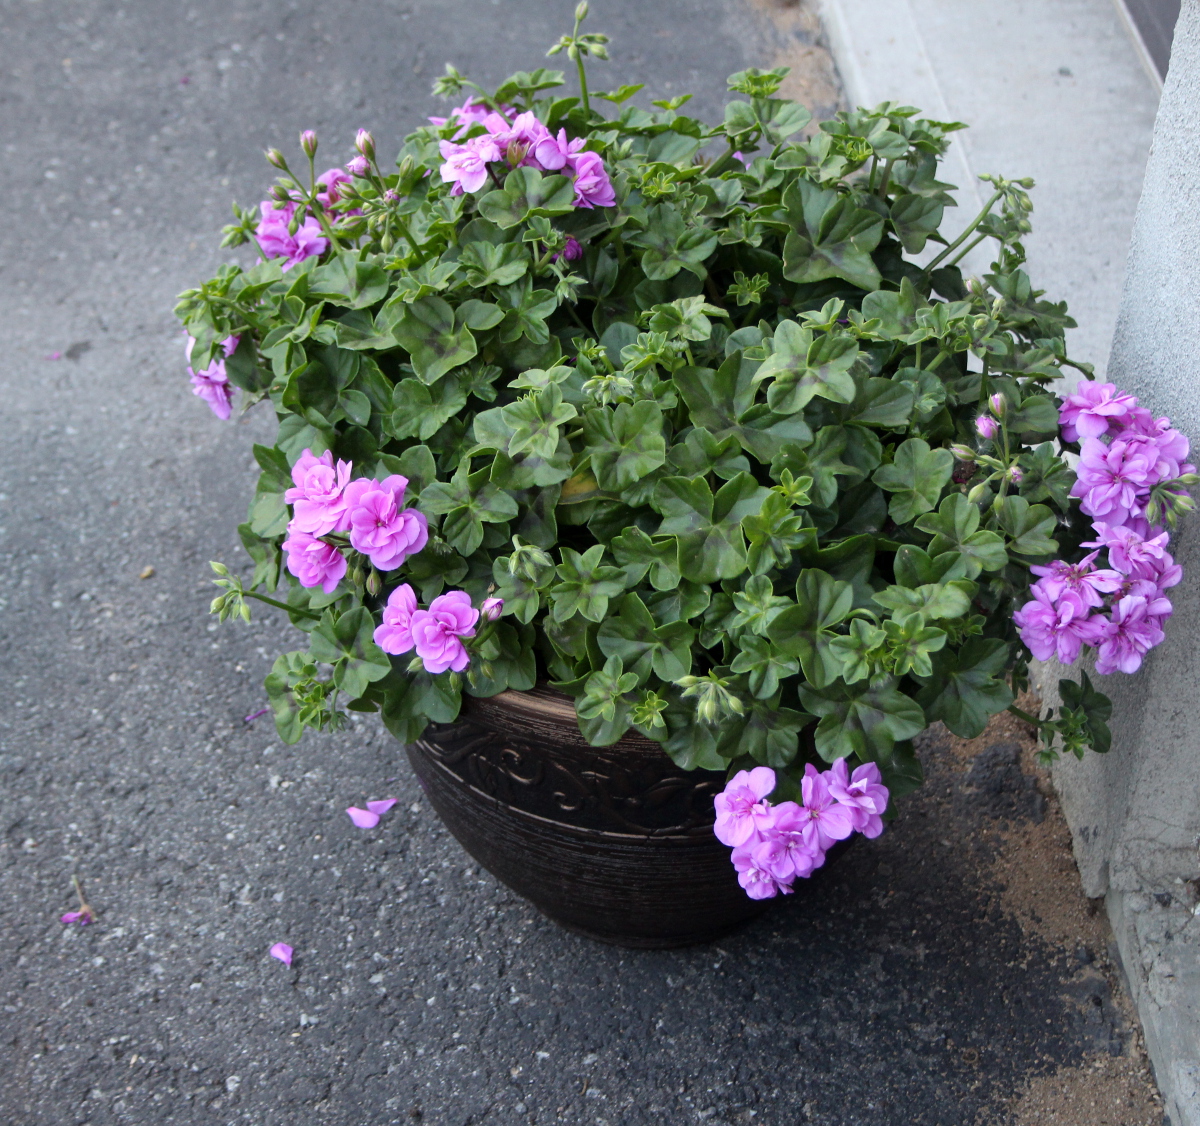
My centerpiece lilac geranium is covered in blooms, with green barely visible.
And the flowers around the front porch make everything brighter:
Almost every day now, there is a strawberry or two to enjoy. The kids love finding ripe berries in the morning.
When we moved into our new place last year, we brought with us two black currant bushes and a load of good soil for the back yard garden. We wanted to plant the bushes in front of the house, on a strip of useless lawn, but after digging a hole for one of them in the terrible rock-filled clay soil, we have decided against digging another hole. We have also realized that we might hit a utility line and there was no time to call up a locate in all the whirlwind of moving in. So the second bush got planted in the back yard.
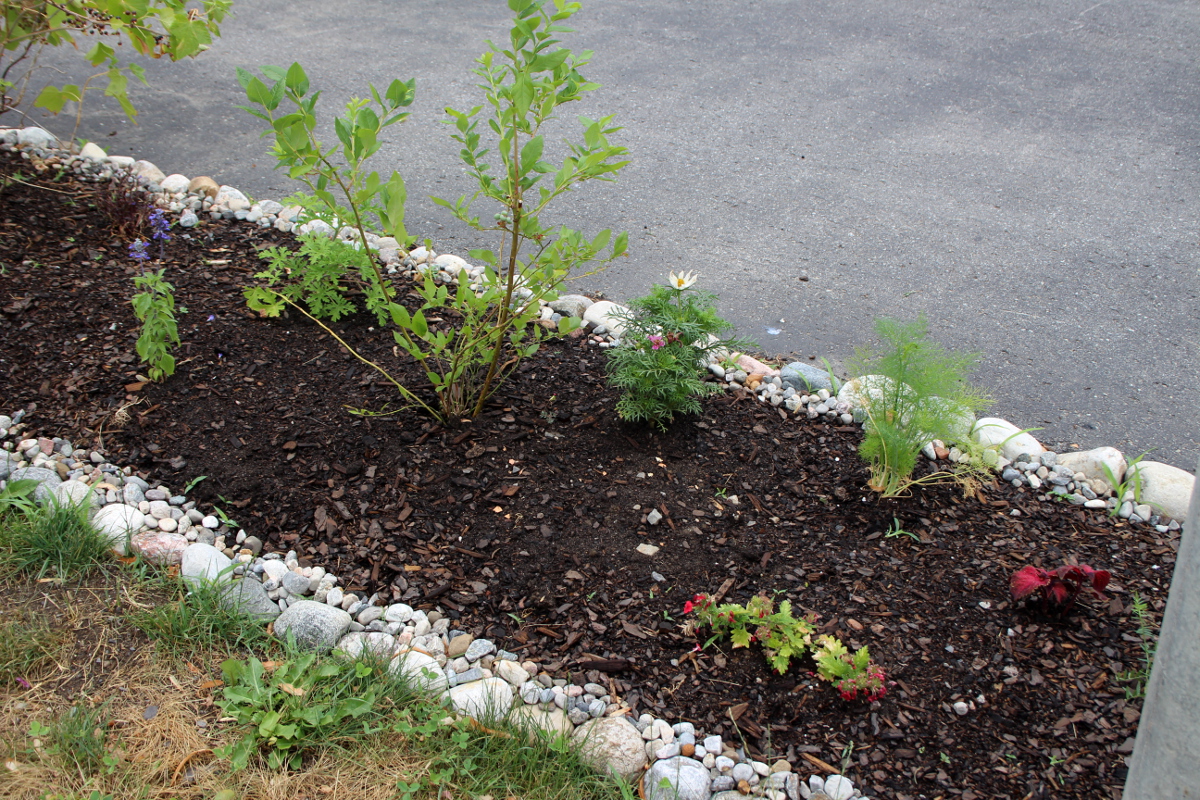
Fast-forward one year. As part of our edible landscaping project, I wanted to incorporate as many berry bushes as possible on the underused parts of land. Thus the following plan was born:
This time, we had heavy equipment with which to dig and plenty of good mix of soil and compost, thanks to Gavin from Edible Landscaping Ottawa.
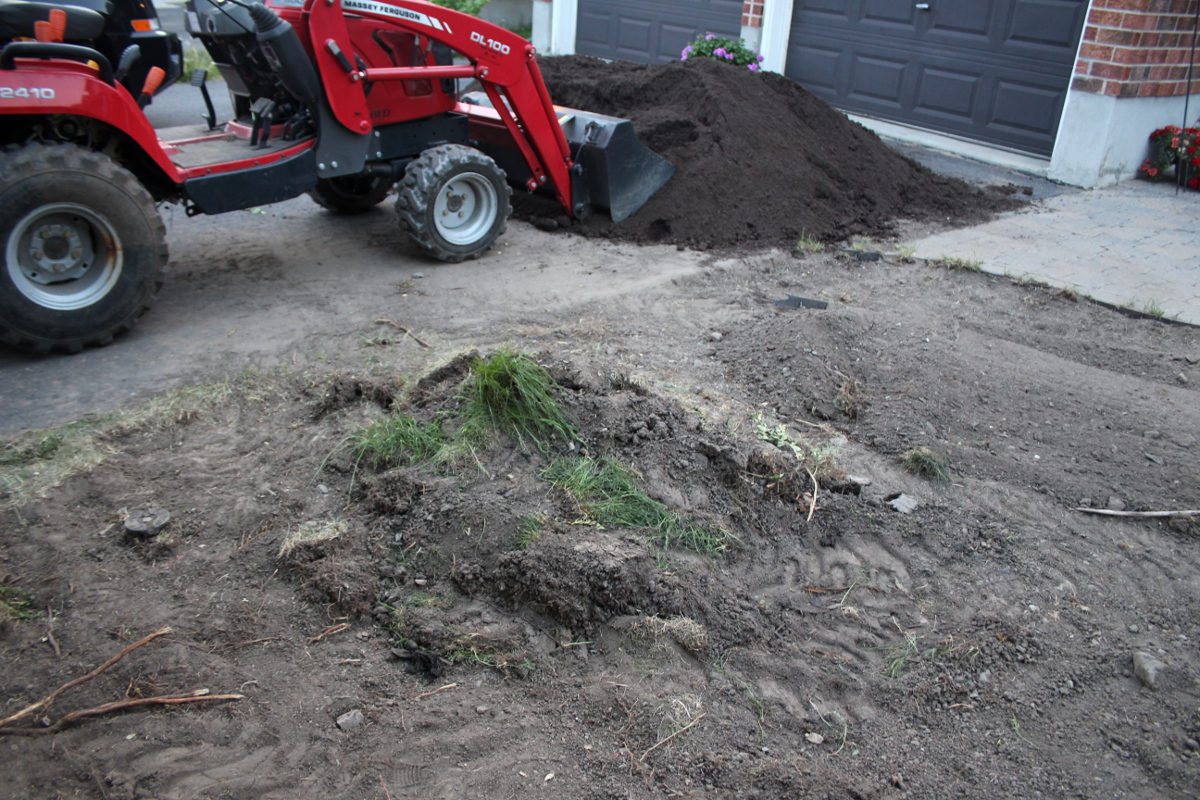
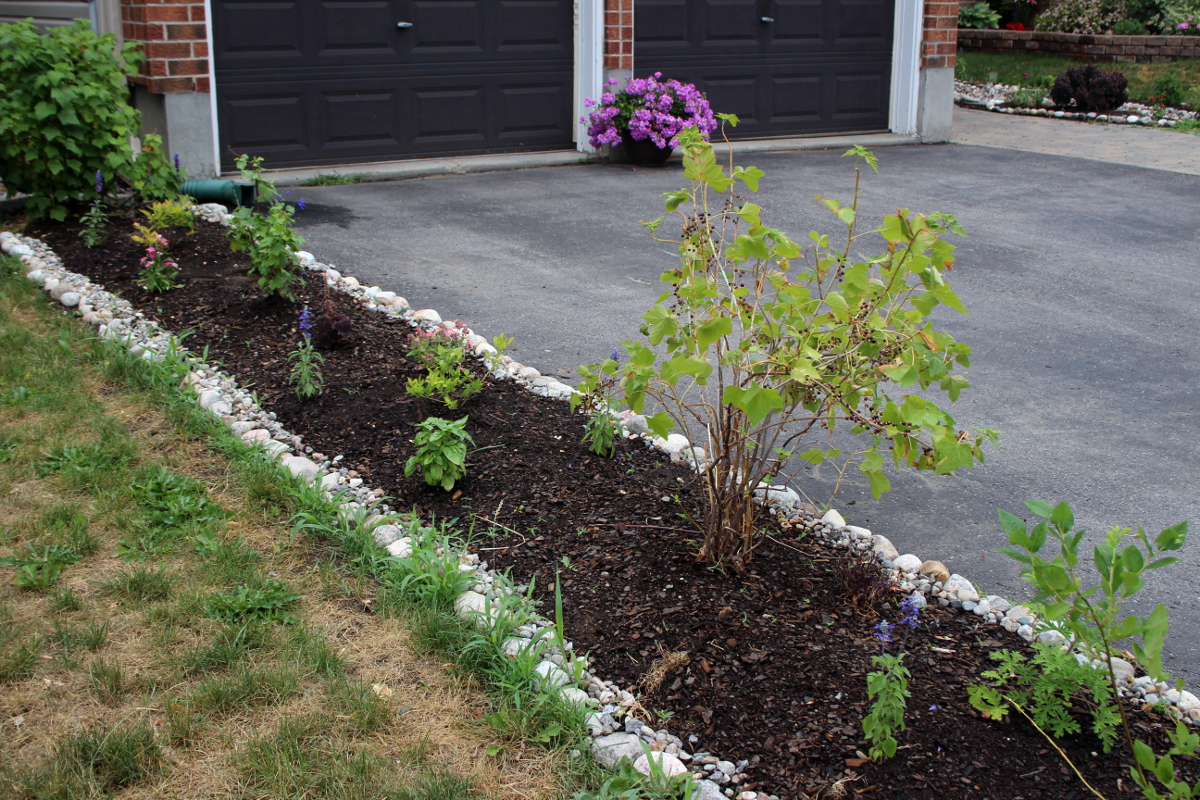
First, we stripped off the top layer of soil and grass You can see the difference between the soil under our lawn and the fresh pile of soil on the driveway in the photo above. Then we filled this new bed in with good soil, and have moved the lilac tree from the back garden to this new bed, to provide the vertical accent at the front and free up space in the back yard. The second black currant bush was also replanted from the back garden.
As Gavin was planting the bushes, I was mixing in eggshells I’ve collected over the winter, to add mineral content to the soil.
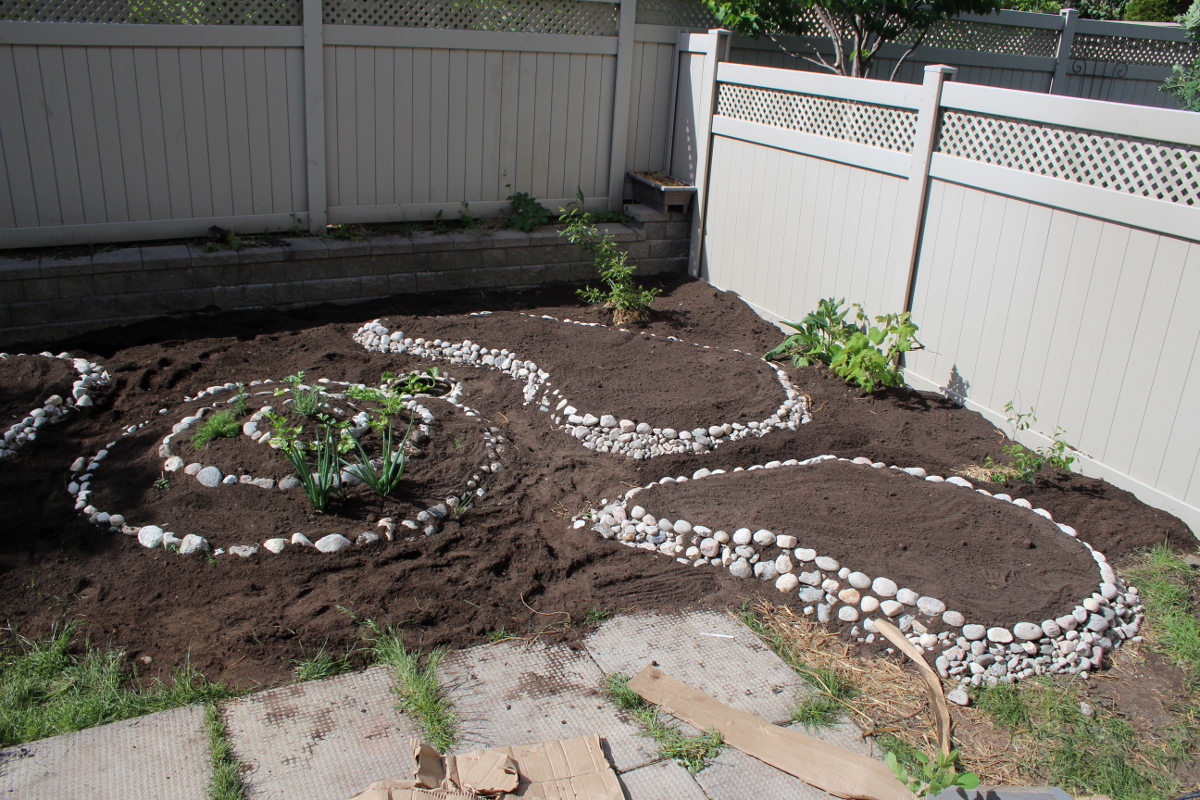
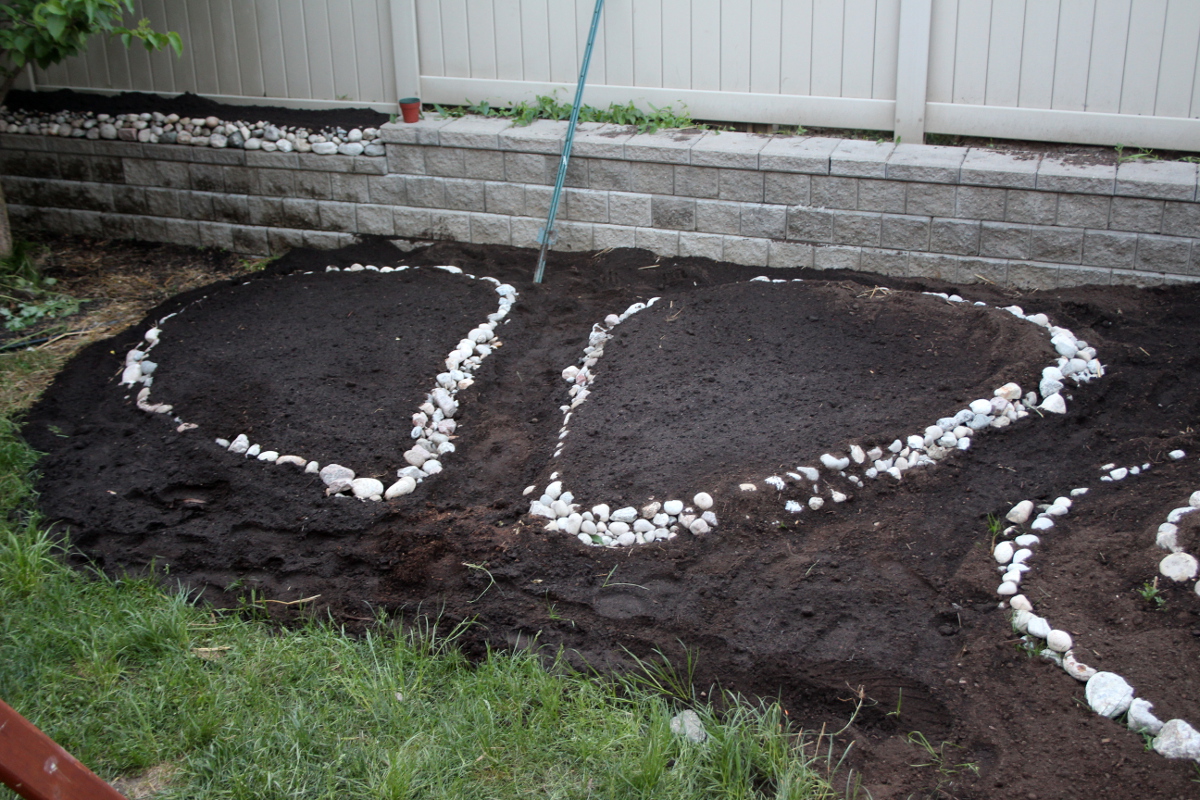
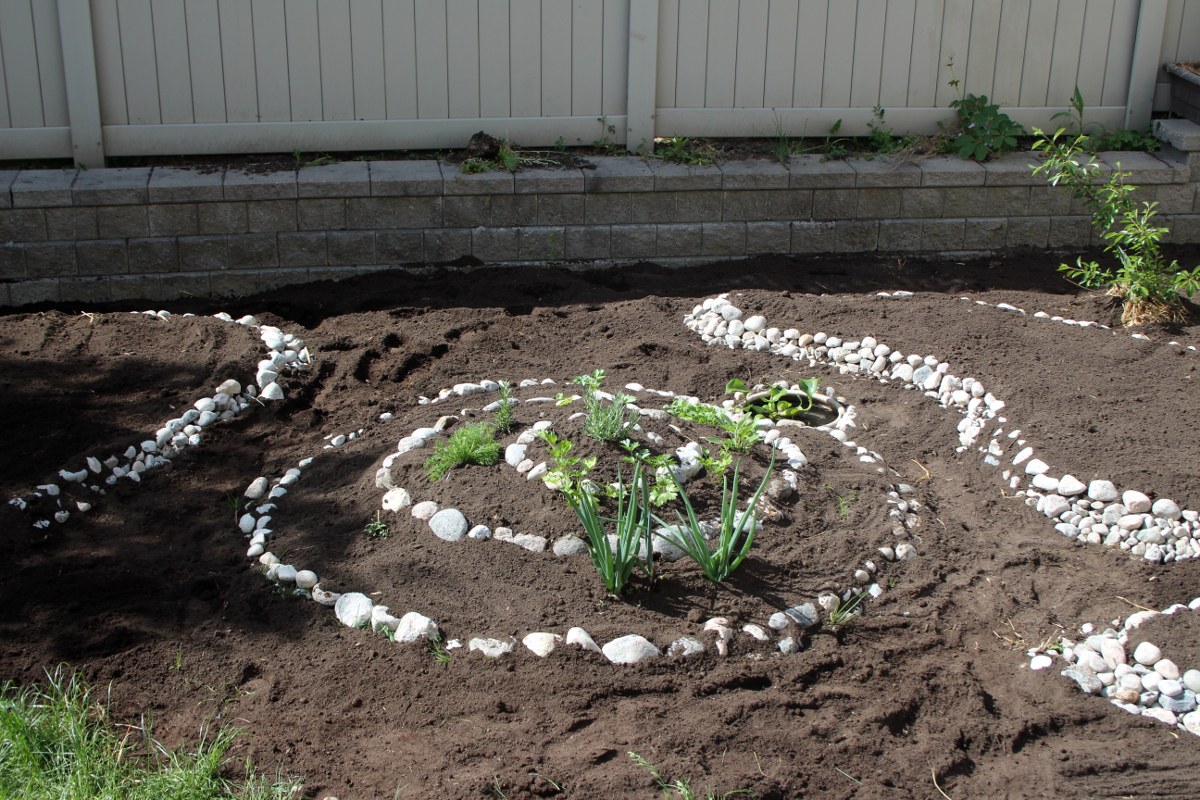
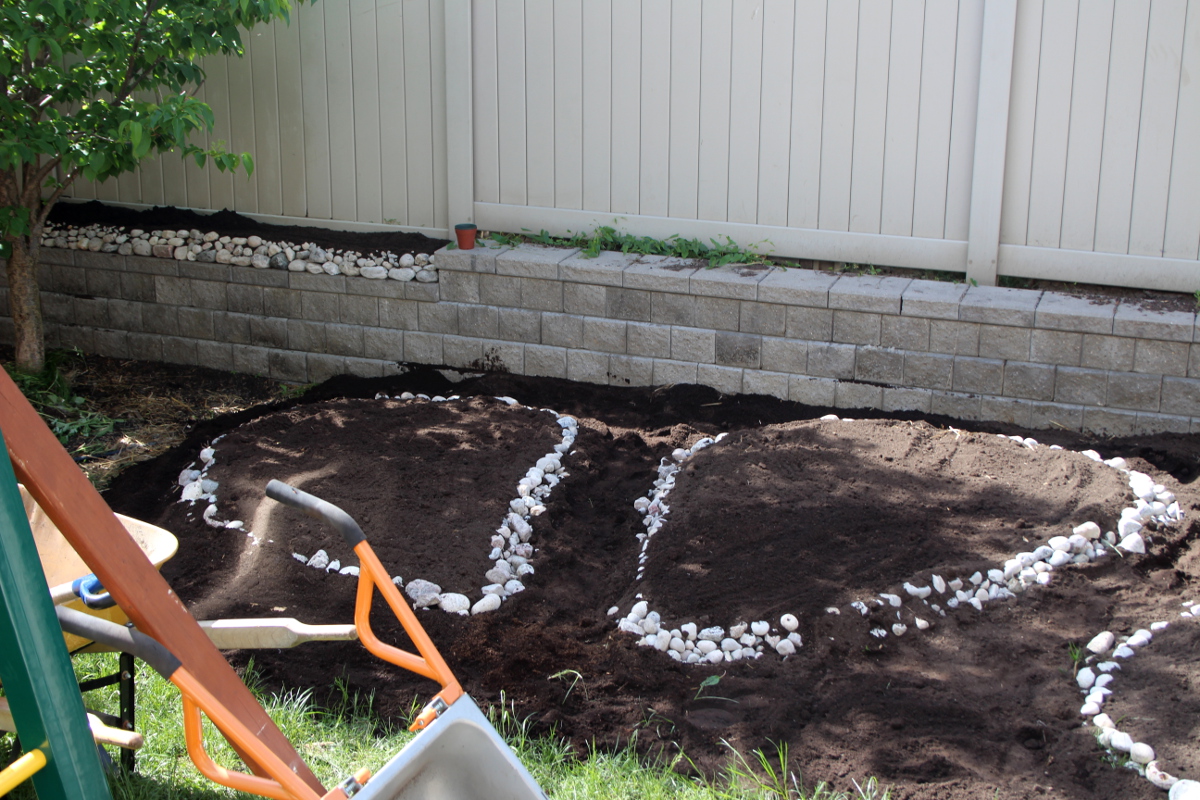
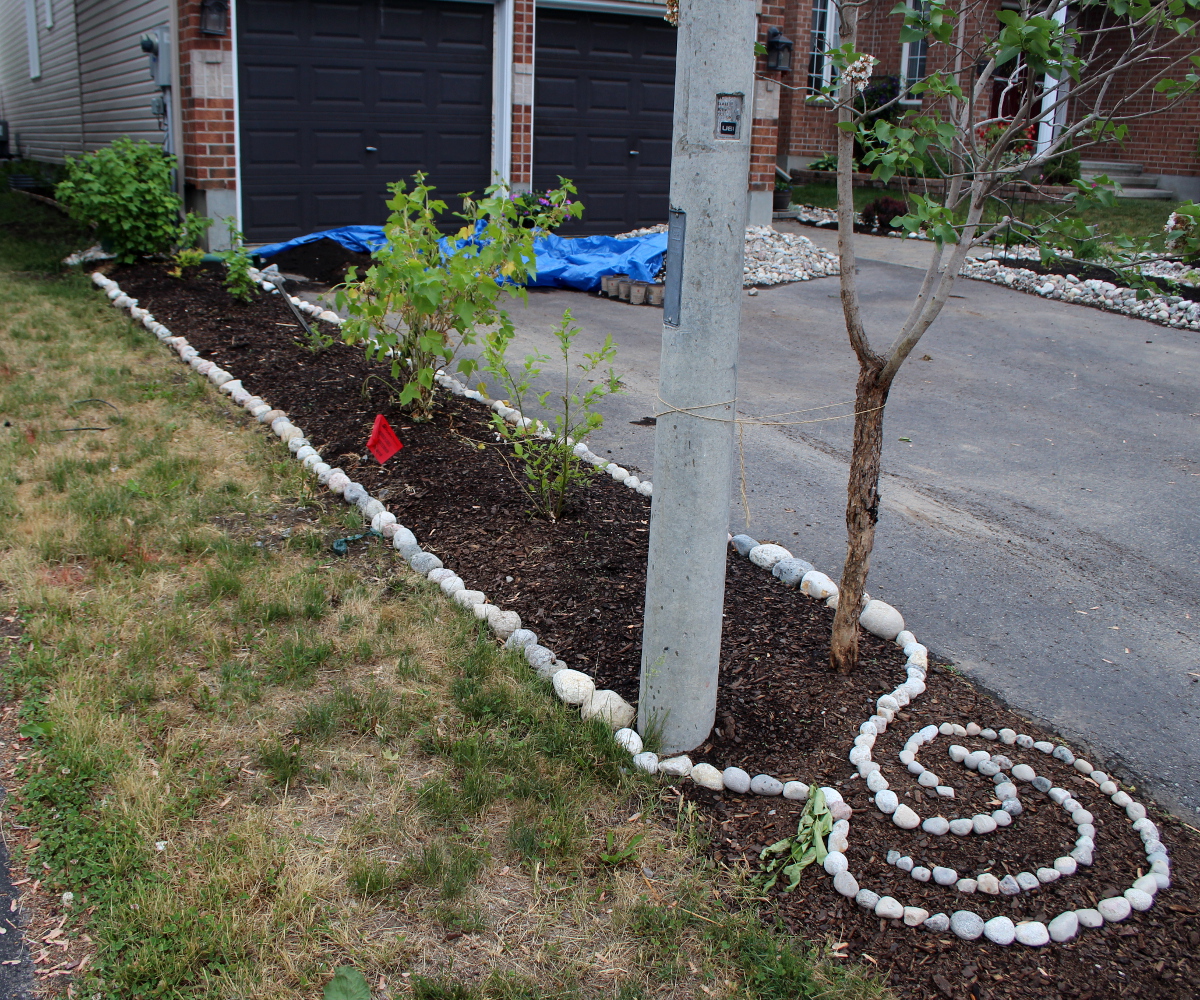
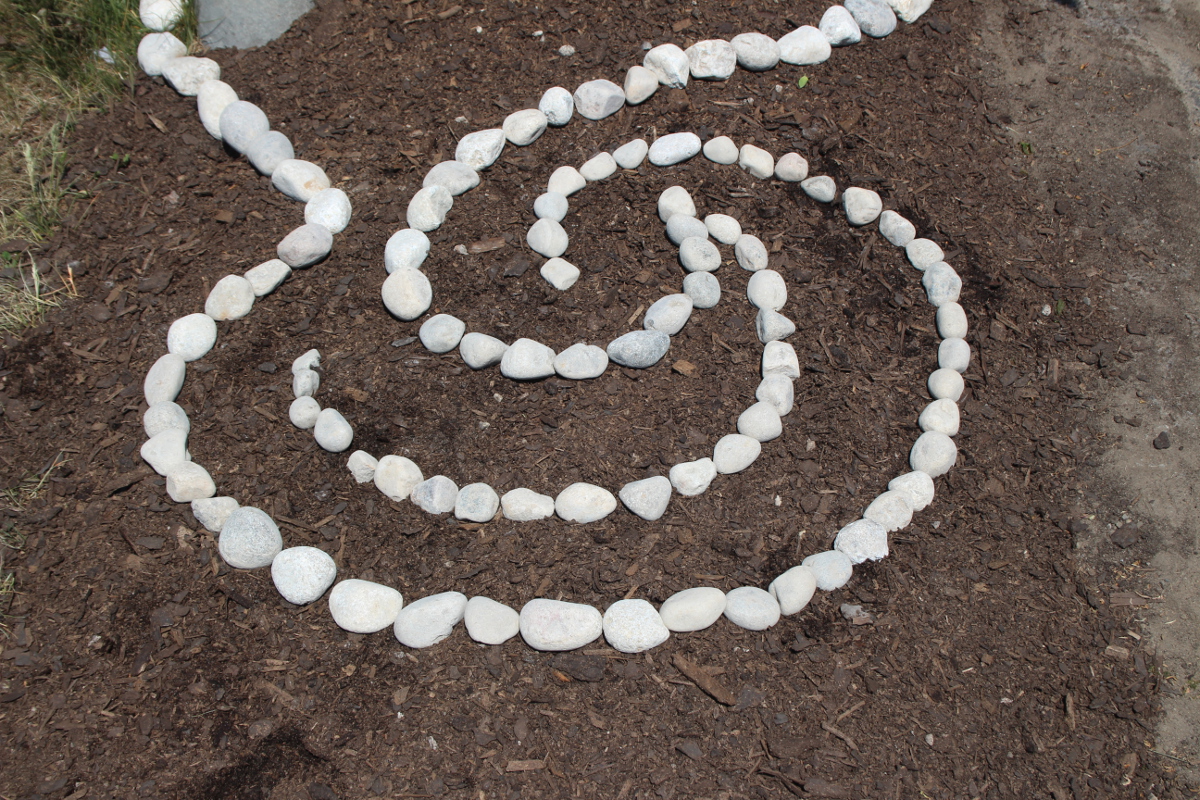
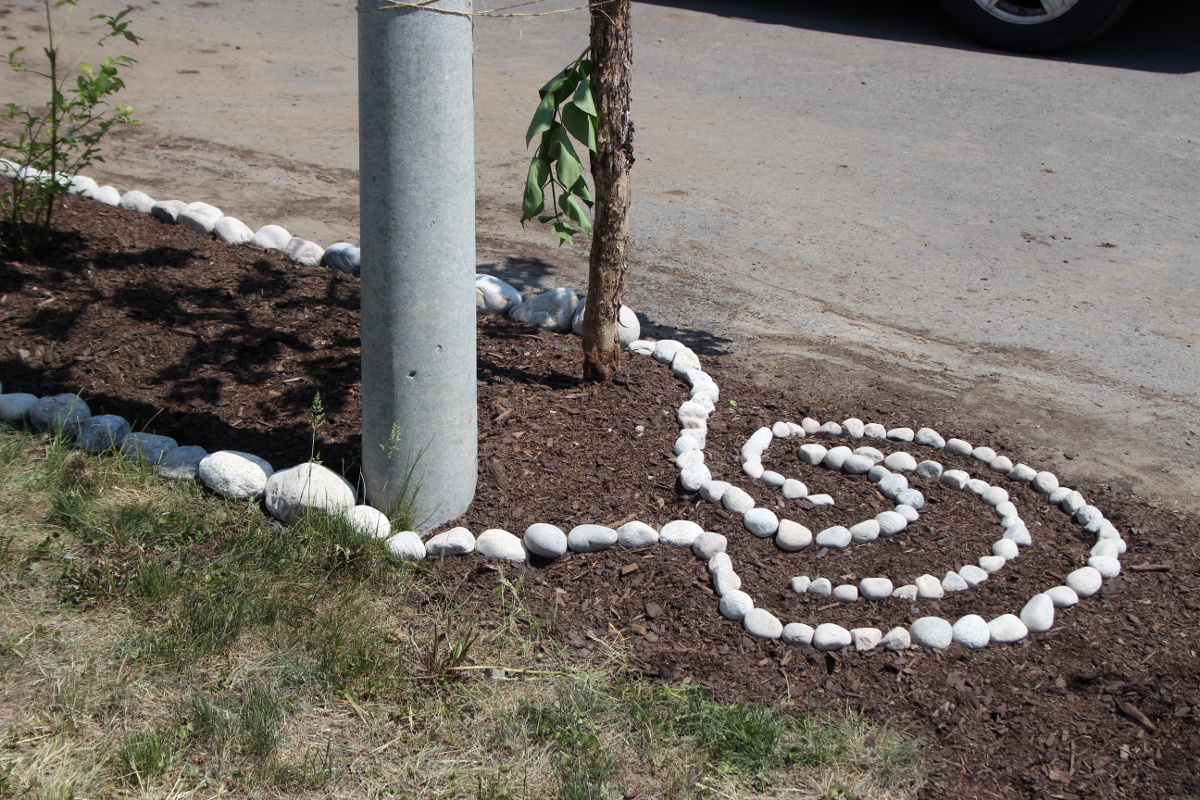
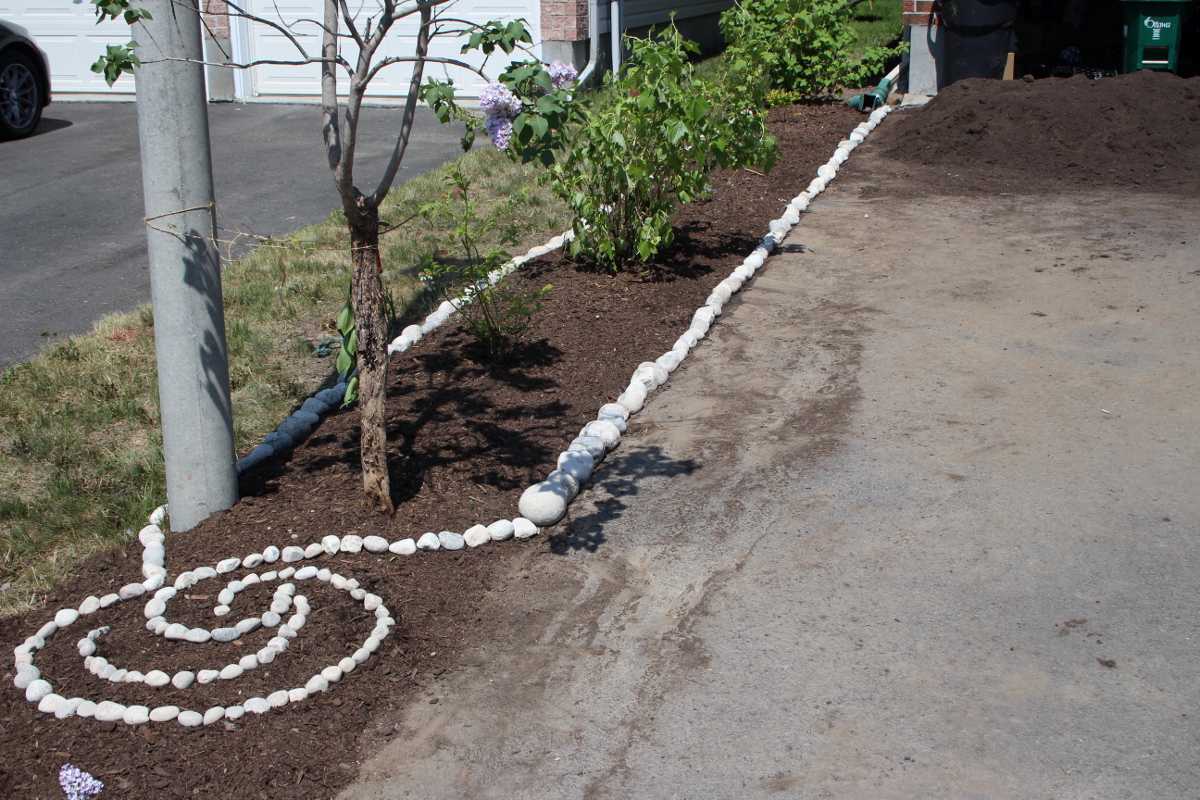
Once everything was planted, we’ve added a layer of mulch. Then kids and I have built the rock borders around the bed, to keep the soil and mulch in and give the bed a visual frame. On a whim, I’ve decided to make a spiral design at the end of the berry bush bed.
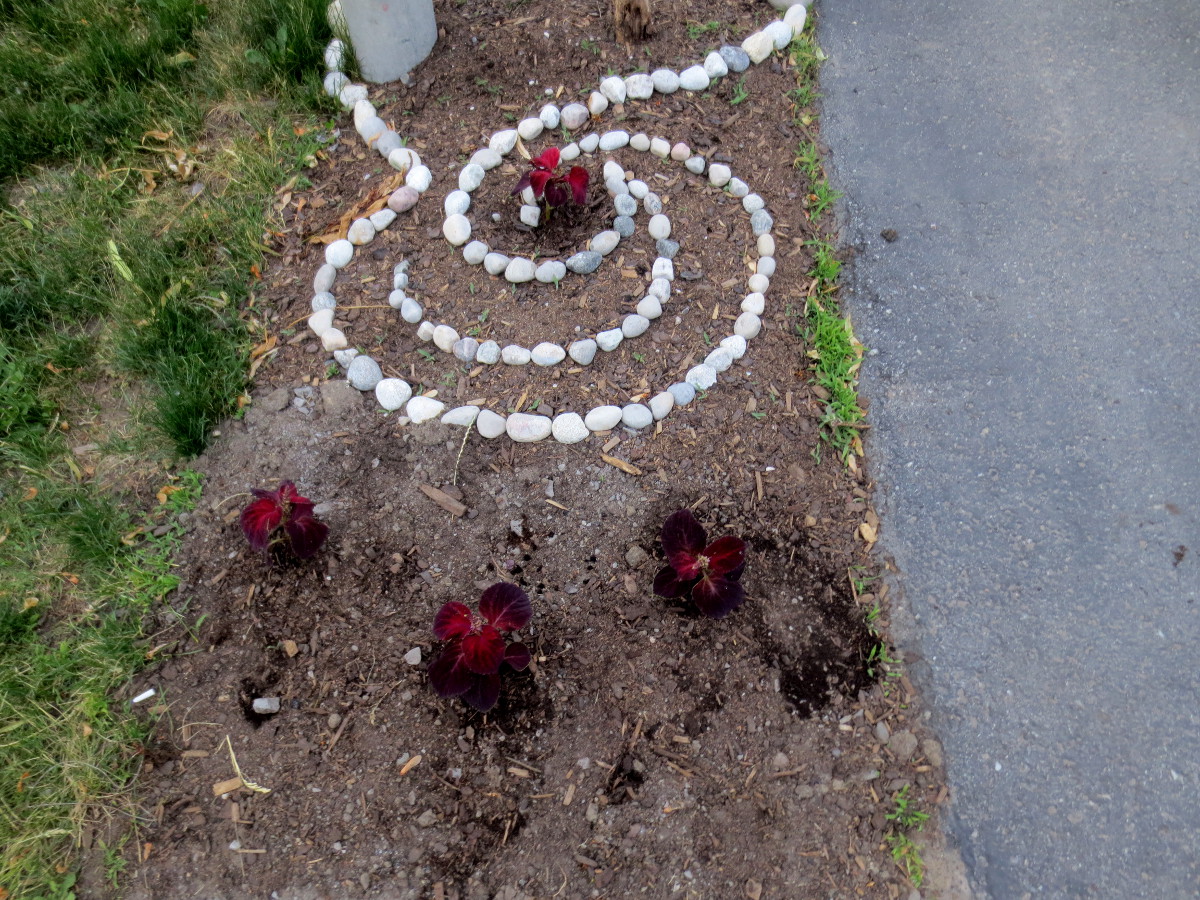
A few days later, I’ve planted various herbs and small ornamental plants in between bushes and around the spiral, to give the bed some character while the bushes are small.
Afterwards, I filled in the bed contours with smaller river rocks, to give it more dimension visually and to minimize washing out of the soil, which is due to the bed being heaped in the middle.
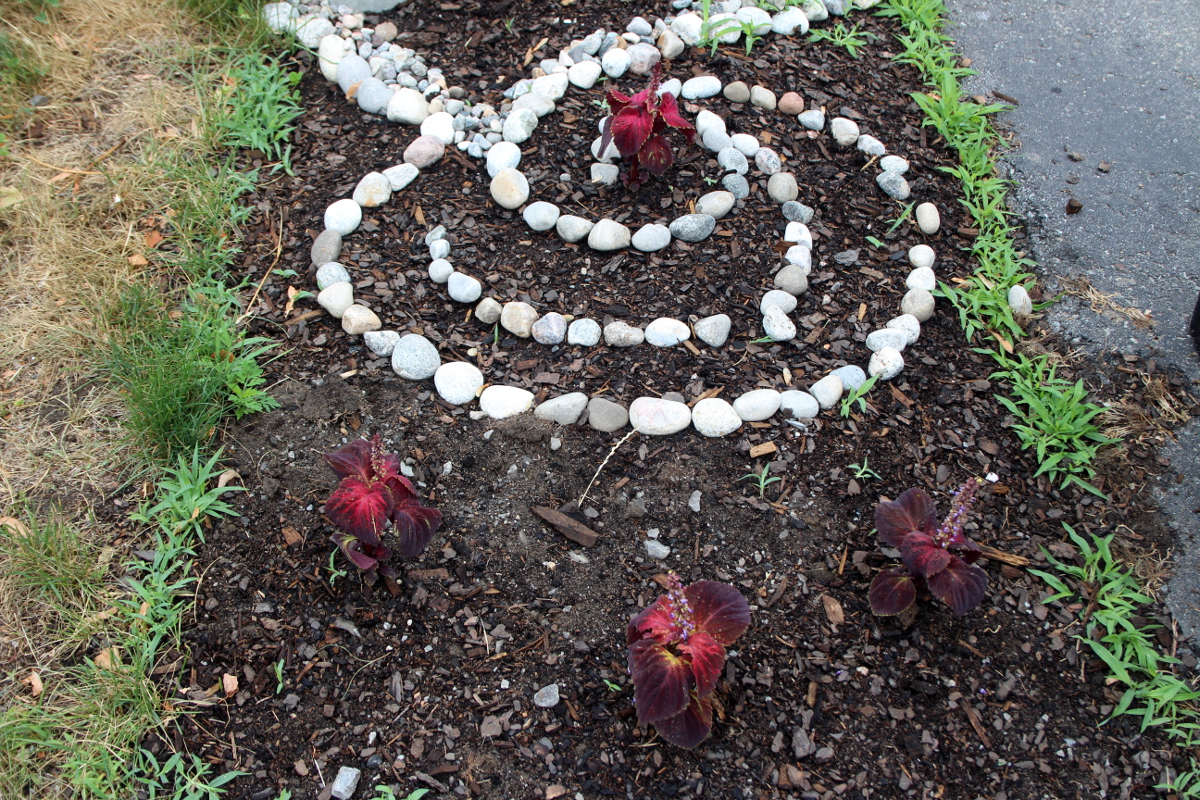
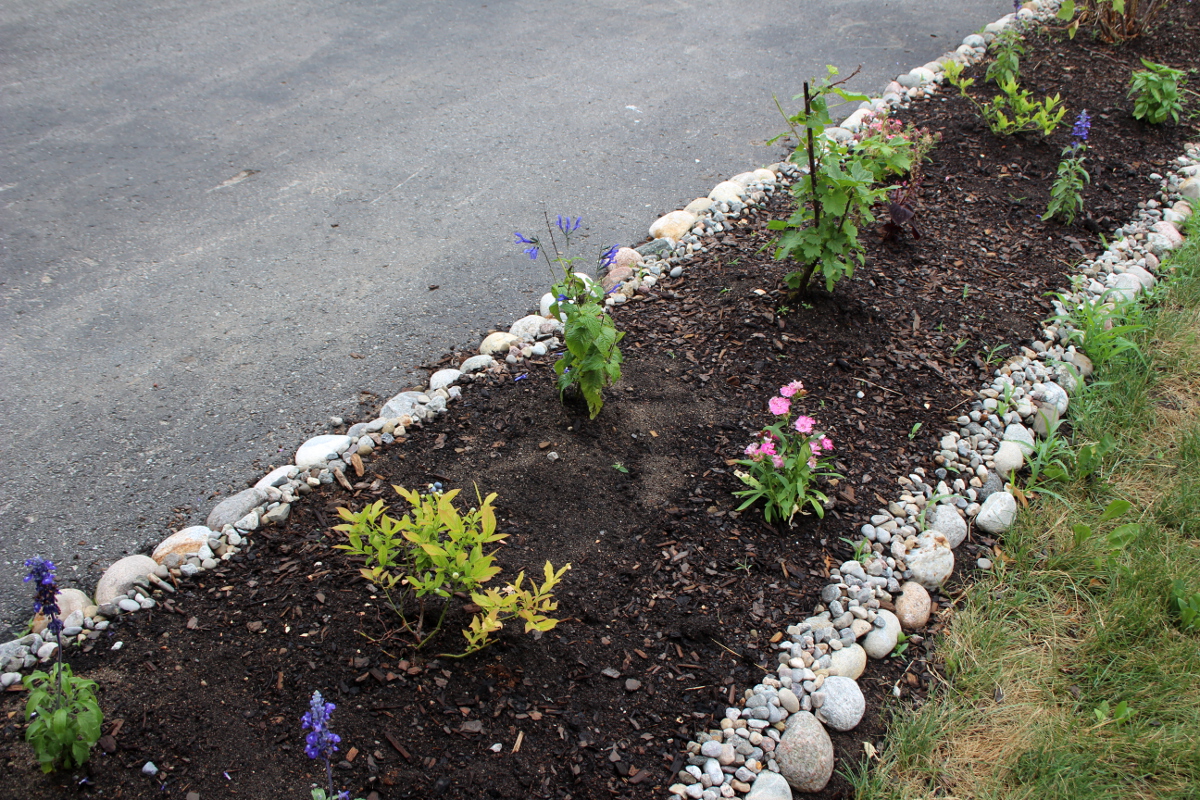
Here are some fennel, verbena, cosmos and purple salvia around a blueberry bush.
Basil, pelargonium, and more salvia around the bluberry bush (bright green) and the red currant bush.
The tall bush here is the replanted black currant from the back yard. It might need another year to fully recover, but it’s already covered in berries.
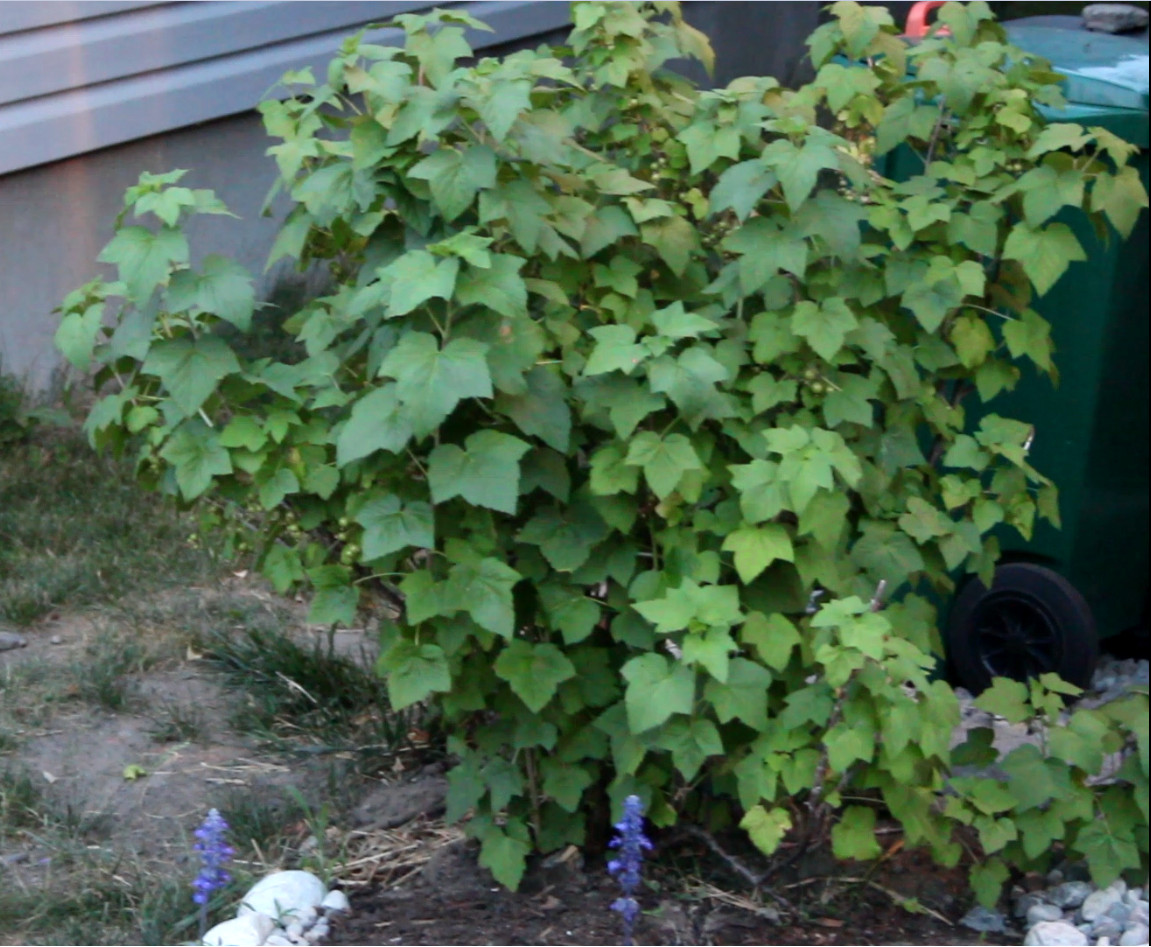
And this lush beauty is the black currant that was replanted from our former place last year. My hope is that the second bush fills out just as nicely as this one had.
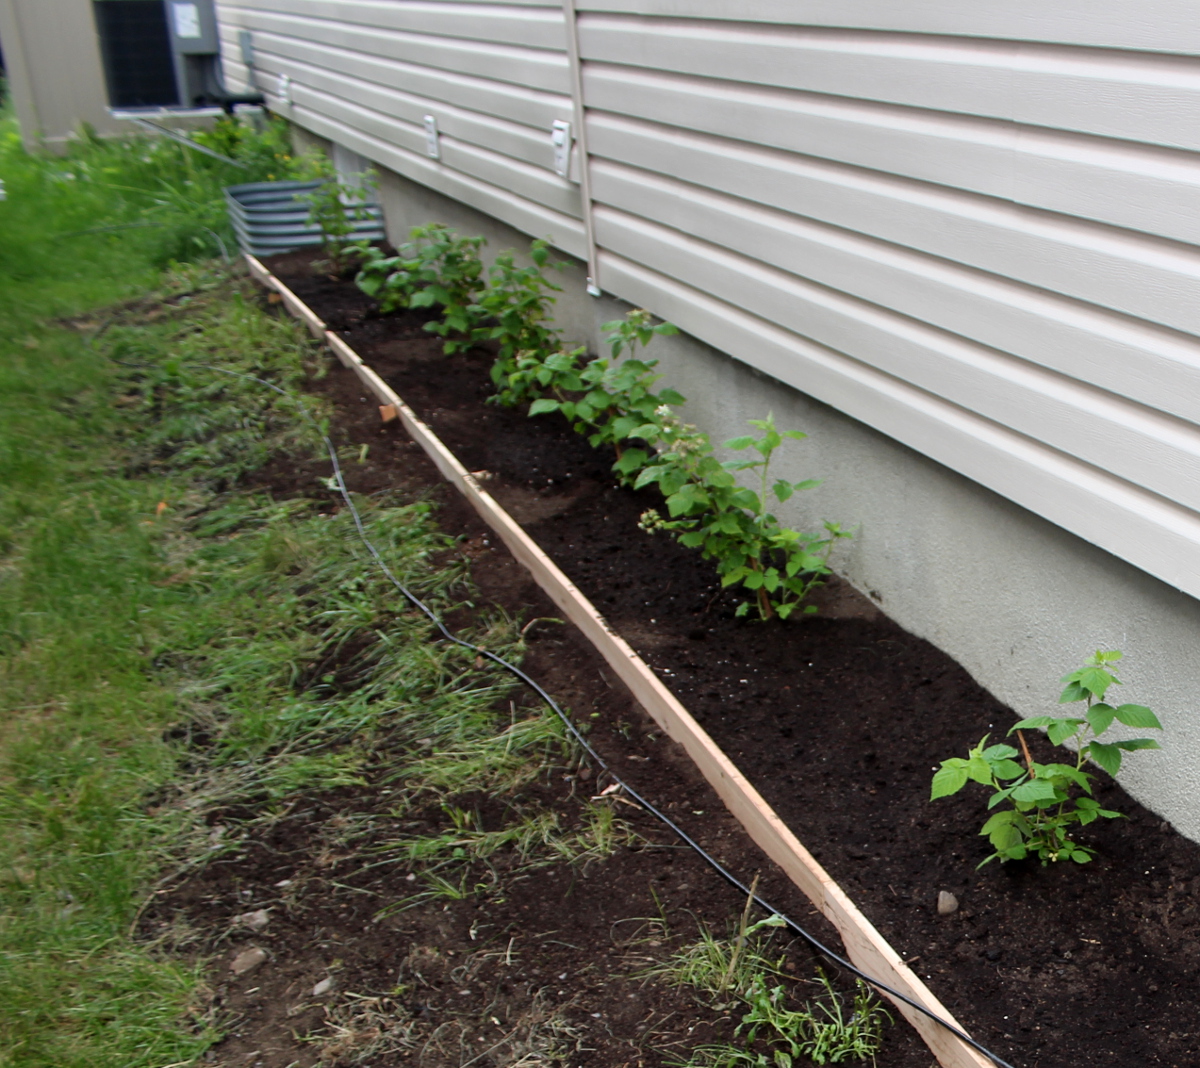
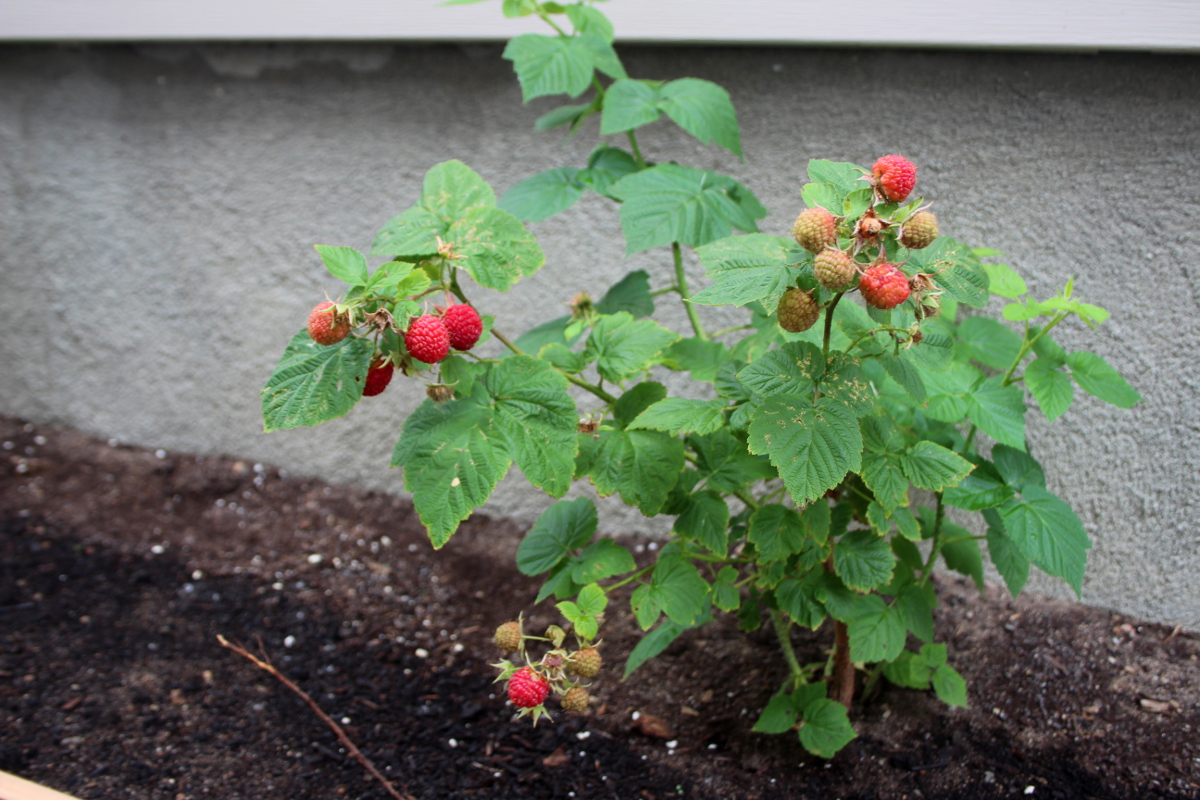
We have also planted a row of raspberry bushes along the shady side of the house. They were put in sunken beds to provide them with the good soil and to curb their spread.
A month later, we are picking a few raspberries each day. Kids come exploring with me, and my 2-year old points to the not-yet-ripe berries and confidently states “not ready”. They love picking berries right off the bush.
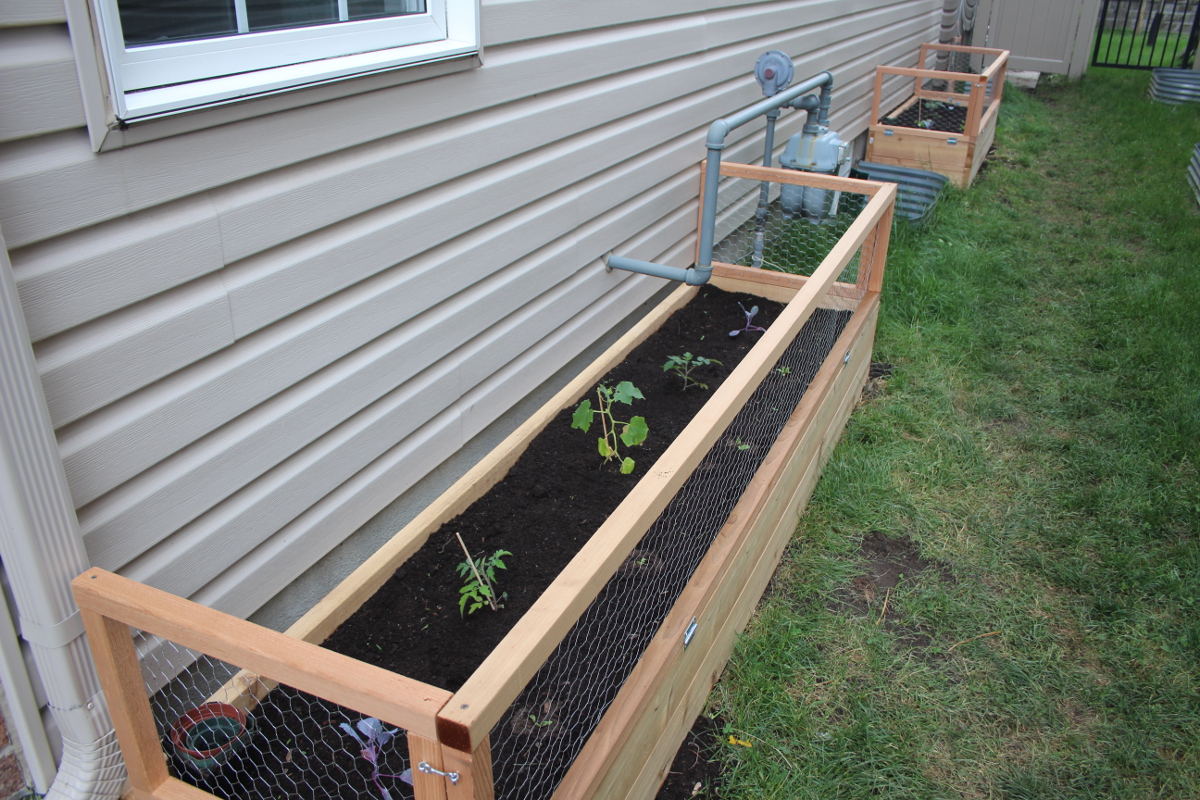
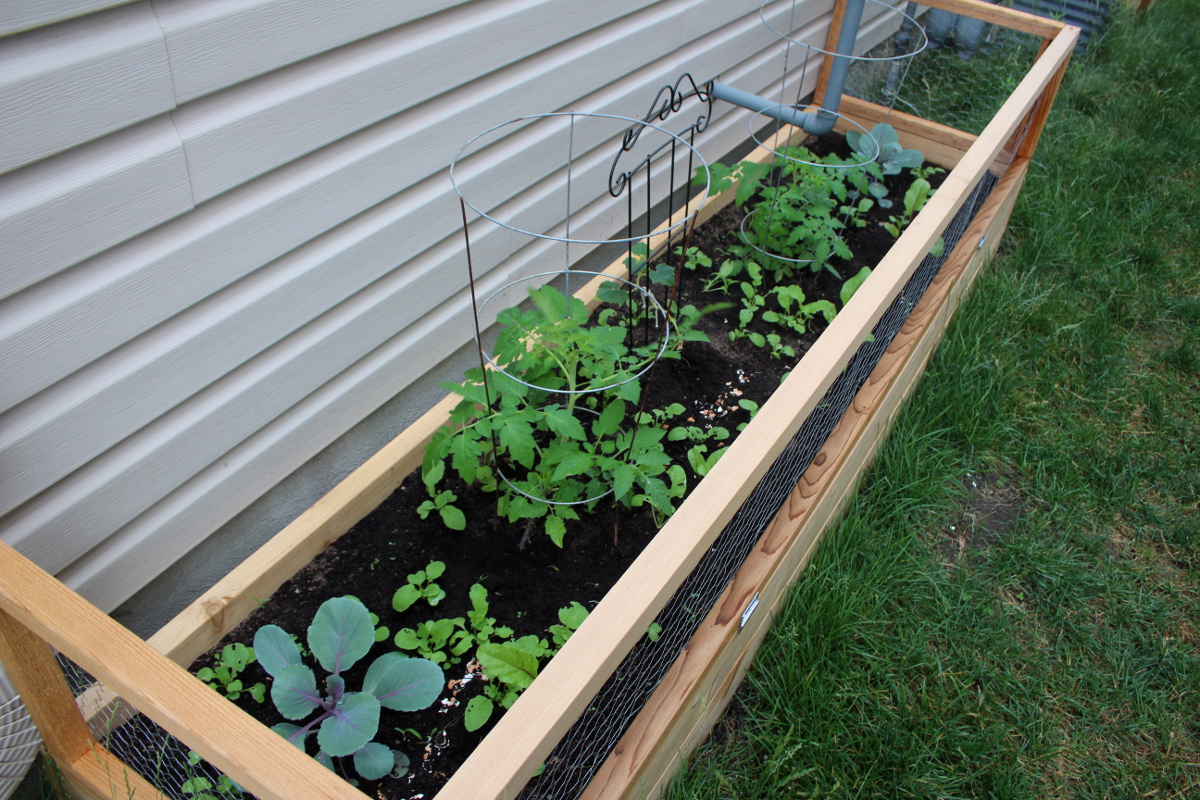
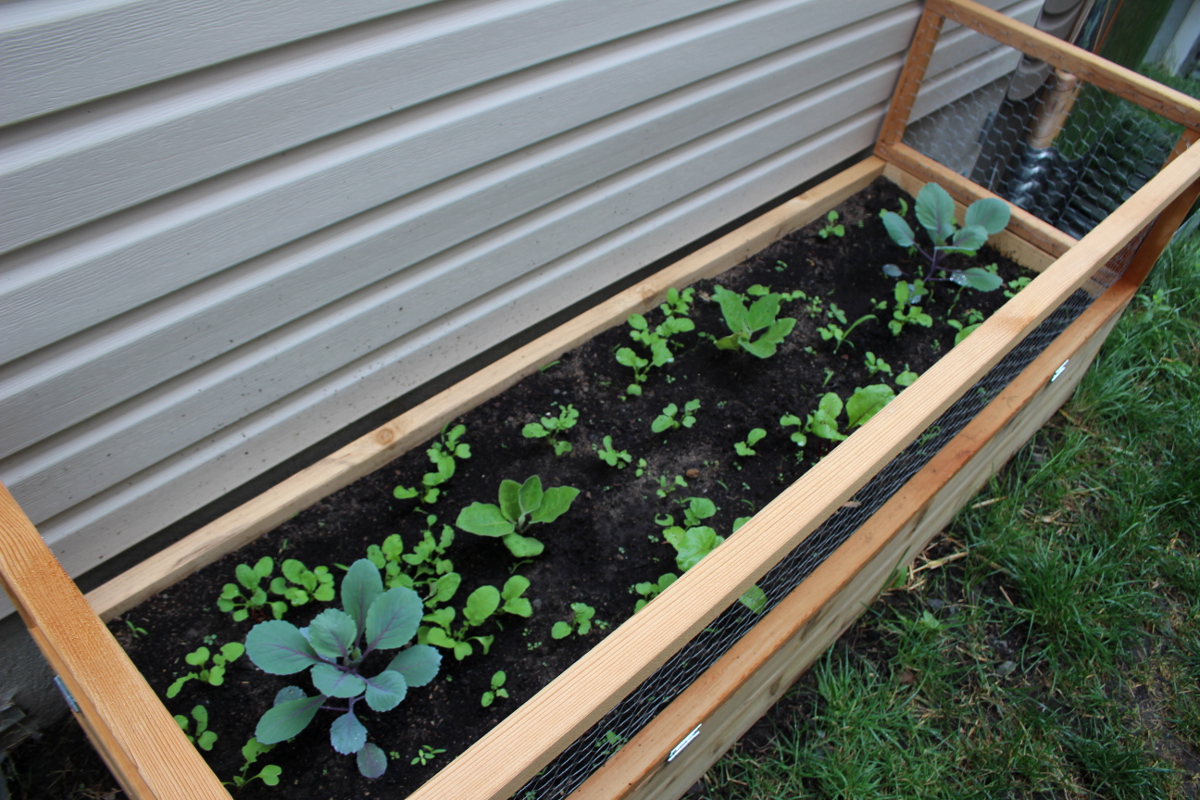
On the other side of the house, where it’s sunny for a part of the day, we’ve built bigger boxes protected from rabbits, to grow tomatoes, cucumbers, eggplant, beets, cabbage, and radishes.
Do you have spaces around your house that you can use to grow food?
Often, we have quite a bit of space available on the sides of houses – space occupied by unsightly bulging appliances, window wells, utility meters, and seeded with dying grass. I see a great opportunity to convert these unused areas into bountiful growing space.
Last year, as an experiment, I have dug out a small patch on the mostly shady part of the house. The going was tough, since our soil is a very shallow layer of clay and rocks. It felt like I was working ground in Ireland, extracting lots of rocks to make the soil to be of any use and piling them up into a rock border around the dug out patch. I added some good soil we brought in for the herb spiral and planted some lettuce there.
In a month or so, with minimum maintenance, we had four lettuce plants, supplying us with salad greens. I considered it a successful test of this planting area.
This year, I’ve decided to maximize the growing potential of this strip of land, and after discussing it with Gavin from Edible Landscaping Ottawa, we’ve decided to put in two raised beds filled with good soil and compost. After working on my front yard during a hot day, Gavin noted that the space closest to the front of the house was getting at least 6 hours of sun, making it a good location to plant not just greens but sun-loving vegetables. Thus the following plan was born (click to enlarge):
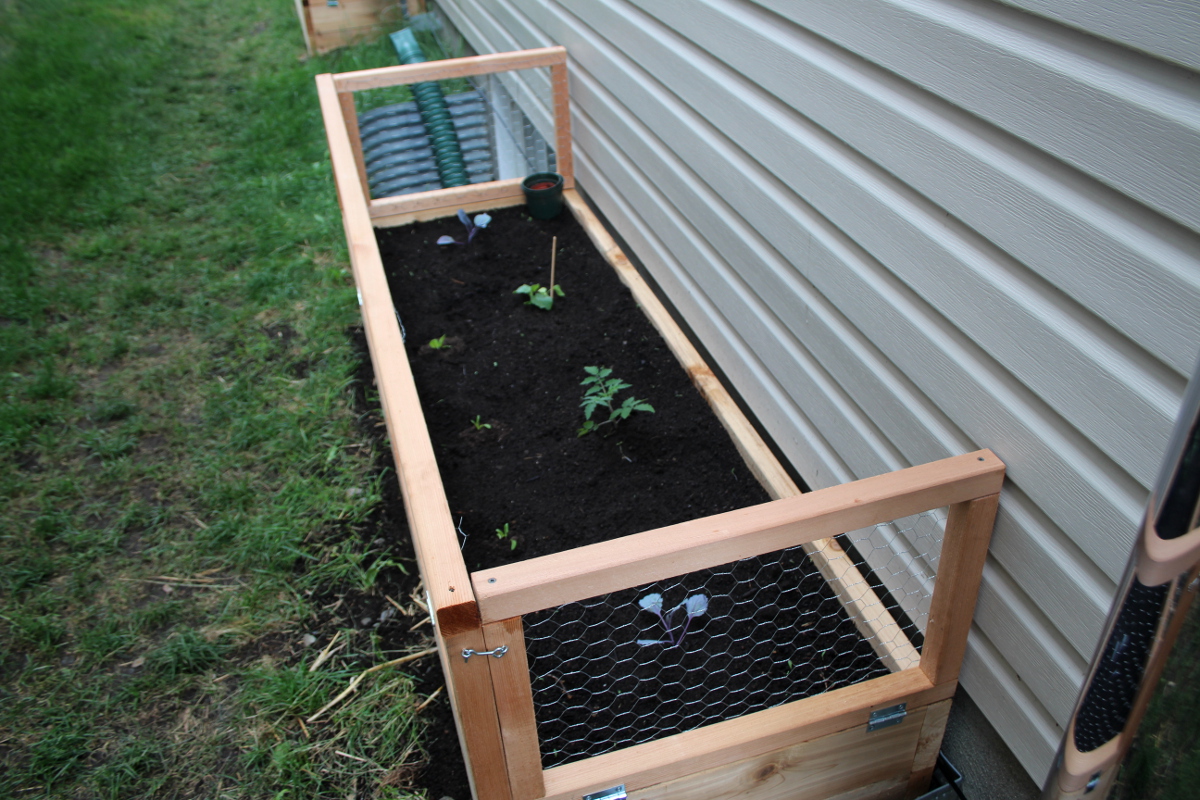
Since our most frequent mammal visitors in this area are rabbits, we’ve decided to add frames with wire on top of the raised beds, to prevent them from hopping on to enjoy the cabbage. The sides are locked with latches and can drop to provide easier access to the soil.
Here are the two beds right after planting cucumbers, tomatoes, eggplants and cabbages (radishes were not in yet):
And here are the beds about a month later, with cages for tomatoes and a small trellis for cucumbers. The first box is the one getting the most sun.
The tomato and the cucumber plant in the second box were not happy, so I’ve replaced them with two eggplant seedlings. The cabbages, beets and the radishes are growing well.
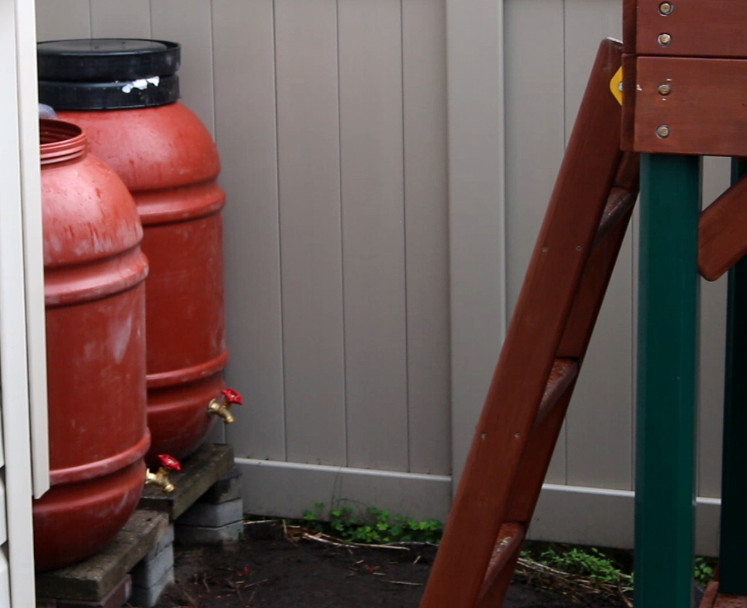
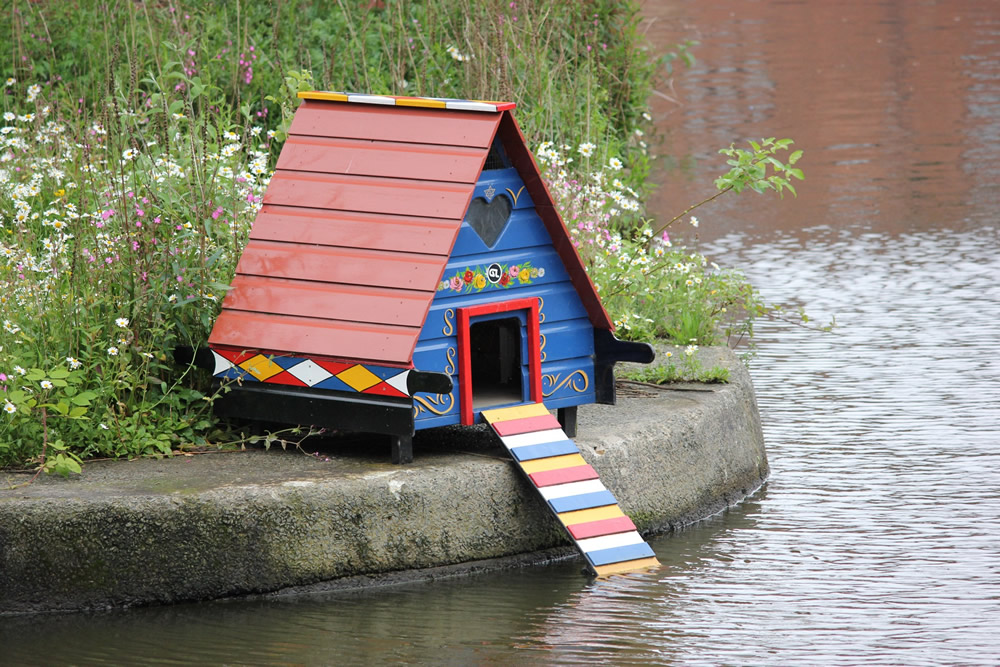
Another options is to use the smaller spaces for rain barrels – you can use the water to irrigate your garden. I have seen people having a staircase setup, where each rain barrel is lower than the one before. They also make beautiful ponds:
Consider the spaces around your home that you are not using. If they are in the sun, you can plant herbs, scarlet runner beans, cabbage – all of these make for beautiful plants. If they are in shade or part-sun, think lettuce, kale, arugula, other greens. Reclaim small spaces to grow your own food.
After long winter months dreaming about the wonders of growing my own food, I have finally completed my edible landscaping project. Where nothing but a useless lawn, more brown than green, has been taking up space, I now have a beautiful dry river bed snaking between two vegetable and herb beds in full sun. Along the side of the house, there are two raised beds soaking up more sun. On the other side of the driveway, there is a row of berry bushes. And in the back yard, there are three layers of planting spaces with raised beds, herb spiral, and trellises. I now spend most evenings outside, grounded in taking care of the plants and reveling in all their splendour.
Come along, I’ll show you my front yard right after the landscaping and planting was done:
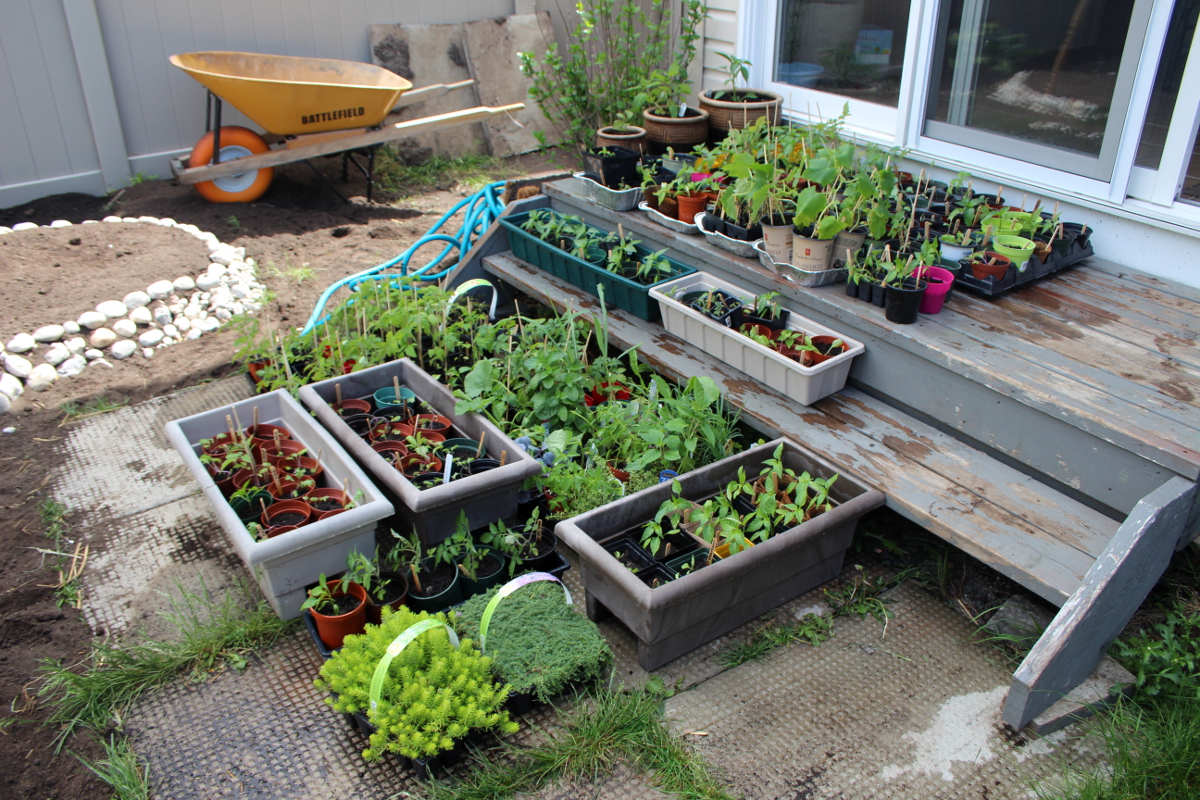
And here is the back yard – you can see the initial space right after the raised beds were built and seedlings planted, and the same space now, a month later, lush with greenery:
Let me take you on my edible landscaping journey and show you how all this was built.
I have met with Gavin from Edible Landscaping Ottawa in early April to discuss the tentative plan. Once he was available, we have worked back and forth via email, before we have come up with a more specific plan. The next step was to acquire locates for city services (“Call before you dig“) – gas, electricity, internet, phone, to be sure we don’t bust a cable or a pipe when digging. Gas and electricity were promptly marked. Phone and internet cables were not. It appears, it’s cheaper for the telecom companies to come and fix the cables if they are cut than to try locating them beforehand.
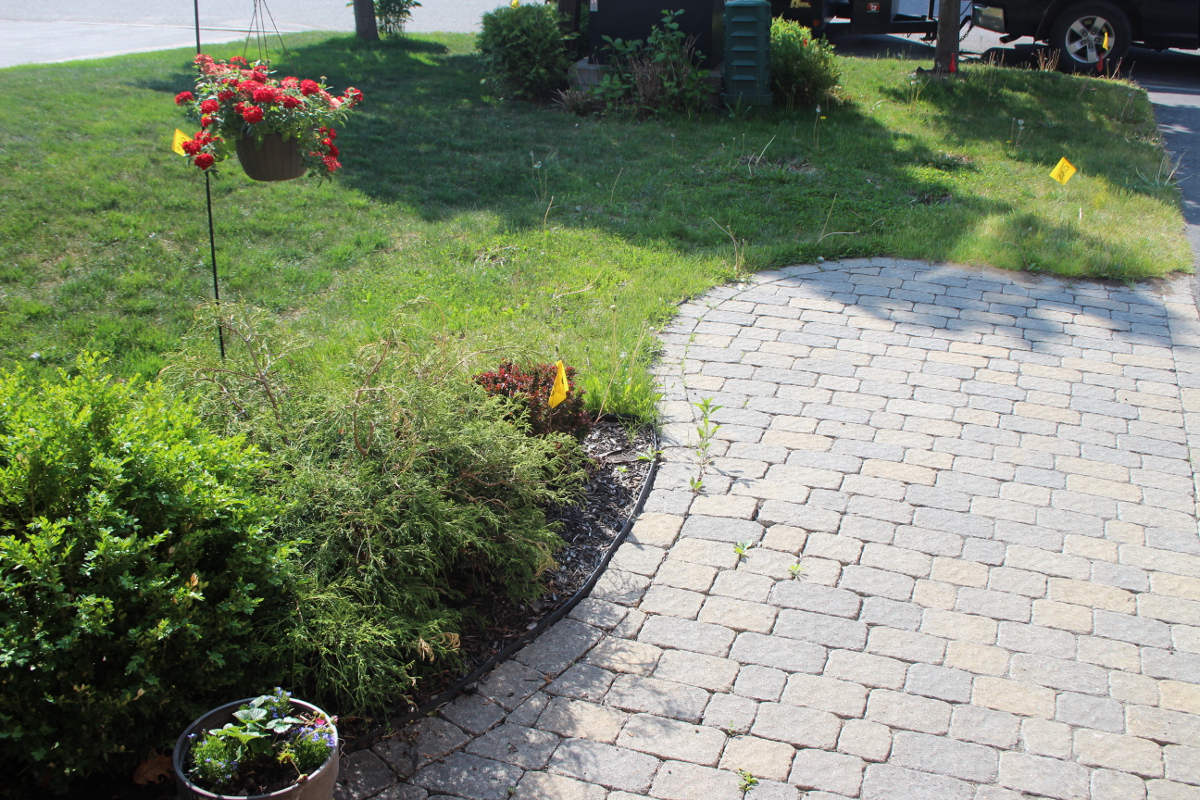
Here is the space in front of the house with yellow and red flags marking gas and electricity. This was our canvas.
Once we have decided on the plan, Gavin had sourced the materials – river rock and garden soil, both from Greely Sand and Gravel.
I have drawn my garden plan on a large sheet of white paper, and have been updating it as we shaped the landscape and put plants in the ground. Later I have transferred it into the Garden Planner format (albeit not to scale, since I find the smaller plan labels unreadable):
I got a beautiful giant geranium plant with lilac-coloured flowers, to create a house facade centerpiece.
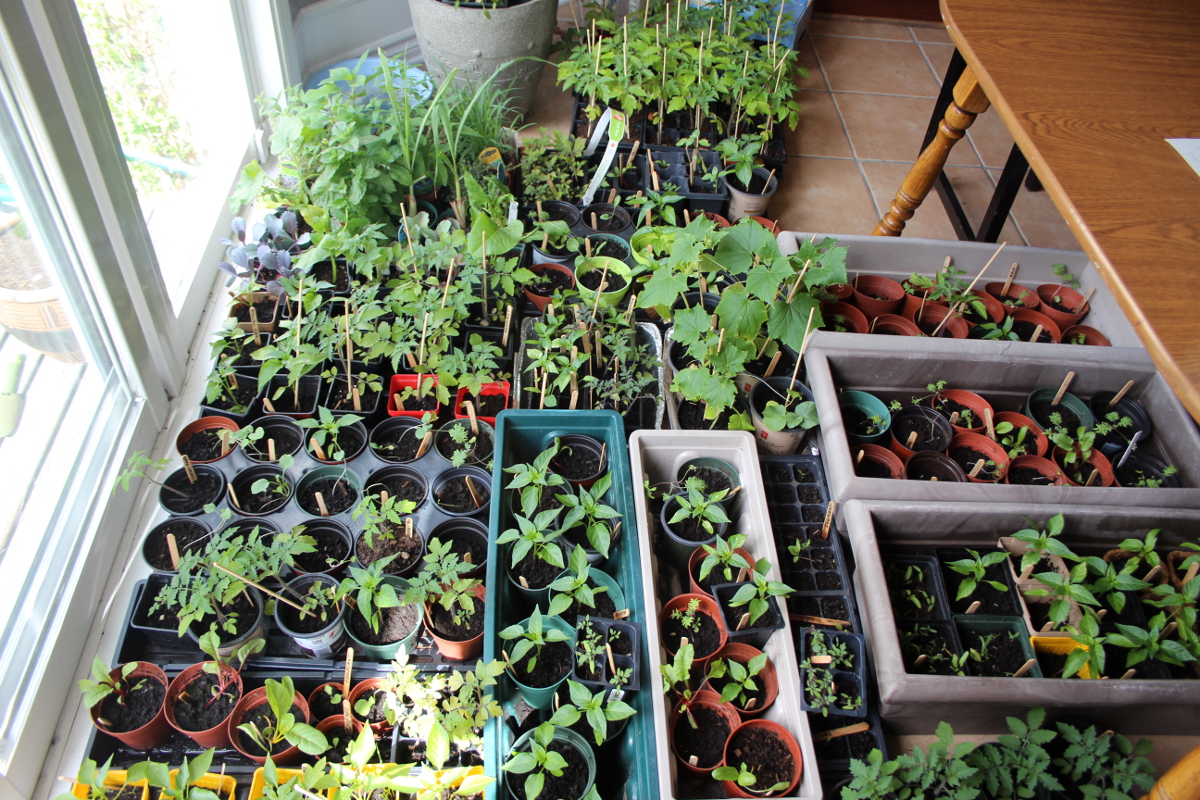
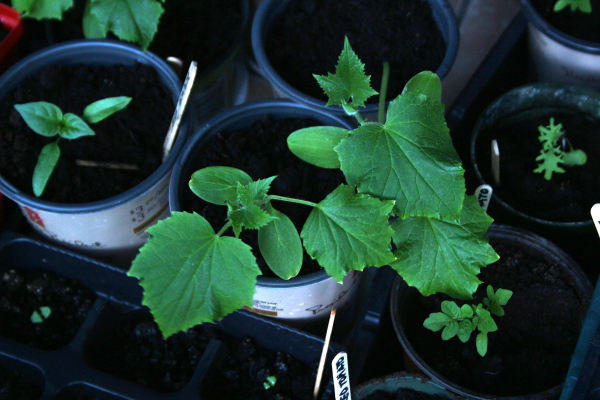
In May, I’ve been taking the seedlings outside each morning for more hours each day to harden off. I would water them outside, let them soak up the wind and the sunshine, and then bring them in for the night.
On May 24th, the digging began. First two days, Gavin was digging with the excavator to remove the soil full of clay and rock. In the process, the internet cable got cut, since it was not marked, and I had to call TekSavvy to arrange a replacement for it.
Meanwhile we were planning the back garden, setting cardboard squares cut from a rescued curbside headboard box where the paths were to be, to kill the grass and make it easier to split the garden into separate beds. I really like my herb spiral with the small pond, so I have decided to keep it and place the raised beds around it.
On the third day, we put in the dry river bed with a pond and two raised garden beds in the front. In the near future, I shall write a detailed post on the construction of the river bed. The water comes from the roof and flows between the garden beds, pooling at the end in the little pond before it flows out. The river bed acts as a path to get access to the plants in the garden beds, and walking on rocks does marvels for your feet (especially in this day and age when we spend so much time on flat hard surfaces like concrete).
Here is Josh from Edible Landscaping Ottawa filling in the round pond by following the outline I’ve set with the river rocks.
Then we planned and planted the bed on the other side of the driveway. The lilac tree got replanted here from the back garden to free up space there and provide a vertical accent here. Gavin planted the blueberry and currant bushes (one of the black currants was replanted from the back yard as well) and I have added crushed eggshell to the soil to boost its mineral content.
While digging to plant the lilac tree, we have found the unmarked phone line which promptly left us without the home phone.
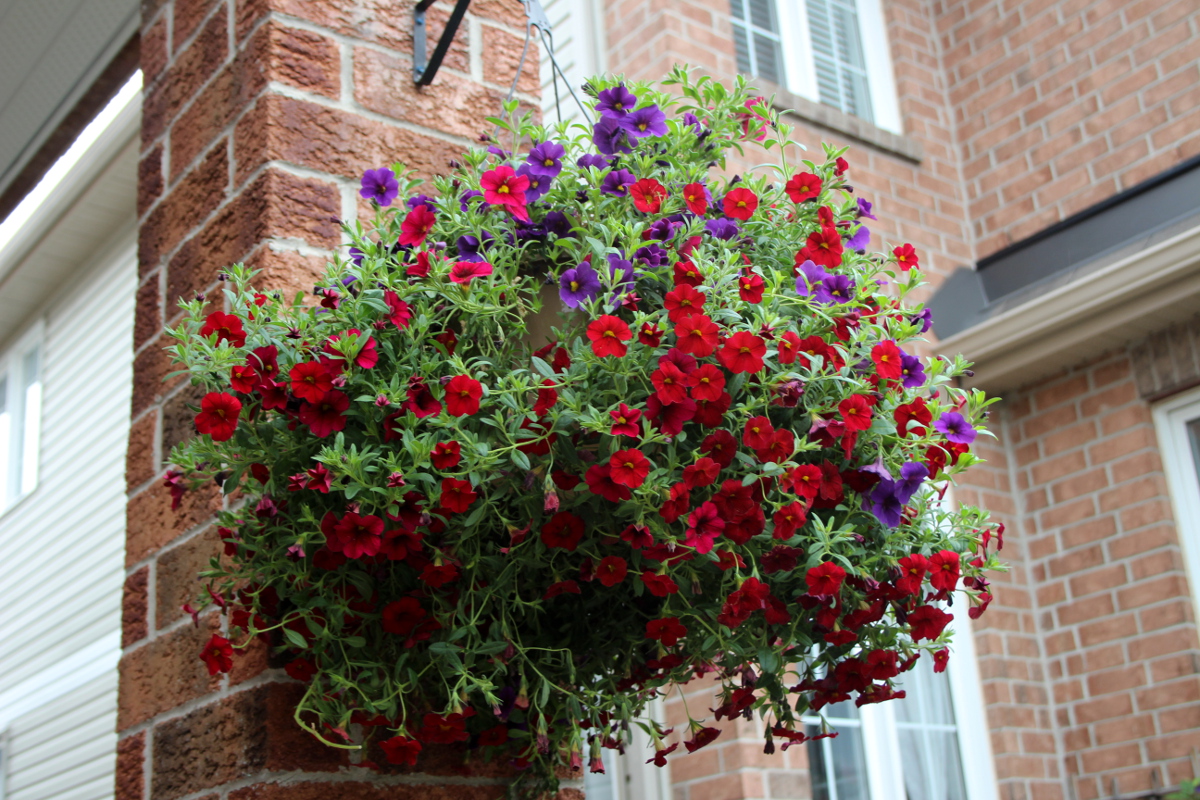
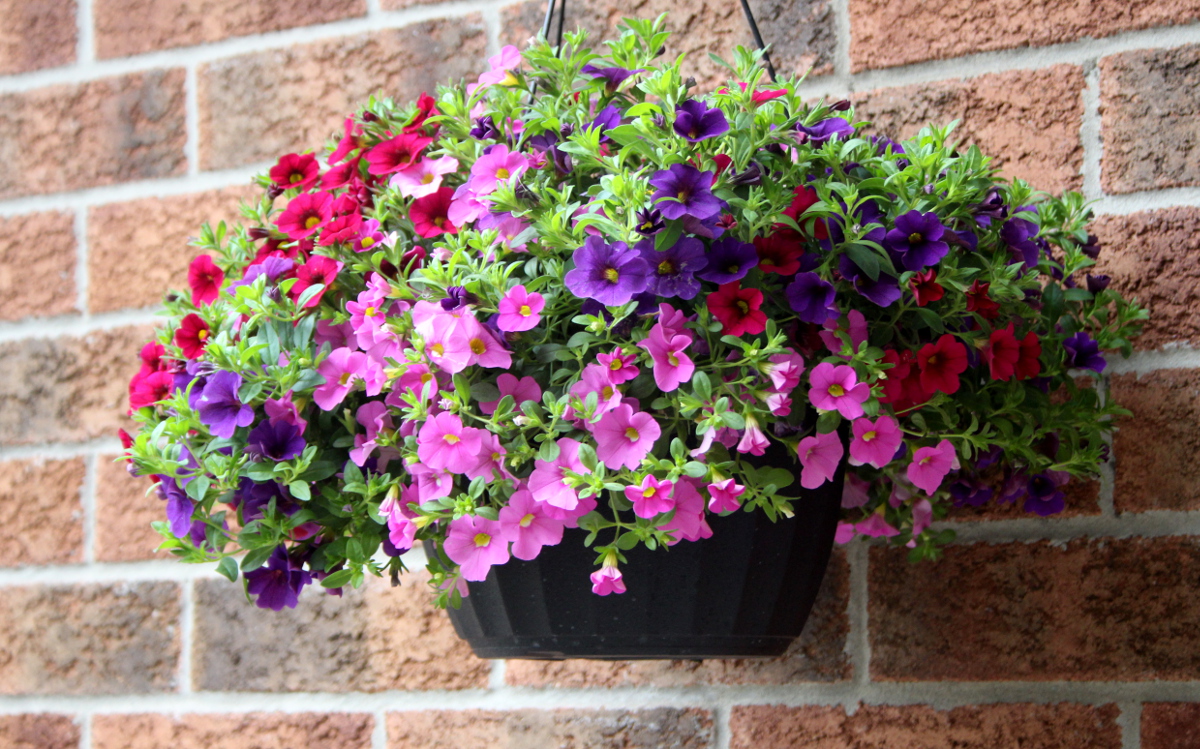
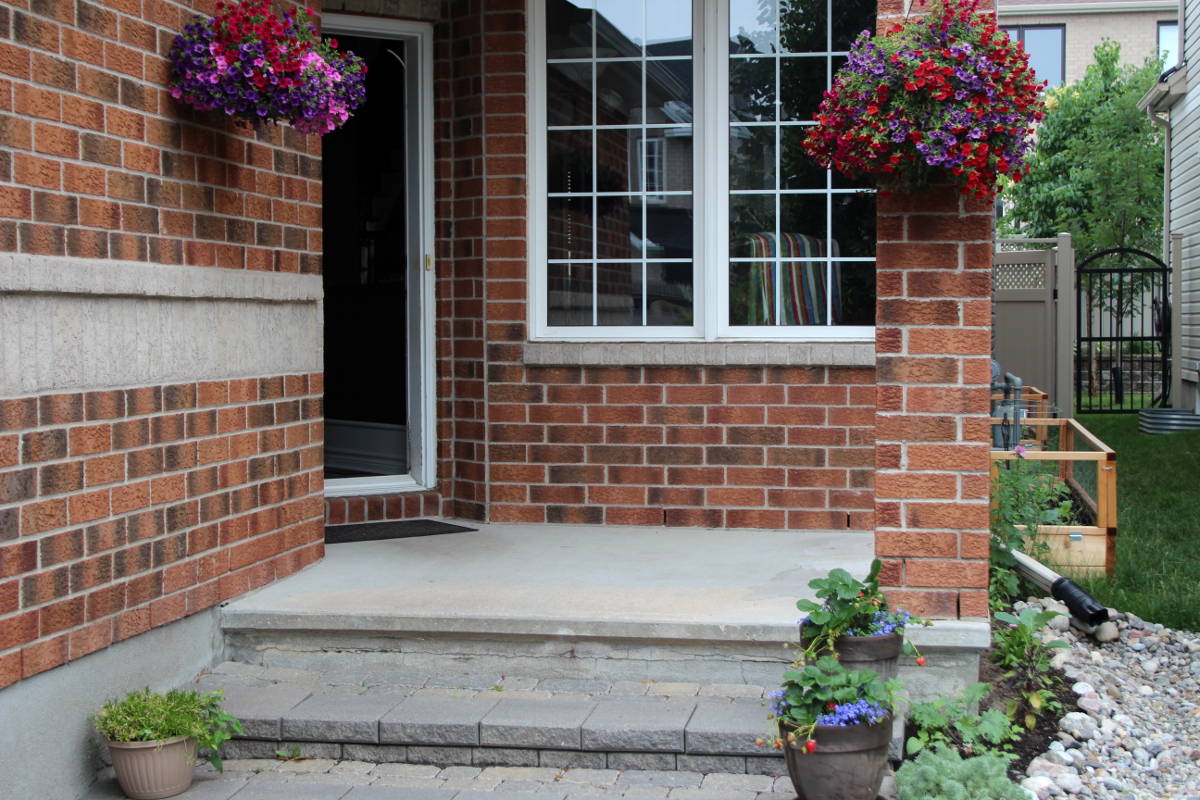
Then we hung the flower planters. I love those Irish pub-style hanging baskets where small flowers quiver with the wind in one giant colourful blob.
This one is a wanna-be pub basket, we shall see how it grows in the next while.
We have also created a curved bed around the front tree for ornamentals. I shall also plant bulbs here, come autumn.
Next we put in the raised beds on the sunny side of the house and added soil. The sides are made with wire to prevent rabbits hopping on and munching on plants.
Then we have added mulch to the circular bed under the tree and the bed containing bushes, replanted perennials (chives and mini-phlox) from the back yard fence to decorate the river bed. We’ve installed the topiaries for beans and peas to climb, and the shepherd’s hook to hang a red verbena flower basket on it.
Gavin’s work in the front was done except for a part left incomplete, since we needed to be able to keep a path open for a wheelbarrow, to bring rocks and soil to the back yard. It now was time to plan the back garden which we were going to do on our own, having participated in and learned from the construction of river rock beds in the front.
First step was arranging the removal of the weeping elm tree by offering it for free on kijiji and facebook, via a cell phone plan since we were still without an internet line at home. As much as we liked the tree aesthetically, it was taking up a huge amount of space, shading a large part of the garden and not contributing to the food production. The offer went out and we settled to wait for a response.
Gavin and Josh have removed the ornamental bush behind the play structure to place rain barrels. That evening, a couple came by to try removing the weeping elm. They dug out the roots, but were unable to move it out of the yard, due to the narrow gate topped with a bar. They took an offshoot instead.
Fourth day, we found other people interested in attempting the removal of the weeping elm. It required four of us to maneuver and carry, and a trailer to transport. We had to disassemble a part of the garden gate to safely carry it through. Hopefully, the tree gets a second life in a bigger yard.
In the afternoon, there was pouring rain, which made for a great first test of the incomplete river bed, and it passed with flying colours. We had to run in the downpour, covering the dirt pile with a tarp and picking up the cardboard in the back garden that the wind was blowing away. That was a refreshing day.
On day 5, we planted two dwarf cherry trees and after have been working for two days to build the raised beds in the back yard, fill them with soil, and water it so the soil settles.
I have also built a raised bed behind the tree along the fence, to maximize on planting space. The rest of the space along the fence was going to contain raised cedar beds built by Gavin.
To take a break, we went on a trip to source organic seedlings and seeds from Greta’s Organic Gardens. Kids loved the trip – they got to play with tadpoles, feed grass to chickens, and watch fish and frogs in a pond. Inspired by water features at Greta’s, we got a water hyacinth to place in the herb spiral pond. For the next couple of days it was floating around in circles like a tiny boat, until it grew to fill the pond.
Then the kids were climbing the dirt and rock piles on the driveway and helping me by spreading dirt evenly on the asphalt and bringing me rocks. Meanwhile, I was working on the rock borders for the berry bush bed and, on a whim, put in a spiral design in the front. I have also adjusted the contours of the dry river bed and front raised beds with more river rocks, to strengthen the places the rain revealed.
Seventh day, Gavin and Josh brought raised beds for the back yard fence, installed them and filled them with soil. They have also installed sunken beds for the shady side of the house, filled them with soil and planted raspberry bushes.
Then they installed rain barrels (formerly used for bell peppers), connected them with a flexible pipe, to create communicating vessels, and installed the taps to let the water out.
Then Gavin and Josh completed the front landscaping and the dry river bed, now that a wheelbarrow need no longer go through.
I have modified the drawn plan to include the actual shape and location of all beds. Our phone line was replaced, first with a temporary line and then with a permanent one, breaking a large lilac tree branch in the process.
That day, or rather during the night, by starlight, as the kids slumbered peacefully, I planted out the seedlings.
It was magical to be planting in the cool night air, in the silence and quiet – it made for a great meditative experience. Front vegetable beds, more herbs to spiral, back fence beds and 3 out of 4 raised beds were filled. I have left the last bed to be seeded with greens.
I have also planted out herbs and greens into the front garden and planted more scarlet runner beans under a topiary in the back garden.
In daylight, I added more thyme and sedum among the rocks of the riverbed.
I have built another small raised bed along the back fence to maximize planting space and have put a black cherry tomato in it. I planted mint in pots to place in front garden where the soil is too shallow for anything else to plant. Mint spreads quickly, so I prefer keeping it contained.
As I planted, I’ve been updating my paper garden plan, to keep track of what had been planted where.
A temporary internet line was put in, wrapping around the house. You can see it in the video, snaking through the river bed. The people who came to put it in were reckless, trampling plants in the process and stubbornly reciting the same mantra in answer to my every question until I started following them around the garden and pointedly asking them not to destroy anything else.
Eighth day, I filled a long hanging coconut fiber planter hooked on the porch steps and planted garlic bulbs into it. The containers lined up on the back porch got a cayenne pepper plant, pineapple sage, and a sprouted acorn or nut we have found – of which we are still not sure whether it is an oak or a hazelnut. Squirrels bring many treasures into our garden.
I have planted radish seeds throughout most vegetable beds, since the radishes will mature long before the other crops will need the root space. I have seeded the fourth remaining back garden bed with different types of lettuce, arugula, bok choy, spinach, kale, mustard greens, mesclun, and have updated the garden plan to reflect the actual distribution of seeds.
I had lots of seedlings left over, and the next day our neighbourhood hosted a garage sale, so I took the evening to prepare for it.
In the morning on the ninth day, I have sold 16 seedlings, 5 puzzles, and a samovar at the garage sale. We have spent the evening relaxing with friends in the Rideau River Park, where kids were catching frogs, splashing in the river and delighting in all things nature.
Tenth day, I weeded the garden and sourced broken flagstones as garden stepping stones from a landscaping centre. I picked them in pouring rain with an injured ankle (nothing like a few obstacles to make things challenging) and placed them in the garden in between the beds, interplanting with thyme. We’ve installed the solar fountain which birds like so much.
After, it’s been maintenance, watering, weeding and watching the plants unfold. A much more attentive and professional team came by to replace the temporary internet line with the permanent one. They cleaned up after themselves and reconstructed the small part of a garden bed that was disturbed in the process.
I have spent about a week to distributing remaining seedlings to people who wanted them – to friends, colleagues, and like-minded mamas from Pathways Connect. Kale was gone fast. Peppers and tomatoes were going well – to be planted in pots in an apartment, and in gardens across the city.
We have also replaced a giant decorative bush in the back yard with an elderberry bush.
We got goldfish for the rain barrels and the herb spiral pond. Goldfish are good for consuming mosquito larvae that accumulates in standing pond water. We have taken another trip to Greta’s for the end-of-season sale, and picked up a water lily for a third pond, which we had temporarily placed in a rain barrel.
Then we acquired and installed more hoses to provide coverage for all the garden beds.I also picked up a larger pot for a patio pond, transplanted the water lily and one of the water hyacinths there, and got a goldfish to inhabit this pond.
The next day, I have added peat moss to blueberry bush soil, and added crushed eggshell and worm castings to vegetable beds. The last stage was to build bamboo trellises for grapes, cucumbers, tomatoes, and pumpkins.
The project is still on-going, and will be so for the rest of the summer. We would still like to seed moss and/or clover in remaining places where grass used to be to create a pleasant, low maintenance coverage. But that is to come later.
Now I am enjoying my lush garden of greens, herbs, berries, vegetables, and flowers.
What do you see when you step outside your door? Do you have blooming and growing things to calm, delight, and inspire you?
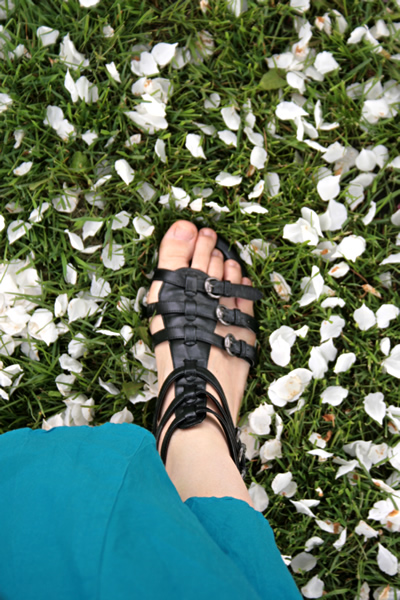
It’s that time of year when we are getting out of bulky clothing and warm boots, wiggling our toes in relief and looking for light and comfortable footwear. I rejoice at every chance to go barefoot outside. Feeling the soft earth and silky grass under my feet is divine. However, living in a city, the reality is that for any trip further than to a nearby park, some sort of footwear is a necessity.
For a few years now, I do not wear heels, aside from dressy occasions. Heels perch one at an angle to the ground, putting the entire body in a state of constant compensation to keep itself upright. Wearing heels shortens the calf muscles and plays havoc with your back, all the way up to your shoulders, neck, and head. Add to it frequent bouts of sitting that comprise our day, and the impact of heels is amplified.
If you want to get the details on how heels change the loads on your body, I highly recommend Katy Bowman’s Every Woman’s Guide to Foot Pain Relief: The New Science of Healthy Feet. It’s a most enlightening read on proper body alignment, gait, and how our footwear affects everything in our musculoskeletal system.
The problem is that most footwear on the market (including children’s footwear, which is alarming) has a positive heel. Any heel will alter the way your body is aligned, even an inch makes a difference, and the shorter the body, the more impact the same size of a heel has. Most running shoes have a heel too. It is a challenge to find flat-soled shoes in mainstream outlets, but they do exist. Katy Bowman has a great list of minimal summer footwear on her blog, Nutritious Movement: Shoes, the Summer list, and another talking about flat-soled solutions for children: Your child might be wearing heels, right now.
I’ve ditched my heels over 5 years ago now and it has made a huge difference. I’ve always walked barefoot at home and whenever I had an opportunity to be on a beach, in a park, or anywhere without concrete littered with broken glass and other debree. Now when I do have to wear shoes, I opt for Vibrams. My favourite is the Alitza model – an elegant, yet minimal design. I also own the Classic Vibrams which are basically five-finger slippers. I find them comfortable, although for me nothing beats the comfort of bare feet.
Take a look at the heels in your shoes. Have they been distorting your body position for years now? Could they be exacerbating stiffness, discomfort, or pain in your body? If so, I would suggest trying to lower your heels to the ground. It’s not necessary to get expensive footwear right away. Check out a second-hand store and see if you can find a pair of cheap, truly flat shoes to try out. You can also make your own minimal shoes (see Shoes, the Summer list). Keep in mind that if you’ve been wearing heels for a long time, it might be hard to go directly to flat sole. Give yourself a time to transition, lower your heels gradually.
Check whether your feet are being overly squeezed by a narrow toe box (most people’s are). Look at shoes that allow your toes to spread comfortably. The more you squeeze your toes, the more the other parts of your foot have to compensate for the load that is normally distributed through your toes. That’s how bunions often form, and the only solution mainstream medicine has been able to offer is repeated surgery. Flip-flops are not great either, since they make your toes have to grip in order to keep the shoe on, once again making the rest of the body compensate for it. You can modify a flip-flow, however, to add an ankle strap that will hold the shoe on your foot without the need for the toe-gripping action.
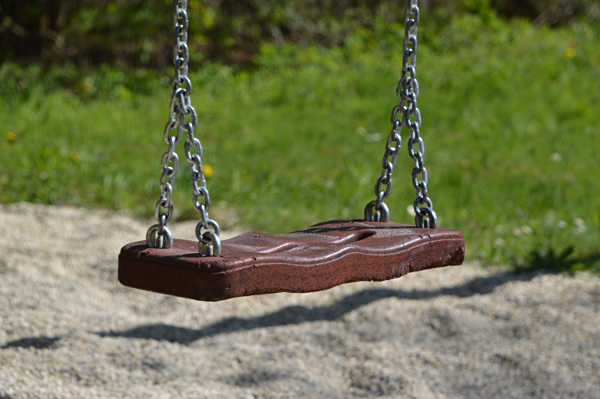
This summer, try going barefoot, even if only on grass or sand. Take your shoes of at a park, a beach, or in your garden. There are many tiny bones and muscles in our feet, they get stiff stuck inside shoes for long periods of time. Let them stretch. Try picking up a stick or a pebble with your toes. Children’s playgrounds often have a variety of surfaces – sand, grass, cedar mulch, bare ground, pebbles. Instead of sitting on a bench while your children play, test the ground with your bare feet and let your feet explore a variety of textures.
Where would you go barefoot? What are your choices for healthy, comfortable shoes?
This week I take the first steps to start the garden, and it’s exciting as ever, since we have a new space to shape.
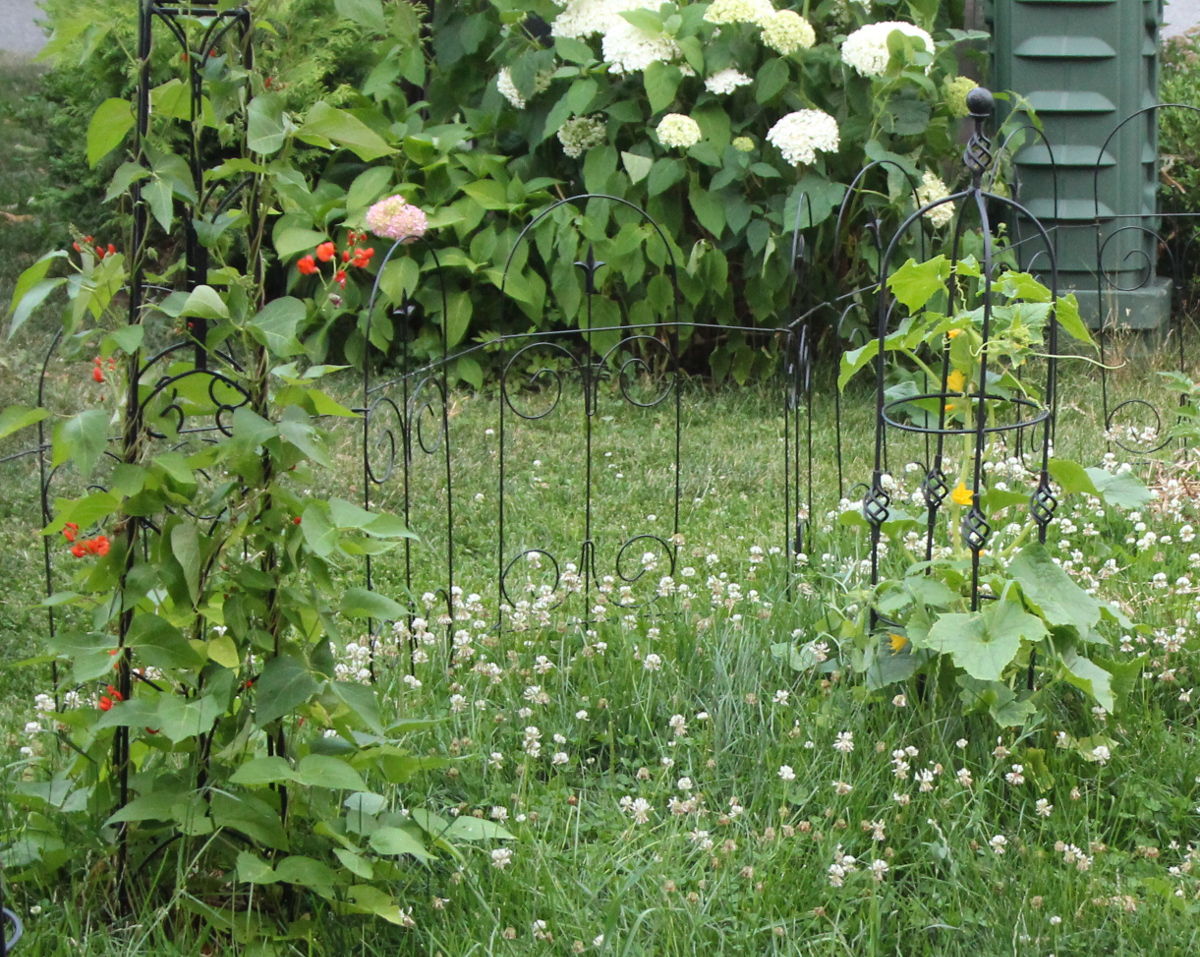
We moved to our new place last May, our hands full with ready-to-plant seedlings, and aside from recreating two permaculture towers, our only experiment has been designing and building an herb spiral with a small pond. The rest of the garden was topped with organic soil and straw mulch, and had accepted all of our seedlings. Lots of them got devoured by the local hungry fauna, and some did not survive the harsh soil full of rocks and clay, but we still got a good harvest of beans, greens, some potatoes, lots of herbs and an insane amount of tomatoes. Our black currant bushes did not have any trouble with being transplanted, and the grape vine is still considering whether it likes the place.
Now we need to think about landscaping our front yard since we do not want to maintain a lawn, and the soil is so bad that raised beds are a must. We want to use all the available land in the front of the house to grow food, as that area gets the most sun. The sides of the house are also not currently being used, so beds of greens and, perhaps, raspberry bushes would be great. The side of the driveway that is a strip of unused lawn would also be great for berry bushes. And it’s time to build some trellises to use the vertical space the back yard fence provides. Lots of possibilities.
This year, I have met with Gavin from Edible Landscaping Ottawa to help us figure out what is feasible to do in our space, with considerations of sustainability, cost, and aesthetics, using permaculture principles wherever possible to maximize the food-growing potential. The meeting with Gavin was very constructive and informative – it’s rare to meet someone who combines passion for growing your own food with building beautiful and functional spaces to make it possible. He did not hesitate to address any of my million varied questions on design elements, construction processes, relevant local regulations, timelines, planting specific crops, installing rain barrels, vertical gardening, soil composition, working with existing infrastructure, wildlife management, and more.
After this first conversation, Gavin took the necessary measurements of the property, got my rough plan of the garden, and promised to get back to me with the design, including materials and costs. In the meantime, I’m starting seeds inside. After a long winter, it feels so good to get back to sinking my hands into the soil and watching little green shoots reaching out to the light.
It has been a while since I have posted on the blog, and for a good reason: life has been quite a whirlwind, and it took all of my time to apply the principles of productive zen to ensure my family got adequate rest, good nutrition, quality time together, and still had time to have fun, despite the significantly-increased level of work.
In addition to my day job and overtime, I have also been working on a puzzle database solution, to consolidate and better classify the hundreds of assembled jigsaw puzzles in my collection. The new system will allow me to more effectively share puzzles and group them by number of pieces, topics, manufacturer, and series.
A little while ago, I have opened a Puzzle Den Ottawa Facebook group for people who wish to borrow or purchase used jigsaw puzzles from each other in the Ottawa area. Many a time, we put a puzzle together and do not wish to preserve it, leaving the puzzle sit in a box until that unlikely time it will be assembled again. This group lets us extend these puzzles’ lives and share them.
In the meantime, I have not stopped assembling puzzles, as that is one of my favourite ways to spend winter evenings after the kids go to sleep. Coupled with a good audiobook and a hot cup of tea, these are the quiet moments of contemplation and rest. I’m planning to get back to posting puzzles and productive zen tips again, so stay tuned.
I dislike the traditional markers of Black Friday, when crowds of people crash through the doors without a care for injuring each other, to snap up deals on cheap, poorly-made consumer items they often don’t need, only to throw them away within a couple of years, to repeat this again and again. It wastes resources, chisels away at our humanity, and does not make anyone truly happy.
There are organizations calling for a 24-hour no-shopping strike during Black Friday, but that seems pointless. 24 hours will not solve the issue. It also is wasteful for those of us with children, because this might be the only time we can afford to get them cloth diapers, baby carriers, good quality clothing and footwear (and that’s important at -30°C here in winter), shampoo that’s not full of toxins, and toys that are not plastic junk.
So I say: rethink Black Friday. Don’t shop large retailers unless you are buying exactly what you need. Instead, focus on small and local businesses, handmade gifts, products made with natural materials and ingredients by caring people. If you are buying gifts for this holiday season, make each one meaningful, and support businesses that enrich your local or mental space.
In that spirit, do visit Etsy. Many artisan shops are having sales. Through my store, Veddma Creations, from now through Monday, I am offering 20% OFF all purchases, Buy-one-get-one-free deals on Blessingway beads, pregnancy tracking necklaces, and keychains, plus a free pregnancy tracking necklace for all orders over $99.
There are also lots of wonderful toys on sale right now. 2016 TRUCE Toy Guide (by Teachers Resisting Unhealthy Children’s Entertainment) differentiates toys that foster creative play and those that stifle children’s imagination. Wooden stacking toys, construction blocks, Waldorf play silks, art supplies, play kitchens, workshops, puzzles are great. Many of them can be found on Etsy, many others – on Amazon, such as the wooden castle blocks by Treehous I’ve had my eye on for a while.
When you do shop large retailers, do it in a smart way. Find out what you need, and focus on that. For instance, Osh Kosh Canada is having 30% off sale + $10 coupon + free shipping on sales over $50. This is an opportunity to buy cotton underwear and pajamas at a substantial discount. When you have multiple children, it does add up.
Look for coupons and get cash back by going through ebates.ca (or ebates.com in the US). It’s not much, but it adds up, and during the Black Friday sales the percentages you can earn are higher.
Well.ca has lots of good sales on natural products. For instance, our favourite Baby Boo Shampoo is 40% off and Nutiva coconut oil 1.6L is $35.69. If you are new to Well.ca, you can get $10 off a $40 purchase if you use coupon code VEDDMA2015 (and it takes $29 to get free shipping). Since we usually buy some of our body care and food staples from Well.ca, it make sense to buy them now, when the prices are lowered.
Through all the frenzy and encouragement from the outside to shop-shop-shop, take a deep breath. Think of what you truly need and what your family would enjoy. Set a budget for each category: food staples, children’s clothing and footwear, toys, books. Pay attention to quality over quantity. It is better to get one great gift with lots of use potential or replay value, than get many cheap, poorly-made trinkets that break or lie forgotten, cluttering up your physical and mental space.
Appreciate the opportunity to cherish beautiful items and support people in your community. Anticipate the joy of sharing the gifts with your loved ones. Enjoy the possibilities and let go of the stress.
Harvest time snuck up on us this year. There were warm autumn days, followed by a few rainy ones, one bright and sunny hot Thanksgiving day, and two days after the temperatures plummeted below zero. That same week, on Wednesday, late into the night, I had to rescue all the tomatoes, peppers, beans, and herbs that I could, and the following Saturday, the rest of the garden followed. Only the kale in the permaculture towers is remaining.
We have grown lots and lots of cherry, grape, and pear tomatoes this year. Moving into our new place delayed our planting of tomatoes. They did not look very happy, so I planted more, hoping that some of them will survive. Little did I know that they all would, and after sitting there unchanging for some time, in two weeks, they went from small bushes into a giant tomato forest, eventually shading the entire herb spiral and pretty much everything else in the garden. They climbed the towers, the trees, the supports, the grape and cucumber vines.
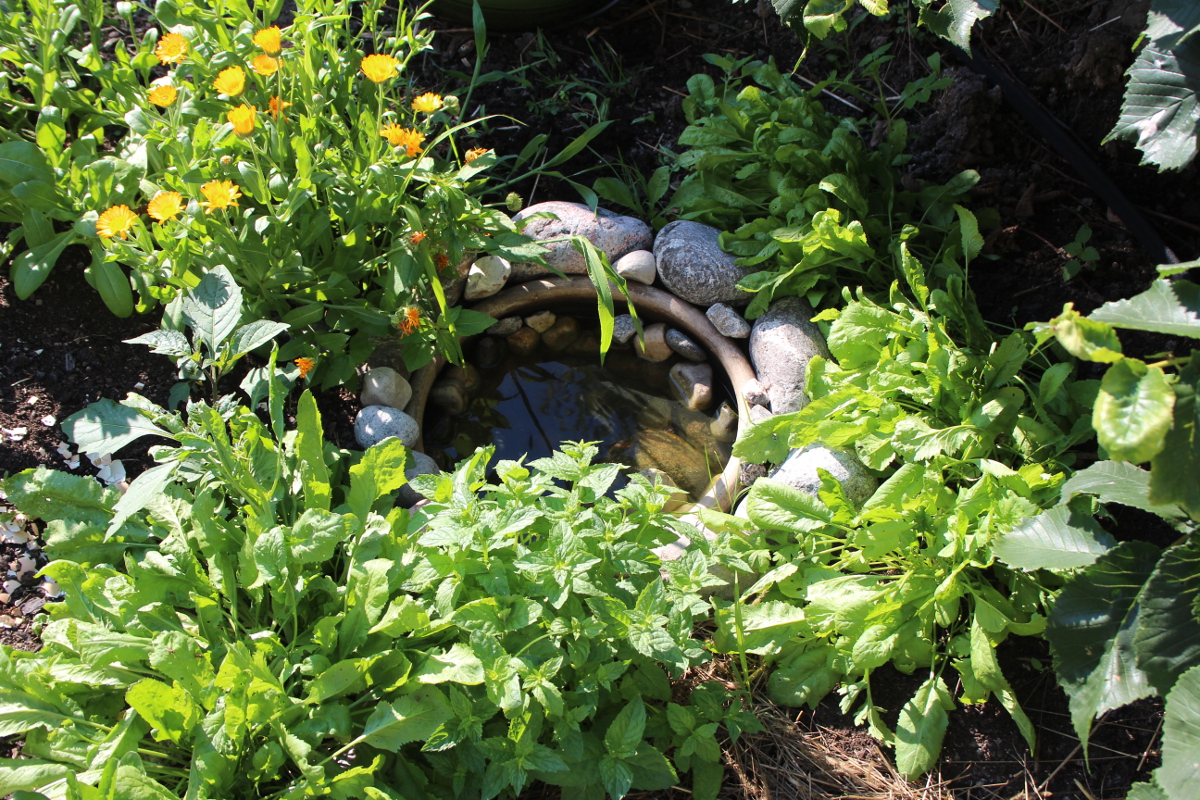
I managed to snap a few photos of the herb spiral before it got completely obscured by the tomato forest.
Spiral in July: basil was being eaten by snails, so I have covered the soil in crushed egg shells
Pond with calendula and Persian cress
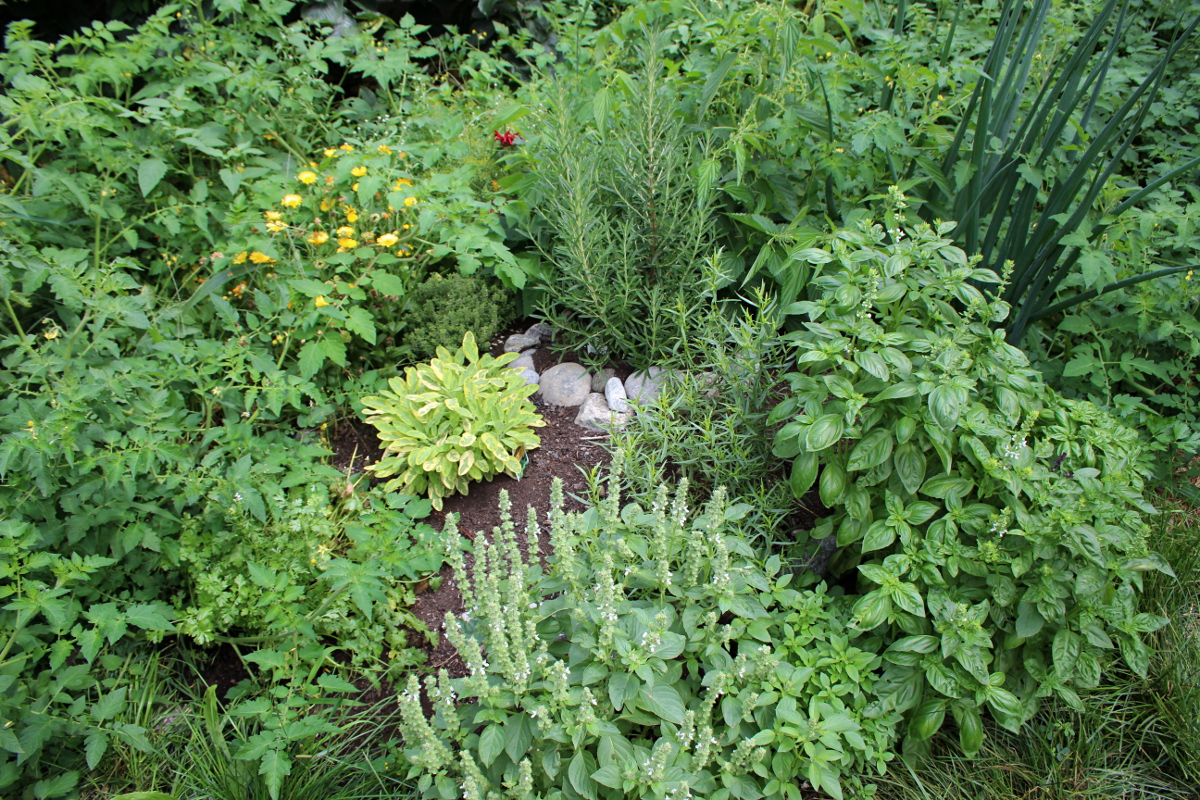
Spiral in August, with basil fully recovered, before being swallowed by the tomato forest
It came as no surprise, since our yard is facing North and plants themselves have created so much shade for their own fruit, that this year we have lots of tomatoes that have not had a chance to ripen before the frost. So, I shall be ripening them inside, off the vine.
Scarlet runner beans loved it in our front yard, and had put out more flowers, despite the cold. It was a wonderfully relaxing activity one cold evening a few days ago, with my two-year old helping me peel them and delightedly playing with the pods.
Scarlet runner beans getting established, next to cucumber vine with yellow flowers
Scarlet runner bean flowers
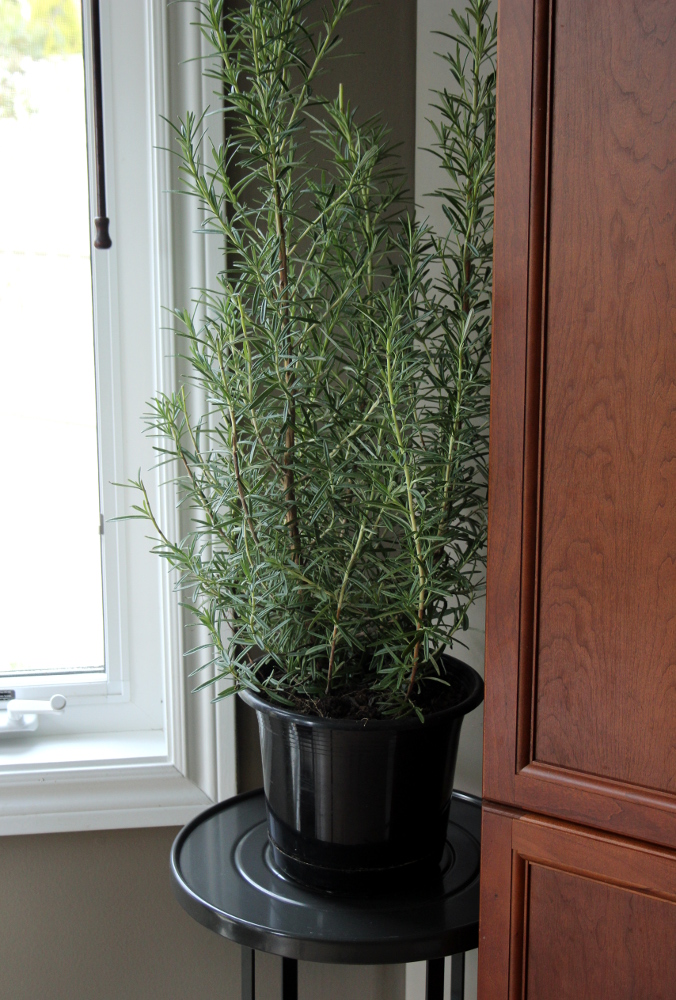
Similarly to last year, I have harvested a huge comfrey plant and have hung it to dry, along with lemongrass and stinging nettle, which is abundant in my new garden. Lemon verbena got replanted, and I’m thinking it will probably shed its leaves just like it did last year. The huge rosemary plant, parsley, thyme and sage got replanted into pots as well. I’ve used basil extensively for cooking, and the pods have now dried, leaving me plenty of seeds.
Rosemary
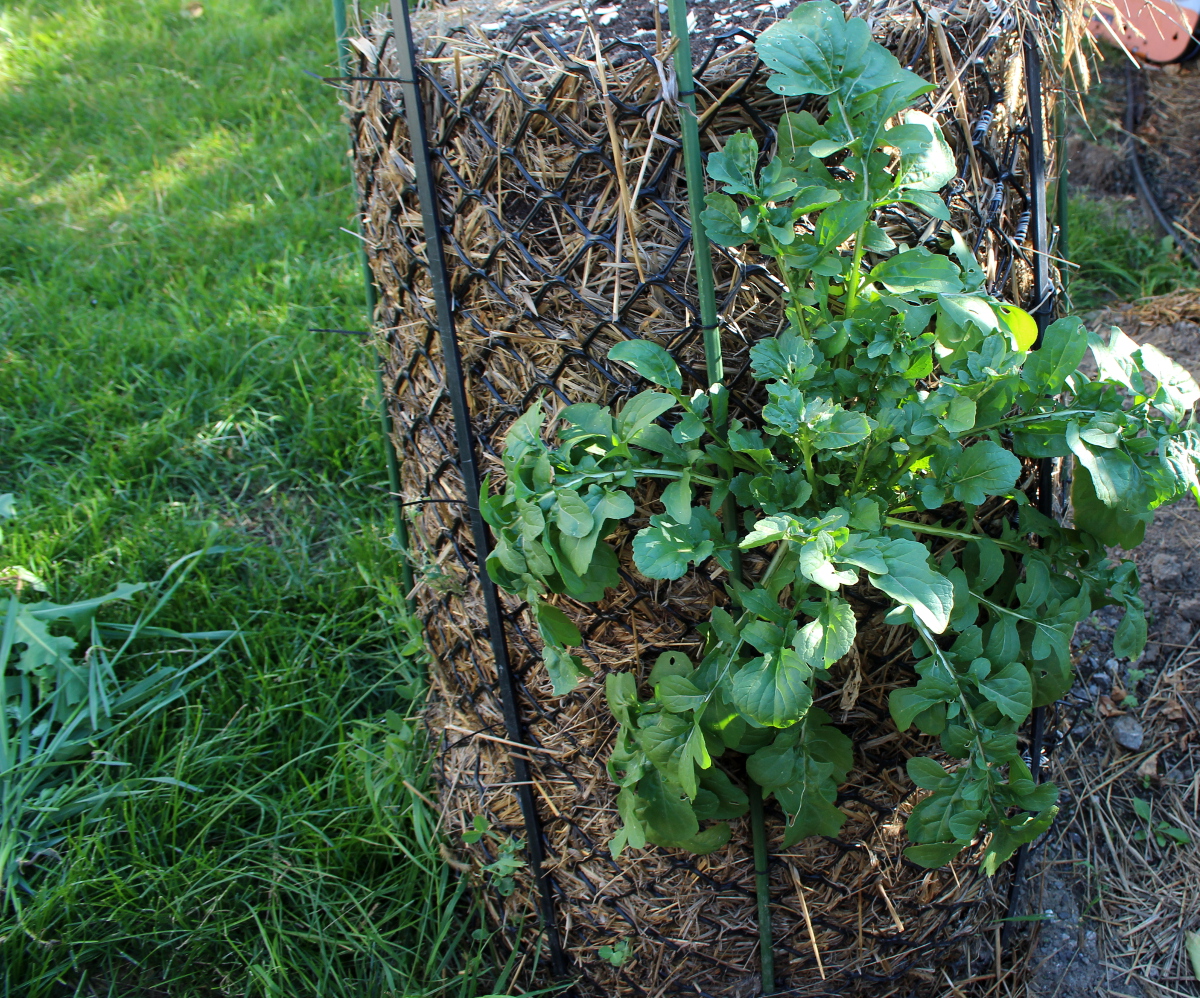
Arugula has given us many delicious leaves over the season, and more now when I have pulled it out. There are lots of seeds as well to save for next year.
Arugula getting comfortable in the tower
I have dug out several potatoes from the two bushes I have planted. They are delicious – most of them have already been consumed. There are some beets and cucumbers, as well as lots of juicy thick green onions I have used in salads throughout the summer, and have now chopped up and frozen for the winter.
Lots of work over the past week to gather and process the harvest. More work to follow to save the seeds for the next planting season. Many thanks to the soil, the sun, and the rain that have nourished our food so it can nourish us.
When a day is frustrating and you’ve had little rest, every tiny thing can throw you into despair. Things look gloomy, there is no light at the end of the tunnel, and all you want is some peace and time to regroup, which seems impossible with work, chores, and children competing for your attention. And then someone breaks a dish, or cuts you off in traffic, or destroys a project you’ve been working on. And you are on the brink of losing it, screaming your head off, or just giving up and walking away. Take a deep breath. Take a step back.
We cannot control other people, and can only control our own environment to a certain extent. What we can control is how we perceive and react to things around us. There will be spills and broken dishes. There will be rabbits and other wildlife eating seedlings you spent many a night nurturing. Someone will cut you off in road rage. You’ll hear snipe, inconsiderate remarks towards you or your family when you are out and about.
Consider whether you want to bring that into your space. Choose when to stand up to it and counter the hurtful comments and when to ignore them. Reflect on why someone cuts you off and what their state of mind is at that time. They are clearly aggressive and unbalanced at that moment — realize that you do not wish to share that feeling, and shrug it off. Clean up the spills and the broken pottery, while realizing it’s a blessing no one was seriously injured. Smile at the critters eating your seedlings — at least, your plants are feeding someone. Perhaps, next planting season, you can come up with a way to keep wildlife from the plants with a mesh until the seedlings are well-established.
In the long term, aim to get more sleep and nourishment, control your environment to encourage a productive and creative atmosphere, and take some time for yourself, to rest and regroup. We often get unbalanced when there has been little time to process all the information that overwhelms us every day.
Let go of what you cannot control and make a difference where you can. You cannot do much about an aggressive driver or a broken dish. You can hug your child, pet someone furry, take a walk outside, thank your garden for bringing you its bounty, even if reduced by sharing with wildlife. Appreciate your reality, and let the small things go.
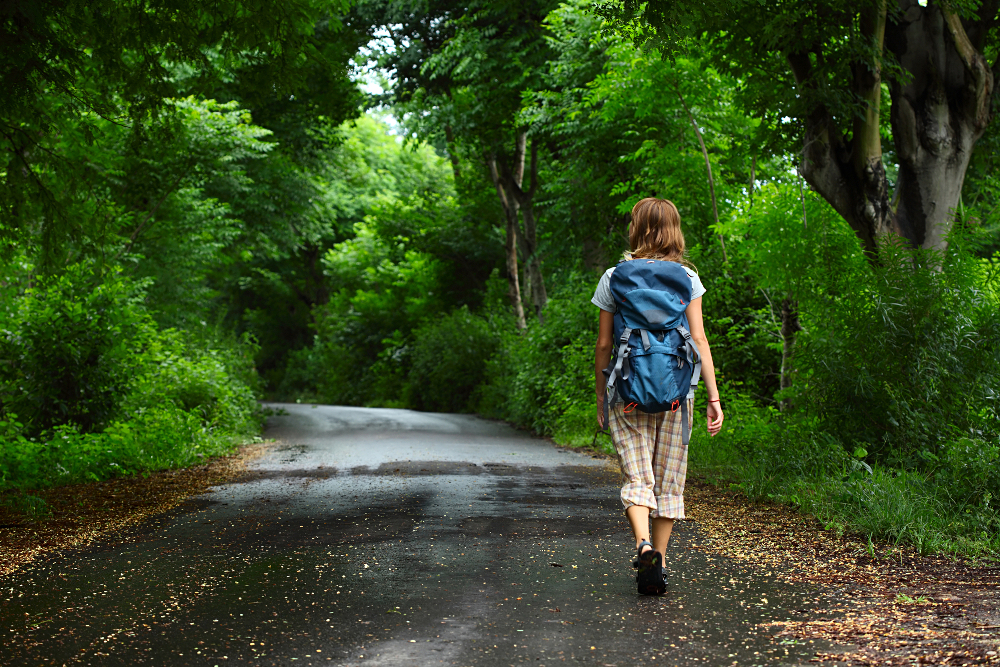
How often have you come home feeling stressed and tired after a long day, with the only thought of plopping down on a couch and not moving for the rest of the evening? Traffic jams, errands, being bombarded with information, work demands, and interactions with the world around us often leave us feel drained, tired, and unmotivated. Add to it inability to fully rest if you have children that need your attention, and having a restful or a productive evening might seem impossible. My answer? Grab a snack or have a quick dinner, and head to a nearby park.
Depending where you live, you might substitute another place with trees, fresh air, and a playground or another way for your children to amuse yourself. Near our new place, there are three parks with play structures, from simple to elaborate, and the kids love all of them. They stretch out stiff muscles after classrooms and car rides, and release the last remaining energy after dinner, so that when we start the bedtime routine, they are ready for a rest.
Being outside helps you reset your mind from the worries of the day, from work and chores. You can breathe deeply and connect with nature. There are studies that show that being in green spaces promotes health and longevity. I love walking barefoot on the grass, to connect with the ground and let my feet rest from footwear. You can stretch your own stiff muscles, and you’ll often find that the weight of worries on your shoulders melts away.
Once you’ve breathed deeply and relaxed, you may find you feel new energy coming on. Indulge yourself: use monkey bars and ladders on the playground, crawl through pipes and go down slides, play with your children, do some pull-ups or squats, run and jump, play in the sand. Play is rare in our adult lives, but it is very important for our overall health and well-being. It’s also a great way to get some of the much-needed movement into your often largely-sedentary day. Katy Bowman has a great short video on 30 things you can do at a playground.
If you find yourself if a more introspective mood, you can watch other families play and interact, observing different games people play with their children. You can chat with another family — meeting new people in your neighbourhood may mean a new friend for you or a new playmate for your children.
There are lots of games in which you can participate with your children, your partner, or other families: bring a frisbee, a ball, a jump rope, a bicycle, a hula hoop, or a badminton set. Cool off in a splash pad if there is one in the park — they are great in summertime. Take a turn on the swing — the changes in visual perception and the exhilaration of movement are great ways to shake off the day’s exhaustion.
Soon winter will set in with cozy evenings at home with hot tea, books, puzzles, and board games. Enjoy the warm sunny days while they are here!
When we have a large project on our mind, we often make it out to be more intimidating than it is. We think it is harder, more complicated, and will take a lot of time. We wait for that “right” day when we have 8 hours without interruption to even tackle the planning of it. As a result, the project gets postponed indefinitely. We end up procrastinating, instead of studying for an exam, executing a work project, completing a home improvement.
All you need is a short planning session and the right attitude. You’ll be surprised how soon you can cross it off your to-do list. This weekend, in 3 hours, we have tackled the garage organization — a project that some people are dreading for months.
When we were preparing to move, many people have said that months or years after their own move they are still “living in boxes” or have many boxes still unopened. They prophesied that we shall not be settled for months. I refused to accept that as a given, and so far we have made great strides towards being comfortable and productive in our new home. My goal is to have all large projects completed before winter. It has now been 3 months, and this is what we have accomplished so far:
Our place has gone through a large renovations project (ripping out all carpets and replacing them with hardwood), which did include external contractors and required a lot of coordination and some material sourcing on our part.
We have washed all windows (inside and out), baseboards, floors, cabinets, and dusted all the walls and ceilings. I have washed more windows this summer than I have in the past 20 years.
We have had a full-house water filter, a drinking water filtration system, and a central vac installed.
We got the ducts cleaned (oh my, they had so much construction dust and debree!)
We have a lovely blooming and fruitful garden, including a permaculture herb spiral, which got planted in 2-3 weeks after we moved in.
Through all this, we have been spending lots of time working outside of home, playing with the kids, inside and outdoors, eating healthy meals (most of the time), entertaining guests, and hosting a housewarming.
Of course, there are other projects we would like to undertake in the future to make the place more suited to our needs, more aesthetically pleasing, more comfortable. This, naturally, will take more time and planning. But as long as we approach it without being overwhelmed, they will all be completed and not cause excessive stress.
Here is how we do it:
Step 1 – Plan execution steps and resources.
Identify the smaller tasks that comprise the project. In the case of small projects, this could be 2 or 3 tasks. In the case of larger projects with steps depending on completion of previous steps, it requires more careful planning. For each task, identify the time, the materials (if any) and the help it would take to do. The more you think the project through at this stage, the easier executing it will be. However, don’t get bogged down in details or trying to make a perfect decision. You might end up researching until you are blue in the face and unable to decide between alternatives that some praise and others condemn. Research enough to make a decision that makes sense to you.
For the garage organization project, we have planned the following steps:
Move all the items that shall not stay in the garage to the basement. Most of the items we use day-to-day are already occupying their appropriate places in the house. The basement has been designated as the storage area for more delicate things that cannot survive the garage or those that will need to be more accessible in winter. This would only need us to identify these items and move them. Easily done with 2 people and about 15 minutes.
Remaining items would occupy shelving units. We had two already completed and placed and two more waiting in the middle of the garage. Our biggest obstacle was a large pile of firewood, taking up space all along one garage wall, where the shelving units would need to reside. This step needed us to plan where the shelving units would go and decide what to do with the firewood. The discussion and decision took about 5 minutes.
We knew that to organize the items piled on the floor, we would have to put up the shelving units along the wall, for which we would need to move the firewood out of the way. The firewood would then need to be stacked higher in the smaller space next to the shelves. The biggest undertaking appeared to be moving the firewood away from the wall and then stacking it back. This seemed so daunting that we were tempted to keep putting this off, our biggest challenge being that when we are both home, both our children are home as well. They rarely nap at the same time these days and having either of them in the garage while we clean, among various unsafe items, would not have been possible. Thus we needed an awesome nap time (unlikely) that would give us 2-3 uninterrupted hours, or someone to watch the children while we were working. We knew the time, we knew the execution plan, we needed child-minding help.
Step 2 – Acquire materials.
Source what you need to complete the project. This might include assembling existing items, renting, borrowing, or purchasing equipment and supplies, finding knowledgeable people to advise or help you. Breathe deeply, don’t get overwhelmed with lots of things that are needed. Tackle them one task at a time — plan what is needed for each step and find out where to get it. For our garage organizing project, we had to assemble the shelving units. The rest was just physical work to be done.
Don’t stress the small stuff – you can tweak the details as you go. For instance, we didn’t know what we shall place under the newly stacked firewood to prevent it from getting wet. The existing rails appeared too long to work with the shelves in place. Once we have removed all the firewood from its original place, we have discovered that we can reuse some of the shorter metal rails that were buried under the pile.
Step 3 – Think in terms of the time that is available to you.
We took up the first two steps (moving away items that obviously did not belong in the garage and deciding on the placement of the shelves and firewood) when we had 5-10 minutes of quiet time here and there. Don’t underestimate the power of short time intervals. Clearing away extraneous items before you get started on any project will help you focus better in the field of work that remains.
Step 4 – Seize the opportune moment.
My mother was coming to visit from out of town for a couple of weeks at the end of summer, and this was the opportunity for having 3 adults, one of whom could watch the children and the other two take care of the physical labour. We have spent the morning playing with the kids and taking them on a grocery shopping adventure, which resulted in two tired, happy children who gratefully went down for a nap after all the excitement.
My partner went to run a couple of errands, while my mother and I proceeded to clean the shelving units, move the firewood away from the wall, and sweep the floor. By the time he got back, the wall was clear and ready for everything to be organized. We proceeded to place the shelving units and to organize: more frequently used items were placed in locations closer to the inner door, and less frequently or seasonally used items (such as car maintenance and gardening supplies) were put on the newly-placed shelves.
Afterwards, we have re-stacked the firewood, and were in the last stages of clean-up when the children woke up, so my mother went in to play with them. My partner and I then spent about 20 minutes sorting through a few remaining boxes and deciding what goes into the house, what stays in the garage, and what needs to be laundered. It then took him another 10 minutes or so to shuffle things to where they needed to be, while I joined my mother in taking care of the kids.
Step 5 – Celebrate.
Make it into a social occasion and combine activities for added benefit. We ended up spending lots of time with the children during the day, and had a good workout session while socializing with my mother. In the morning, we marinated some shrimp and chicken, so, after the garage project, we had a lovely afternoon in the garden, making some kebabs, and collecting greens, herbs, and cucumbers for a salad, all of which was then gladly consumed by everyone.
As the above example clearly shows, it is difficult to do certain things without external help. If you, like us, don’t have family help readily available, you can either plan for when the family is visiting or find a way to get help. I have recently come across a brilliant arrangement mentioned by Katy Bowman in her Community podcast episode: rotating time with families helping each other around the house. The idea is that, say, four families (usually including children) agree to help each other. First weekend, everyone gets together at the first family’s house and helps them do whatever needs done: cleaning, cooking, organizing, planting a garden, renovating, etc. In the meantime, one of the adults (or two, if you want to make it more social) is watching the children. People can switch up, as long as everyone is contributing to completing whatever tasks need doing. Everyone brings a dish or two, so that the afternoon can end in a potluck, to celebrate the completion of the work. Next week, the four families repeat this in the second family’s home, doing whatever needs doing there. The next two weekends, the remaining two families get help. Work goes faster with more hands, you have a variety of skills at your disposal, people are socializing, children are playing together in a new house (which, as everyone knows, is way more fun than the same house day after day), and everything gets accomplished. I’d love to try this arrangement out.
I confess, I’m guilty of having 2-3 projects on the go at any given time. It is handy to overlap material sourcing stage of one with the planning stage of another, for instance, but it is much easier to focus on one project at a time, especially if you tend to get very stressed out or have limited time intervals due to other endeavors.
This post has become rather long, as I really wanted to illustrate each point well. Don’t be afraid to tackle larger projects. To get to an organized garage, all we needed to do was plan the steps and resources needed to complete them (time, materials, people), do whatever prep work we could in shorter time intervals available to us, execute the most complex step when all the resources were available, and celebrate the project completion.
Make it fun and don’t forget to celebrate. The success of one project will inspire you to tackle the next one. It’s not as hard as you imagine. You can do it!
When you find that your emotional state is not conducive to interacting with people, step back and take care of yourself. Give yourself time to regroup, recover from whatever emotional turmoil or physical strain you are experiencing, and come back with a fresh outlook and a productive attitude.
We are brought up to perform and deliver, to achieve and act responsibly. However, when your own resources are depleted (like it frequently happens during postpartum or at an emotionally- or physically-demanding job), you need to cut down on your obligations and allow yourself time to rest and resolve your inner conflicts.
It often happens that a mother is so focused on taking care of her children that she neglects her own needs for nutritious diet, restful sleep, and relaxation. An article on postnatal depletion I have recently read mentions a mother of five who was so extremely depleted that she had landed in a hospital with pneumonia, only to rip out her IV the next day to rush back to her family, ignoring her own need to recover.
This is an extreme example, but it happens all around us, with mothers juggling family and work responsibilities, with people pushing down their grief, anger, exhaustion, and pretending that nothing out of the ordinary is happening, while struggling to perform their work duties and fulfil their obligations to others. We are brought up not to show vulnerability, so instead these people often become abrupt and rude, or weepy and easily upset, teetering on the edge of tears, unable to control their emotions or stay civil in their responses. Needless to say, their productivity suffers, and if they work with people, their ability to feel compassion and be understanding melts away, leaving sharp edges that slash anyone who approaches. At the extreme, this can lead to causing pain or inflicting injury on self or other people.
As a community, we need to support each other through these times, being mindful and understanding of how difficult it is to climb out of this depleted and highly emotional state. This is not the time to load the person with additional responsibilities or expect high performance. Reprimands are not helpful. Expressing understanding, alleviating the stress, sharing responsibility, and working on the solution together is a better way forward.
As an individual experiencing depletion, you need to put yourself first. Drastically reduce whatever responsibilities and work obligations you have, as much as possible. Take stress leave or vacation. Let the people around you know that you need time to regroup and recover. Gather around you all the support you can — family and friends who can bring you meals, watch your children, spend time with you if you like, or allow you the space and time to rest. Go away to a resort where you can connect with nature, reduce your pace, and spend time resting away from your everyday surroundings that carry with them the stress of obligations.
In earlier societies, there were rituals for various life situations. We kept a few, such as weddings and funerals, but have forgotten many other ceremonies, such as a Blessingway, that support people going through times of transition. The tradition of Mother’s Blessing is being resurrected in small birthing circles, but other transitions are rarely honoured. Consider holding a ceremony to support your loved ones through divorce, bereavement, coming to terms with a serious illness in the family, or with another challenging emotional transformation. Show them that they have people who care, who love and support them, who can help them navigate this tough time with compassion and understanding.
Remember that you cannot take good care of anyone else unless you take good care of yourself first. Your loved ones want to see you healthy and happy, not sacrificing your sanity and well-being to your sense of duty. Be well and take care.
We are creatures of habit. It is so easy to fall into repetitive familiar patterns and end up getting bored with your reality. So many of us get up, go through the motions of getting ready for the day, get the kids ready, follow the same work/eat/parent cycles, and end up turning to a familiar TV show or Facebook in the evening, to pass the time until sleep, only to start the same round of activities tomorrow. Needless to say, such a lifestyle does not spark creativity, make your days exciting, or have you looking forward to waking up in the morning.
Feeling locked into a routine? Break it up! The first step is the most difficult psychologically — we are inclined to fall into familiar patterns instead of venturing out into the unknown. Your routine will still be there tomorrow to lean on if you need it, so shake off its chains and take off on an adventure.
Here are some ideas:
Join a club: reading and discussing books, playing a sport, beading, crocheting, cooking, yoga, dance, exercise. You can learn a new skill and meet new people.
Try a new hobby: assemble a jigsaw puzzle, paint, dance, sing, play an instrument, draw, read, build models.
Undertake a project that interests you: you can try anything from robotics and technology to improving your house or garden. Anything that gets you excited about the process and the outcome is great.
Train for a marathon or another physical challenge: a friend of mine has just embarked on a 12-week course to restore her core strength and pelvic floor muscles postpartum, and she is finding that the entire family, including the dog, is enjoying the new activities. Take on a martial art, dare to try parcour, join a sports team, try belly dancing or zumba, or find a ping-pong partner — the possibilities to improve your physiology while having fun are numerous.
Expand your horizons: visit a gallery or a museum (great with kids), go to a concert or a play, attend a film screening. Look for independent films on a topic you are interested in, such as CHOICE! Film festival and you can connect with like-minded people and learn a lot.
Host a get-together: having people over can reset your energy. Arrange food (cook or do a potluck), drinks, and music, barbecue if the weather allows. Get-togethers are great to reconnect with people you haven’t seen in a while. Learn what they are into lately — you might find a new exciting activity to join or re-kindle your passion for a forgotten hobby. If you want to make it more engaging, host a theme party.
Meet with friends for lunch or a playdate, at a pub or a cafe, for a parenting meeting, with or without kids.
Go for a walk — step outside your door and take in nature, breathe deeply. Sometimes all that’s needed to break the routine is to lift your head up from a repetitive activity and take a fresh look at your surroundings.