


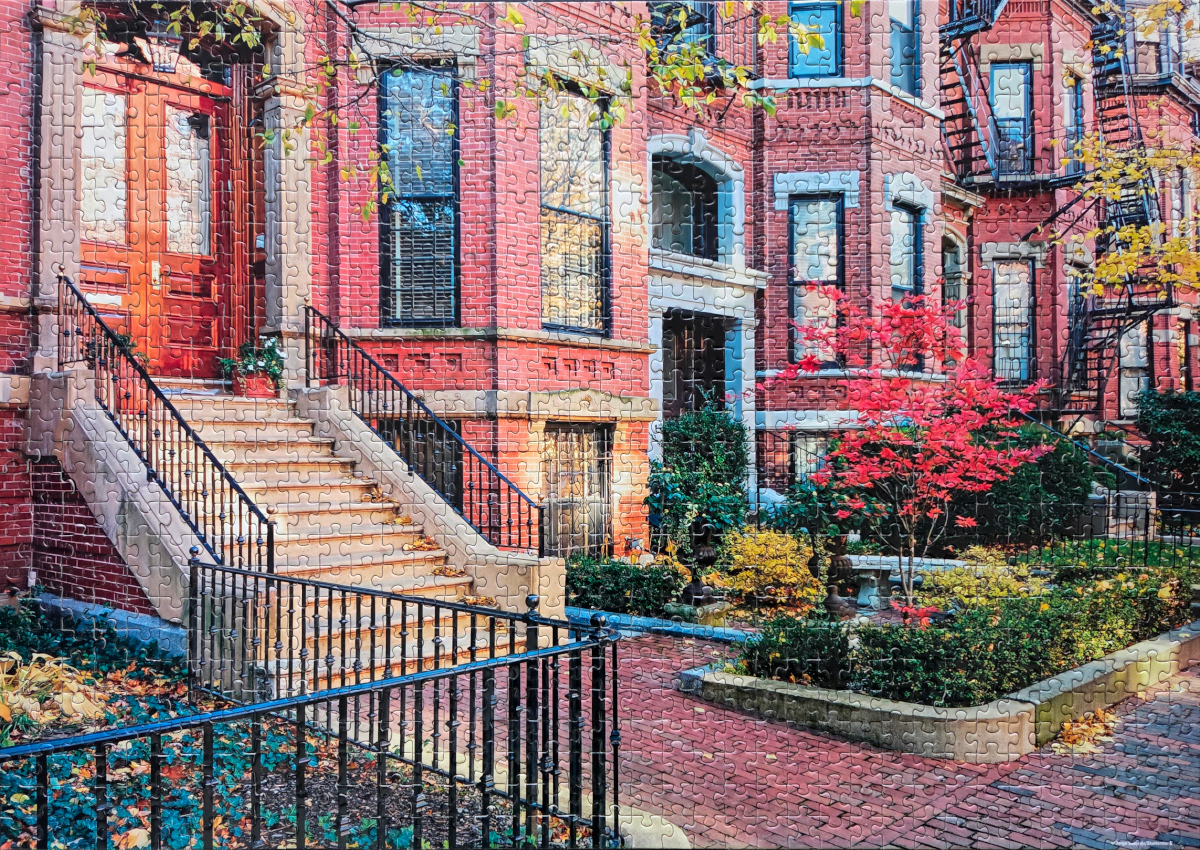
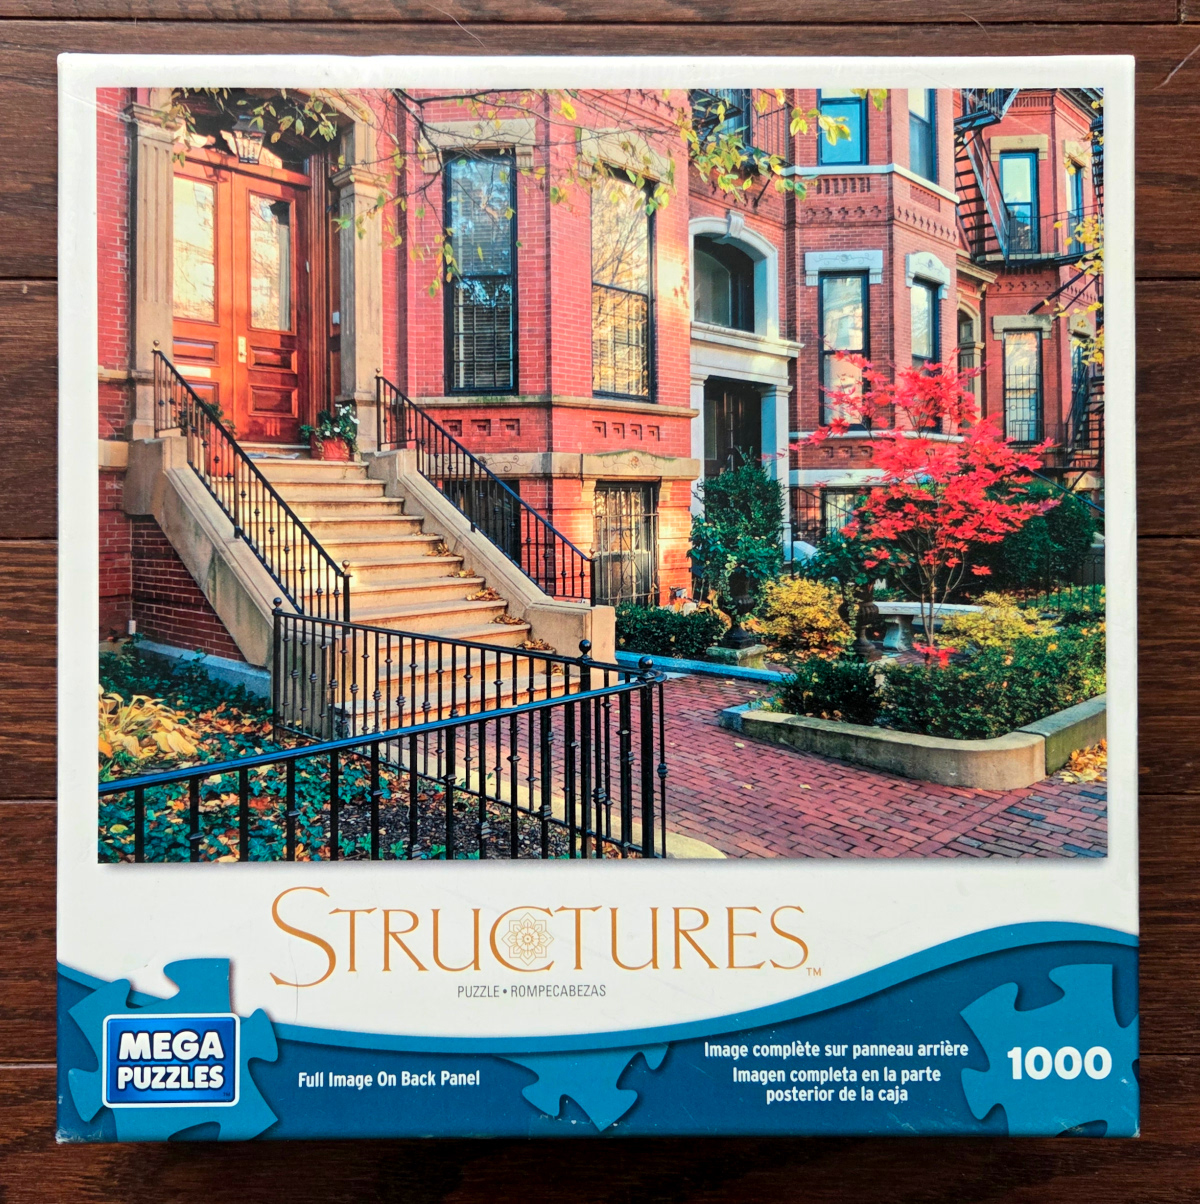
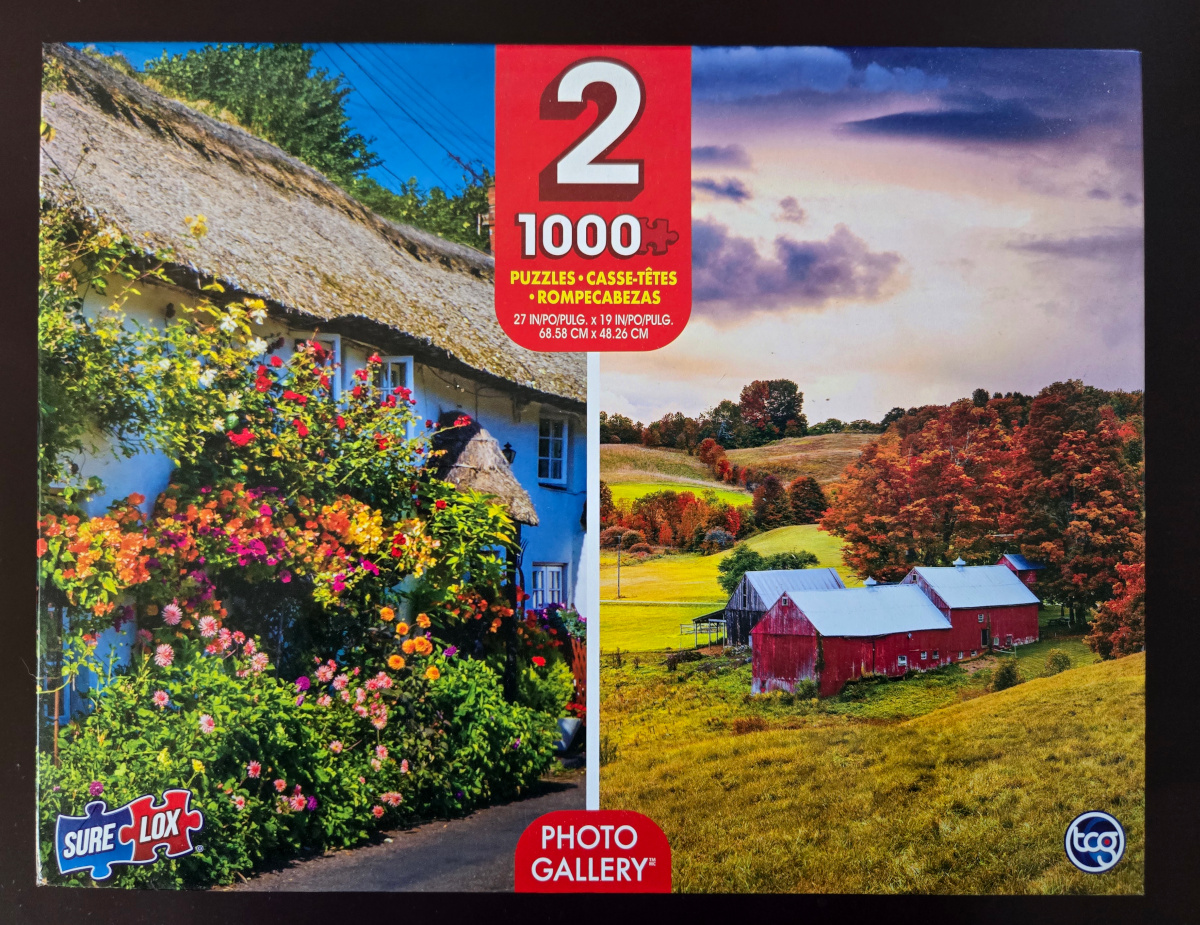
Size: 1000 pieces
Available for purchase on eBay
Dimensions: 48.1 cm x 67.95 cm
Manufacturer: Mega Puzzles, A 22084 PP, CXB71 ASST DFD13
Photographer: Shutterstock
Box: photo
Tag: garden
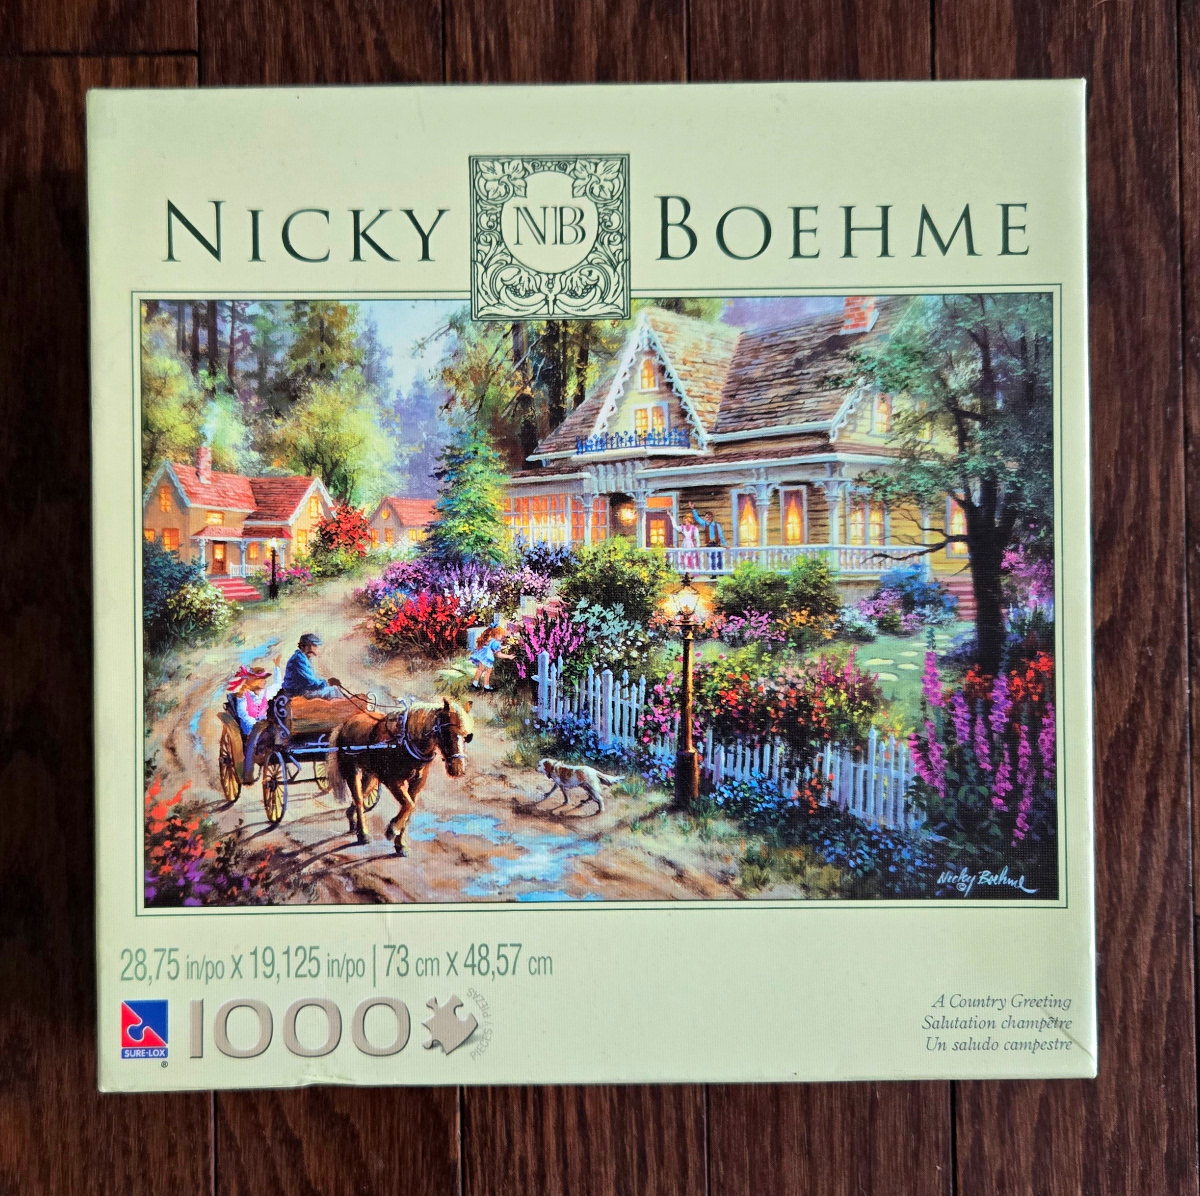
A Country Greeting
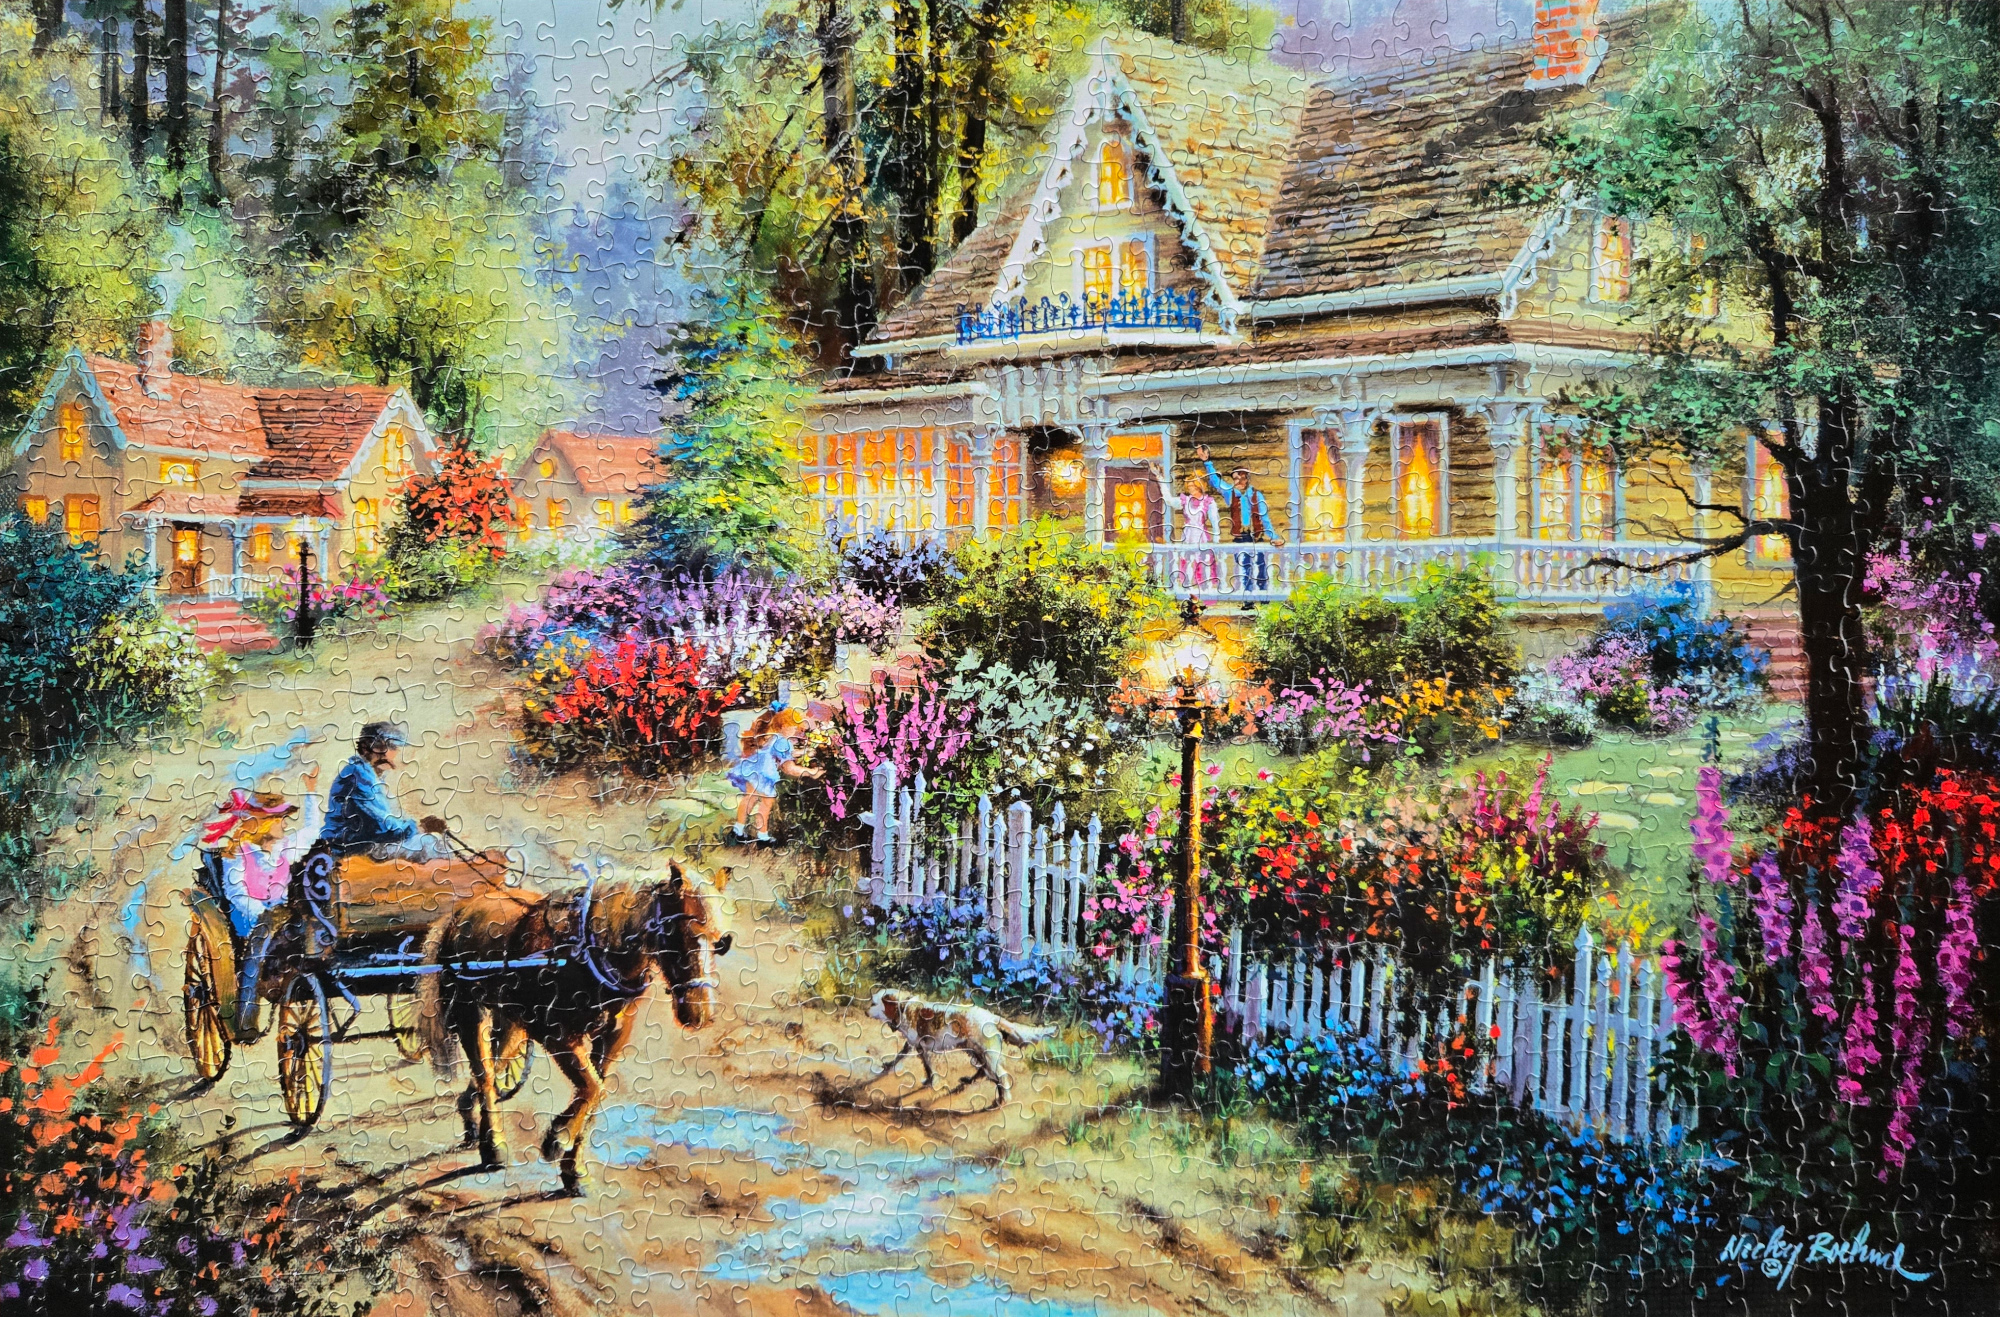
Size: 1000 pieces
Available for purchase on eBay
Dimensions: 48.57 cm x 73 cm
Manufacturer: The Canadian Group, #44714-1
Artist: Nicky Boehme
Box: photo
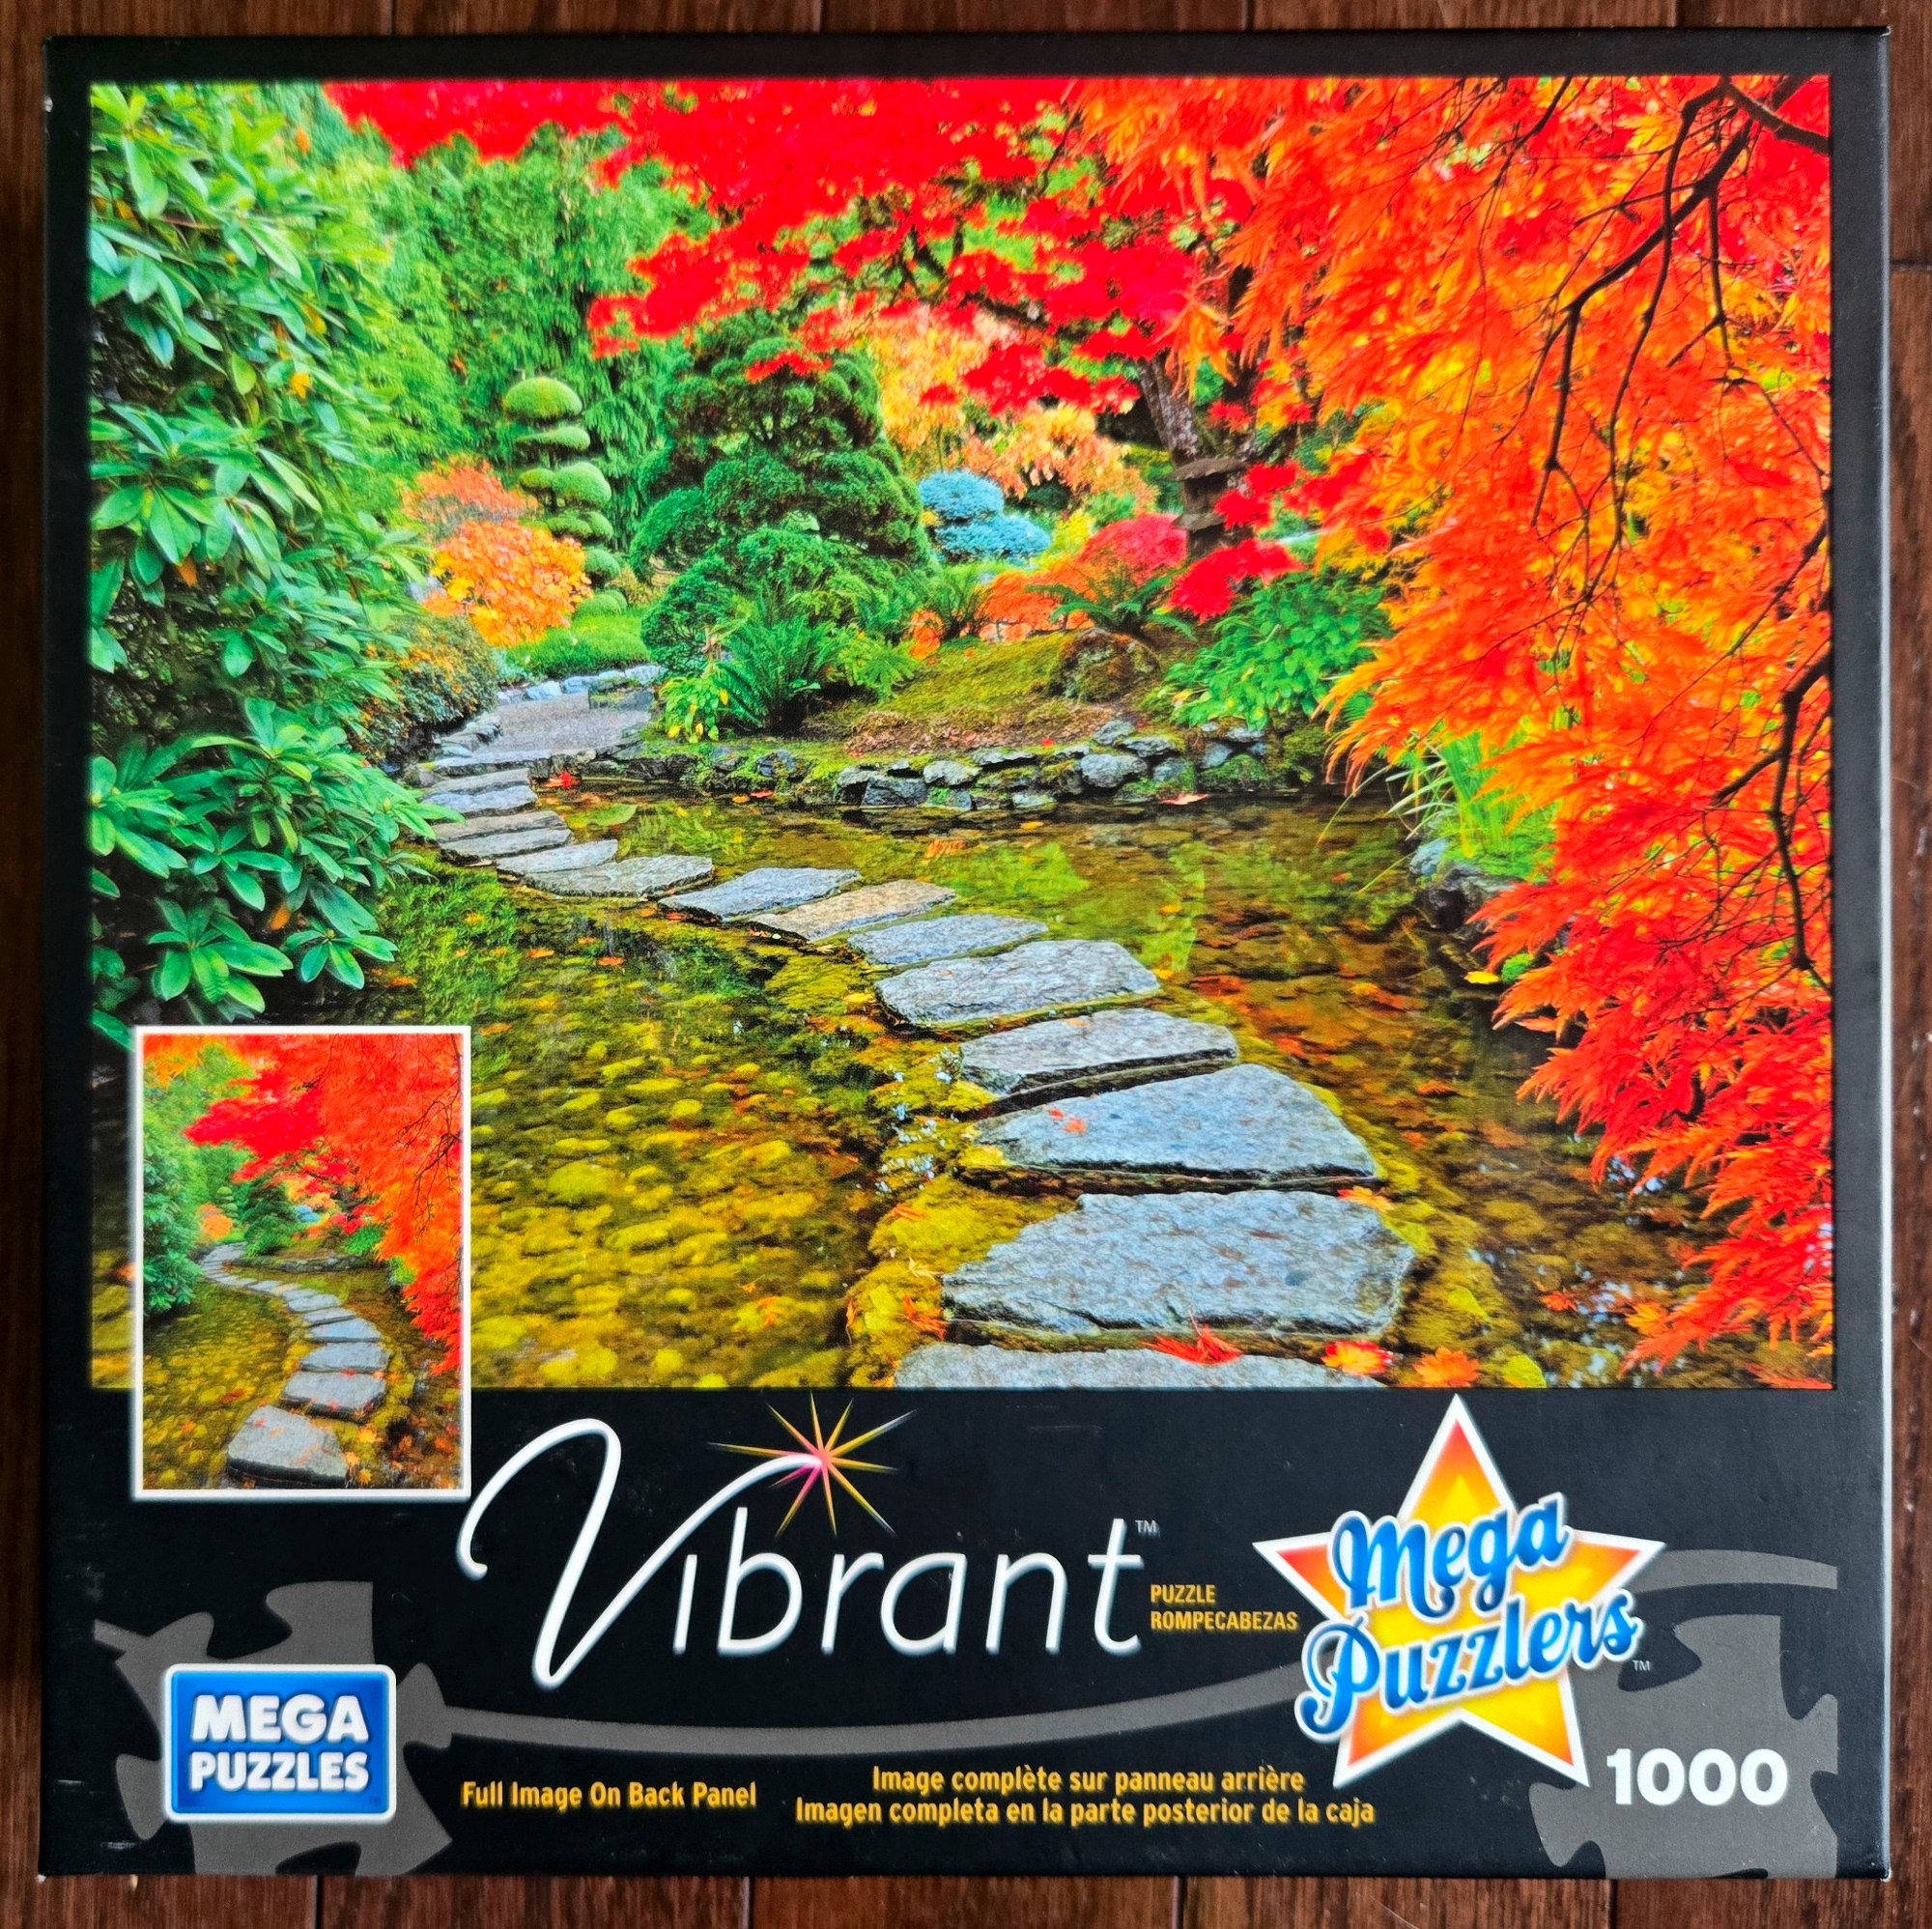
Autumn in Japanese garden
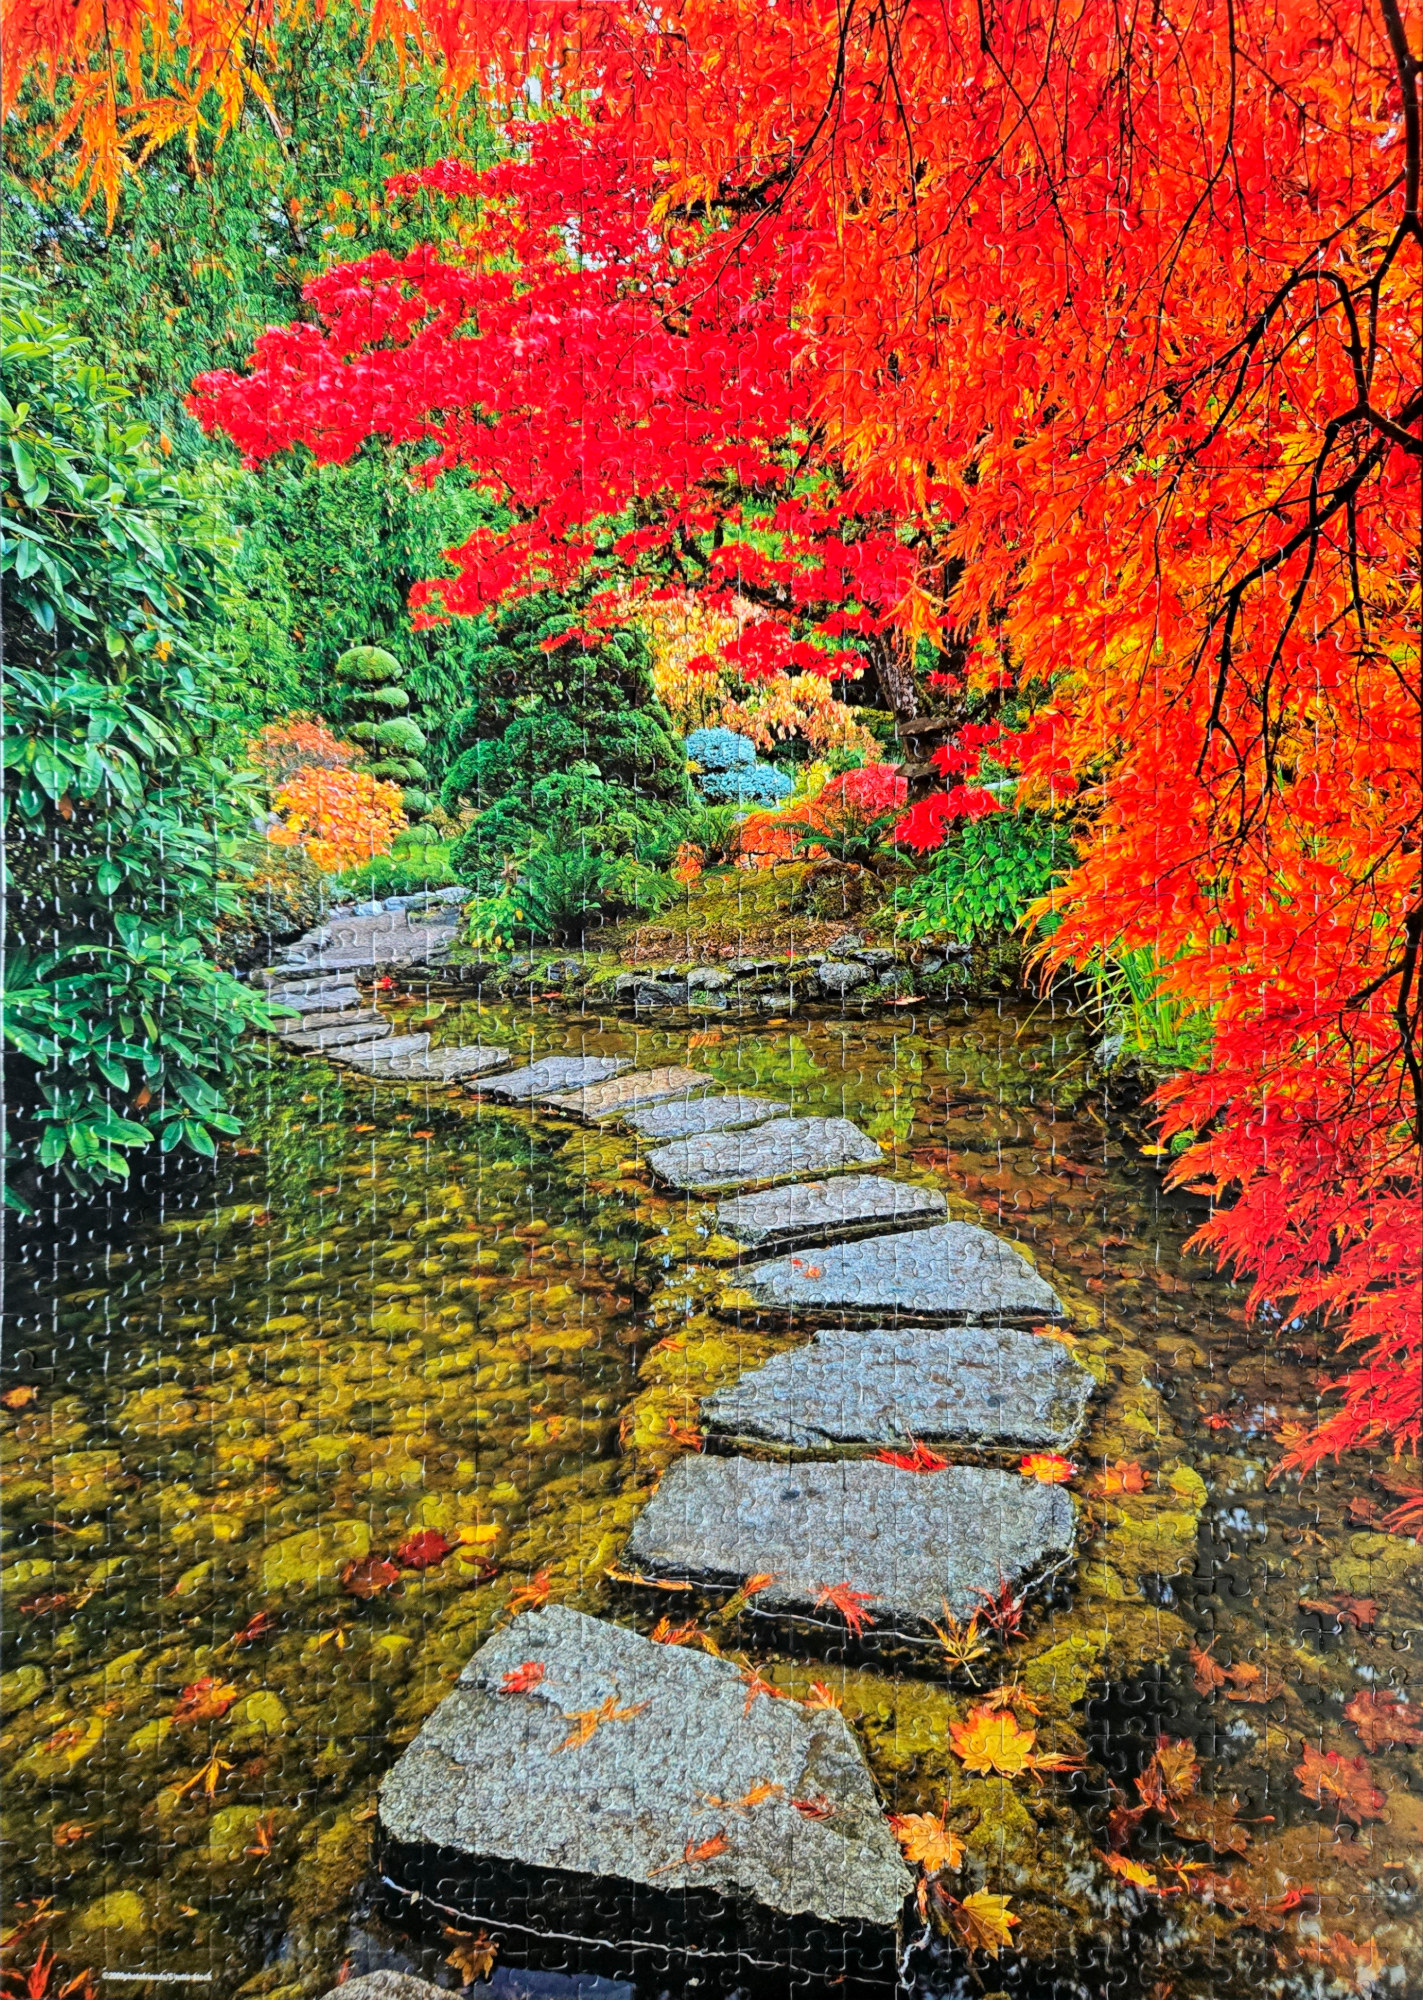
Size: 1000 pieces
Available for purchase on eBay
Dimensions: 48.1 cm x 67.95 cm
Manufacturer: Mega Puzzles, No. 51420ACN, A23044LP
Box: photo
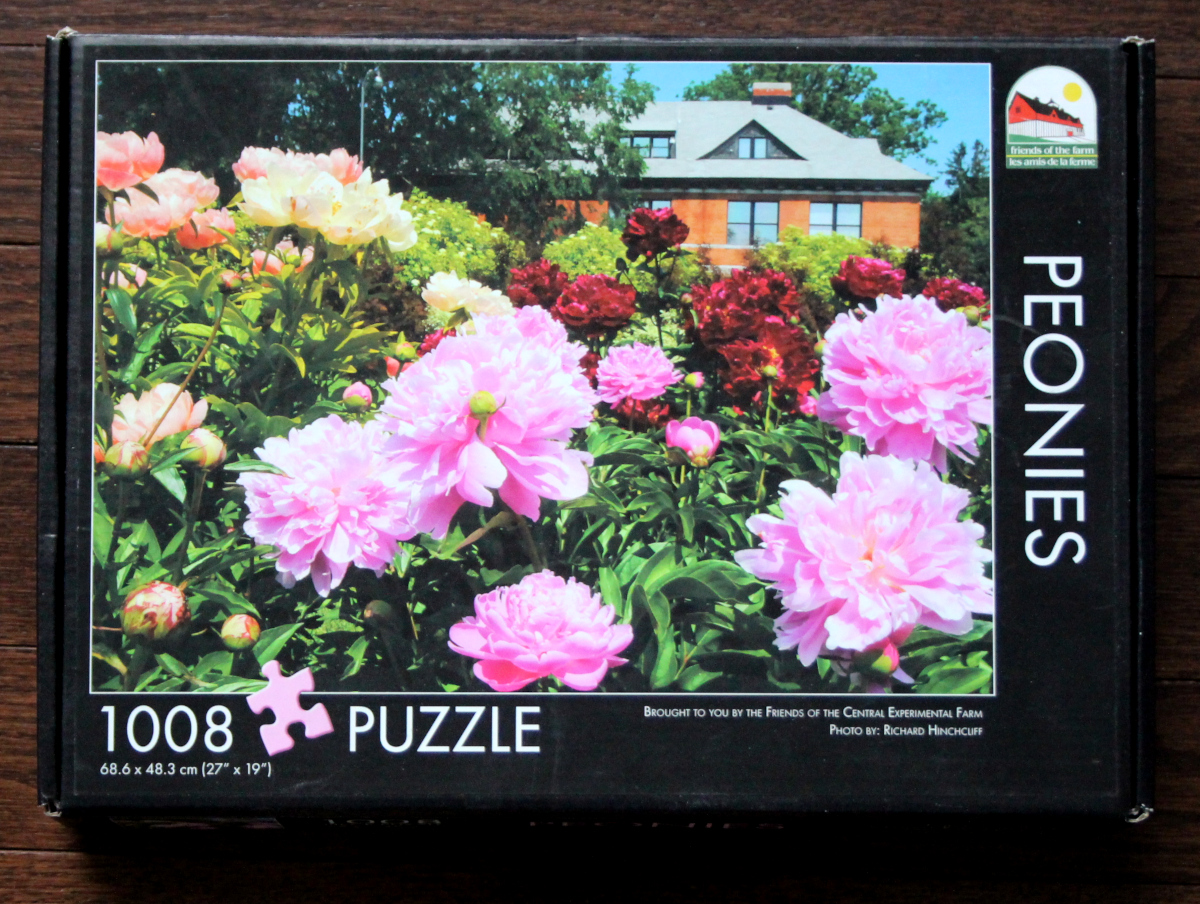
Peonies
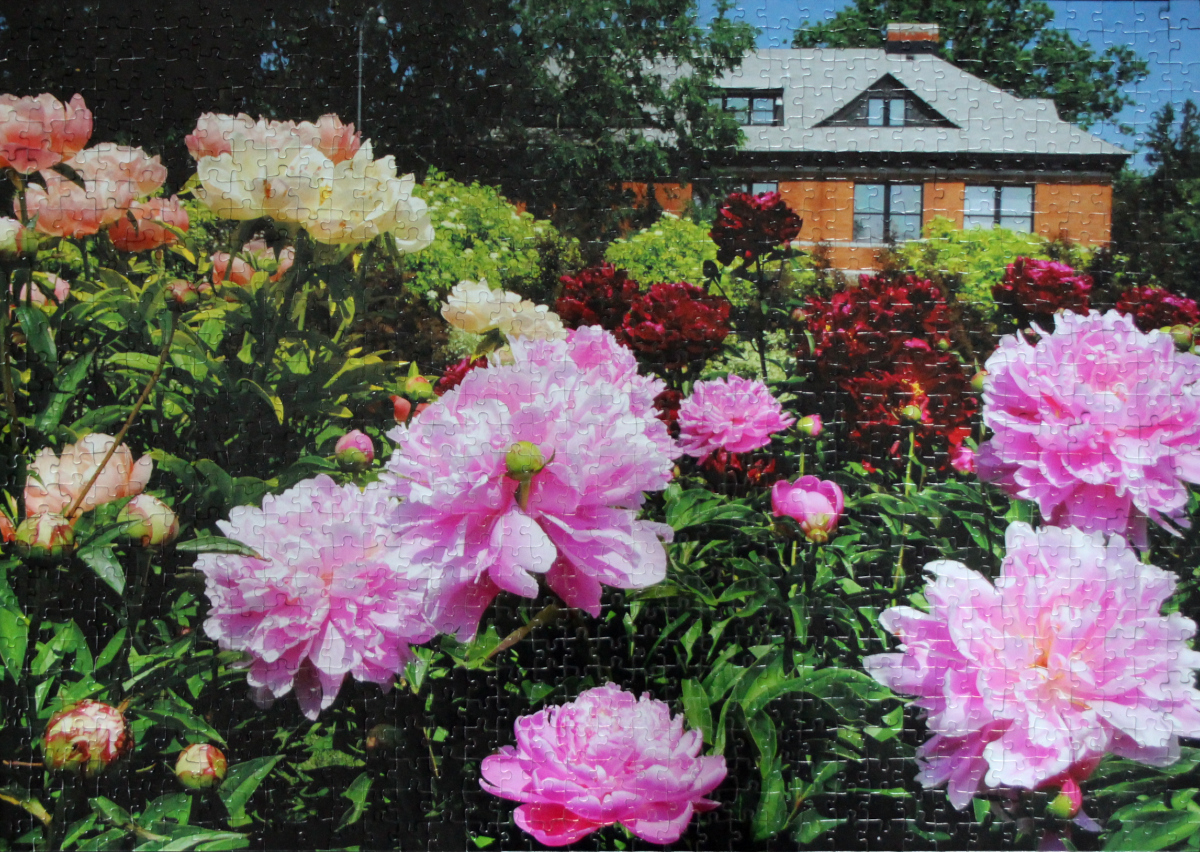
Size: 1008 pieces
Available for purchase on eBay
Dimensions: 48.3 cm x 68.6 cm
Manufacturer: Friends of the Farm
Photographer: Richard Hinchcliff
Box: photo
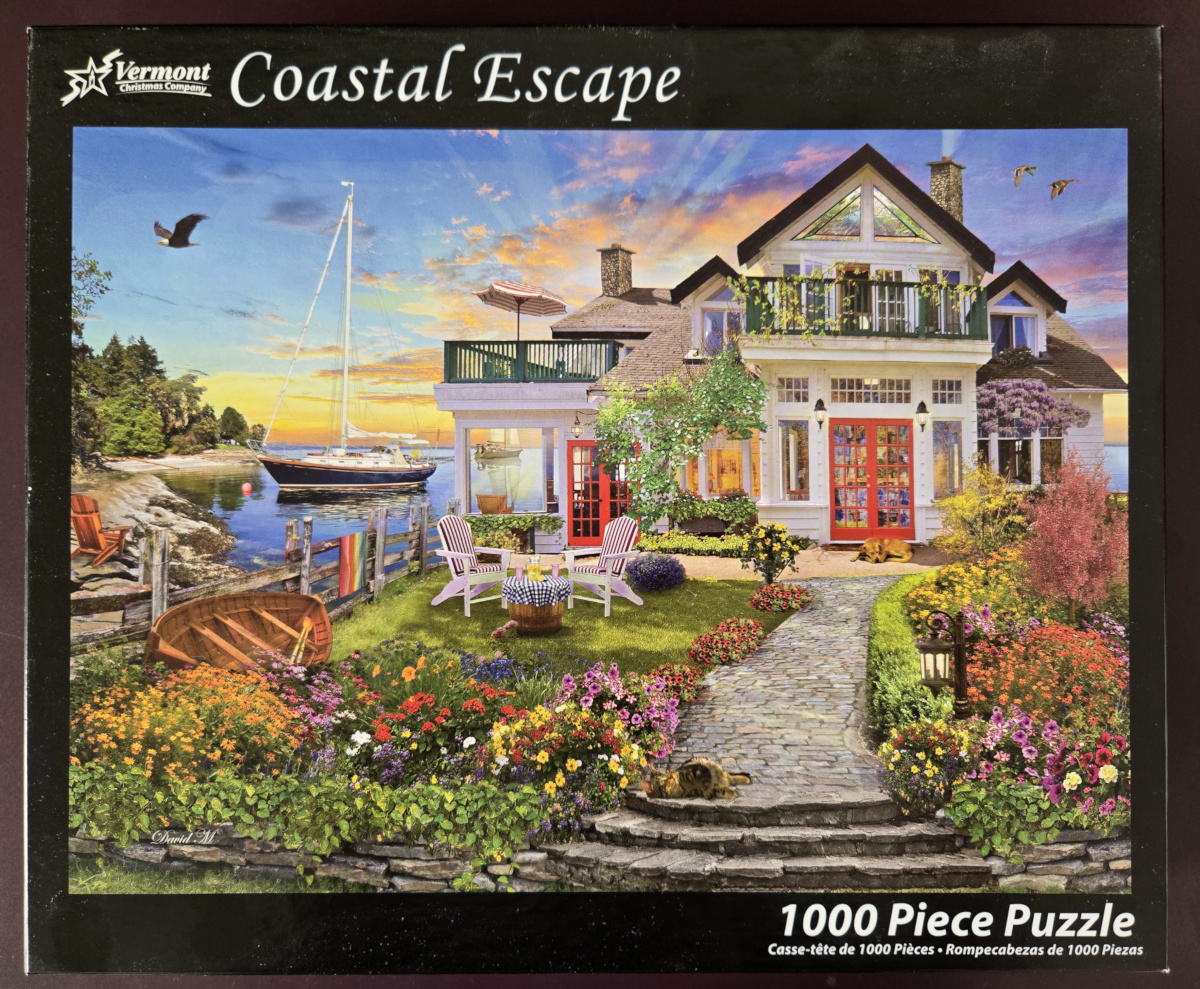
Coastal Escape
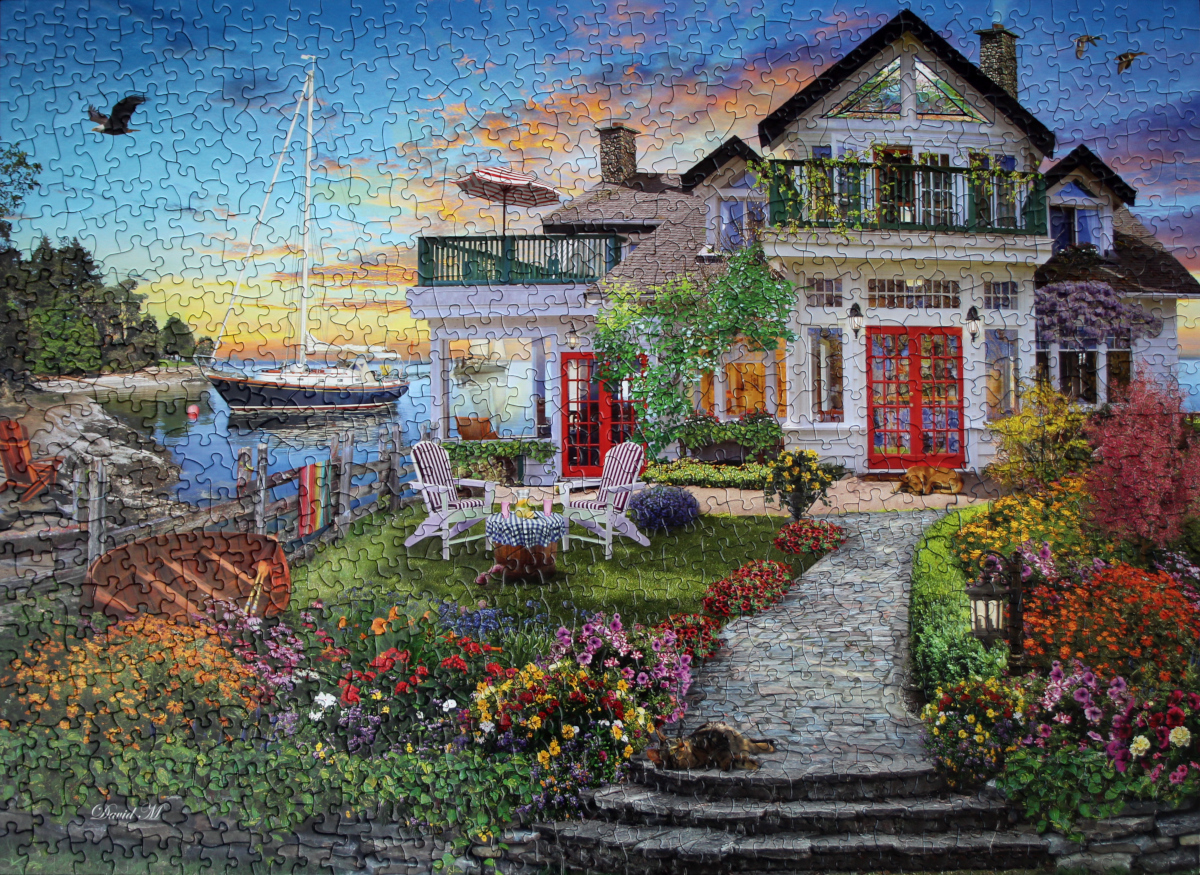
Size: 1000 pieces
Available for purchase on eBay
Dimensions: 49 cm x 68 cm
Manufacturer: Vermont Christmas Company, L220415, Item VC1213
Artist: David Maclean
Box: photo
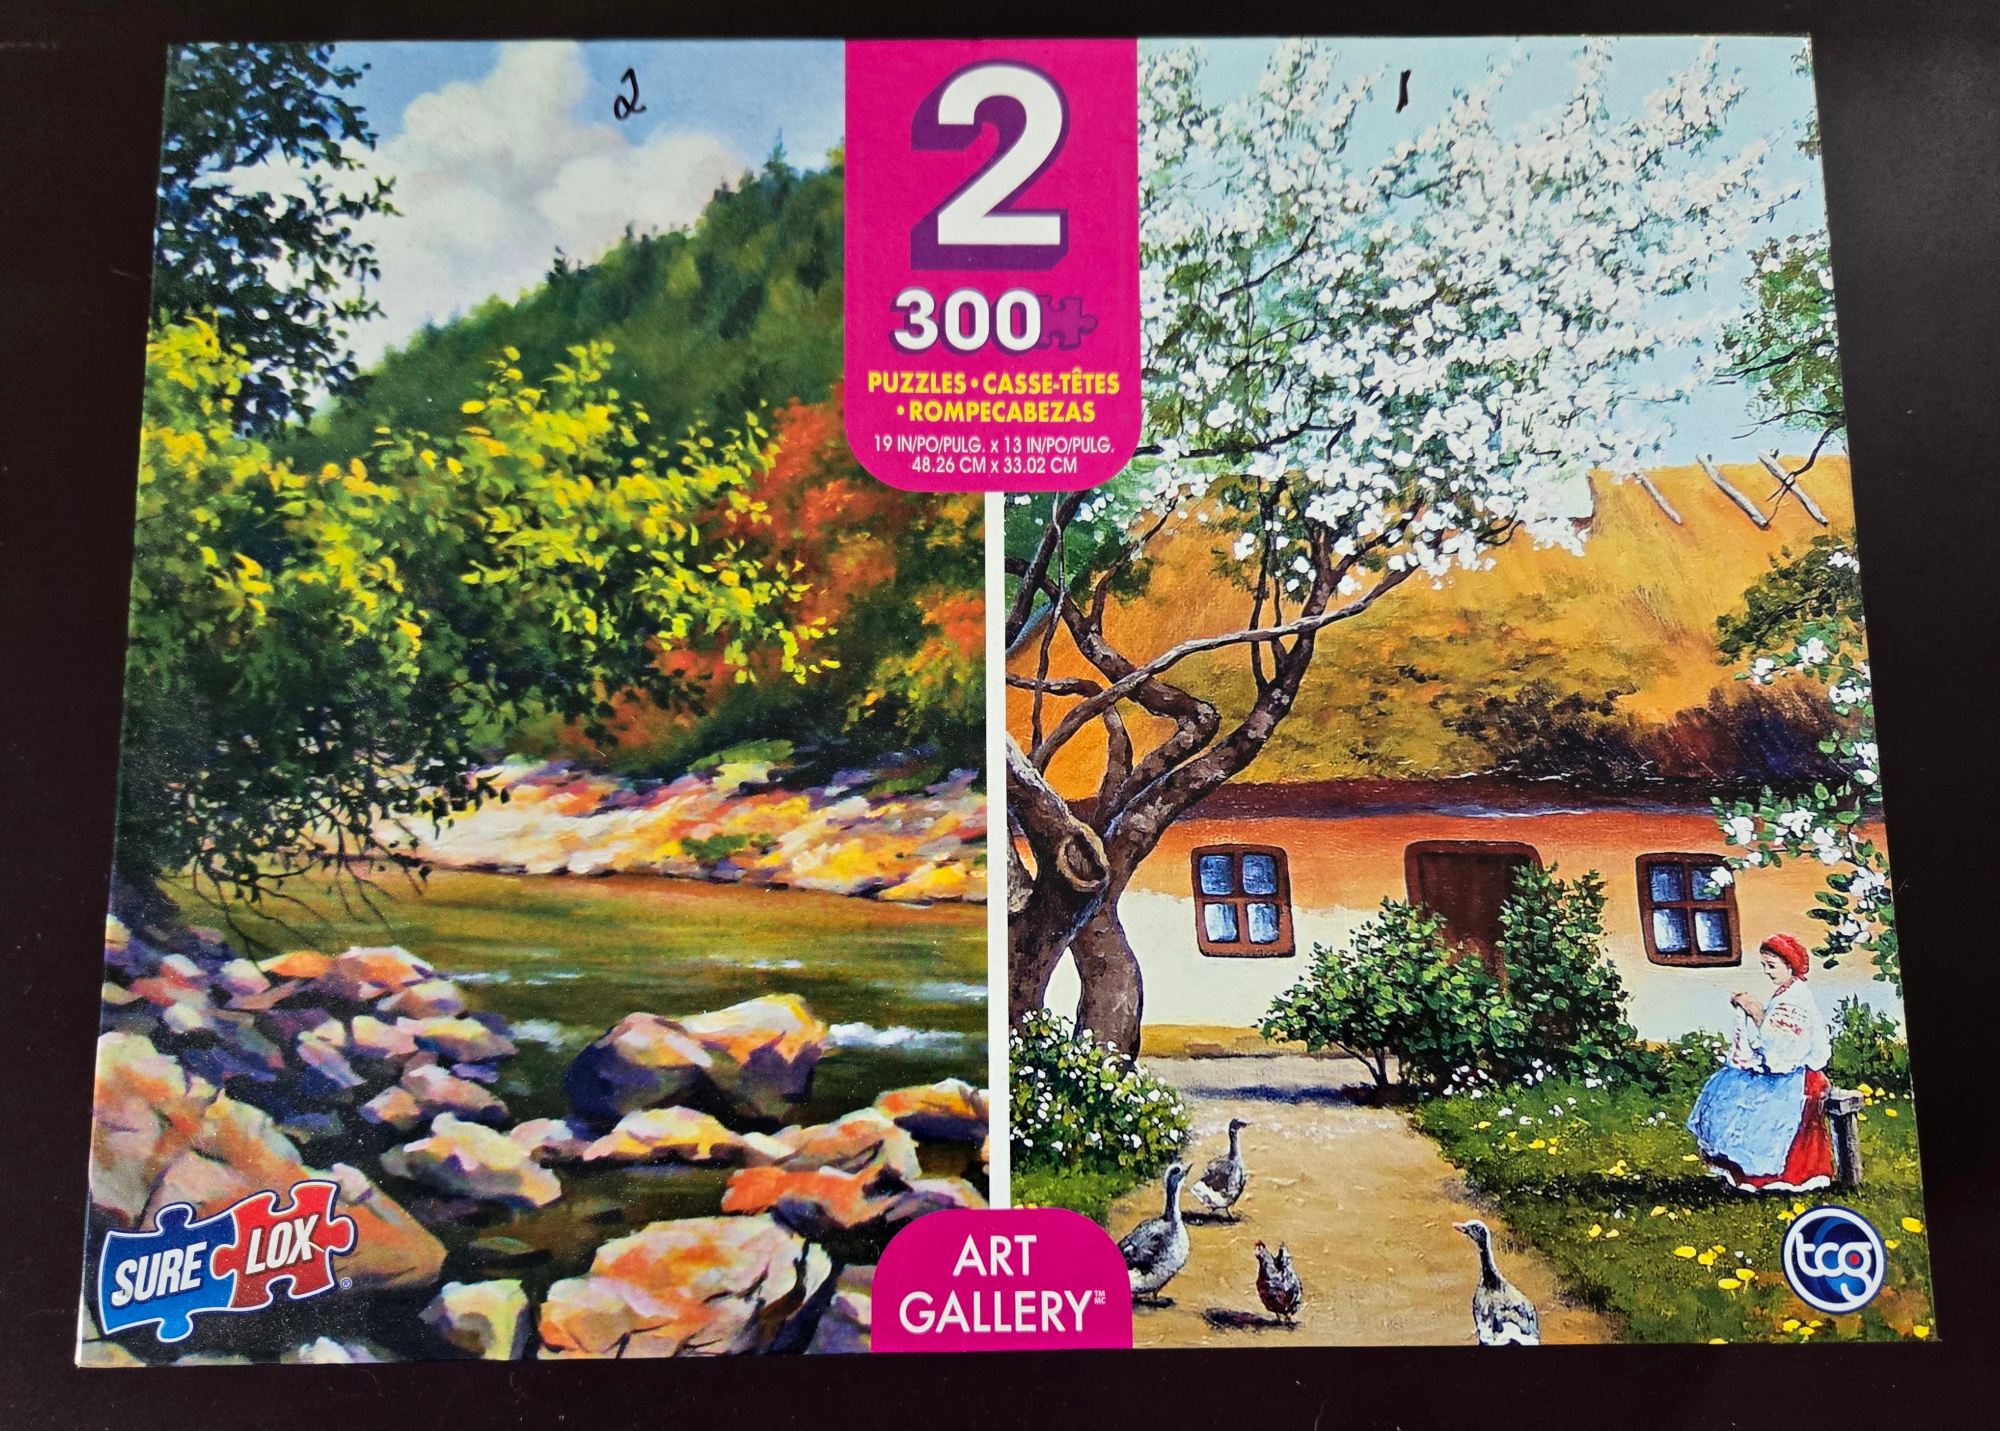
Feeding the geese
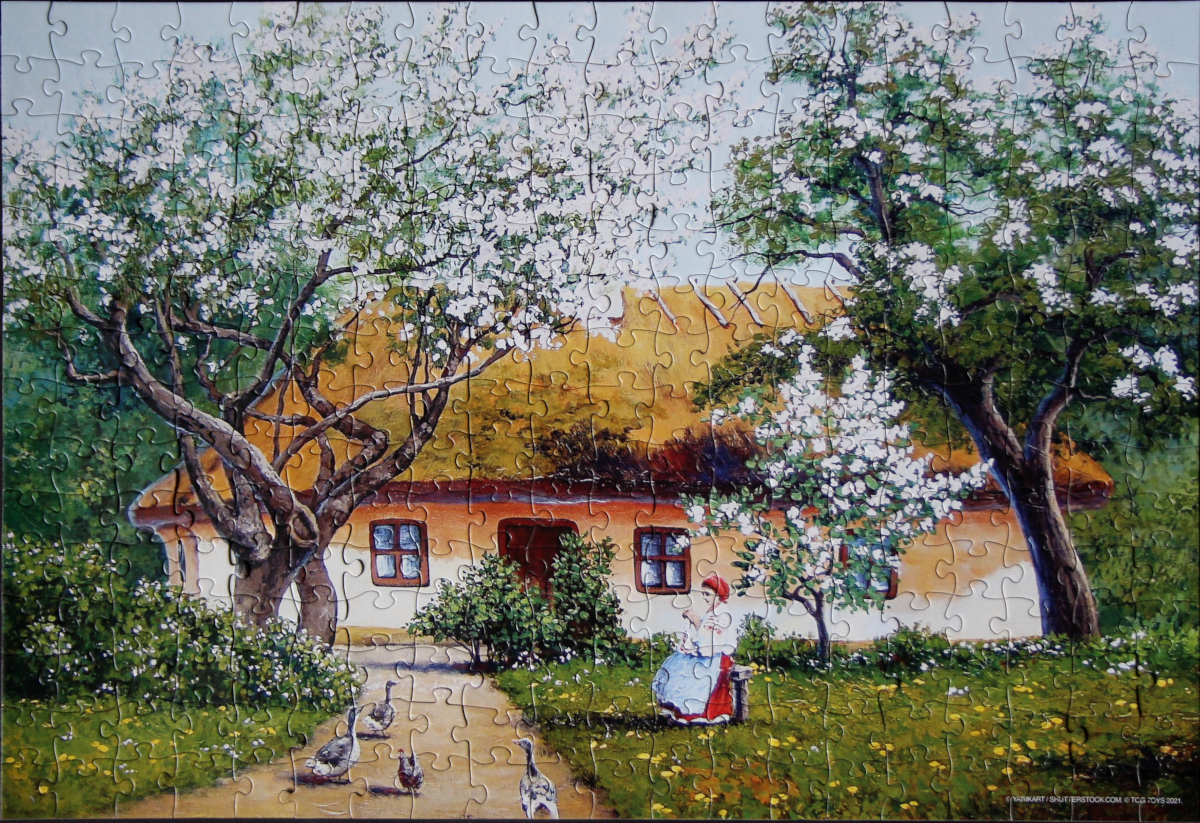
Size: 300 pieces
Available for purchase on eBay
Dimensions: 33.02 cm x 48.26 cm
Manufacturer: The Canadian Group, #03878
Artist: Yaroslav Chyzhevskyi
Box: photo
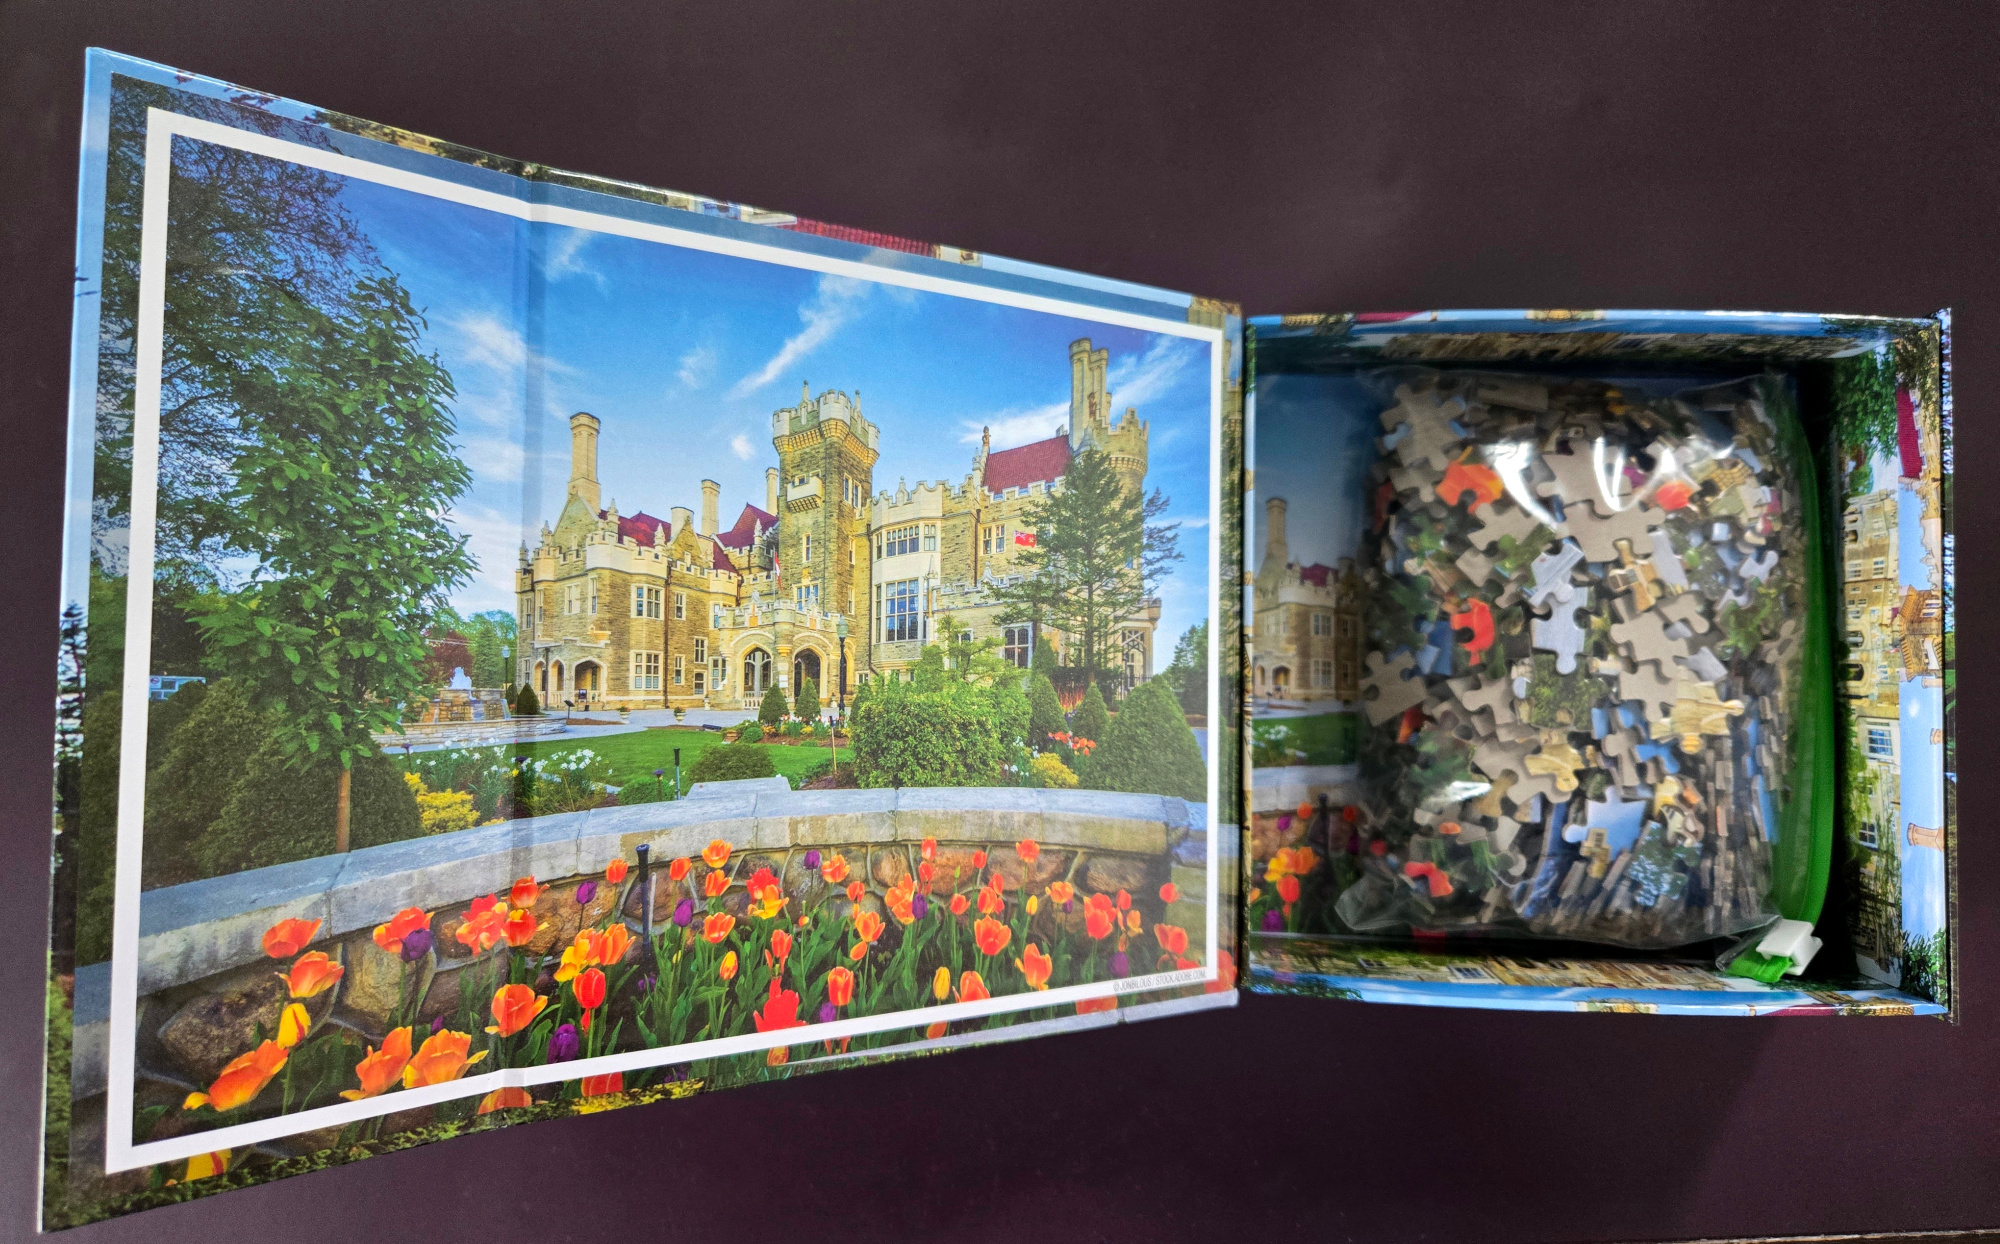
Casa Loma
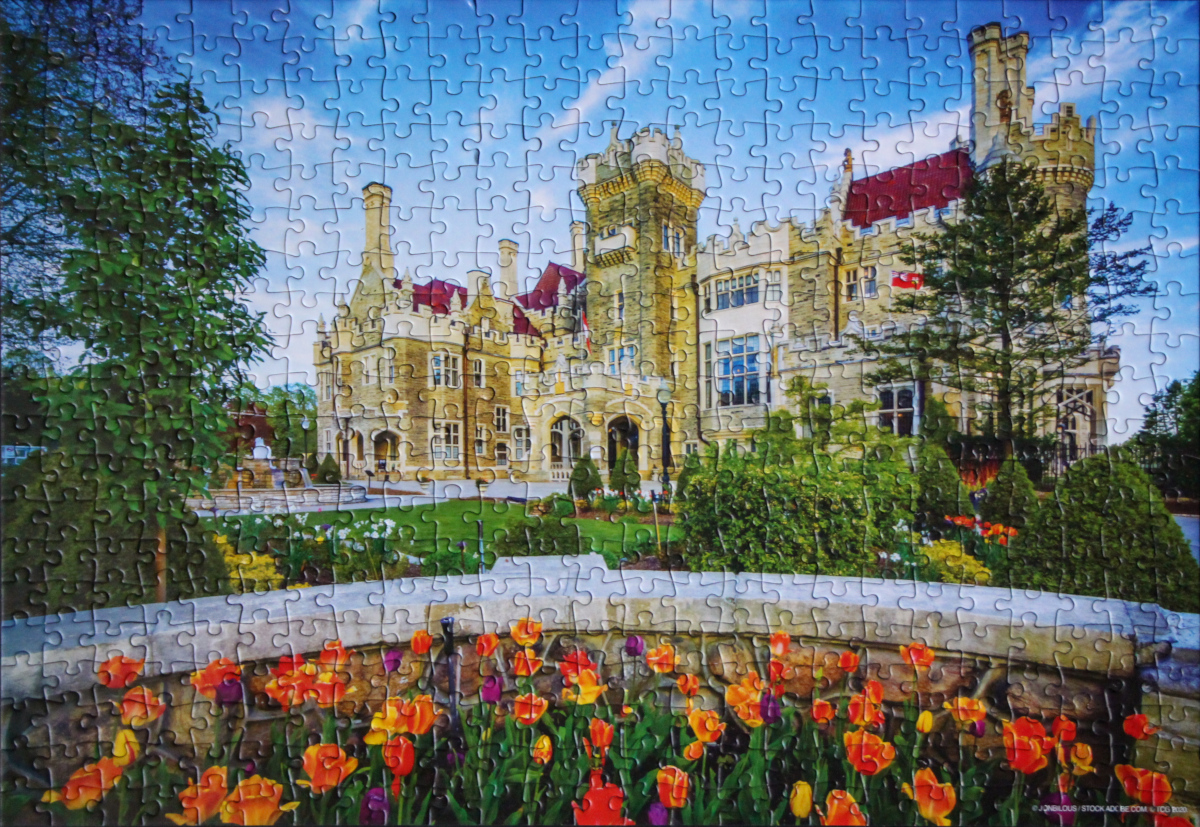
Size: 500 pieces
Available for purchase on eBay
Dimensions: 33.02 cm x 48.26 cm
Manufacturer: The Canadian Group, #20231, Itm./Art. 1231110, 20150MSDG
Photographer: Jon Bilous
Box: photo
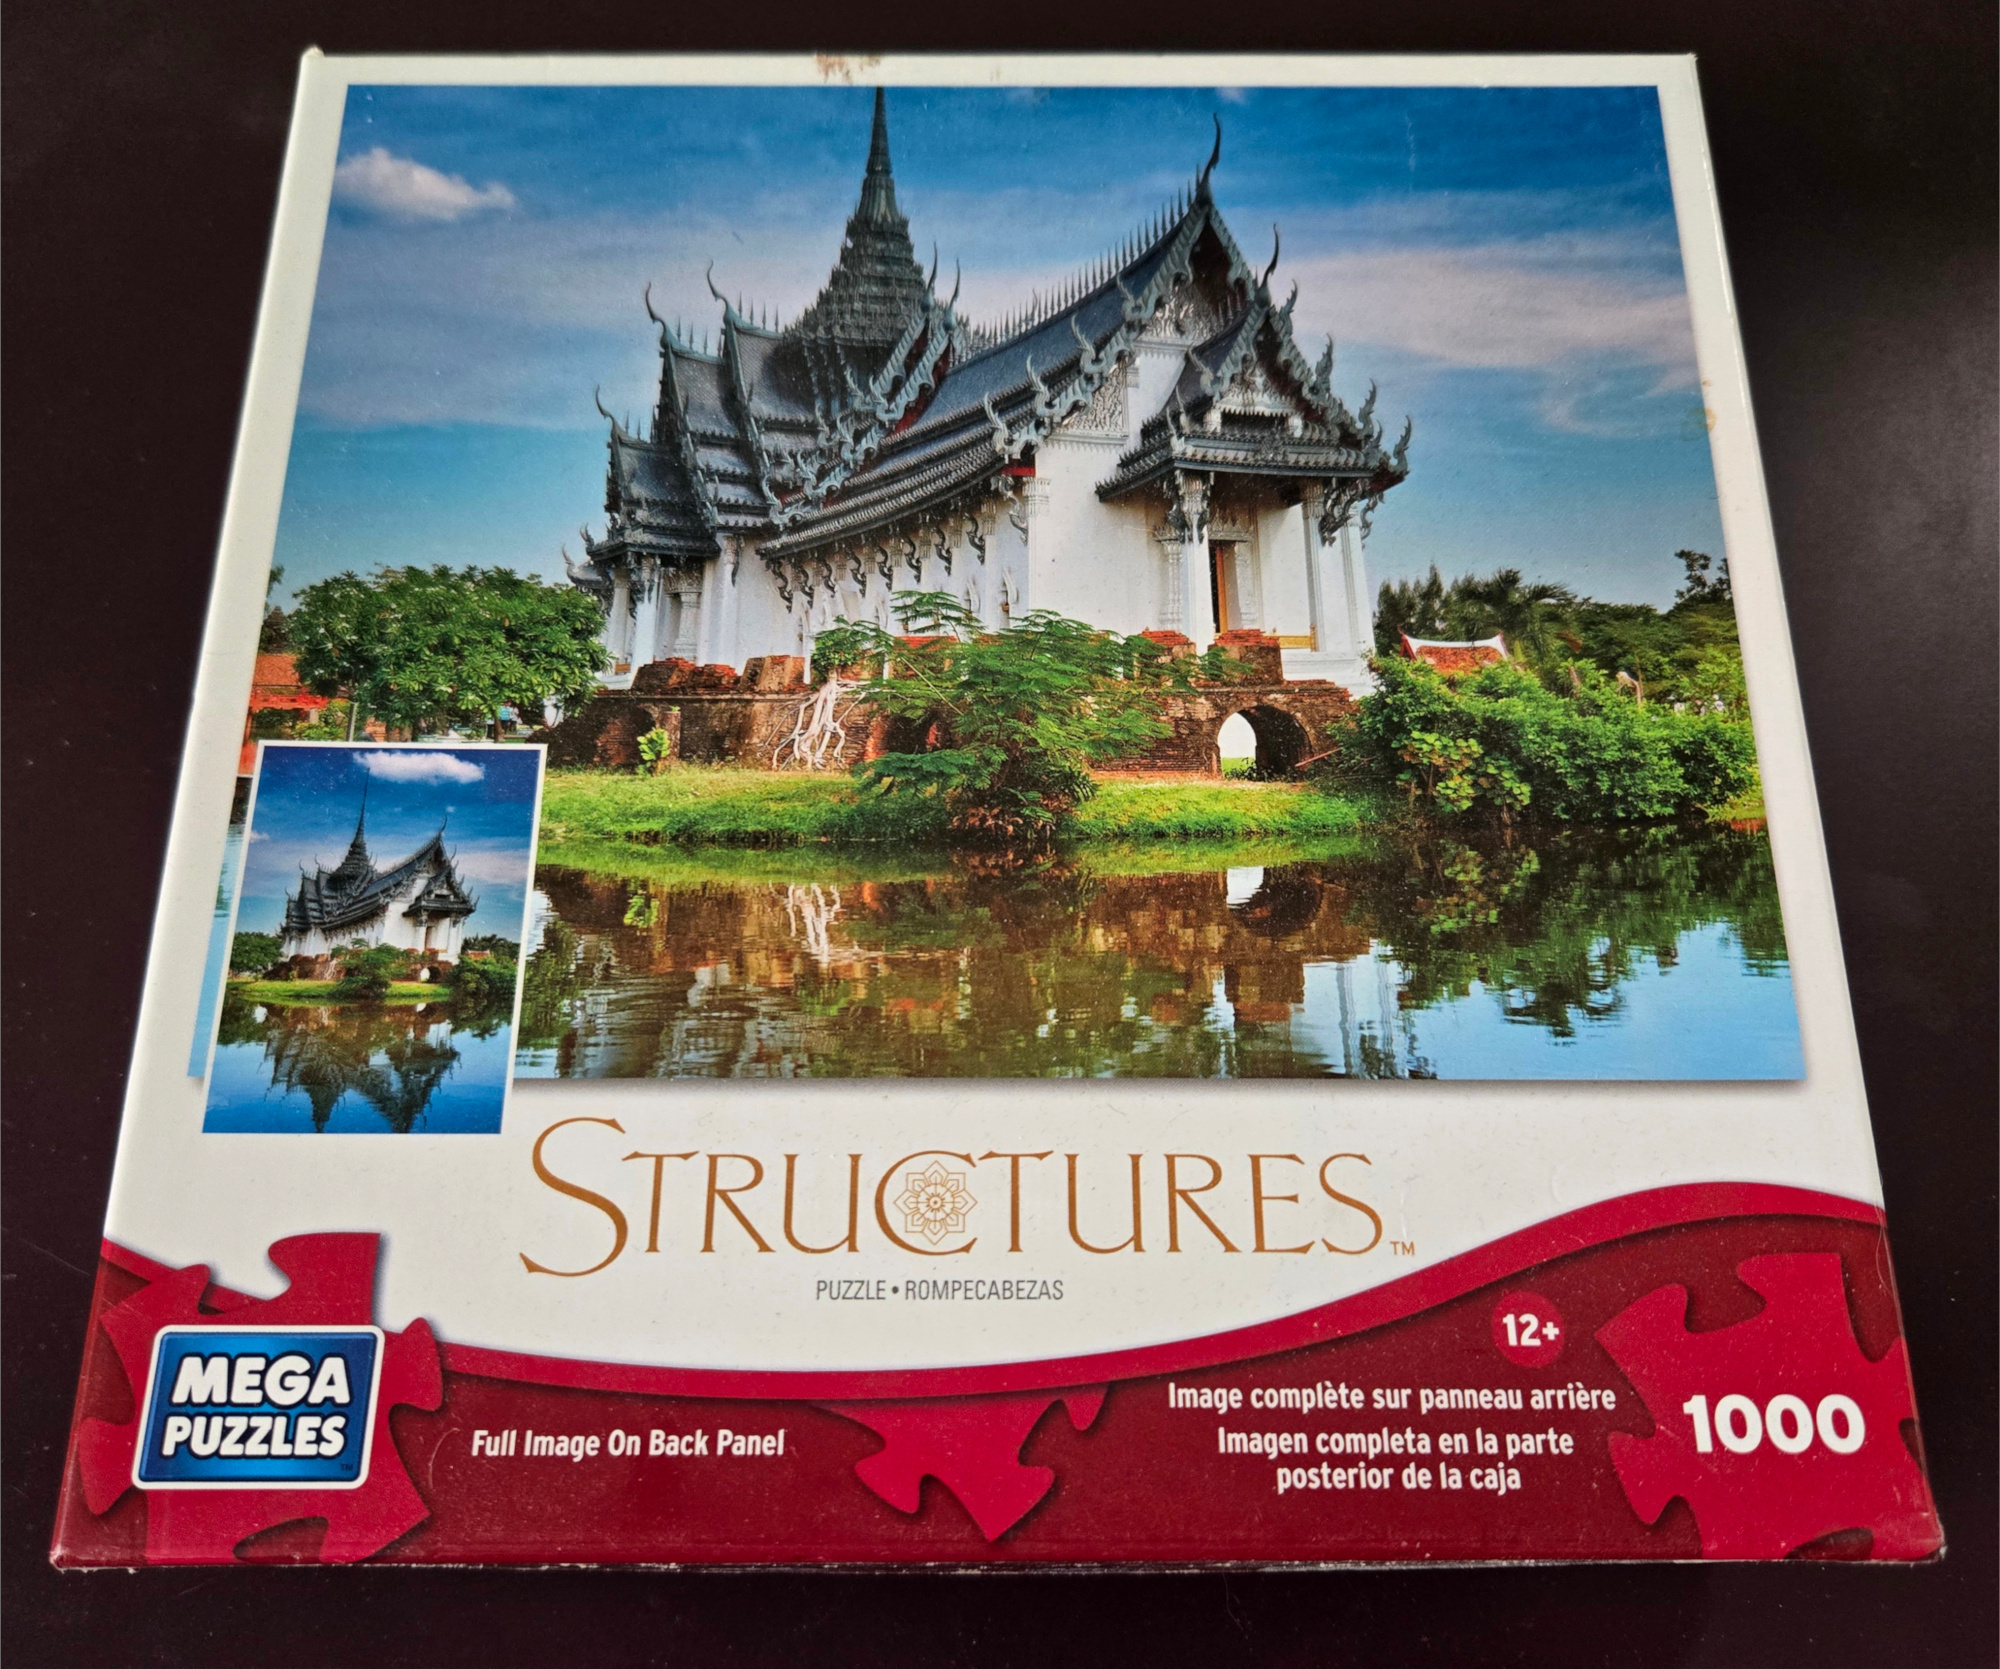
Sanphet Prasat Palace, Bangkok

Size: 1000 pieces
Available for purchase on eBay
Dimensions: 48.1 cm x 67.95 cm
Manufacturer: Mega Puzzles
Photographer: Dmitry Pichugin / Shutterstock
Box: photo
Dorset countryside

Size: 1000 pieces
Available for purchase on eBay
Dimensions: 48.26 cm x 68.58 cm
Manufacturer: The Canadian Group, #03814
Photographer: Vivvi Smak
Box: photo
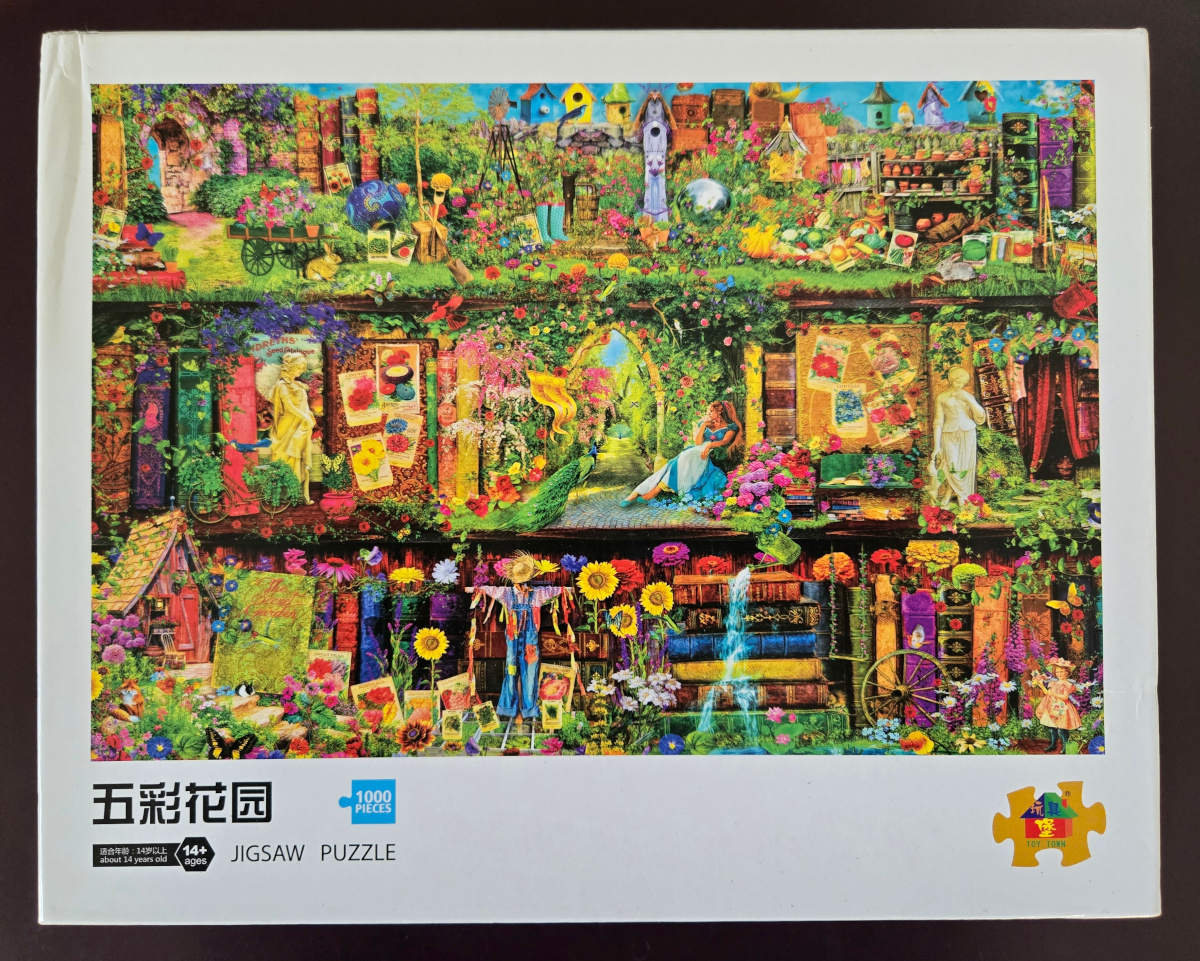
The garden shelf
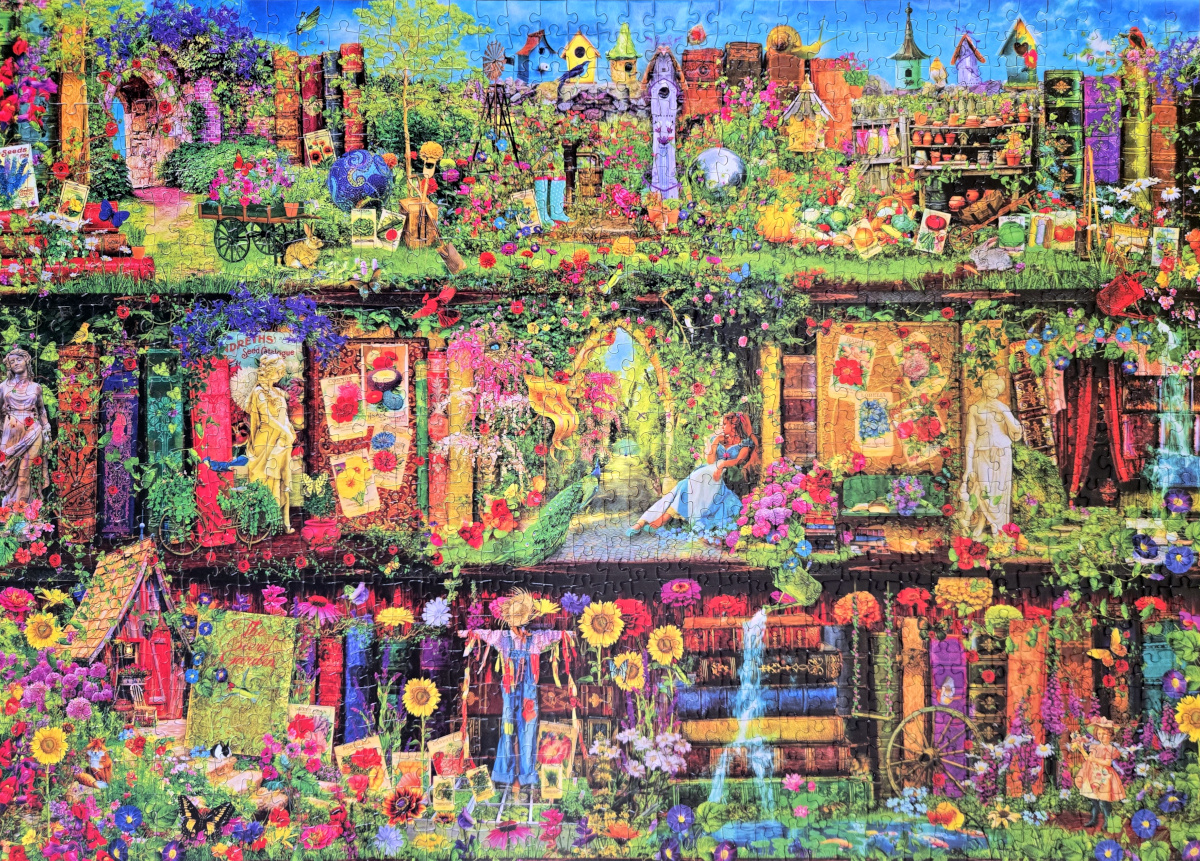
Size: 1000 pieces
Available for purchase on eBay
Dimensions: 50 cm x 70 cm
Manufacturer: Toywea, 20075-17, 0755-3360-0999
Artist: Aimee Stewart – Aimee Stewart gladly adopts the title ‘Renaissance Woman’, and for good reason. As a self taught artist, photographer and writer who has music in her soul and daydreams in her blood, she lives life as one giant creative endeavor.
In 1999, Aimee started dabbling in website design. By 2005, she had made the leap from simple graphics to experimental photomanipulation. Since then, Aimee has excelled in erasing the lines between ‘digital’ art and ‘traditional’ art, until only the inspired creation remains. [Bio on Aimee Stewart site]
Box: photo
My blooming, growing world
It has been a while since I’ve posted an update to Fingering Zen. The main reason being – I birthed a baby. Since that makes three, it’s quite lively here over the past couple of months. And now that summer finally appears to have graced us with its warmth, there are lots of things happening outdoors, which means I’m rarely at the keyboard.

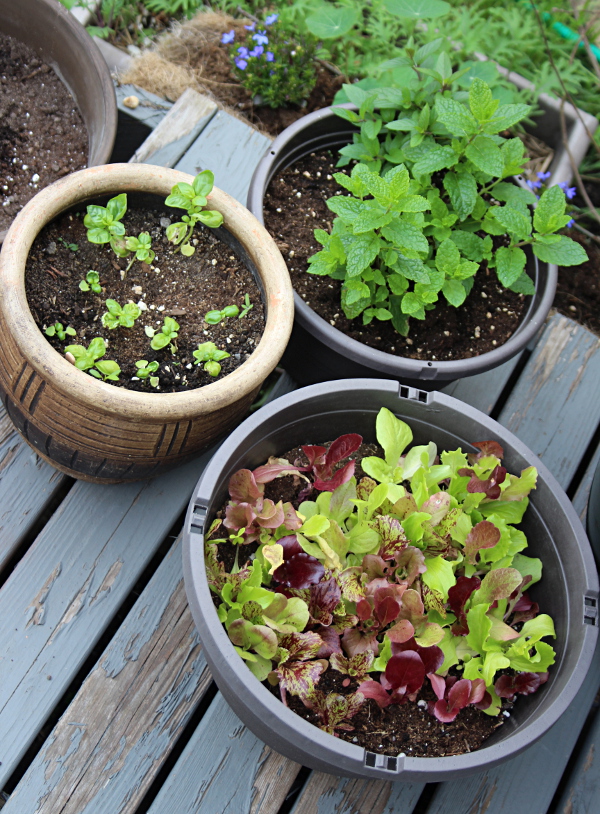
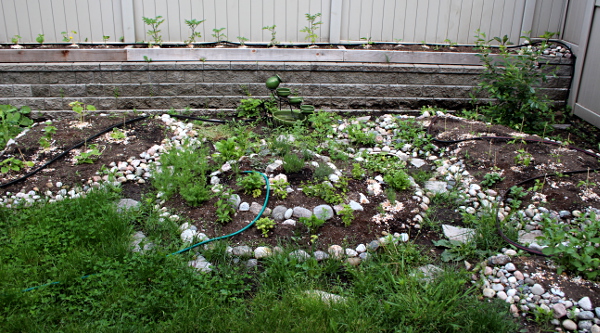
My garden is in bloom, and lots of veggies and herbs have been planted. Having a little one attached to me pretty much around the clock means that I have to find 15 minute windows of time here and there to take care of the garden. This is what we’ve done in the garden when children are playing and the baby is carried by me or my partner:
– Pull a few weeds while playing with children outside — I showed them what to pull and engaged them in the process.
– Plant a few seedlings — it might seem like it would take forever, but I’ve planted a garden bed or two in 15 minutes. Kids have helped by bringing me plants and taking away empty plant pots.
– Seed a bed — it doesn’t take long to make a few channels, drop some seeds into them, cover and water. My kids like to put the seeds into the ground and then watch them grow.
– Stake plants — I stake tomatoes and peppers, and initially cucumbers and squashes.
– Set up irrigation — it took about 3 sessions of 15 minutes to re-create our hose setup from last year: rain barrels with a hose, and a splitter with two drip hoses snaked throughout the garden and a hose with a nozzle we use to water potted plants, the herb spiral and other stand-alone plants. Children loved help us test the setup by turning the water on and splashing around in all its wet glory.
– Water plants — my kids love directing the spray hose, turning on the dripping hoses and moving the rain barrel hose from bed to bed.
– Make a trellis or two — I still need to do this as it’s early in the season.
– Gather herbs and salad leaves with children — great to teach them what’s edible and what is not. This actually made my 3-year-old want to taste lettuce and pronounce that “hm, it’s not bad!”
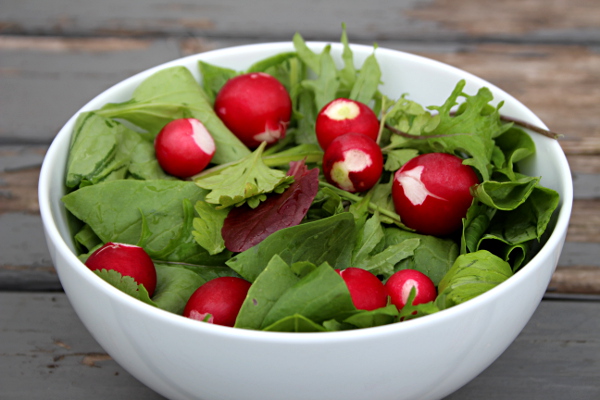
I’ve just sampled my first salad, comprised of young kale, bok choy, arugula, lettuce and a few sprigs of parsley, cilantro, and basil, topped with radishes picked from what used to be our front lawn.
We spend a lot of time in the garden in the evenings — eat our dinner outside, play games, note plants that have grown, flowers that have bloomed, keep an eye on which plants have been nibbled on by local fauna. Kids can now point out certain plants, know how to recognize stinging nettle and comfrey, so they can avoid being stung and pricked. They also now watch out for ripening fruit and excitedly tell me about their discoveries.
I feel this summer bursting with potential. May it bring us many a warm lovely day.
Lake District

Size: 500 pieces
Dimensions: 48 cm x 36 cm
Manufacturer: TCG, #40275-3
Photographer: David Noble
Original: photograph
Puzzle: Great Britain Cumbria Lake District, National park. Lovely easy-to-assemble puzzle with a serene country-side landscape. Good places to start are the boundaries of grass with flowers and sky with mountain and trees. Distinct textures of the house and a brick-coloured roof, smooth green mountain, orange, yellow, and black tree leaves split the picture into clear regions. The flower bed can be assembled by focusing separately on purple, red, green, and black flowers.
Central Park, New York

Size: 500 pieces
Dimensions: 48 cm x 36 cm
Manufacturer: TCG, #43270-24
Photographer: Sandra Baker
Puzzle: Small bright puzzle easily put together in an evening. The horizontal bands of lilac flowers, green tulips stems, white and pink tulip flowers, darker hedge, lighter leaves above, the fence, and the grass and trees beyond split the puzzle up into easily-assembled regions. The fountain and the statues are distinct enough in texture and colour to be easily put together as well.
Harvest frequently
With a bountiful garden, comes a need to harvest. It takes planning and time to start plants (especially from seed), harden them off, transplant them into the garden, weed, water, feed the soil, trellis. When things are finally lush and green, we tend to sigh with relief and let the garden grow. Soon however, we need to consider harvesting. After all, that’s the primary reason for growing edibles.
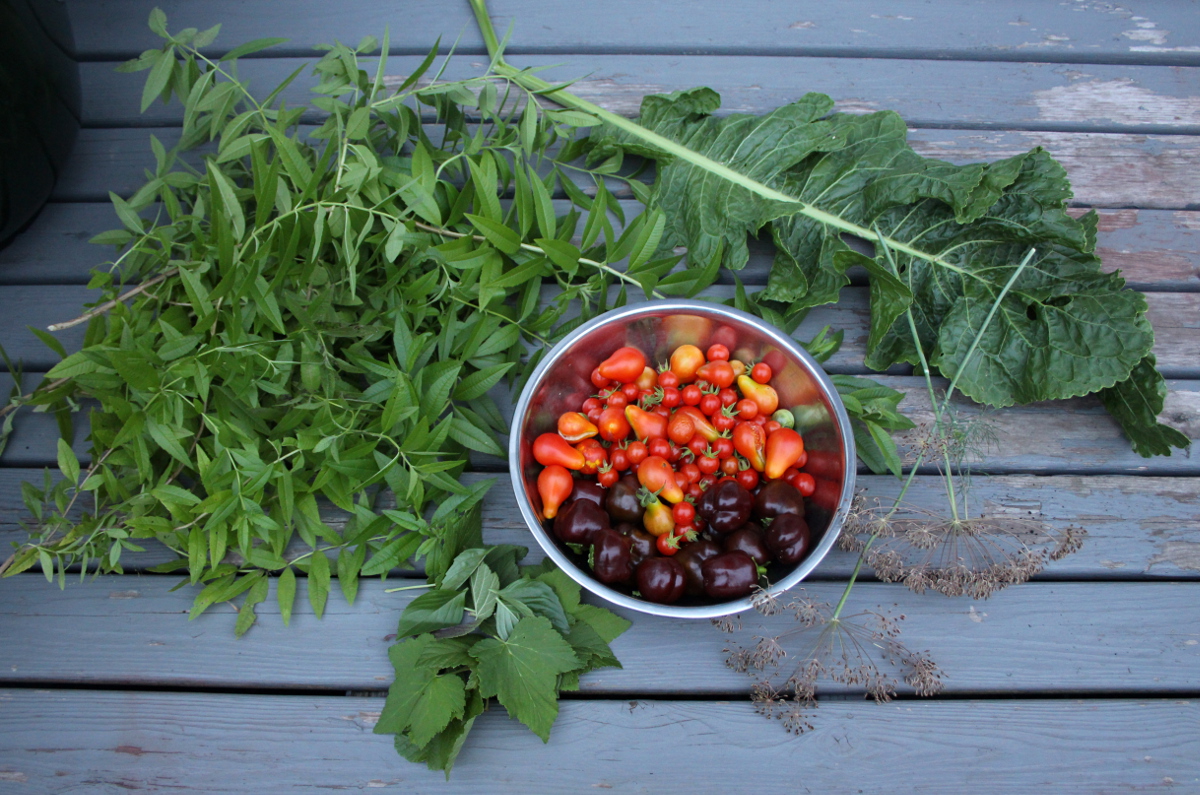
Cherry tomatoes, mini chocolate peppers, lemon verbena, horseradish, dill, and black currant leaves for pickling
With many plants, the more you harvest, the more harvest there will be. Herbs, greens, fruiting plants put out more growth and fruit after harvest. In the earlier years, mots of my harvesting happened at the end of the growing season, often in several grandiose batches that required hours of processing. This year, I’m determined to harvest frequently and in small quantities. It’s much easier to manage, the freshly-picked produce is the most delicious and nutrient-rich, and I’m encouraging plants to produce more.
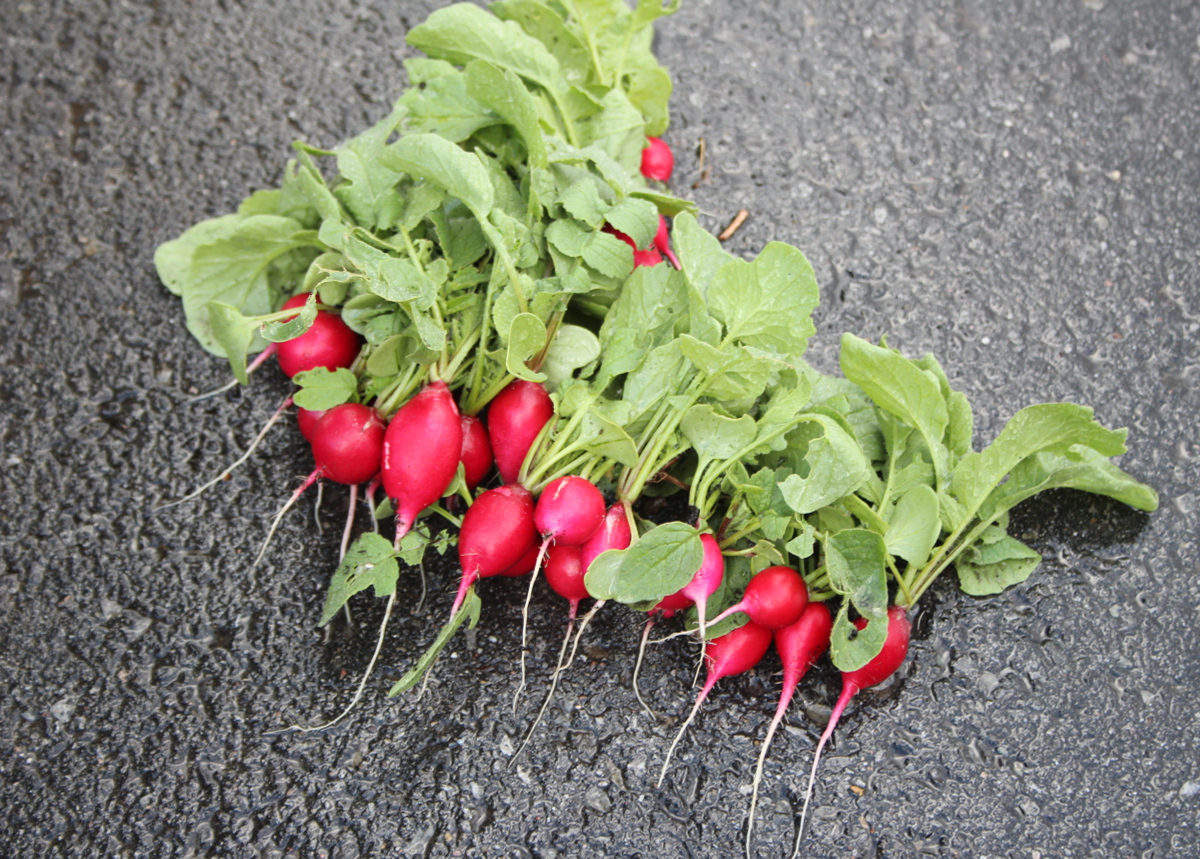
Radishes pulled out of what used to be my front lawn
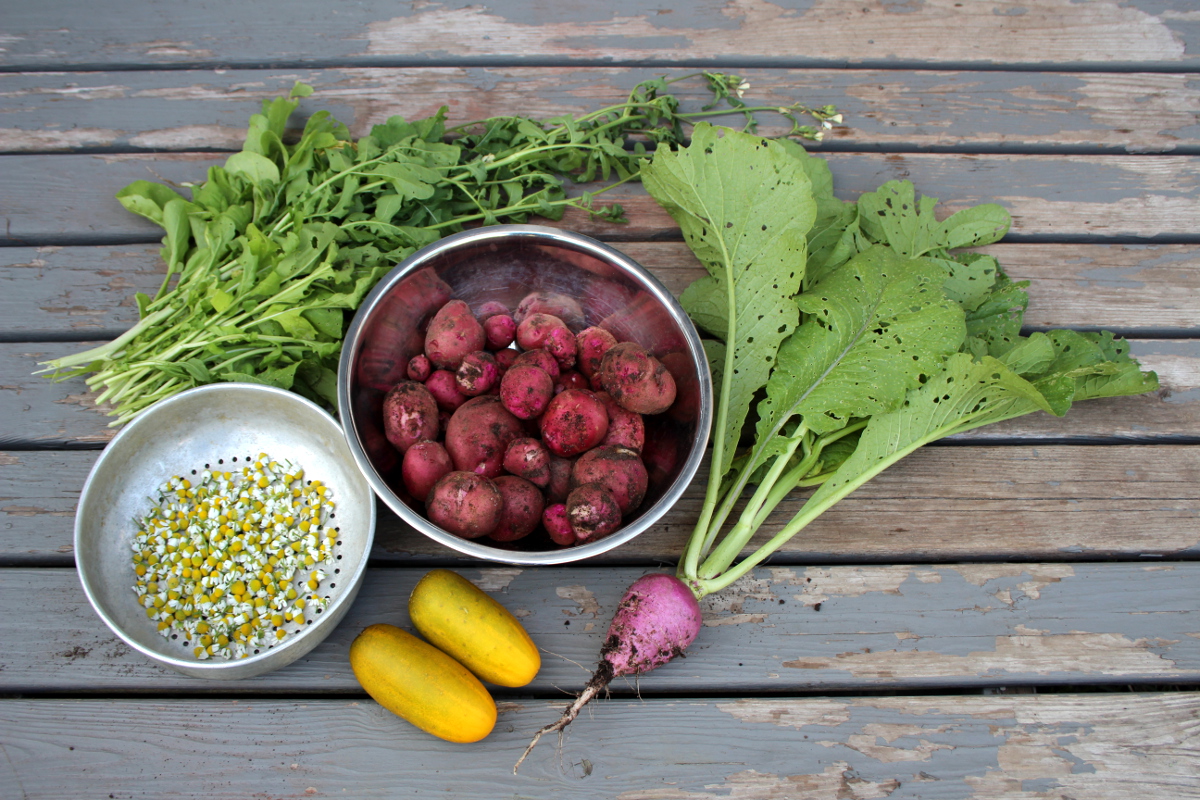
Surprise potatoes, arugula, cucumbers, chamomile and a giant radish
I’ve been picking chamomile and calendula flowers, greens, potatoes, cucumbers, radishes, and now tomatoes and eggplants are ripening.
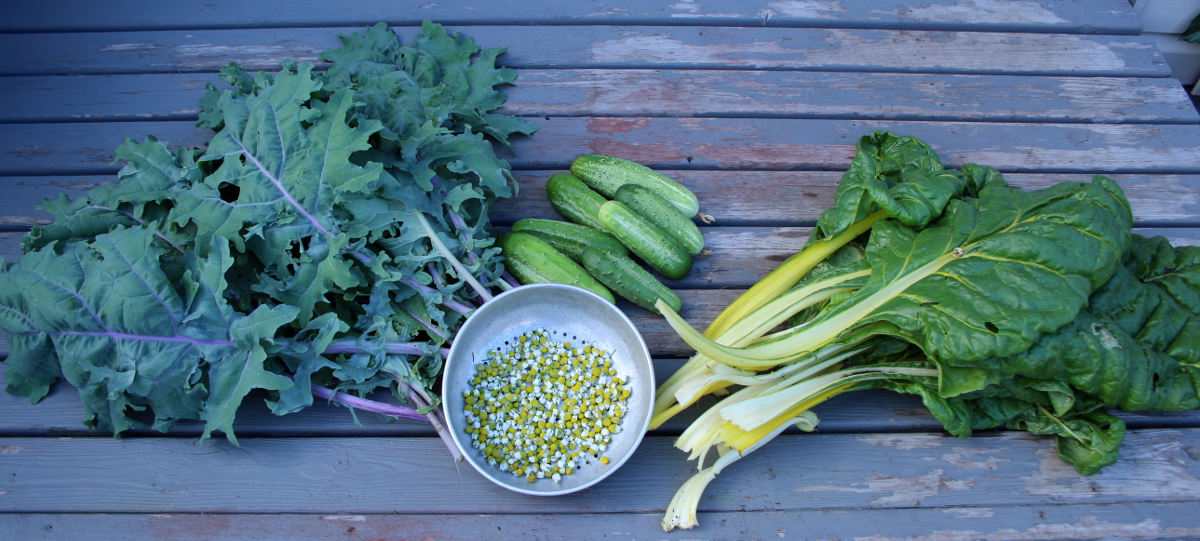
Kale, chard, cucumbers, and chamomile
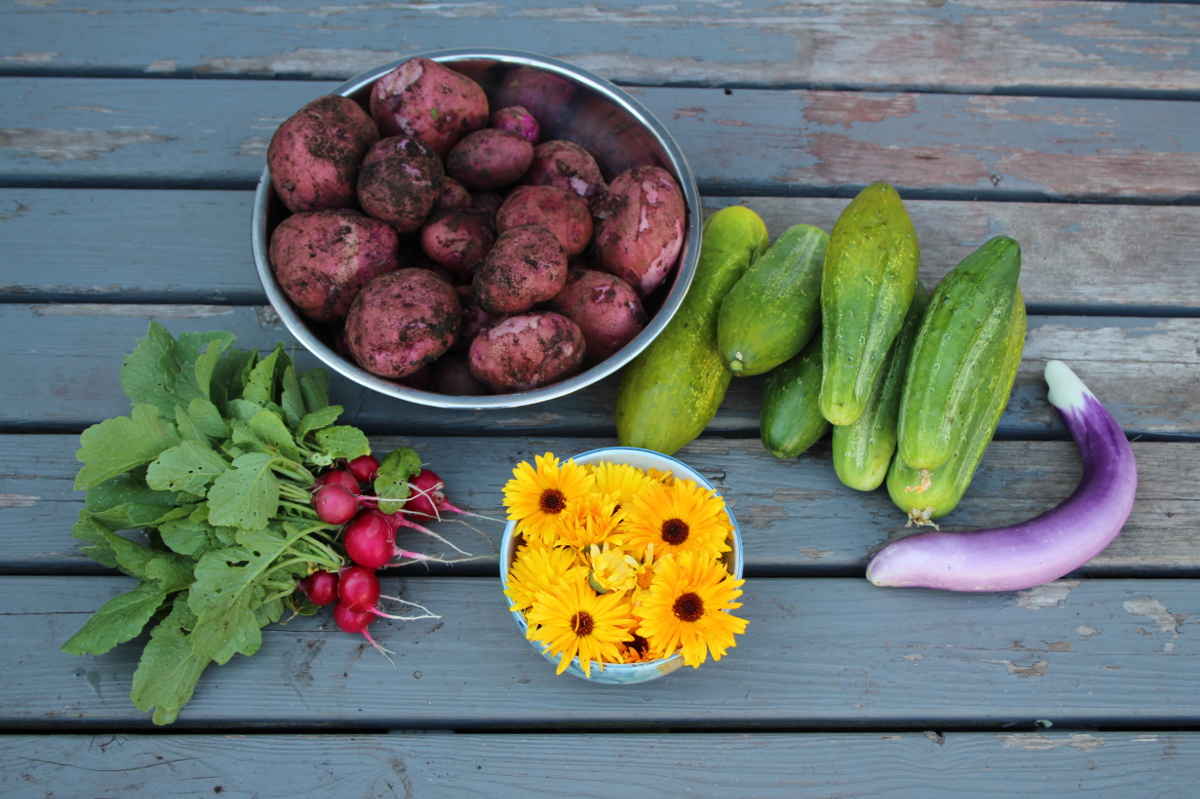
Surprise potatoes, radishes, calendula, cucumbers, and an eggplant
The only two large batches I’ve harvested to simplify processing, were the herbs from the spiral (because I let it go without harvesting for a few weeks) and greens (kale, arugula, and Swiss chard).
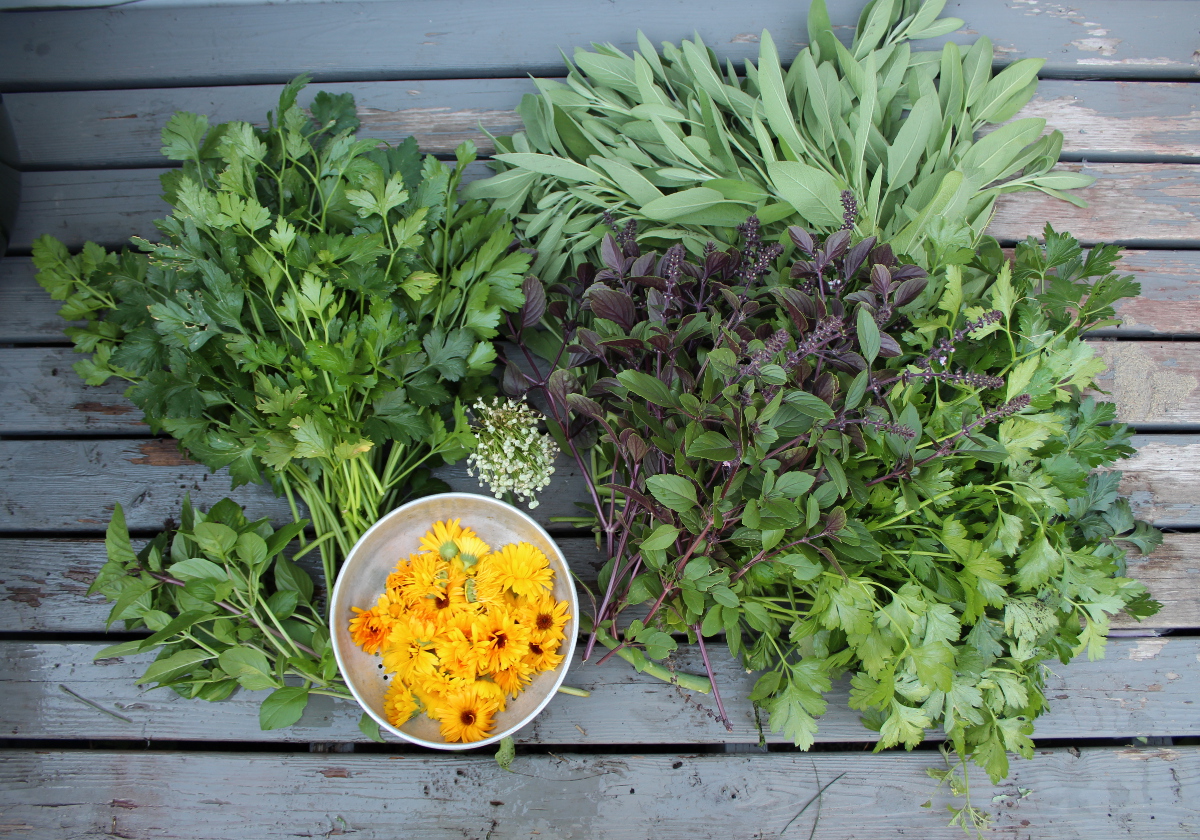
Calendula, basil, parsley, sage, onion seeds
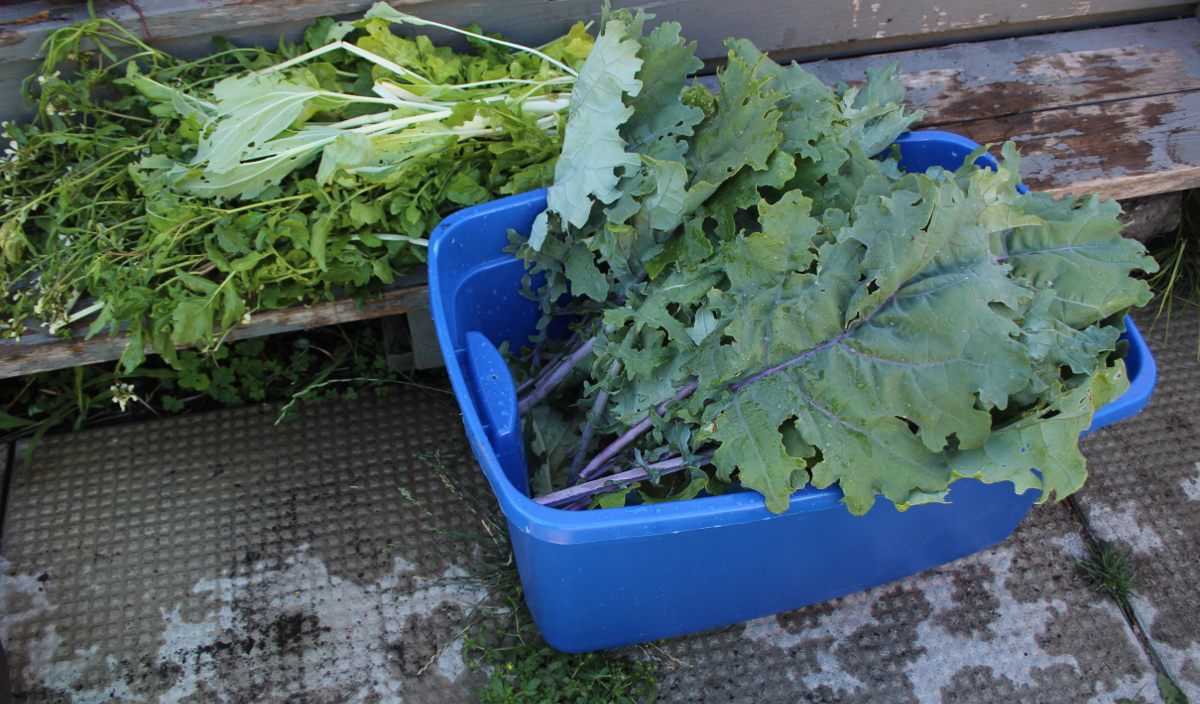
Arugula and kale
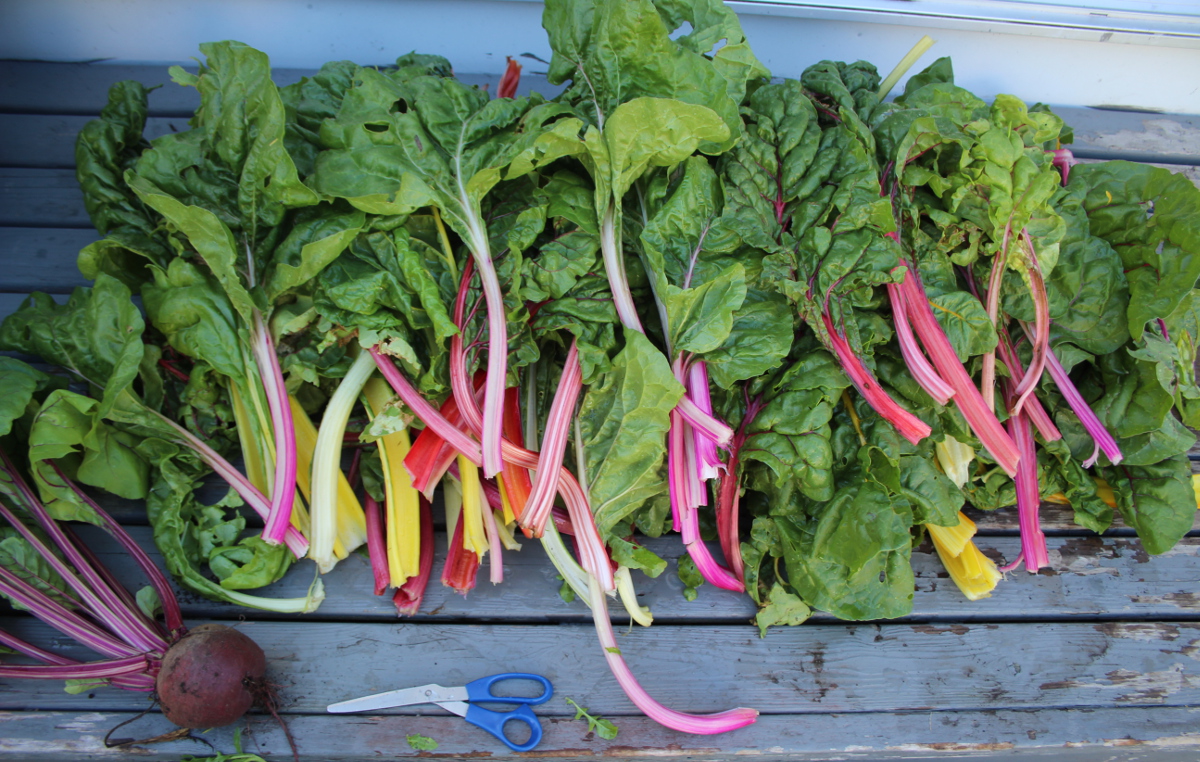
Swiss chard and beets
I wanted lots of basil, parsley, and sage to preserve them in oil for winter and to encourage the plants to put out new growth. Arugula was used in goat cheese pesto with basil and parsley.
Kale I’ve blanched and frozen in ice-cube containers. Swiss chard was separated into stems and leaves, chopped up and frozen. Both of these were easier to do in large batches.
I’m making calendula oil and steeping chamomile tea. I’m putting fresh cucumber slices in kids’ lunches, making low-salt pickles, and throwing together salads with radishes, cucumbers, and greens.
I’ve made beet salad and haddock in beet and carrot marinade.
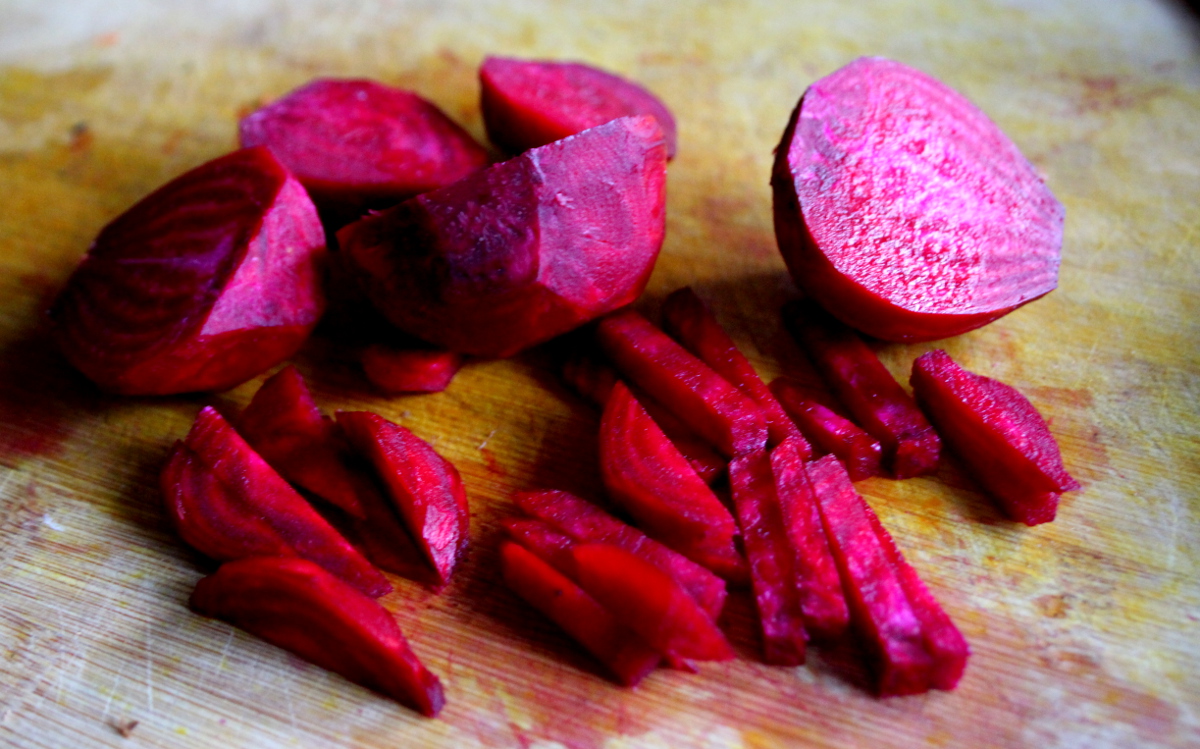
Chopped up beets for marinade

Beet, carrot, and onion marinade for haddock
Harvesting lets me find branches that need tying up, weeds that are craftily hiding in foliage, plants in pots that need relocating to catch more sunlight, irregularities in leaf colour or insect activity. Harvesting gives me more opportunities to connect to the garden, to ground myself, and breathe deeply.
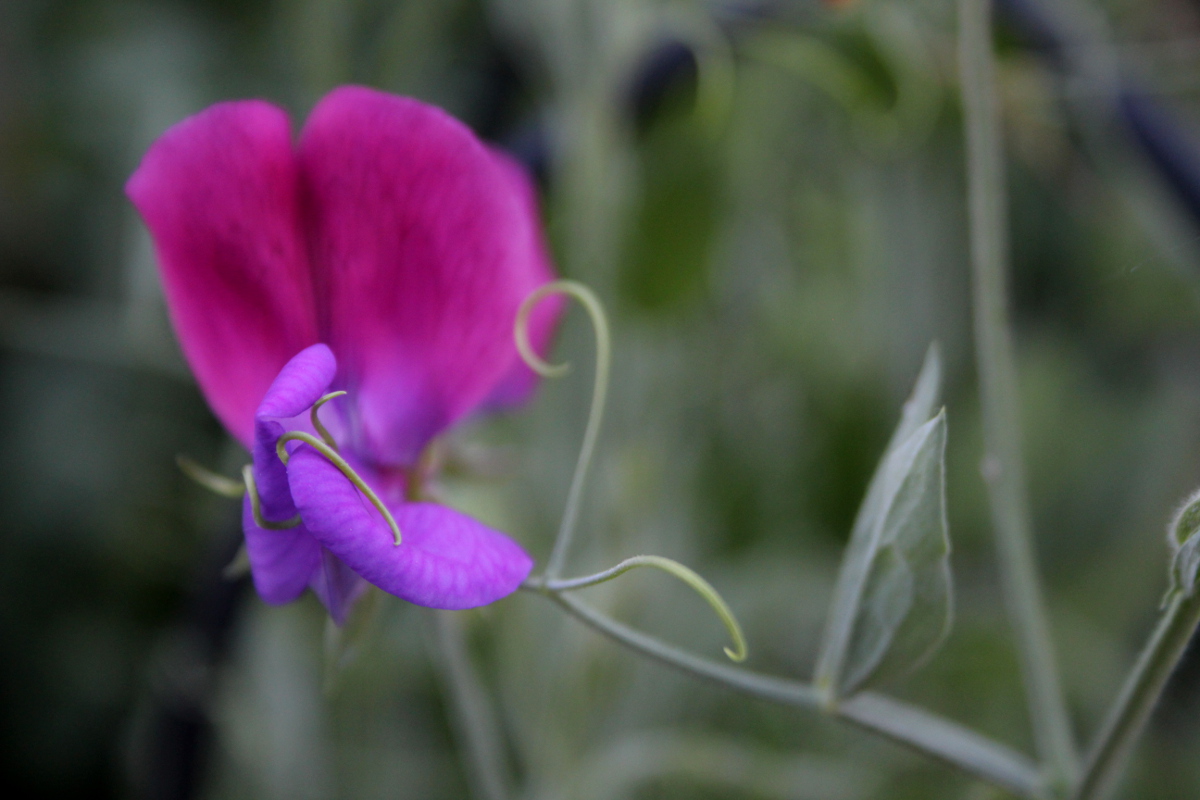
Sweet peas in bloom
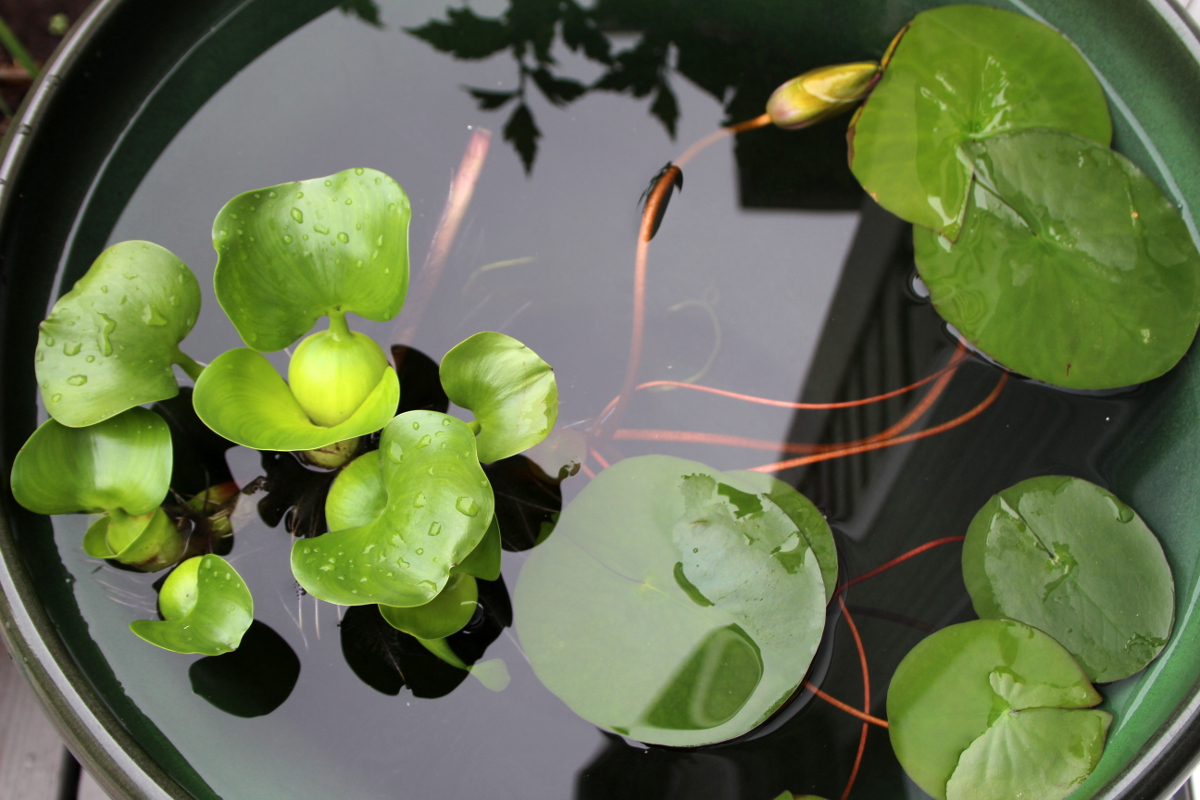
I love hunting for hidden treasures in the vines and plucking green fragrant herb leaves. The kids go outside after supper for a dessert of a few raspberries and black currants. We watch unfolding blooms of water hyacinths, hibiscus, calendula, and lavender, watch the tiny goldfish dart among the water lily leaves, and inhale the aroma of basil and lemon verbena.
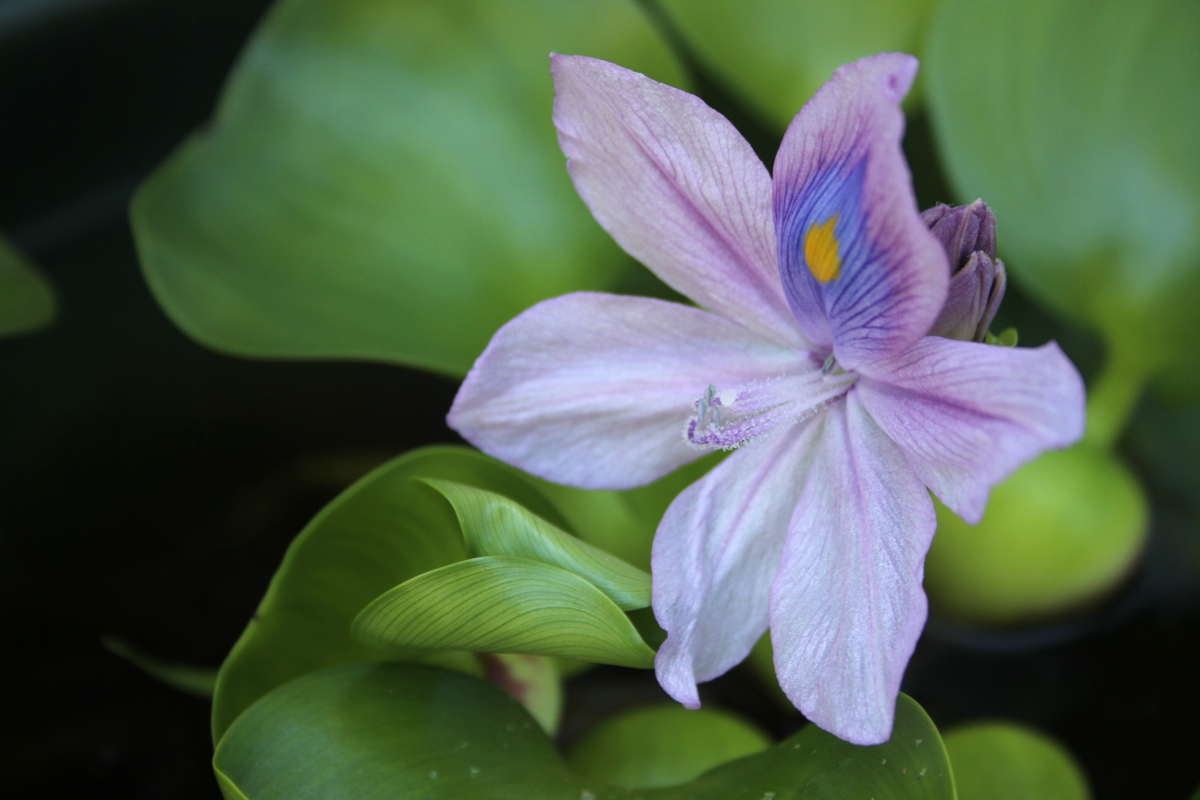
Blooming water hyacinth
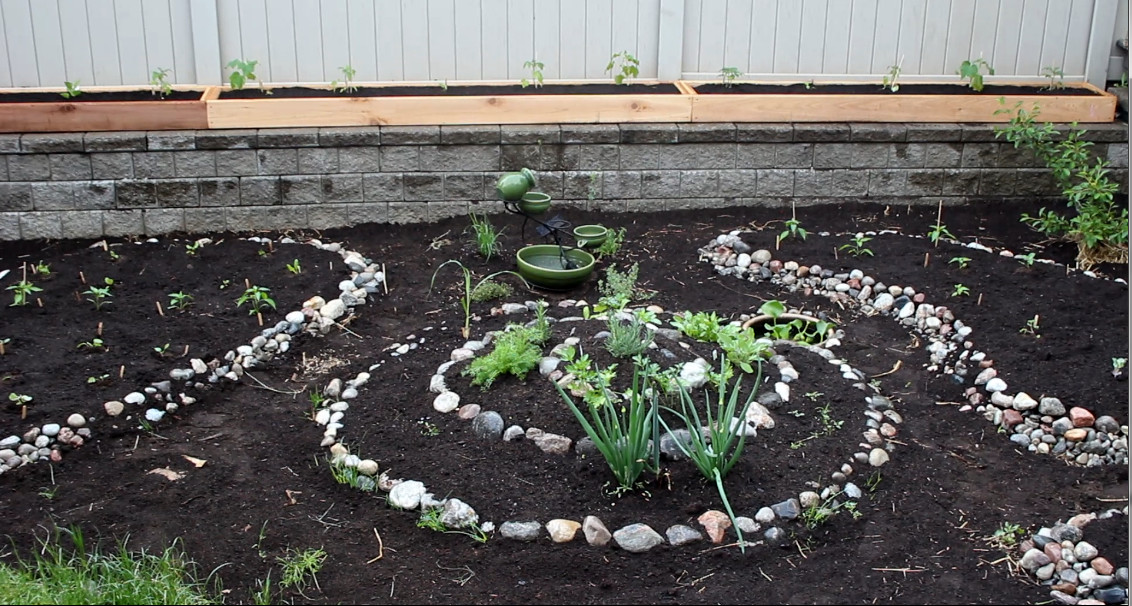
Back yard edible landscaping – raised beds, herb spiral, trellises, ponds
We spend lots of time in the kitchen, which has a splendid view of our back yard. Last year, when we just moved to our new place in May, we brought in a few yards of good soil and planted all the seedlings I’ve started at the old place all over the yard. The only back yard project for which we had time was an herb spiral with a small pond. With three trees and a play structure taking up space, most of the garden filled with a tomato forest, and harvest was quite a challenge. This year, as part of my edible landscaping project, I’ve decided to shape the back garden to maximize planting spaces, make the best use of the sunny areas and have an easier time during harvest.
That meant removing two trees (the third one is at the bottom of a play structure slide, so whatever would be planted there would likely be trampled during play), building raised beds (we have very tough rocky clay soil), bringing in good soil and compost mix, and using trellises to maximize vertical space. Aesthetically, I prefer curves to straight lines and right angles, and thus the following plan was born:
We love the herb spiral, so it is here to stay. The first major challenge was removing the corner weeping elm tree. We really wanted it to live, so we posted ads online to invite people to come and take it.
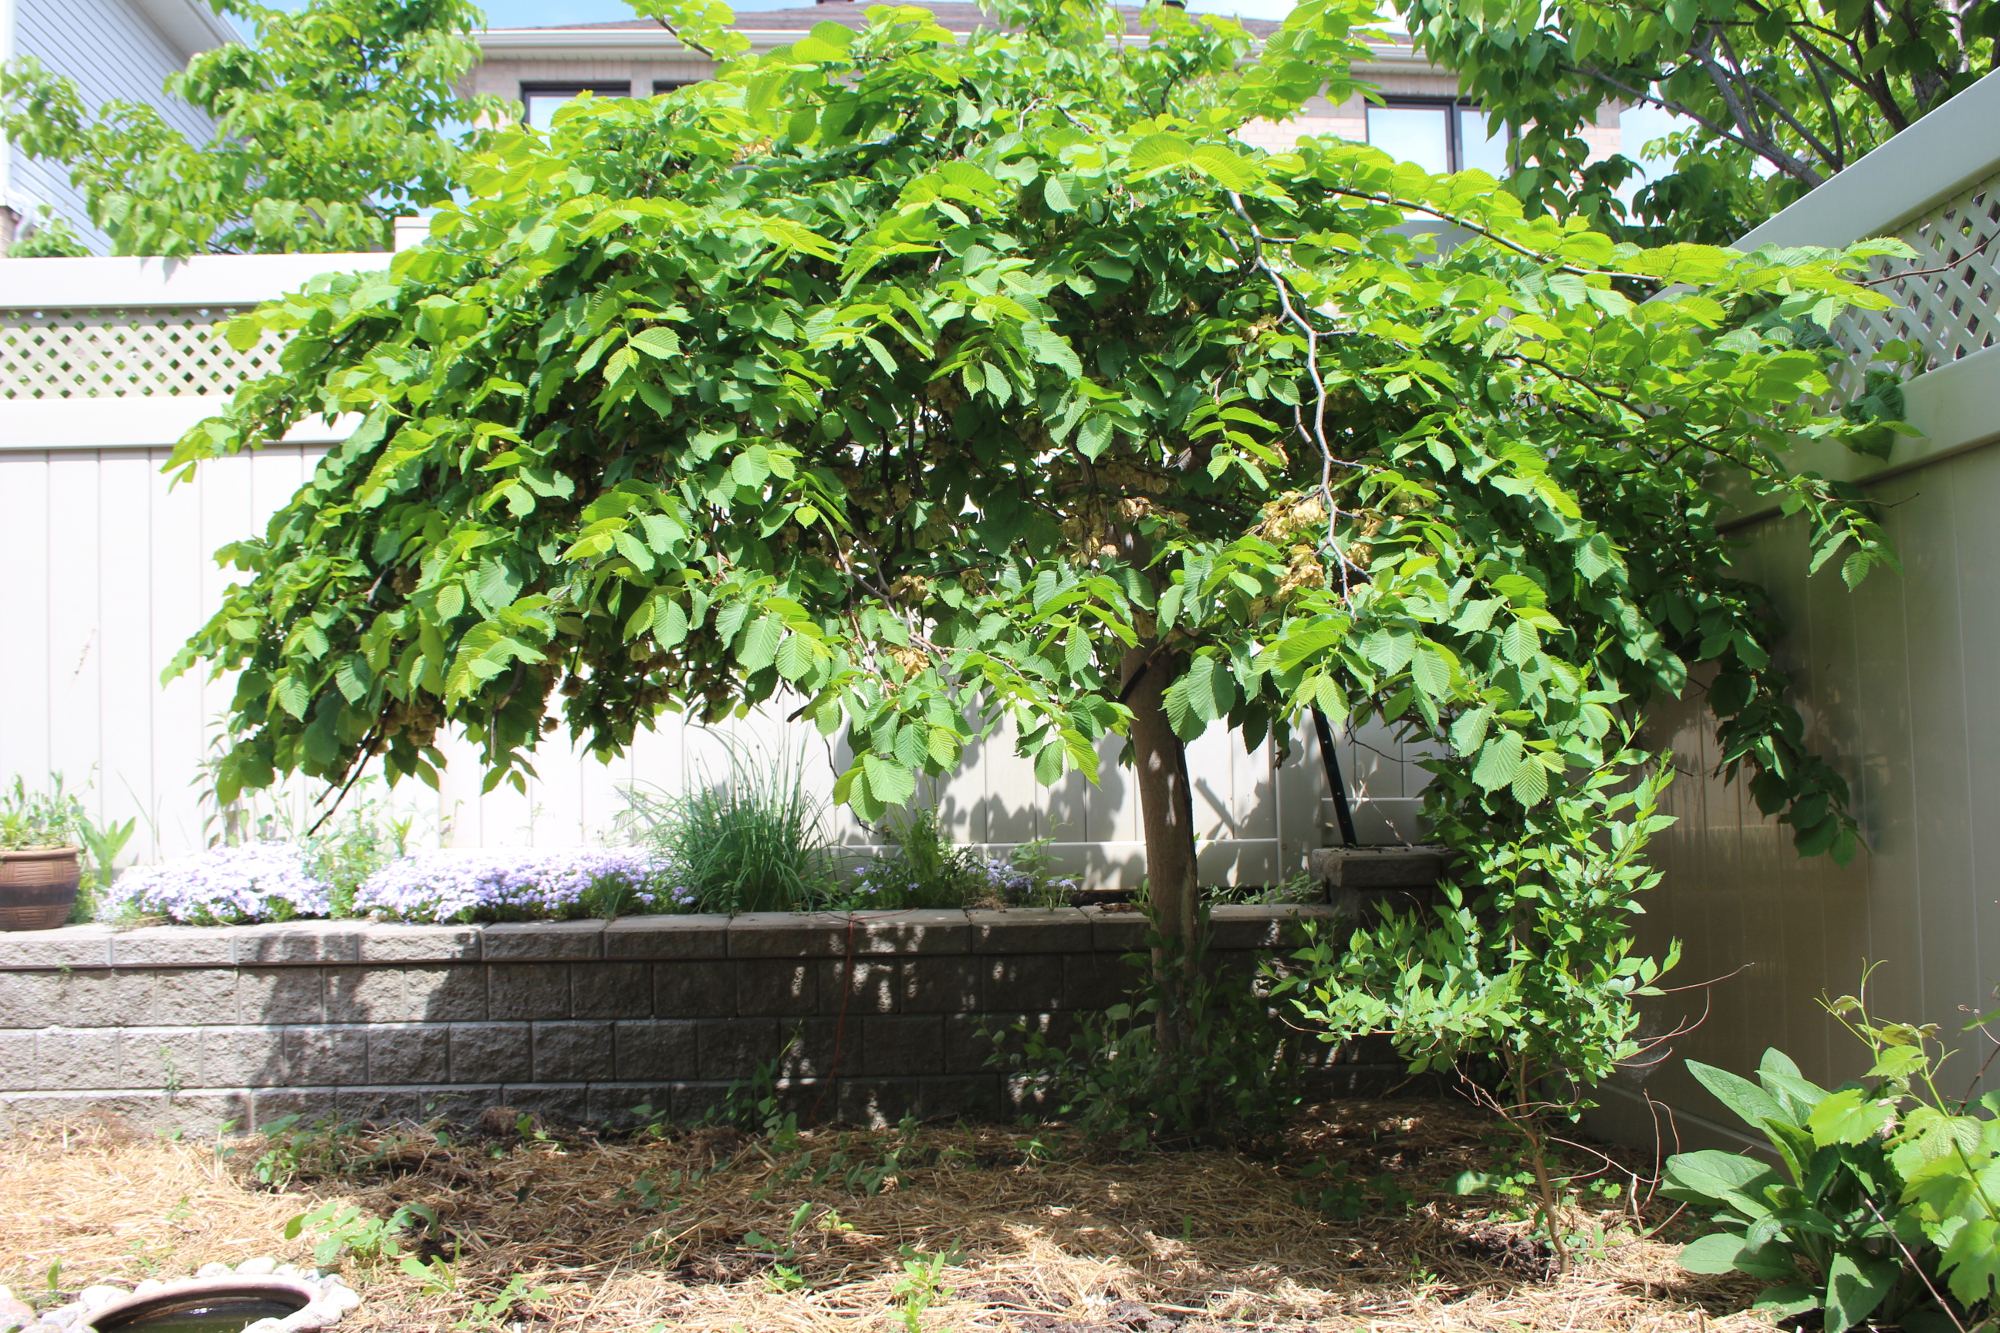
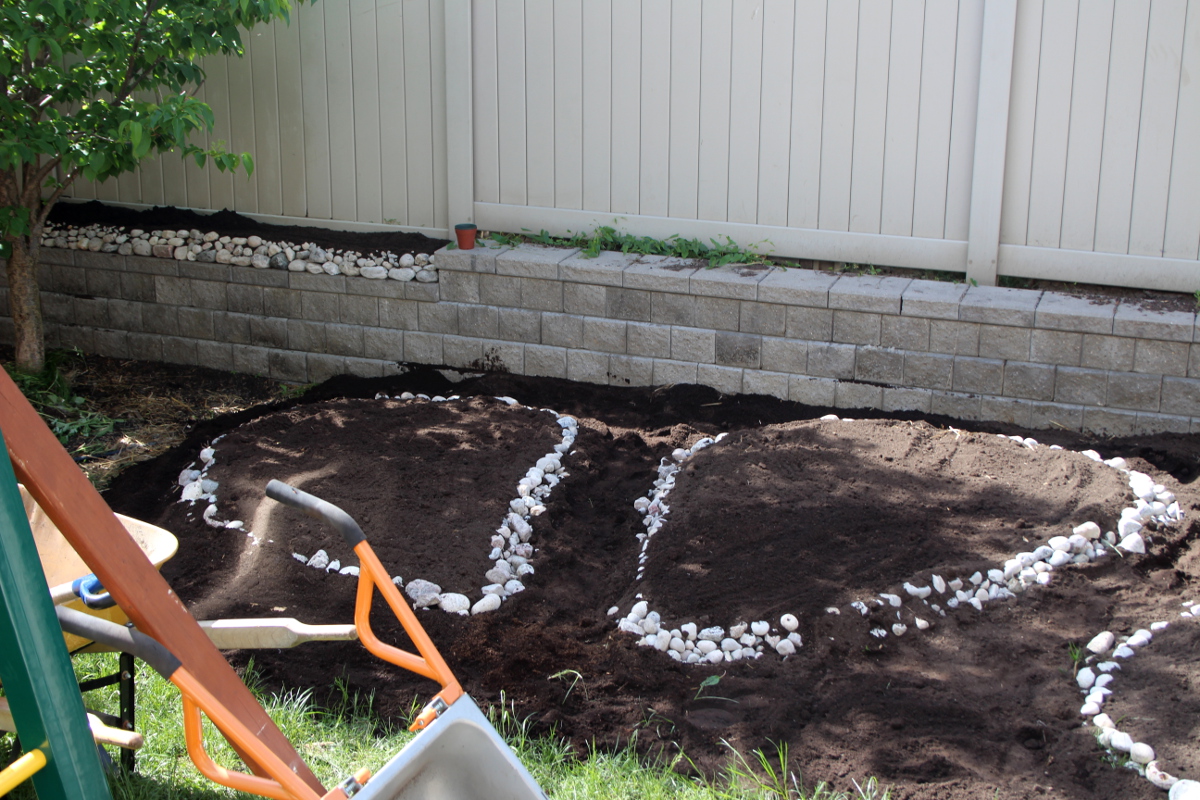
Here is the back yard before we started, with the weeping elm and the lilac tree (just visible at the right edge of the photo) still in place.

The weeping elm was dug up, and we had quite a challenge removing it from the garden, since it was heavy and the garden gate was too narrow. It took a wheelbarrow and four adults to carry and guide the branches out of the gate, and a trailer to transport it away, hopefully to a continued existence.

The lilac-coloured mini-phlox that used to grow along the back fence, together with some chives, got replanted into the front yard river bed. The lilac tree ended up crowning a row of bushes in the front.
We’ve cut up a large cardboard box salvaged at a road side into squares, and have placed them around the spiral and between raised beds, to indicate where the paths will be. Behind the barbeque, there is a large sheet of white paper which served as my dynamic garden plan. I’ve updated it as I went, with garden bed placement, paths, trellises, and plants once they were in place. Later, I’ve converted it into a digital copy linked above.
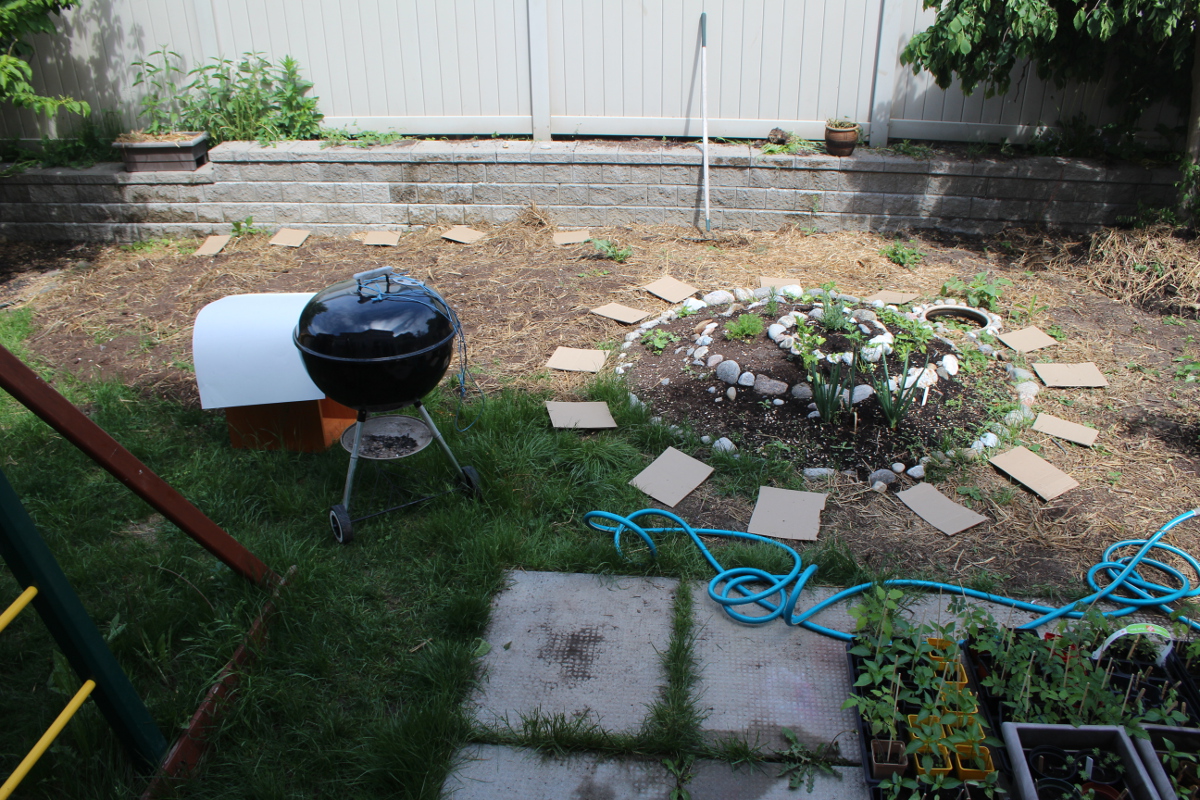
The squares had to be held up with rocks against the wind. We have also planted two small cherry trees in place of the trees we’ve removed. Grapes and comfrey were left to grow at the side fence, since they are very happy there.
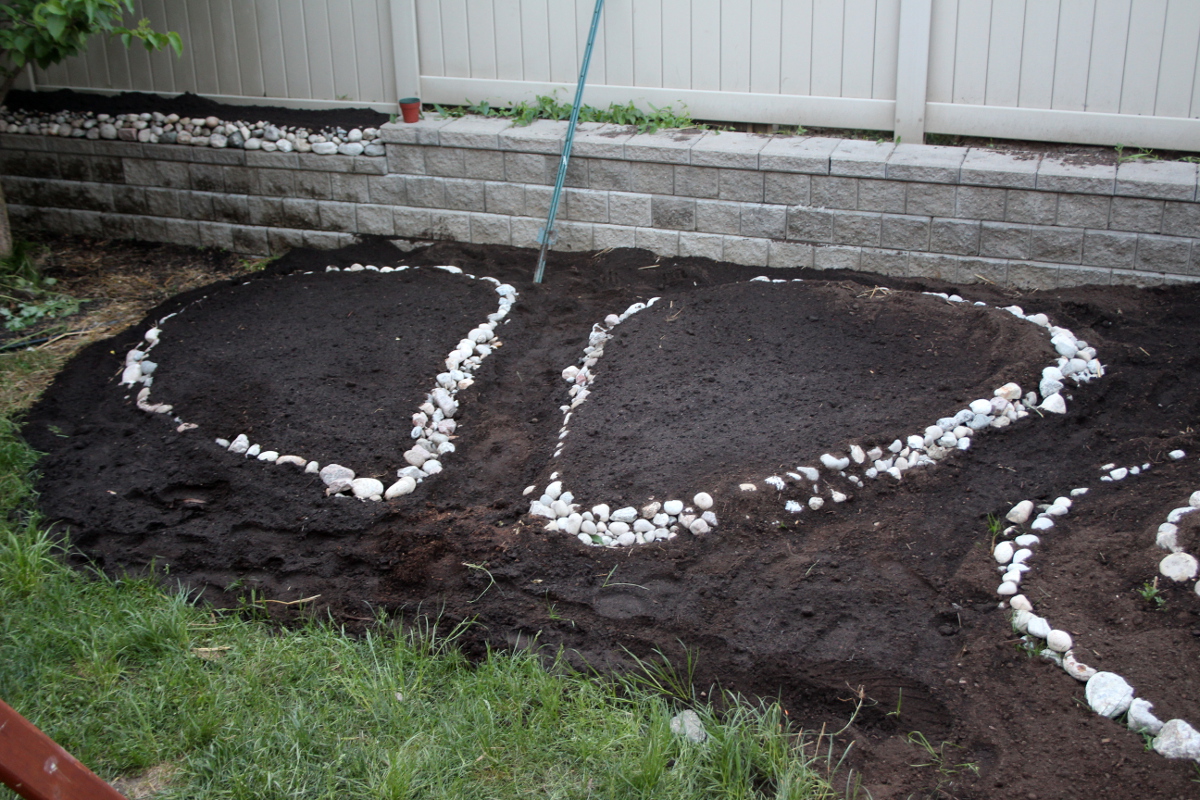
Then the building of raised beds commenced. River rocks and soil had to be brought from the front driveway, over the river bed, along a narrow passage between houses, into the back yard. The whole process took about one and a half days, and made for a wonderful workout, in fresh air and warm sun.
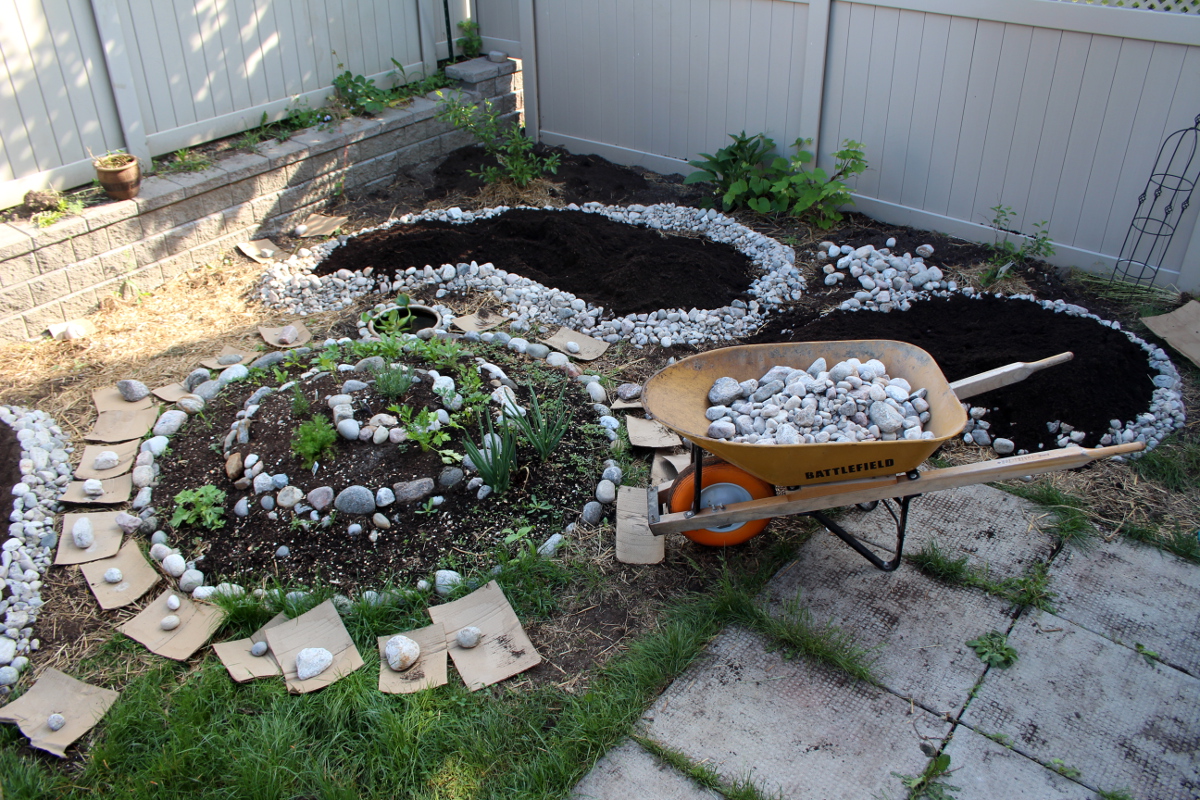
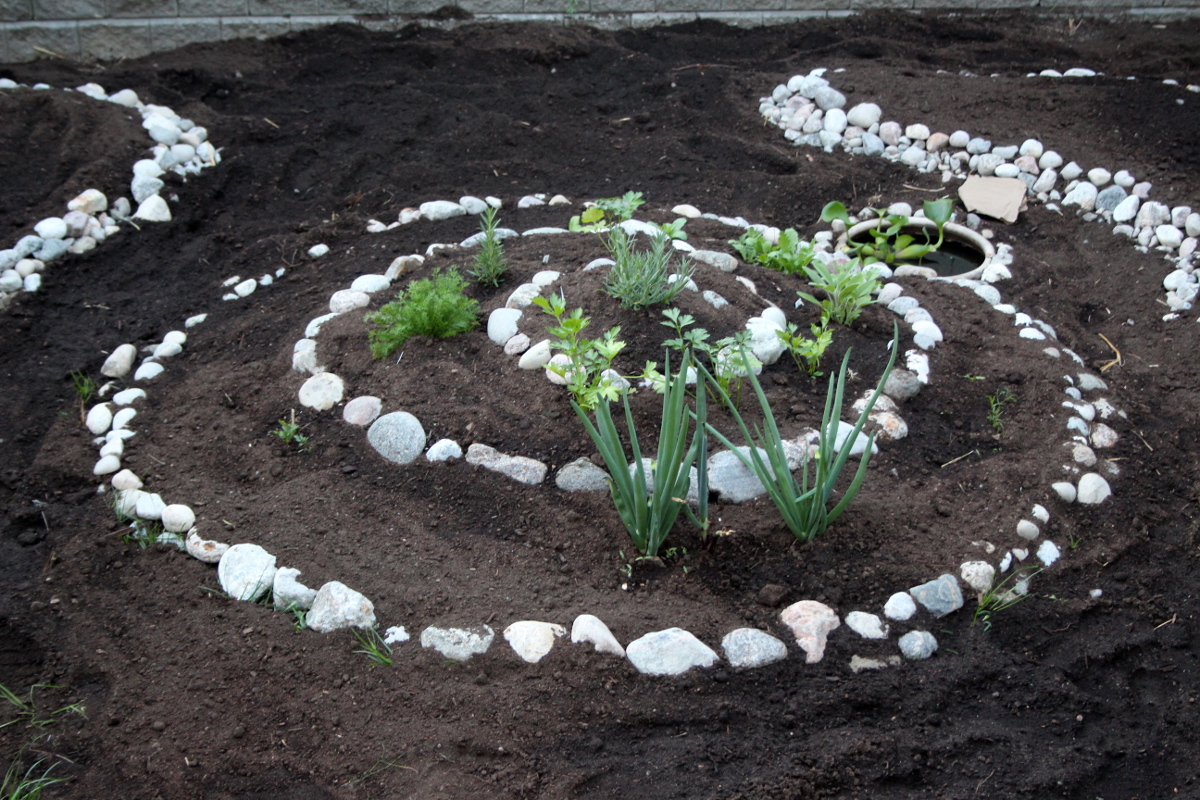
The rocks were piled into teardrop shapes, and the soil was placed inside the borders. Then soil had to be smoothed out evenly and pressed into the sides to help hold the rock borders up. Alternating soil and rock placement, the beds were slowly brought up to the desired height.
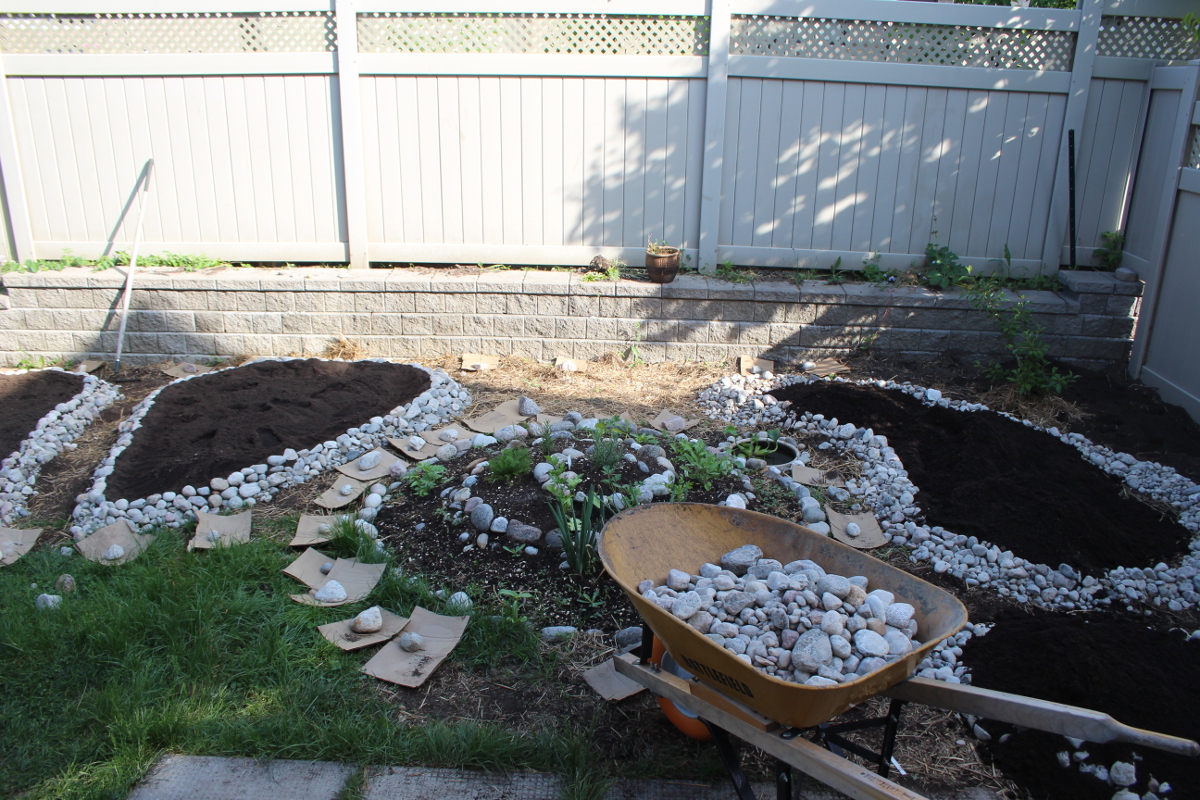
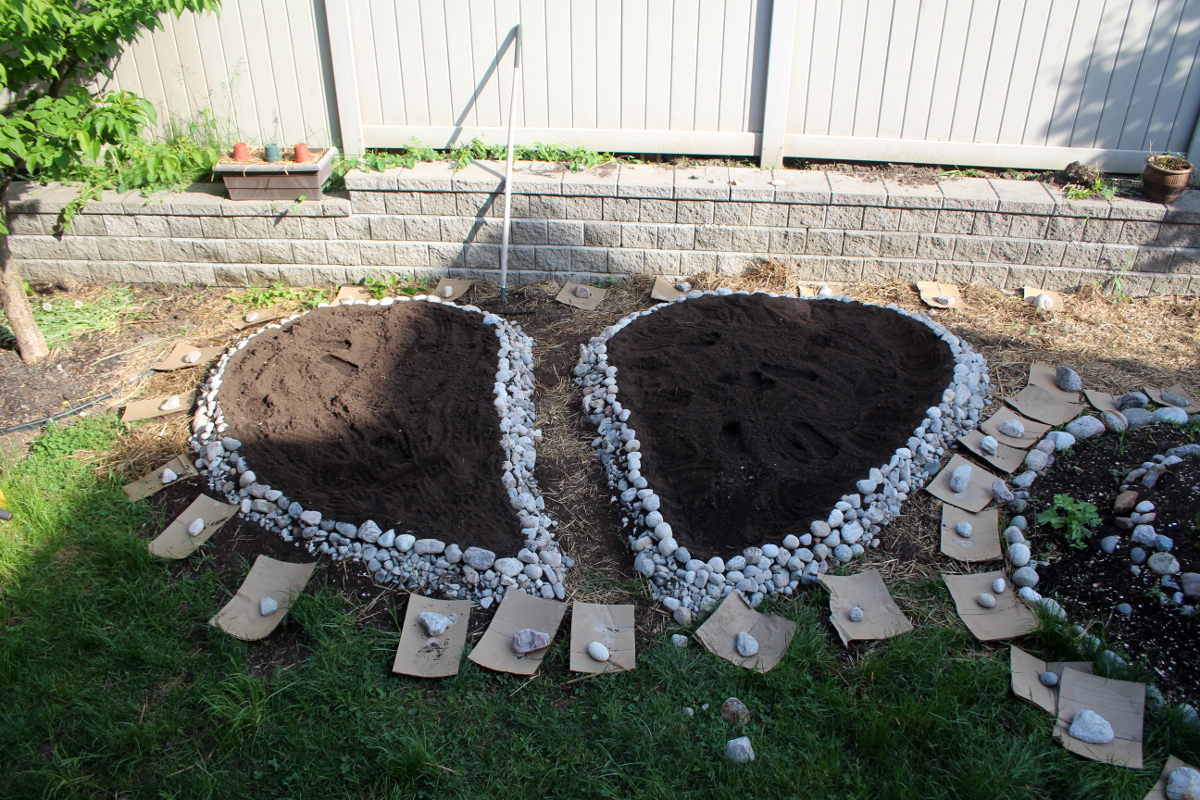
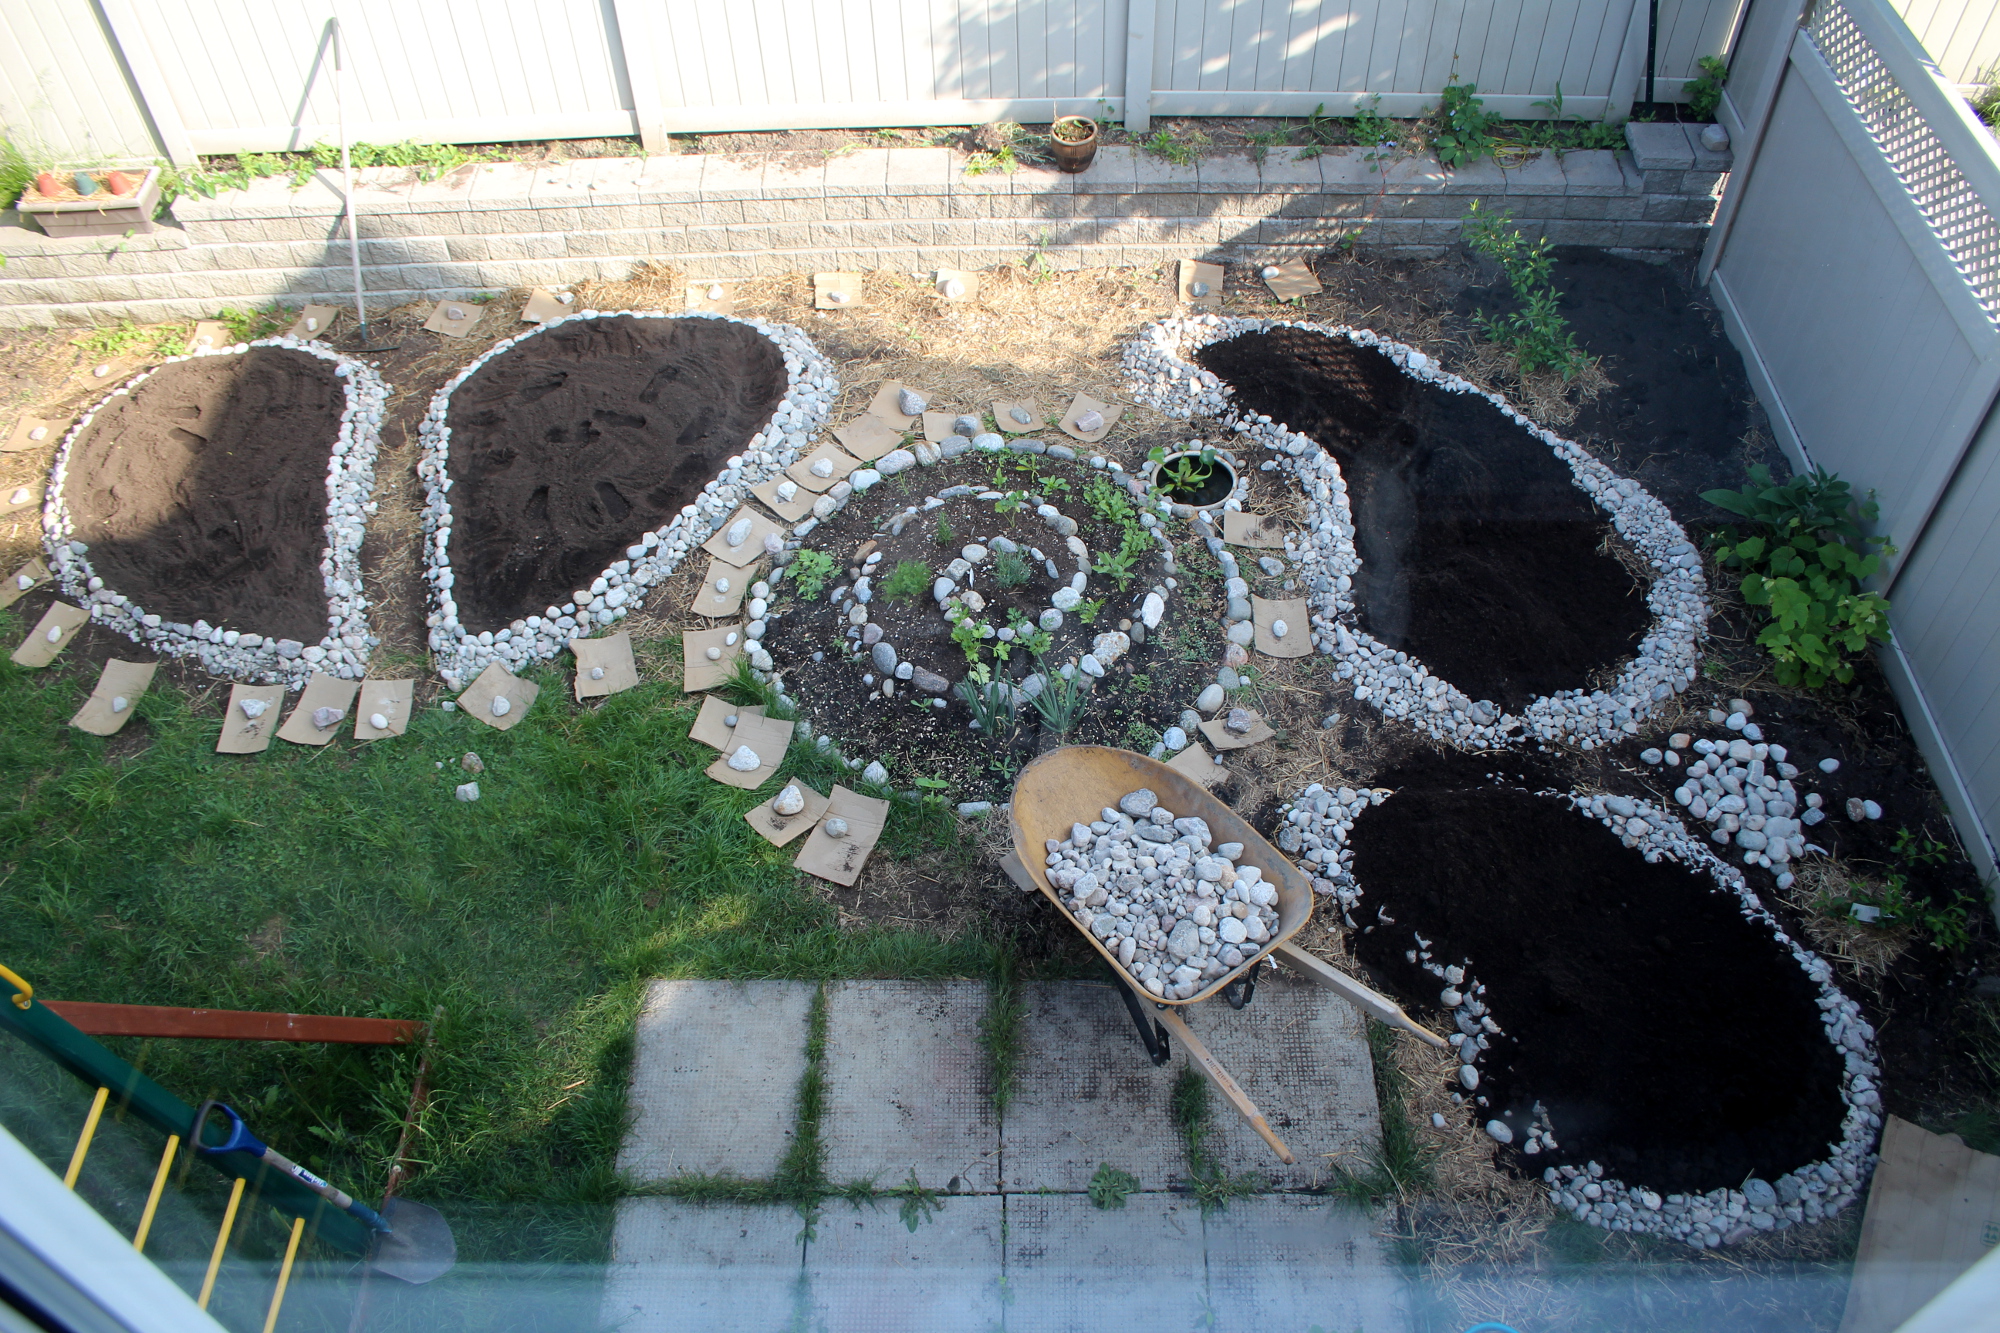
Once all the beds were filled in, I brought in the soil to fill in the spaces between, leaving the cardboard in place to prevent light from reaching the grass underneath.

I’ve watered the soil, so it can settle, and the next day brought more in.
Gavin from Edible Landscaping Ottawa was building three long boxes to be put up against the fence. I’ve decided to add more planting space for shade-loving plants along the fence behind the tree, so I’ve built a smaller raised bed edged with river rocks. In the opposite corner of the fence, there is another small area, enough for a single plant, which I have also made into a raised bed and planted a black cherry tomato there.
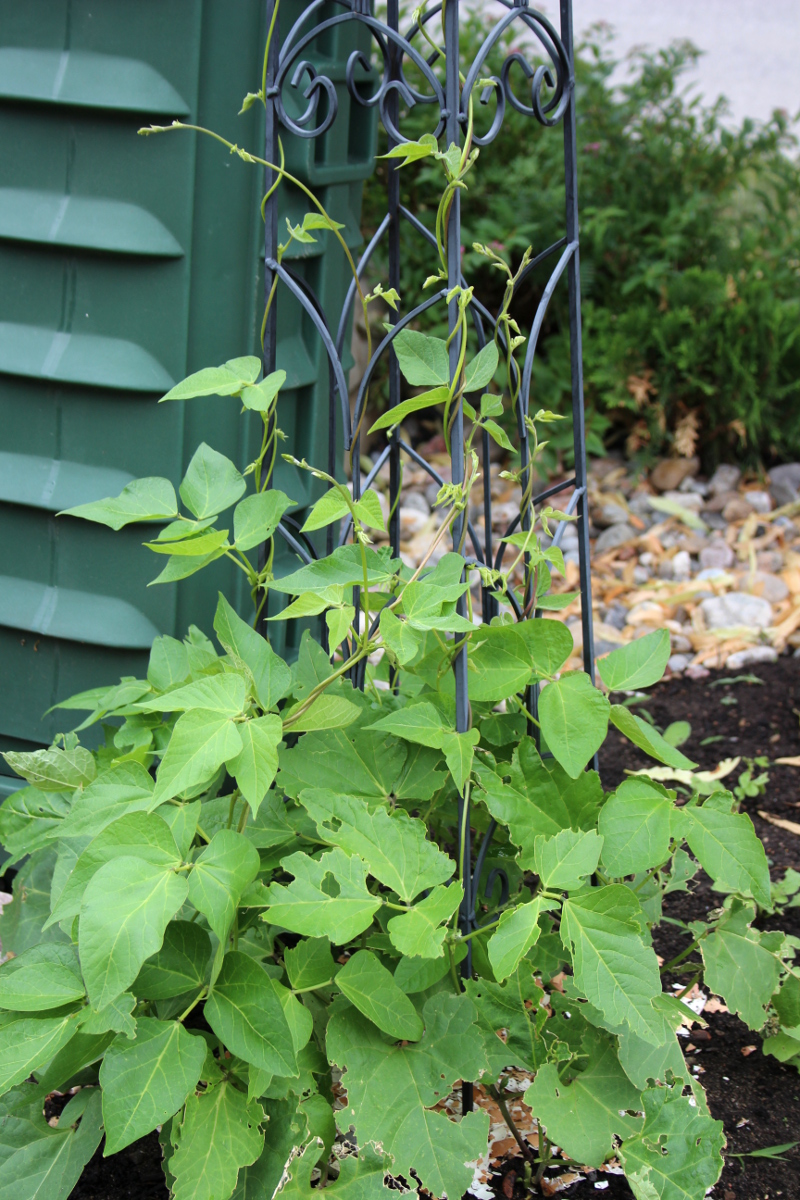
I’ve also put up a trellis in the corner, so that scarlet runner beans could climb it.
Some of my herbs were already planted in the herb spiral, and we’ve got a water hyacinth for the small pond.
Then, when all the beds were ready, I’ve started planting. Since this was an evening after work, most of the planting was done after children were asleep, meaning I was planting by starlight, until about 1 a.m. This was the most serene, peaceful experience. Even in low light, I had little trouble placing all of the plants, since I’ve plotted their placement in advance on a paper map.
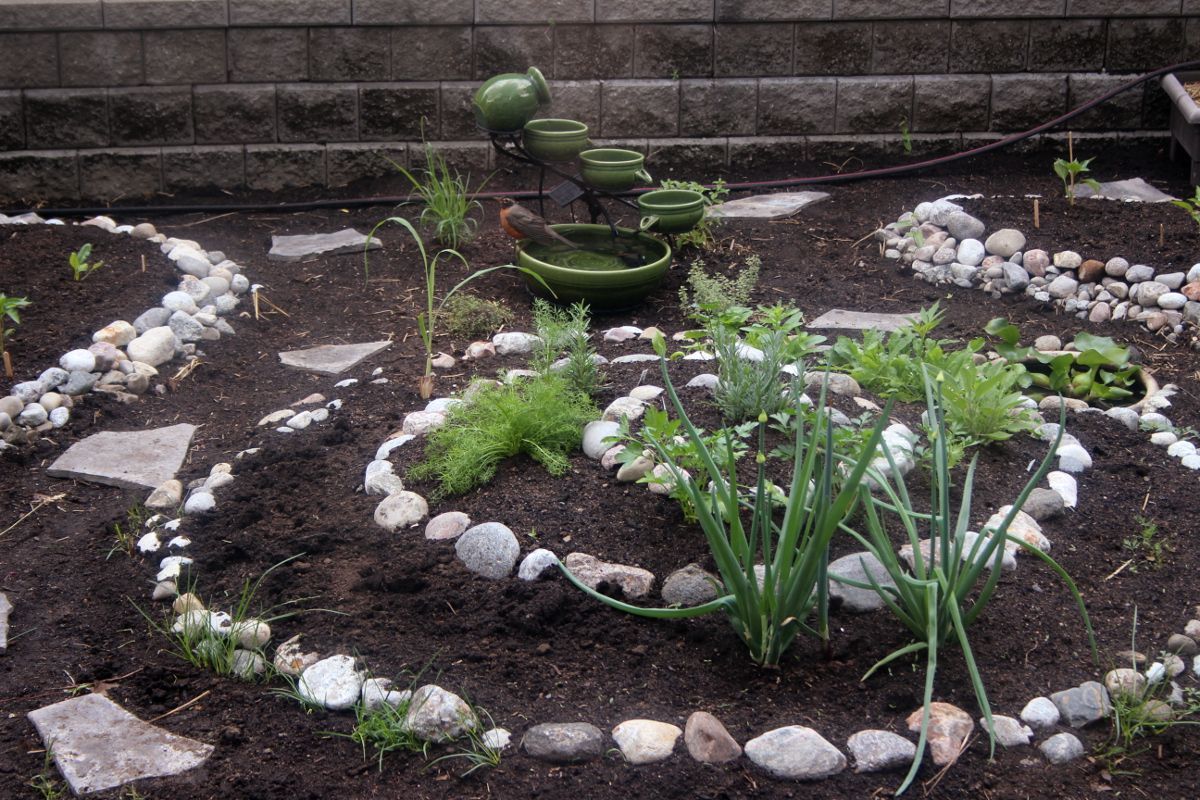
Behind the spiral, I’ve set up our solar-powered fountain which birds love so much, and around it I’ve planted lemongrass, lemon verbena, and two types of thyme.
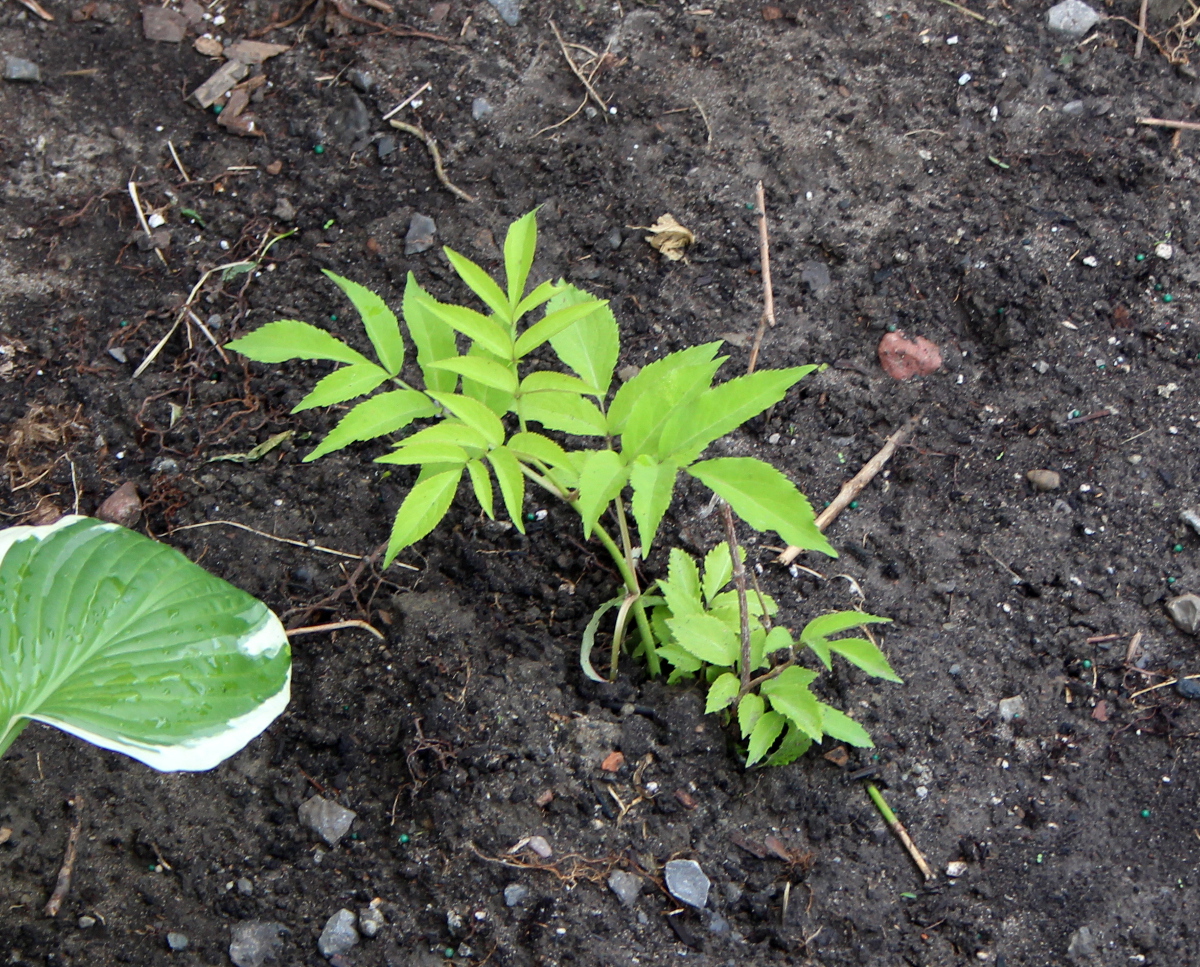
Later on that week, we’ve decided to remove another large ornamental bush behind the play structure, and plant an elderberry bush in its place.
I’ve also sourced some broken flagstones, to line the paths between the beds. Later on, we are considering planting a cover crop, to suppress the grass between the rocks.
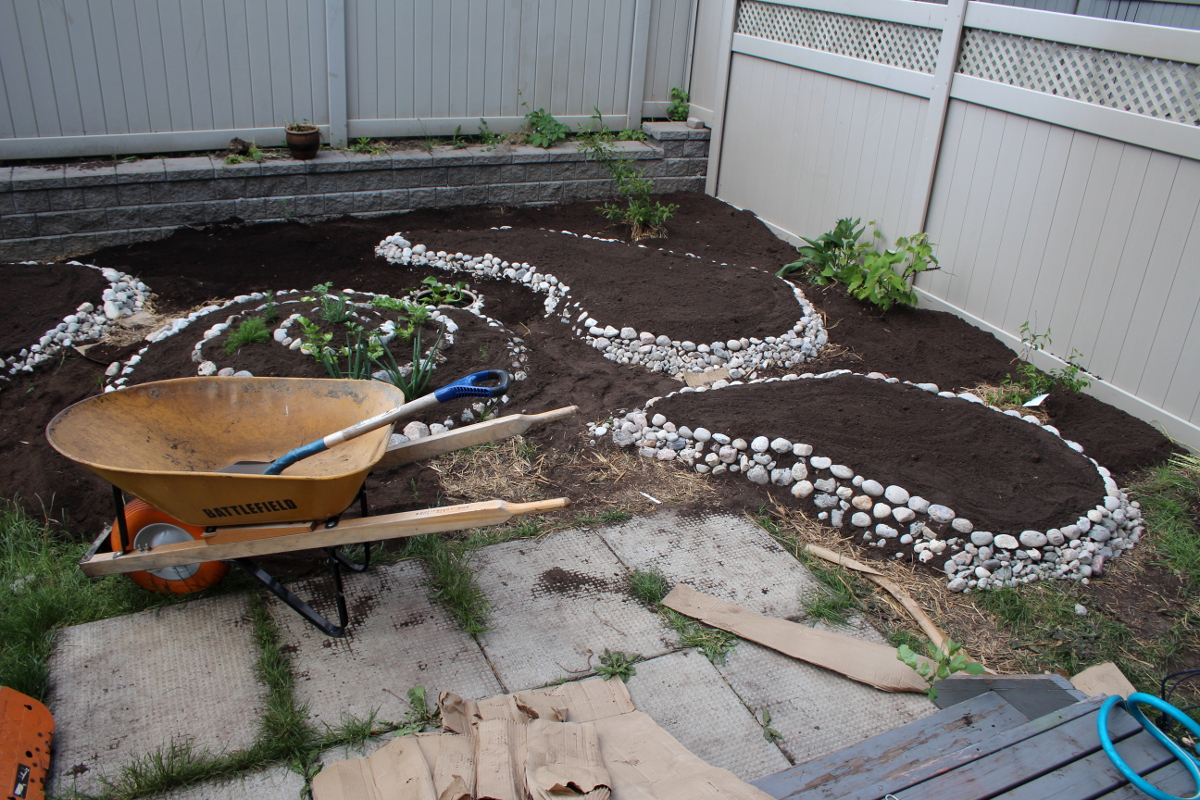
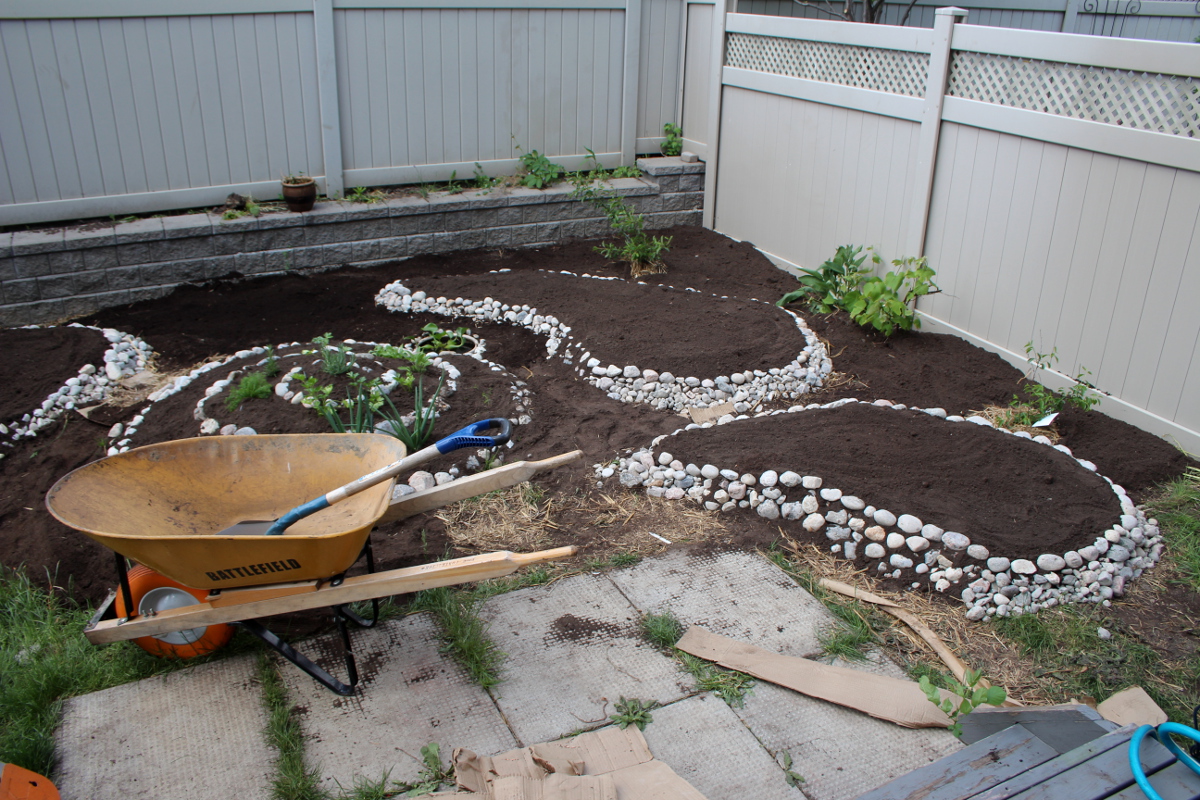
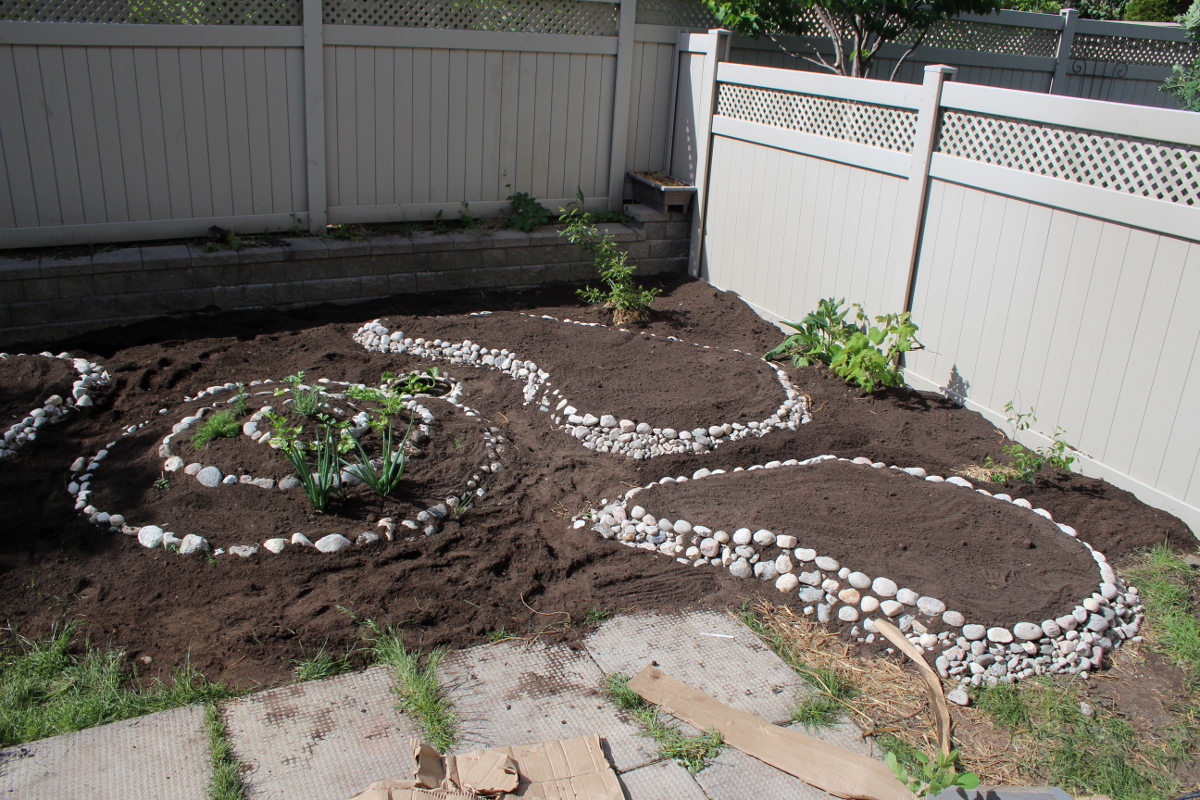
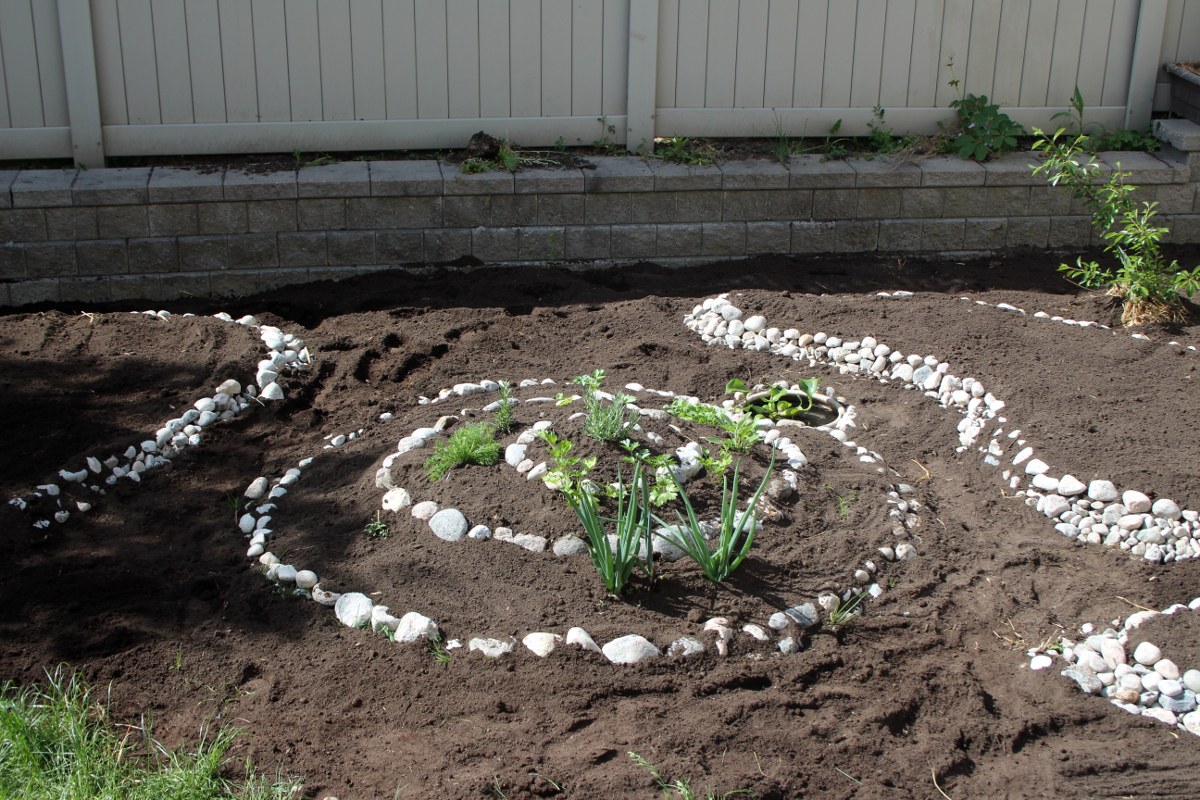
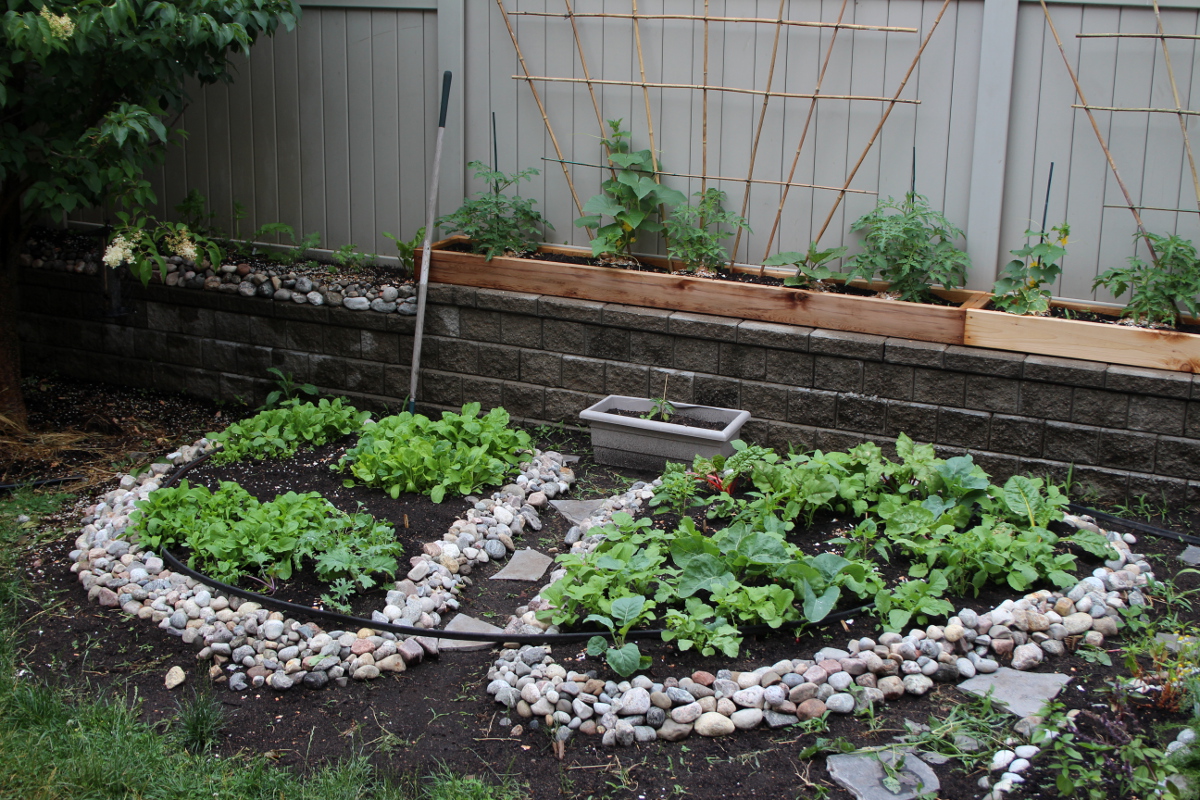
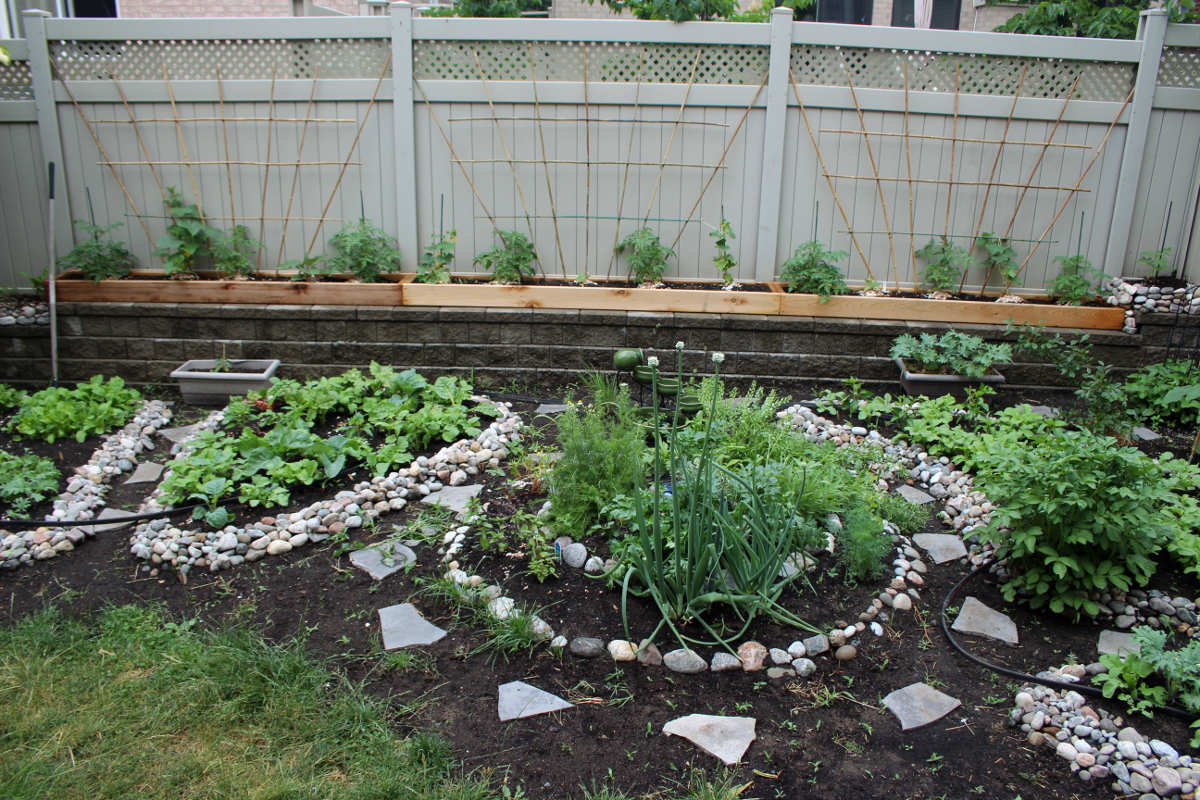
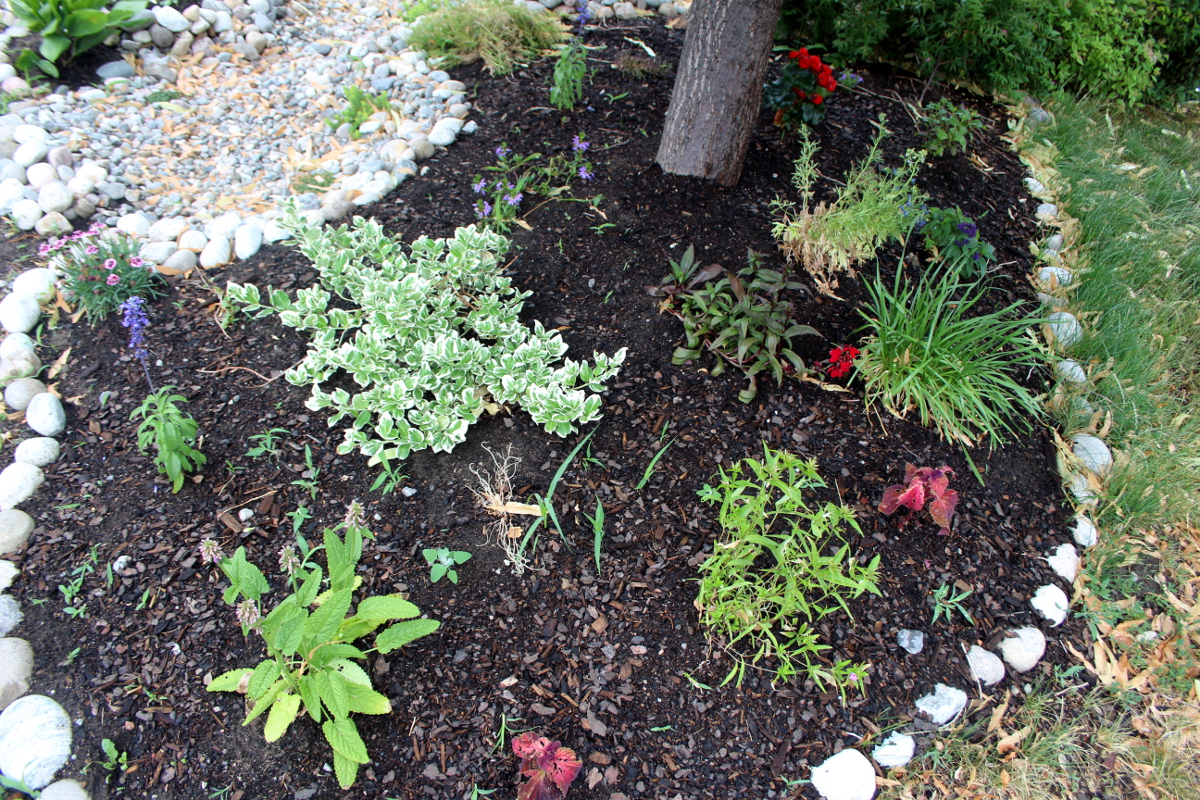
About a month after my initial planting, the garden was wonderfully green.
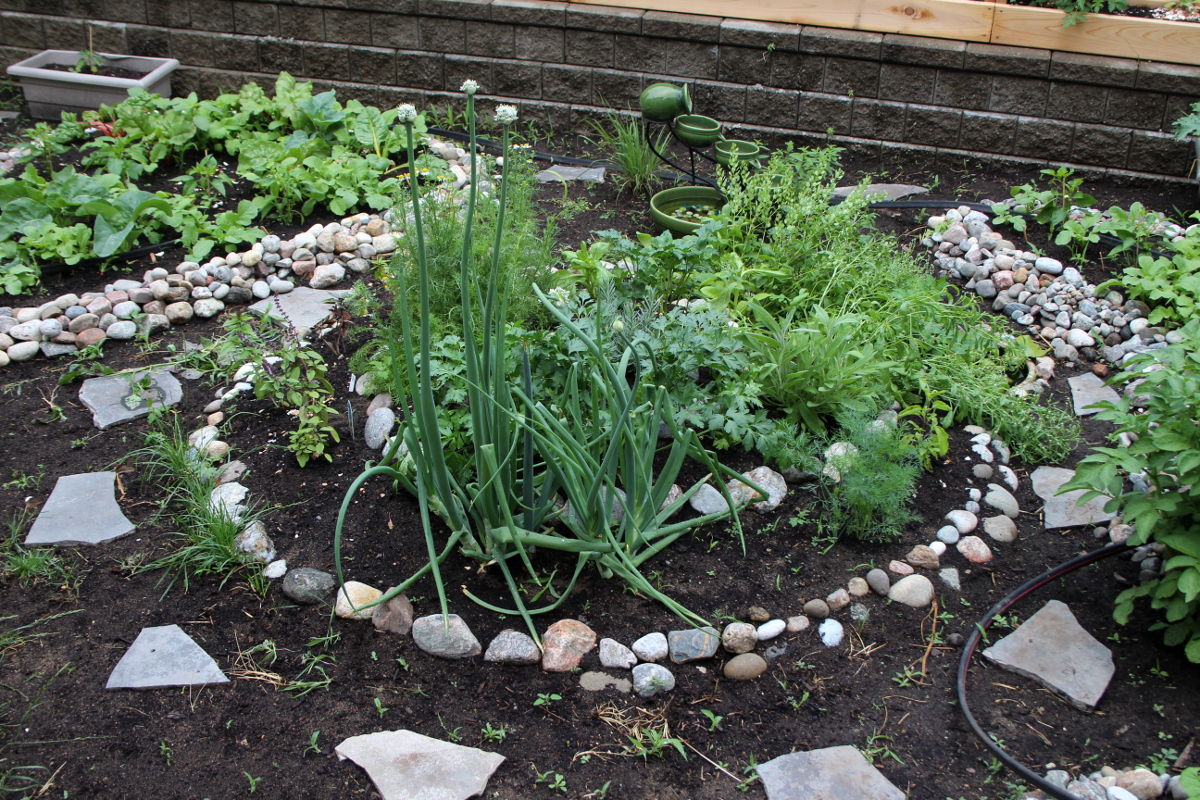
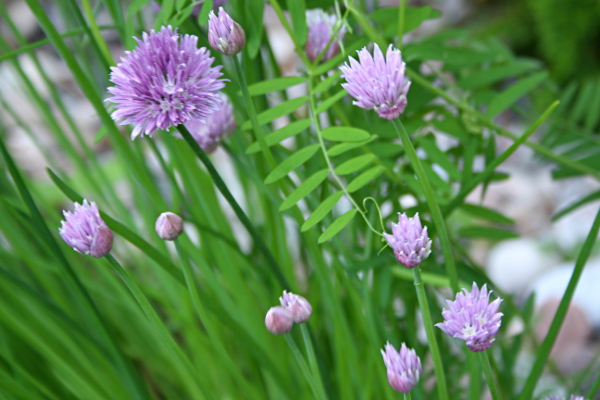
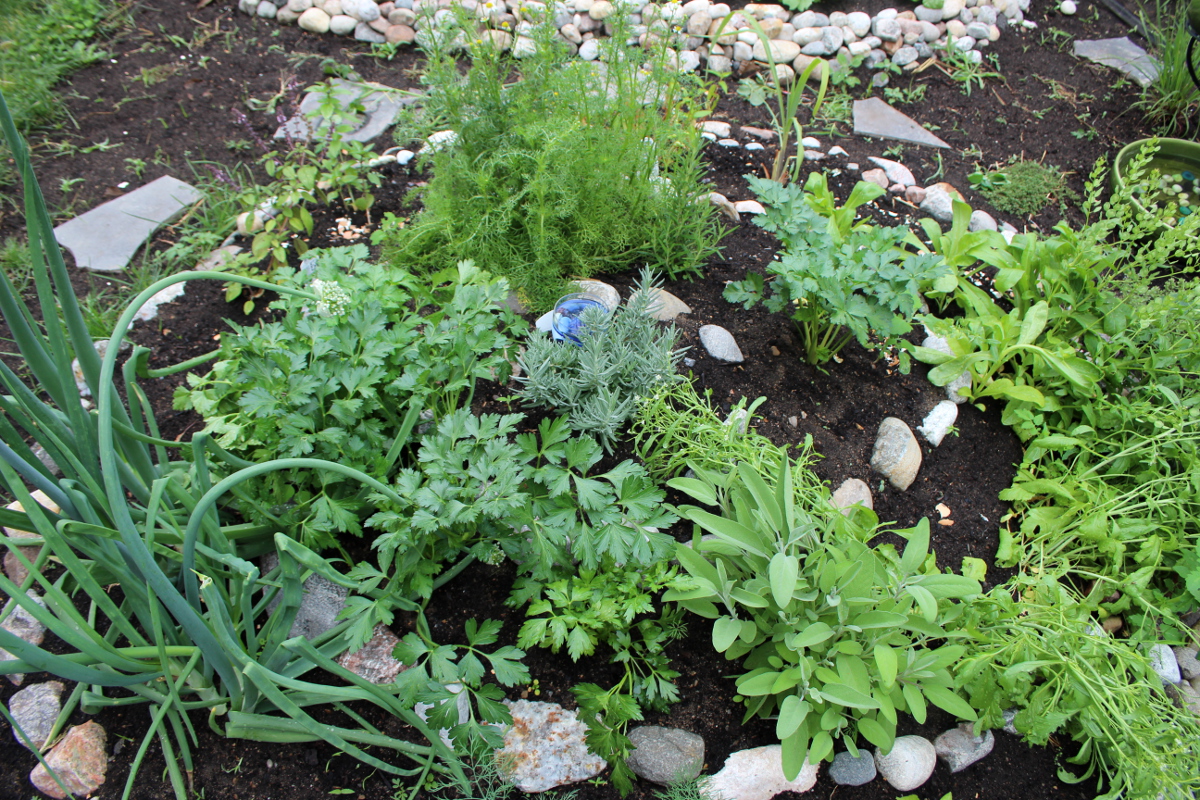
The onions were the first thing planted in the spring, and they are happily blooming in the herb spiral.

Some things, like cress, have sprouted from last year’s seeds without any involvement on my part. I also have a random tomato seedling sprouting here and there, but as I would rather not have a tomato forest again this year, I gently usher them out. Two large ones, that insisted on growing in the herb spiral, I have replanted into pots.
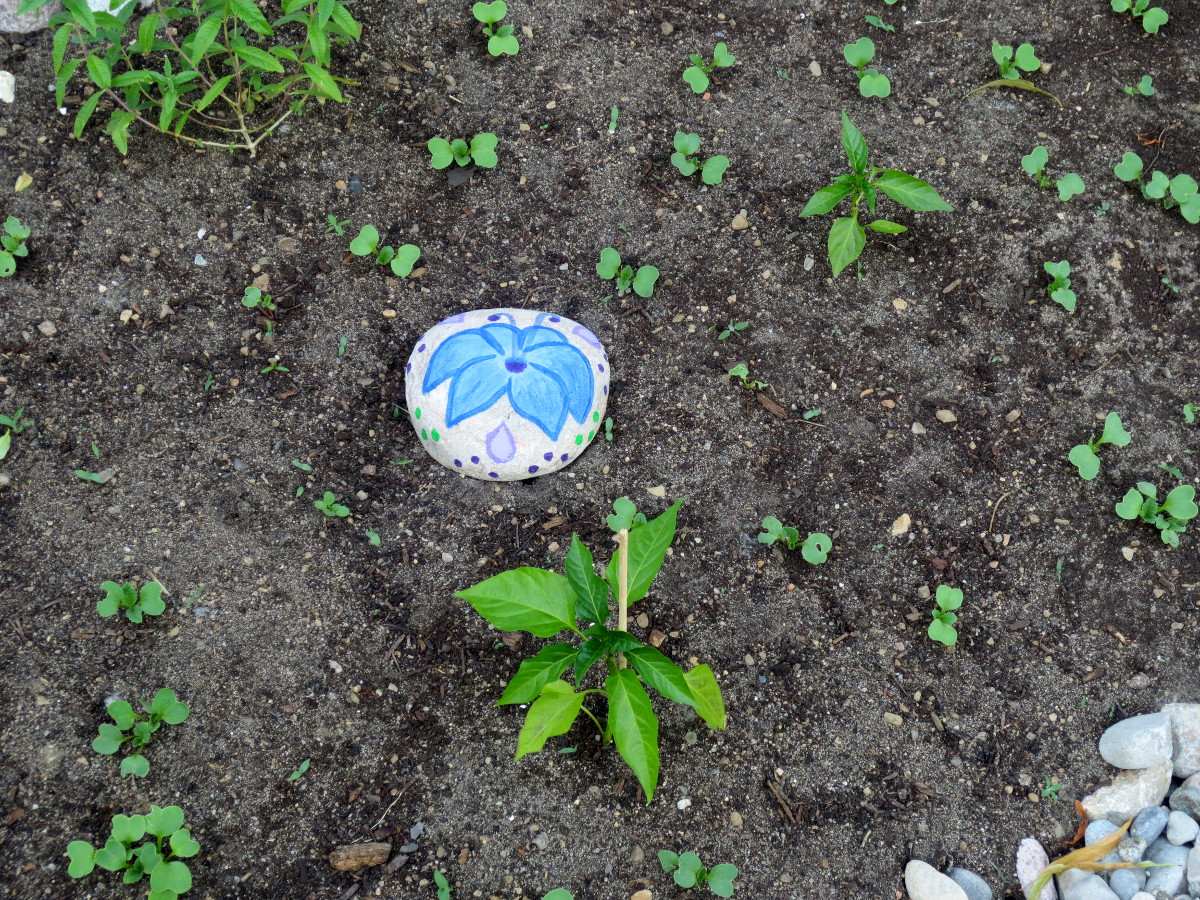
The blue ornament, barely visible in the picture below, was created out of a broken blue wine glass and some rocks, sea glass, and beads, topped with water. It sparkles in the sun and attracts curious creatures that sometimes also get interested in consuming delicious bugs nearby.
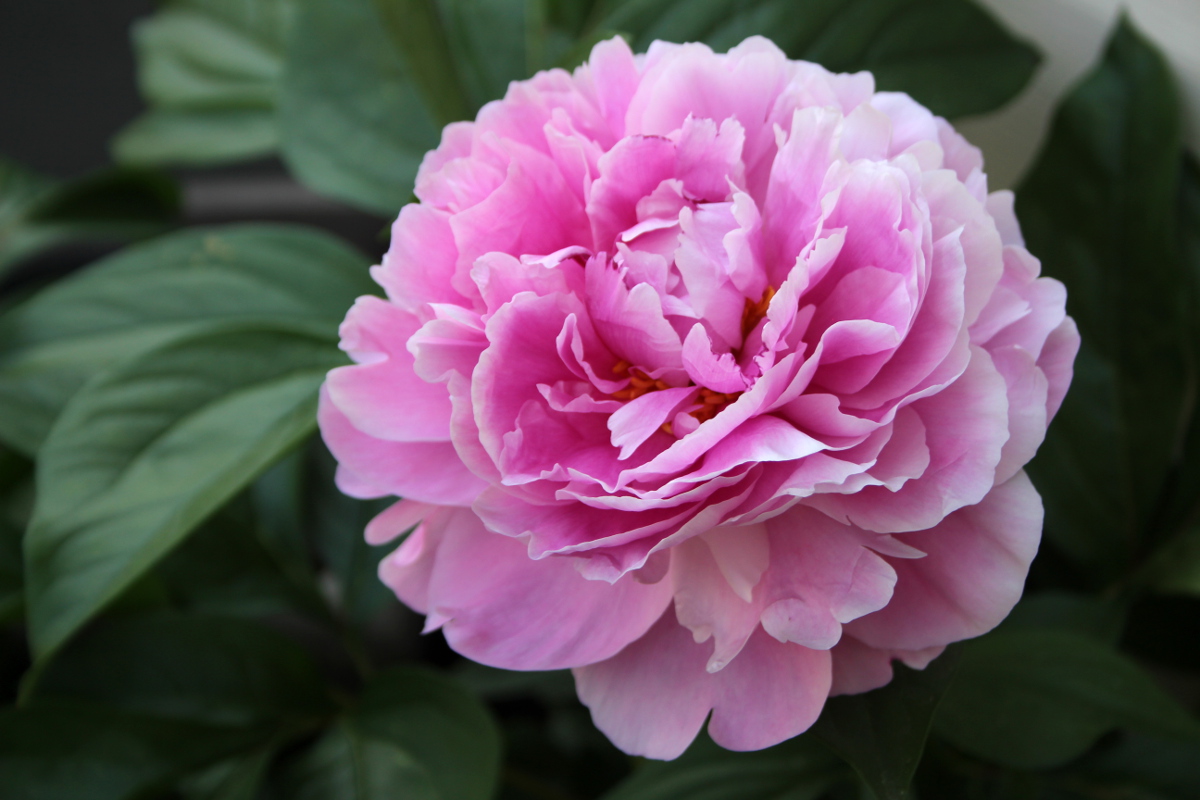
In the meantime, peonies planted by the previous owners, were delighting us with their blooms:
The remaining tree is a Japanese lilac, which blossoms in June, after most North-American varieties have finished blooming, and has a very sweet smell to the flowers.

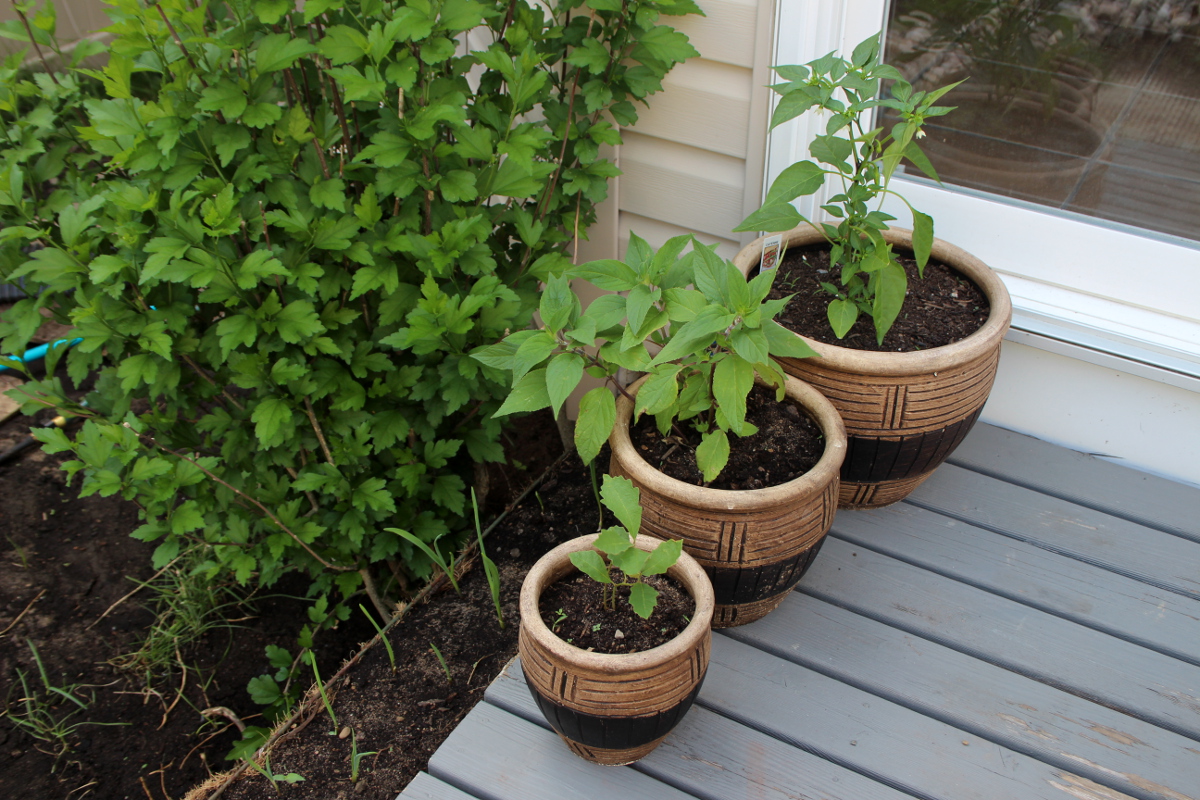
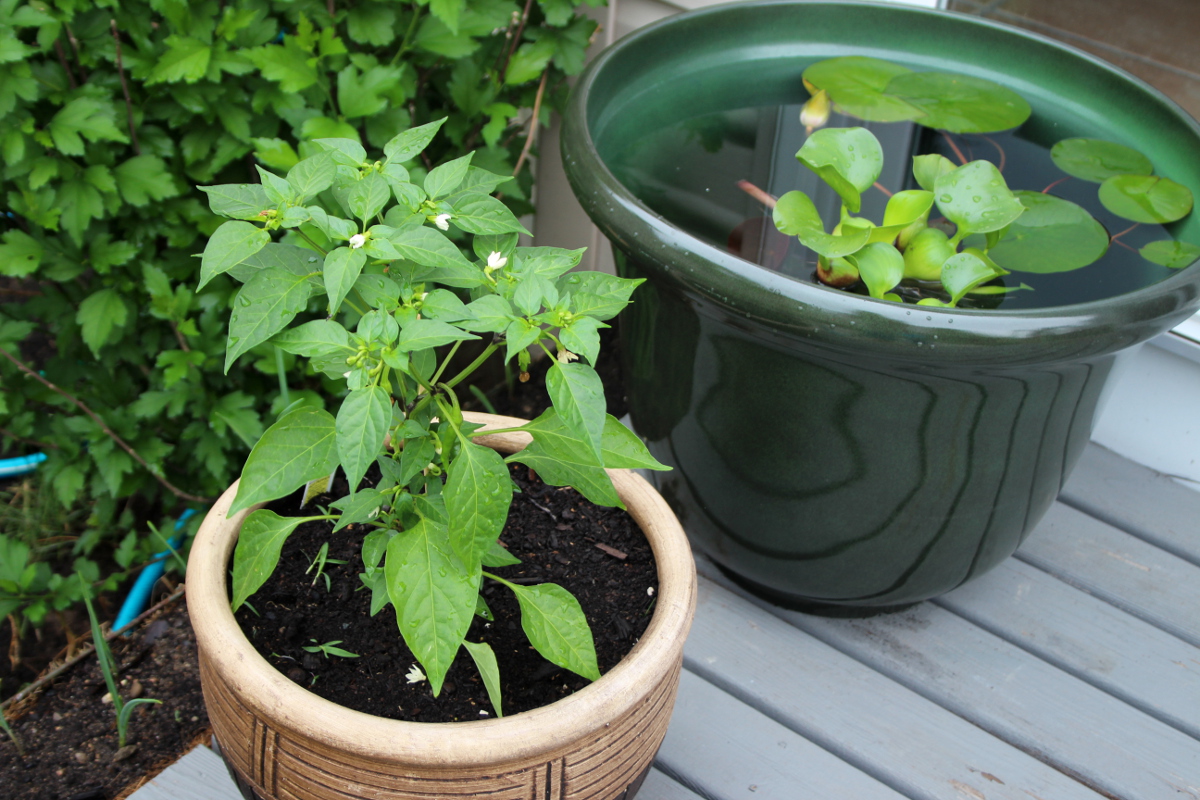
Along the porch, I have lined an old metal shelf with coconut fiber, added soil and planted a row of garlic, which has happily sprouted. And in the pots, there are cayenne peppers, pineapple sage, and either a hazelnut or an acorn we have found sprouted in the garden. The squirrels bring us many treasures.
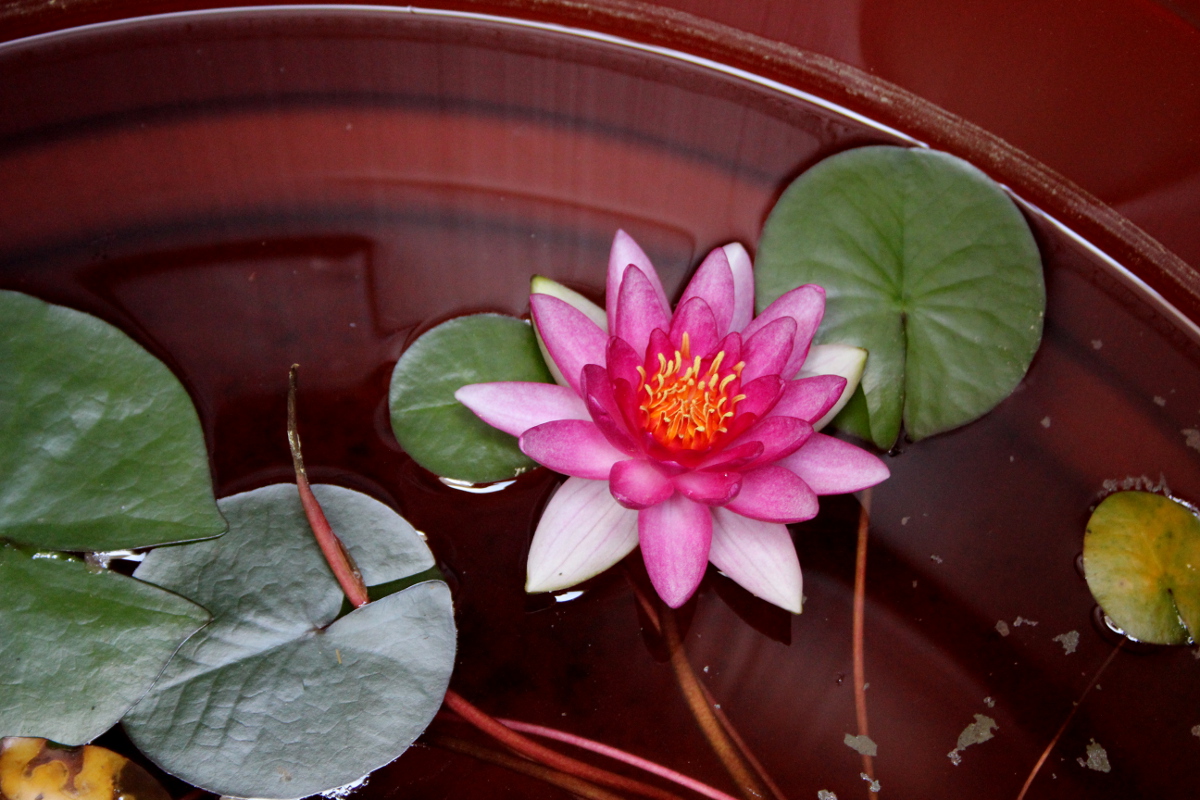
As part of the remodeling, we’ve installed two rain barrels, and have added goldfish, a water hyacinth, and a lily to them. The lily was here temporarily as it counts on a more or less constant water level, being planted in a pot placed at the bottom of the water-filled container.
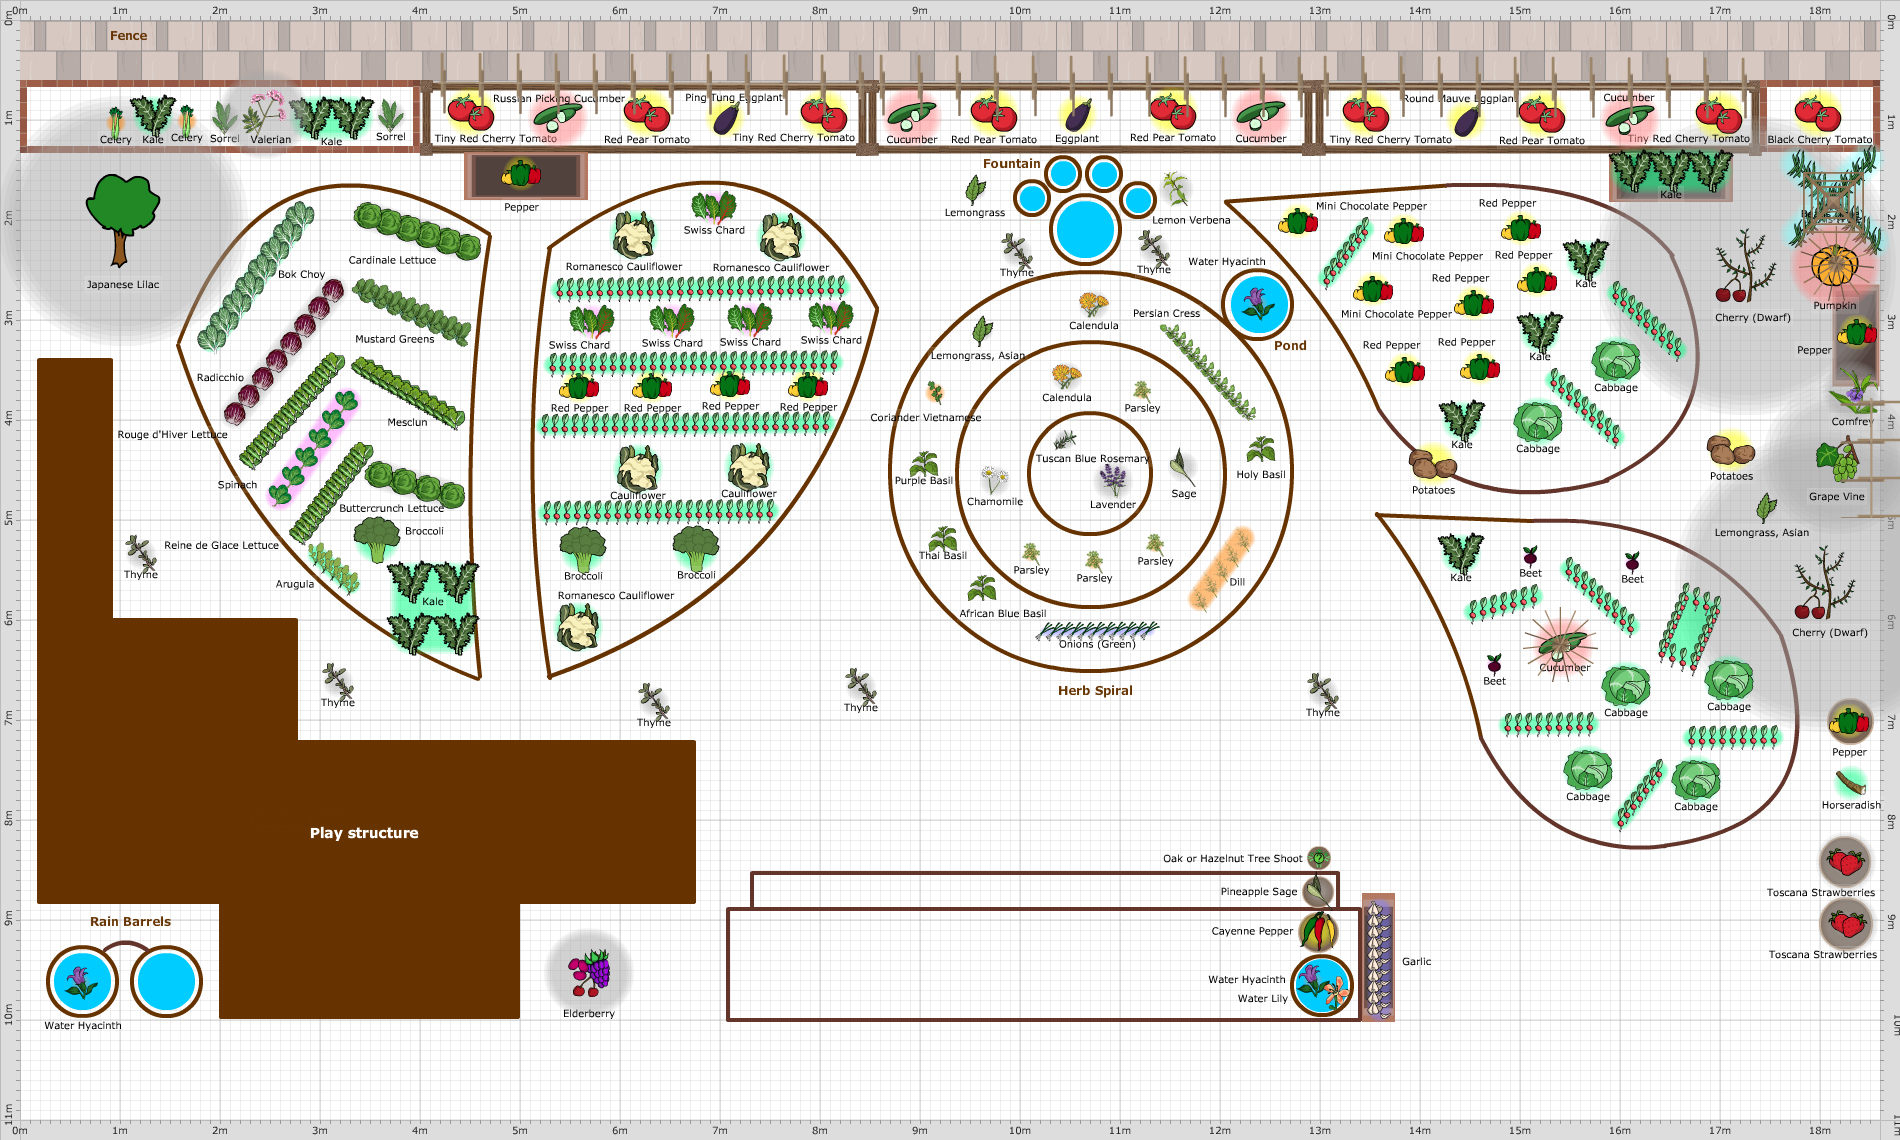
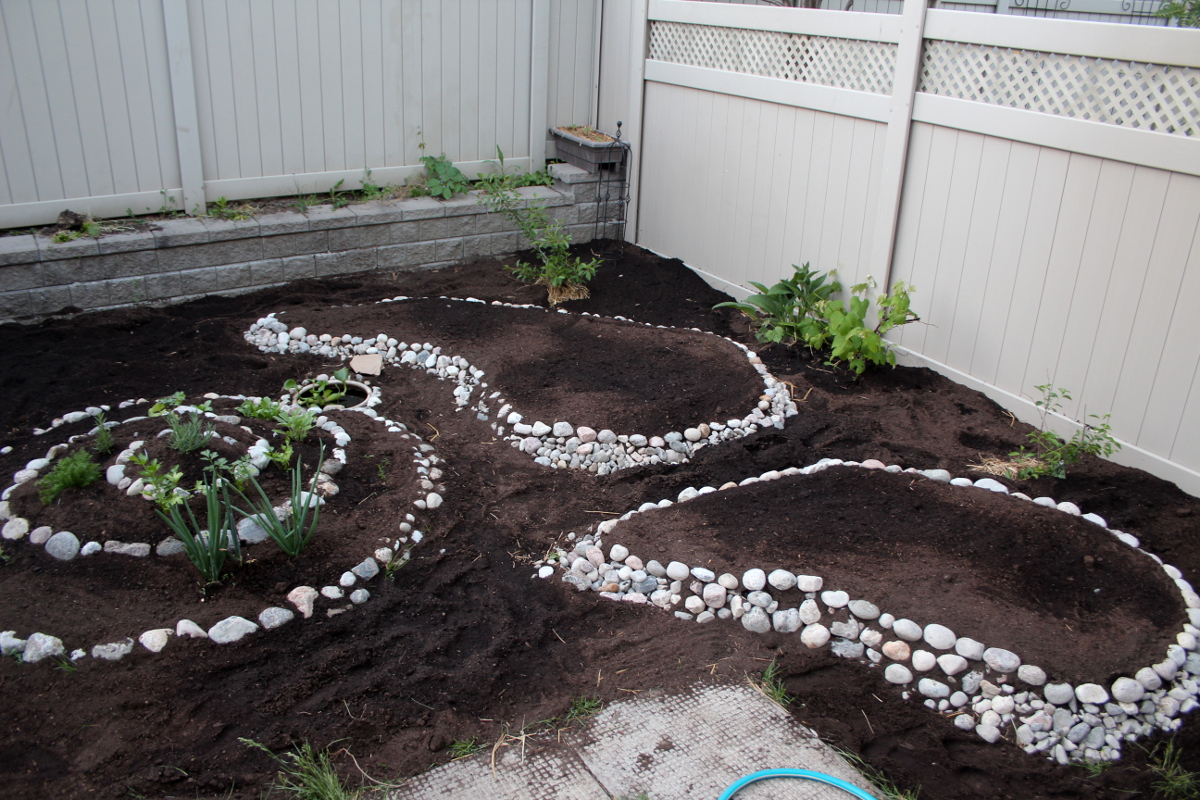
This is a view from above. I’ve built trellises for the grapes (on the side) and the pumpkin (close to the top right corner), and for the tomatoes, eggplants, and cucumbers growing along the fence. I’ve also added crushed eggshells to the soil, to discourage slugs and to add minerals.
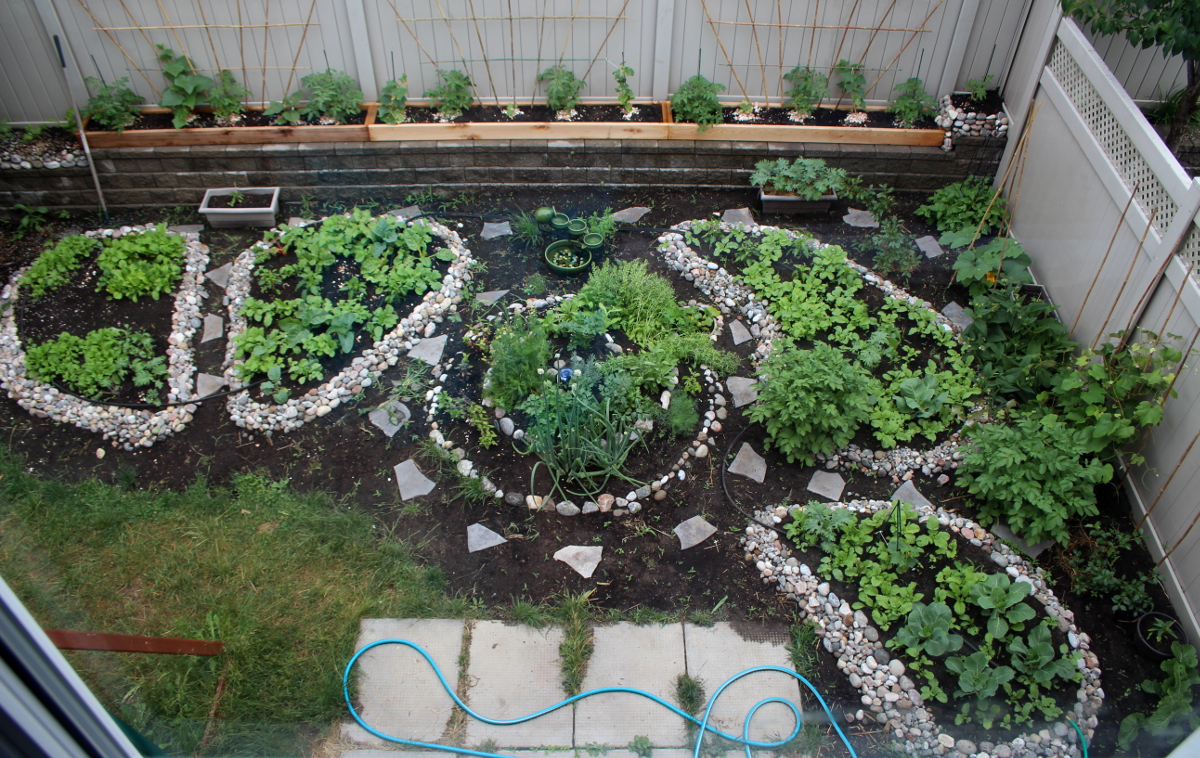
After I’ve offered my extra seedlings to people, there were a few left over, and so I’ve planted them in a few pots I’ve placed around the garden.
I’ve staked tomatoes and cucumbers, to give them extra support before they can reach a trellis.

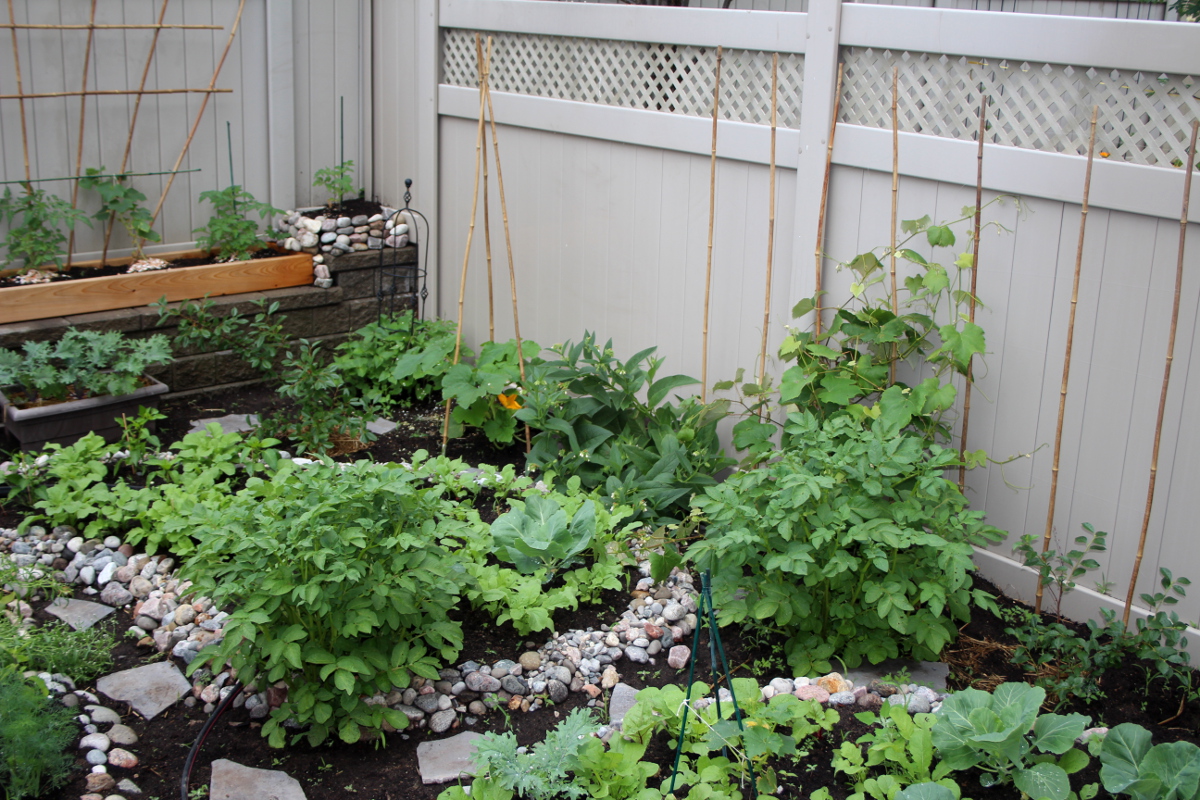
Without my intention, surprise potatoes from last year have happily sprouted two large bushes, one right through the wall of one of the garden beds. I’ve decided to leave them there until harvest. As one of my friends put it, the best potatoes are surprise potatoes.
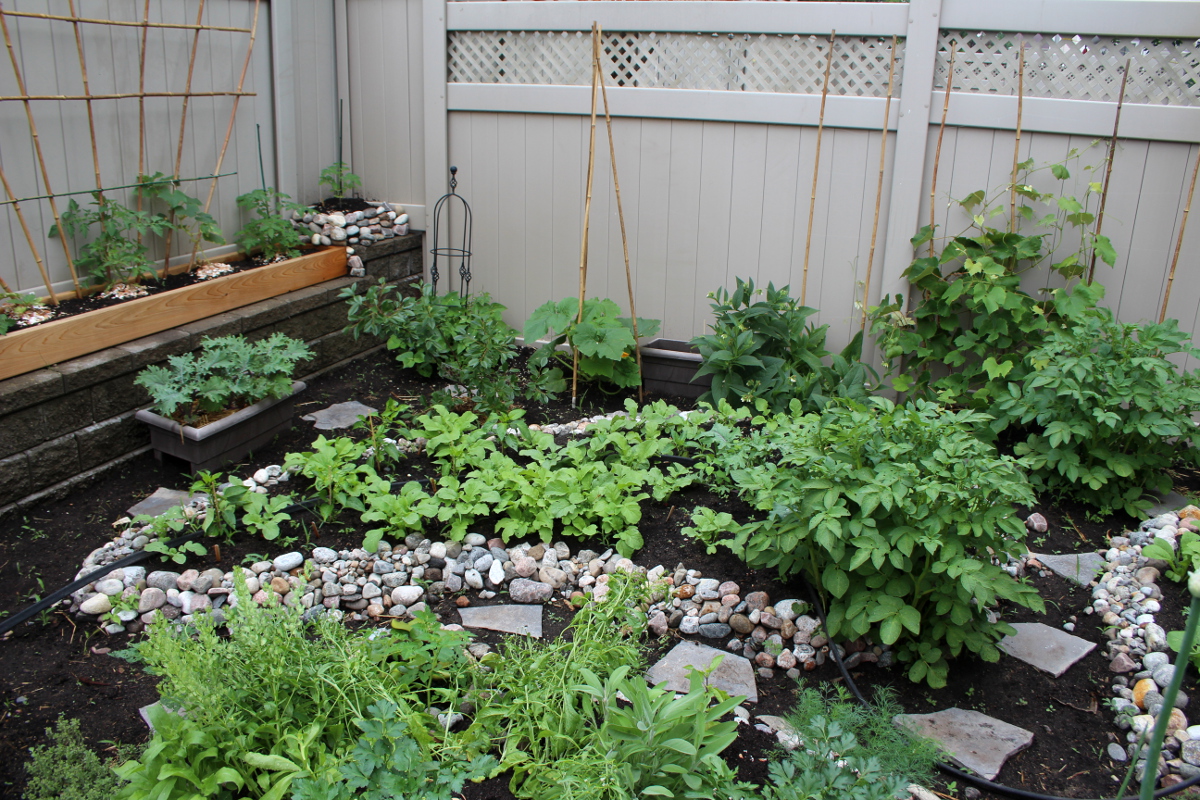
The grapes took to the trellis with pleasure, which has also freed the comfrey, as it was no longer getting entangled by grape vines that had nowhere to climb.

We have later acquired a large pot into which the water lily was migrated since it’s of a more suitable height. As my water hyacinths keep propagating, I’ve placed one here as well. Two goldfish now call this new pond home.
It’s been a significant transformation for my garden and a lot of work, even though, being a labour of love, it does not feel like the effort was significant. When we are truly excited about a project, we find energy, time, tools, and processes to achieve the desired result.
Here is a video of progress from the first planting (taken in the rain) to the growth a month later:
I love looking out of my kitchen window at all the greenery. I love stepping out on the porch and seeing all the buzzing life in the garden. It’s a wonderfully calming experience to sit outside on a sunny day, feel the breeze on my face, listen to the soft tinkling of the water in the fountain, watching the goldfish among the leaves of the water lily, and feeling the warm rays of the sun.
My youngest keeps asking to go outside all the time, rain or shine, and loves poking around among the greens. My oldest likes examining flowers and leaves with me, learning how vines climb and fruit form, helping me collect greens, herbs, and radishes for dinner. And they both love picking fresh berries from the berry patch and strawberry containers. The garden is a truly wonderful place that keeps on gifting us new experiences every day.
How to build a river bed on your lawn
From the first time I’ve considered my edible landscaping project, I’ve been set on using natural materials – rocks and wood – instead of plastics and rubber, to create an oasis that one might encounter in nature. One day, I was looking for instructions on building raised garden beds with river rock borders, when I stumbled upon the following image:

It caught my breath, so beautiful was seeing a flowing river in the middle of an ordinary city lawn, with plants growing among the rocks. It’s almost as if a rift opened in the lawn with a glimpse of a forest spring. I love combining aesthetics with functionality, and from that point on, I was inspired to implement this idea. It would work beautifully with a garden bed on each side. Thus my edible landscaping project has changed shape to incorporate a dry river bed as the central element.
For a timeline view of the project, you can read about my edible landscaping journey and specifically the front yard. This post will focus on the front yard design with a dry river bed and highlight the steps and tips to create a dry river bed. You’ll notice that some of the photos are out of order, as I try to illustrate each feature of the river bed, and the photos were taken at different times in the span of the first month during and after the construction.
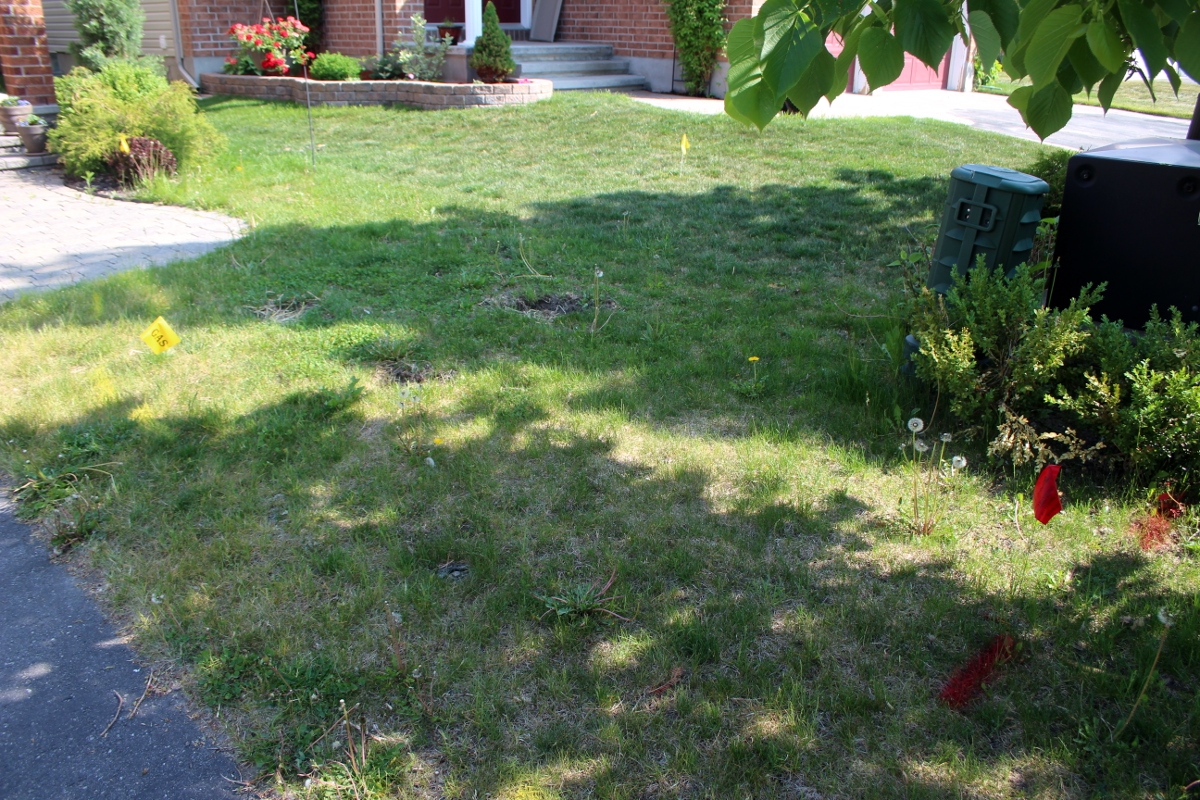
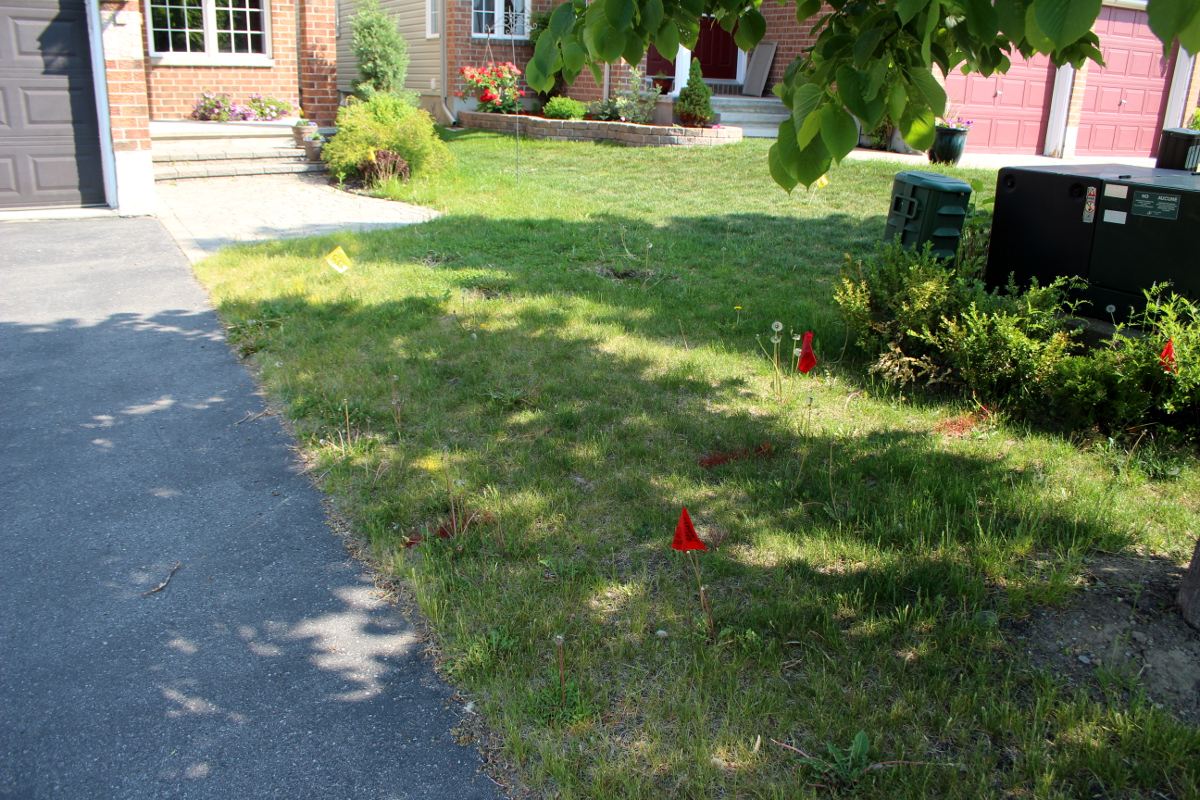
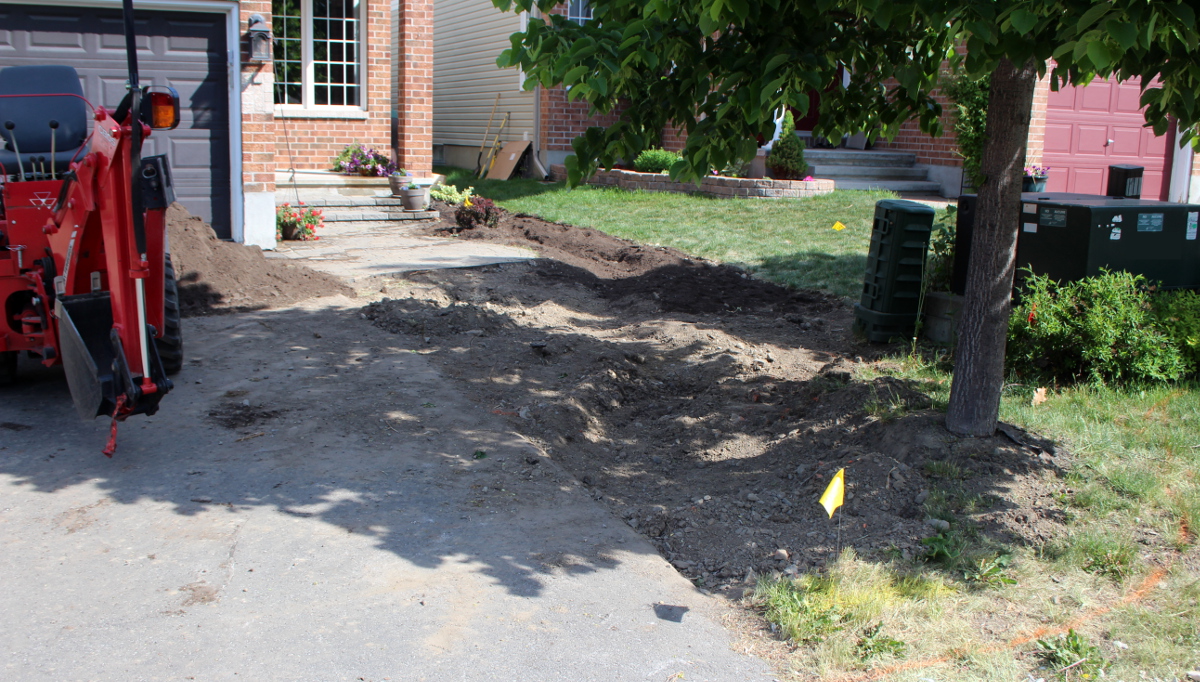
First, get the utility companies to mark where the cables and pipes lie, so you can plan the design around them and avoid hitting them while digging. This includes gas, electricity, phone, internet, water and any other services you are using. Most municipalities or states/provinces have a number to call or a site to visit to request a locate. The companies come by within a given period of time (for us it was a week) and mark the utility lines with spray paint and flags.
Secondly, plan where all the major landscaping elements are going to go. Plan the water path. For us it is coming from the roof spout, snaking through the ground between two garden beds, and ending in a small circular pond-like structure. Plan how the water is going to drain once it’s run the course of the “river” and ensure the exiting water will not be washing out the soil as it flows out. Plan the shape and size of the garden beds. Remember that you should be able to reach every spot inside the garden bed without stepping on the soil (otherwise you are going to disturb the soil and compact it, possibly damaging plant roots). If the bed comes out too big, consider splitting it into two or placing a stepping stone in the middle of the bed.
Consider that you will have to walk on the river bed in order to reach the inside of your garden beds. Walking on rocks does wonders for all those underutilized muscles in our feet, but it might take some time to get used to it. I walk barefoot on the bed rocks, so does my two-year old. My five-year old finds it easier while wearing shoes. Walking on such a varied terrain (with the slope and texture differing from step to step) is also an exercise in balance. I find it pleasantly challenging after hours of time spent sitting during the day.
If for some reason you cannot walk on the river bed itself, make sure the garden beds are narrow enough to be reached from the other side and plan where the paths are going to be.
Think where the prime planting spaces are. We have full sun in most areas of the front yard, which is where I planned to plant vegetables, herbs, and (on the other side of the driveway) blueberry and currant bushes. That’s where the largest garden beds should be. Reserve spaces under trees and where taller plants and structures create shade for greens and more delicate ornamentals. Consider using space closest to the road for non-edibles, since there is higher traffic in those areas of people and animals, as well as higher levels of traffic pollution.
Here is our plan. It was first drawn on a large poster-size sheet of paper, and later I have transferred it into the Garden Planner format, albeit not to scale. The plan pictures our porch, the river bed going horizontally along the porch and then sloping down to the round pond, with garden beds framing it on both sides and a pathways near the porch (stepping stone) and near the pea trellis, where the bed starts sloping down. Avoid right angles and mimic nature so that the water flows in a smooth, curvy path.

Once you are sure of your plan, source the materials. We needed soil and river rocks. The amount will depend on the size of your space. Since we used soil and river rocks in both the front and back yard, we got lots. We chose to have the rocks of mixed sizes, to create a natural look for the bed. Make sure to get good soil and compost, without toxic additives – after all, you are growing food, and your plants will soak up all of their nutrients from whatever soil you give them. We sourced top soil already mixed with compost from Greely Sand.
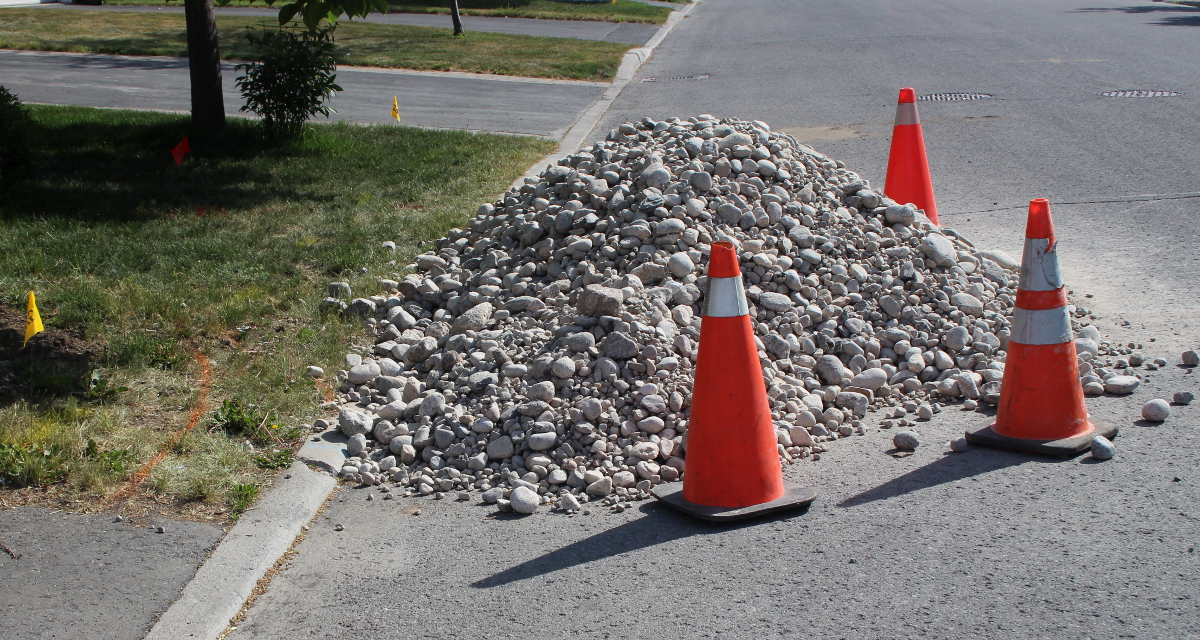
Next, it’s time to dig. For a large project like ours, we needed an excavator, since hand-digging our hard clay soil full of rocks was near impossible.
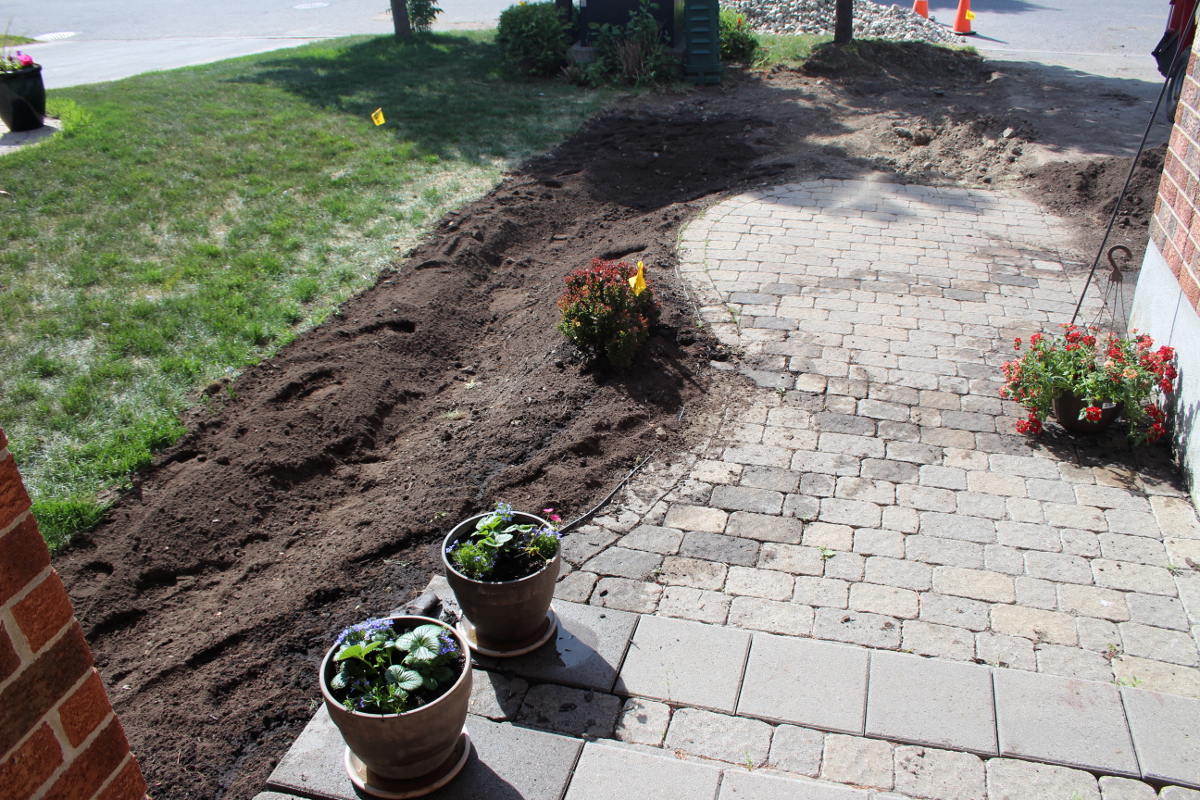
First, strip the top layer of soil, deep enough to remove all the grass roots and to accommodate the depth of soil needed for plants to grow. This will be the lowest level of ground around the bed.
Next, create a deeper trench: dig deeper in the middle of the river bed, with the soil on the sides rising up. Vary the elevation, so that landscape looks more like a natural terrain and the water can flow easily.
Once the digging is complete, add good soil to the river bed, padding the sides where the beds will be and providing enough soil for plants that shall grow among the rocks.
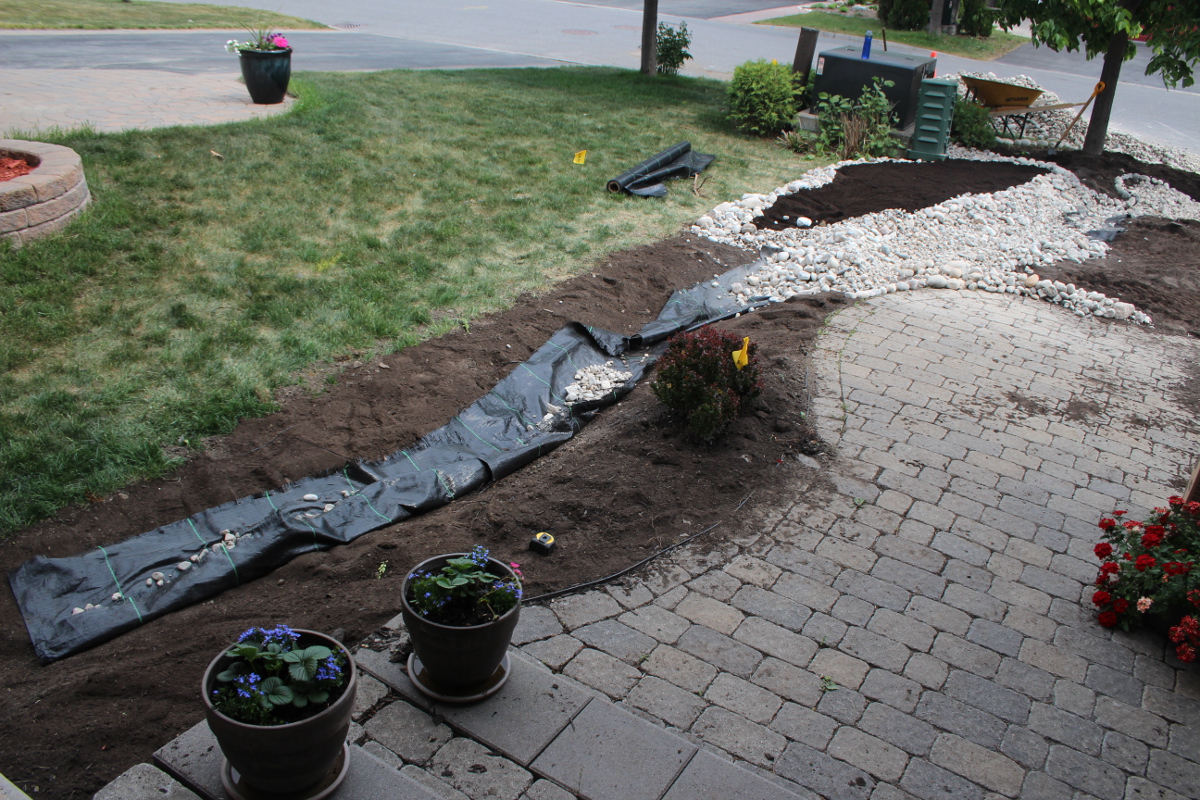
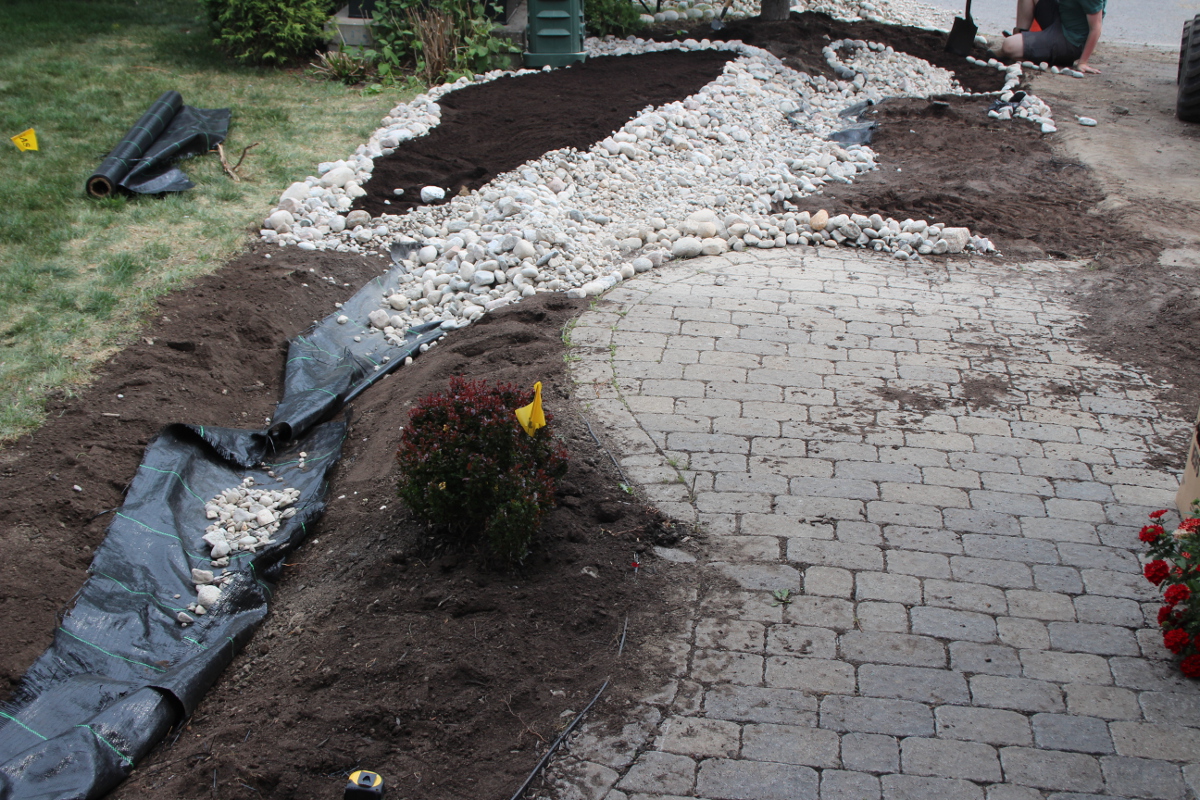
Put down landscaping fabric to cover the bottom and part of the way up the sides of the river bed. We left the pond without a cover, as we wanted the water to slowly sip out and not be forced out washing away the soil on the sides.

Dump the river rocks in. I found it helpful to first take a few rocks and outline the shapes of the beds first, to guide the construction. We had to use machinery to lift and carry the rocks or it would have taken a lot longer. Dump the rocks in a border around the garden beds and inside the river bed. Add the soil into the garden beds. Alternate soil and rocks so that they support each other, until the garden beds reach the height you need.
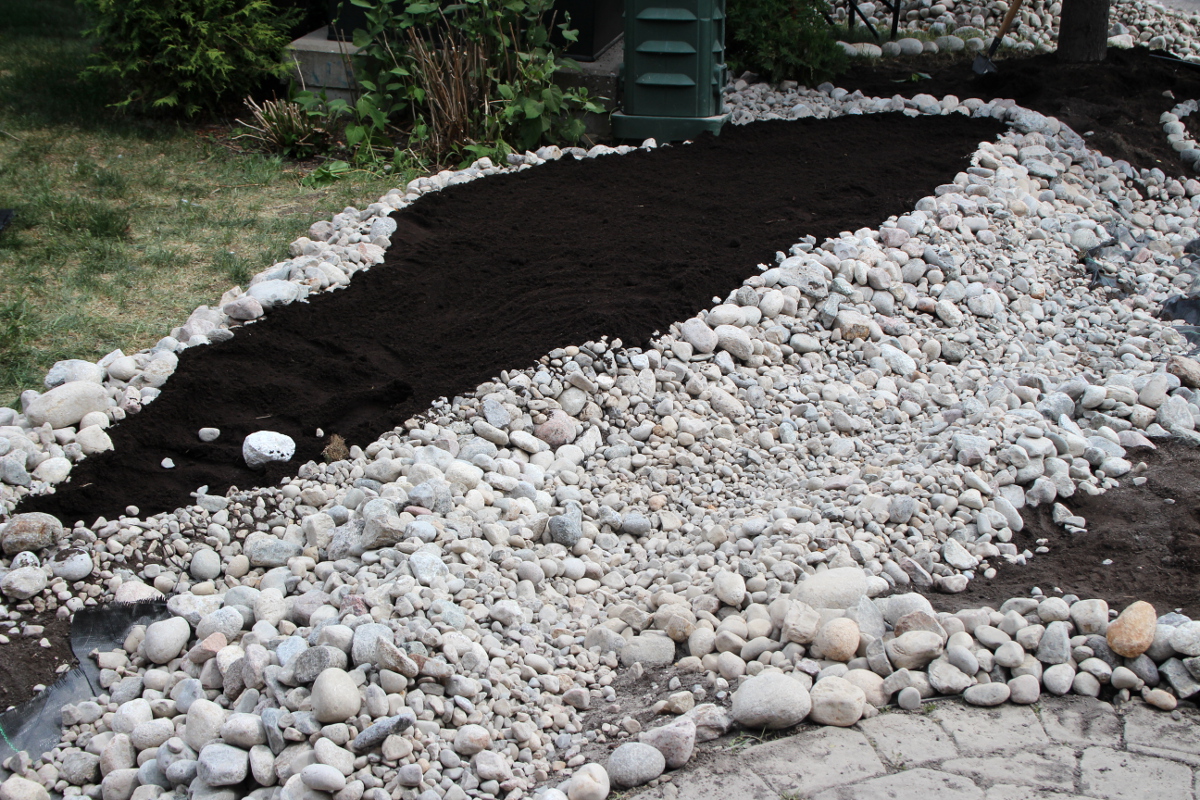
Then rearrange the river rocks so that the smallest are at the bottom and the medium to largest are on the sides, to mimic the natural look of a river bed. This needs to be done by hand. Shape the garden bed and river bed borders by hand, to smooth out the curves and achieve a natural look.
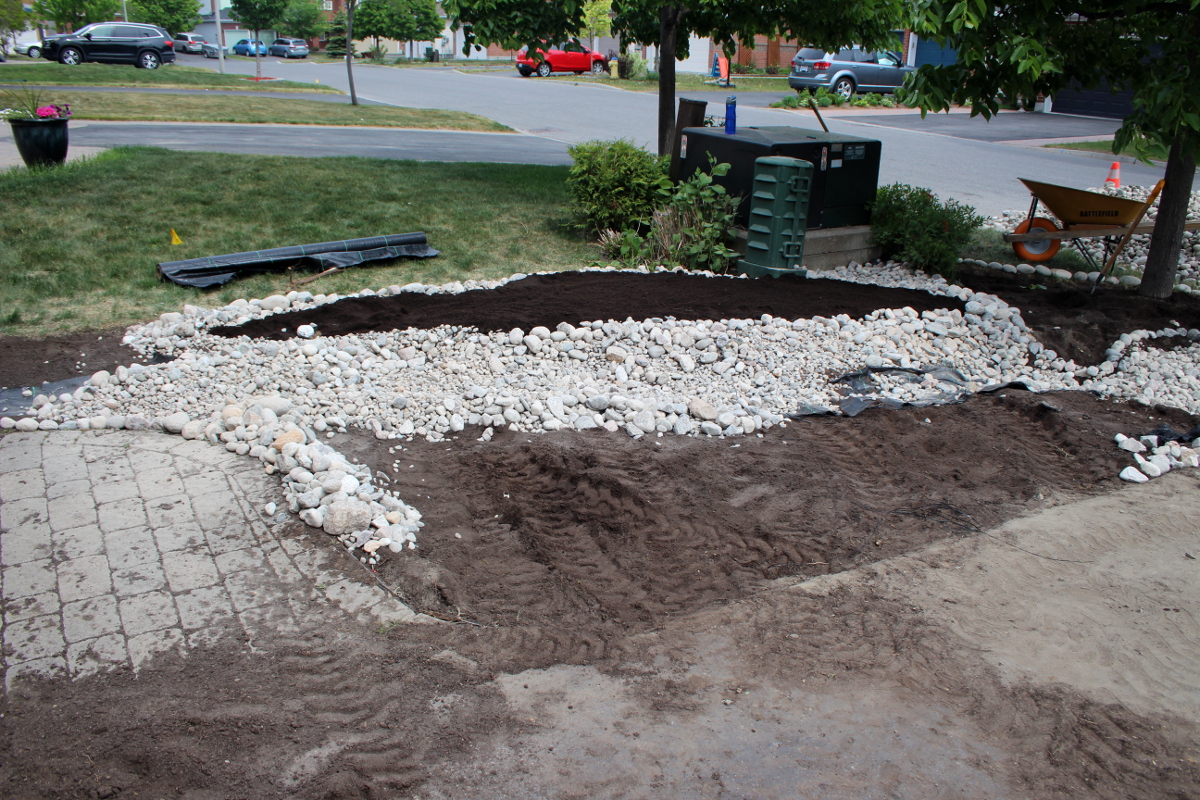
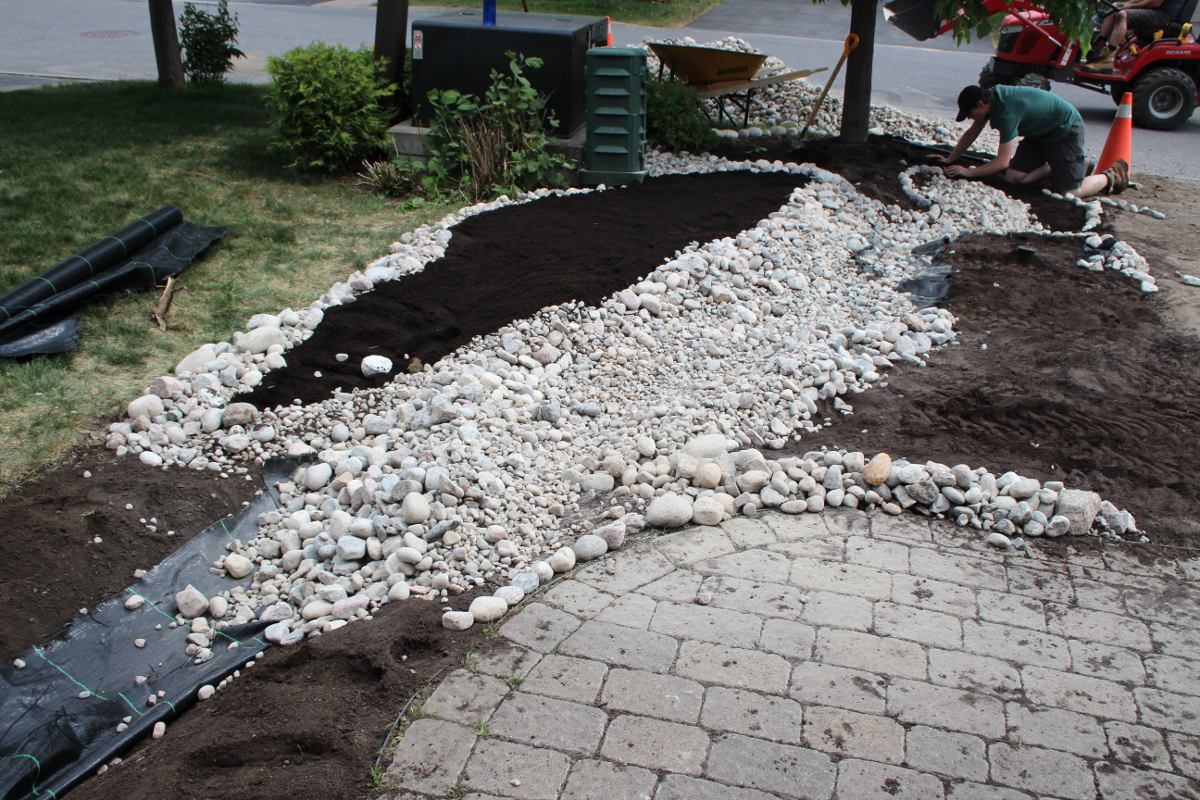

Shape the end of the water path. We have created a round pond-like area, with smaller rocks on the bottom and larger rocks around to create a more sturdy border with a path for the water to exit.
Build the borders to your beds with larger rocks, to prevent soil from washing up and to visually split up the large beds into smaller areas. Get your children to help out by picking the rocks of whatever size you need and building borders with you. Playing with rocks is fun.
Use small spaces for an accent – here a lily of the valley is planted in a small bordered space, creating a smaller rounded area next to the circular pond.
Place a few larger rocks near the spout so that the water doesn’t hit the small rocks at the bottom hard and wash them out.
Now it’s time to decorate the plain river bed.
Plant larger plants (herbs and ornamentals) around the sides of the river bed: we have chives, basil, lemon verbena, lemongrass, lovage, mint, salvia, dianthus, lily of the valley, and mini phlox framing the rocks.
Consider planting Swiss chard, beets, and kale as ornamental plants – their foliage is both beautiful and delicious.
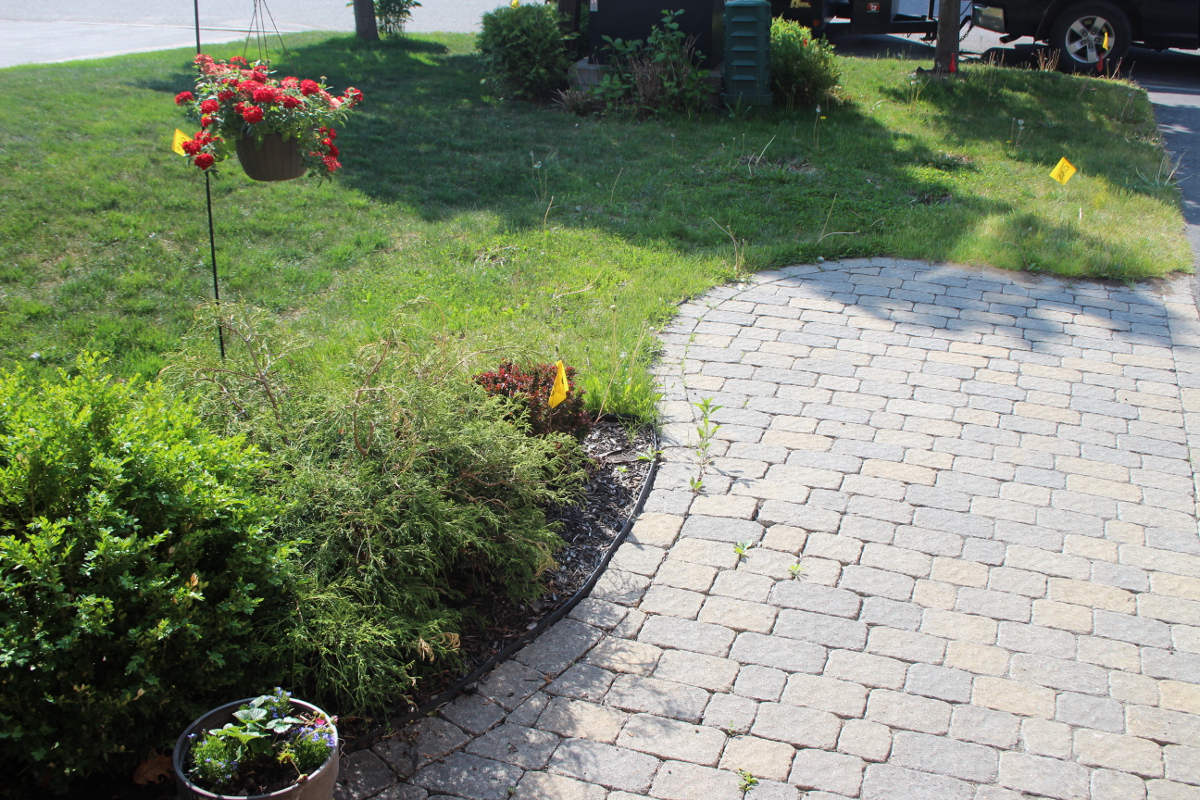
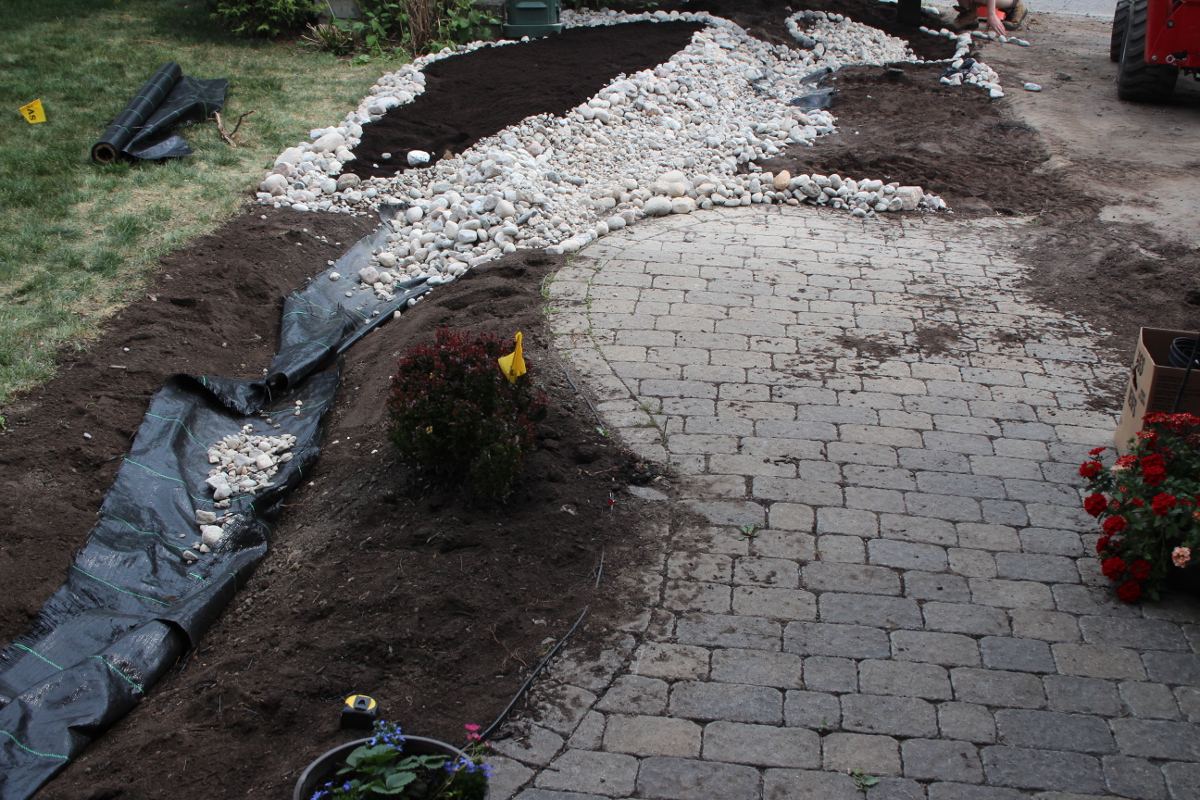
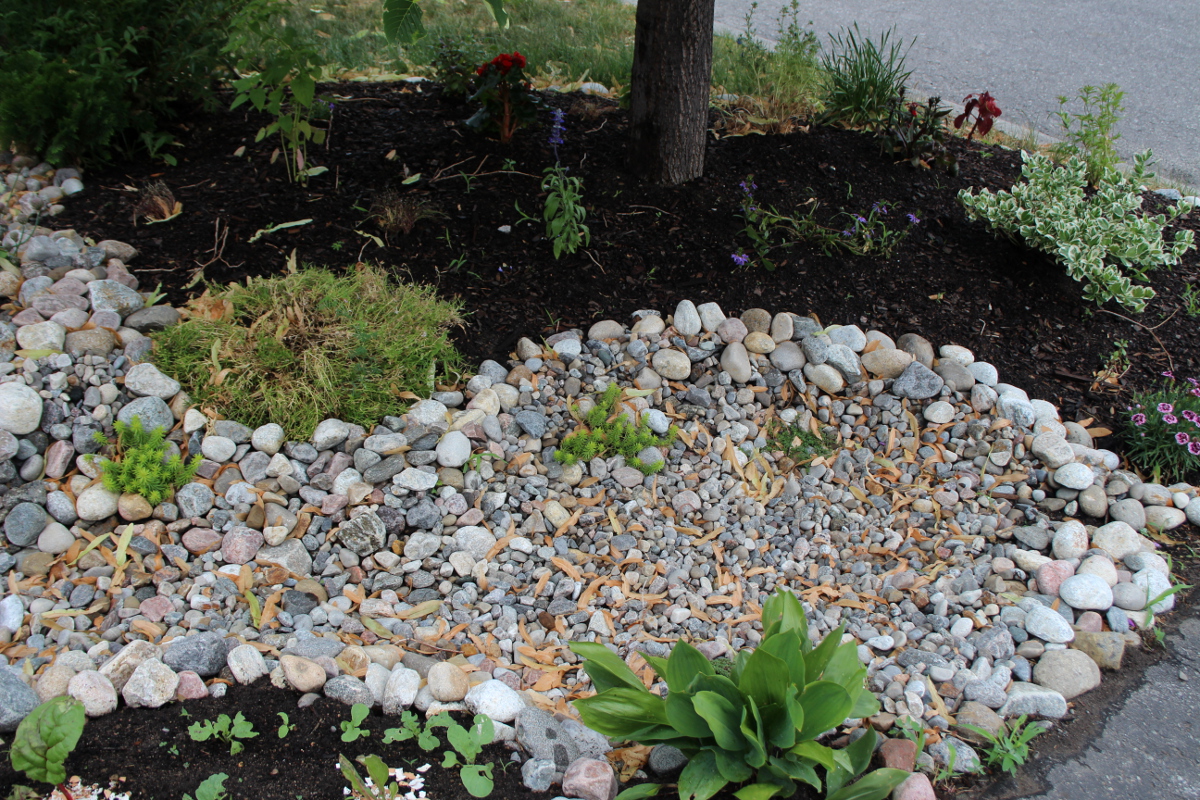
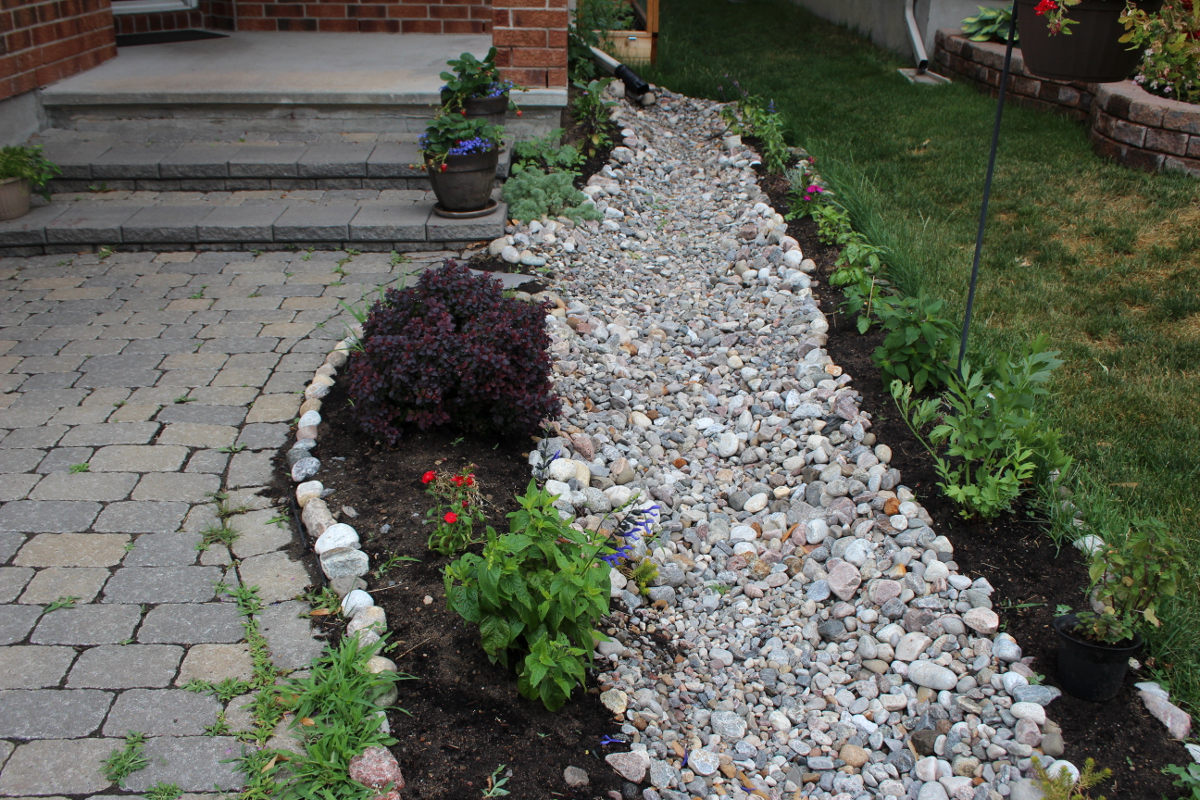
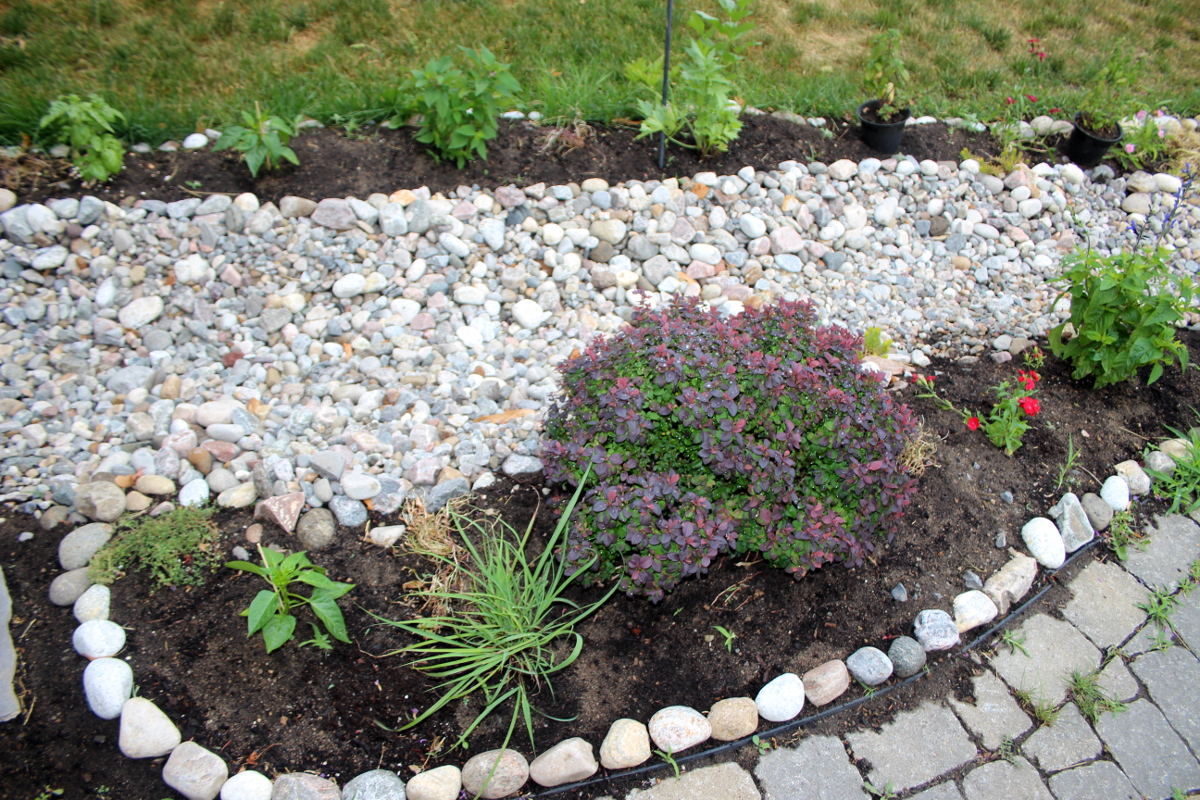
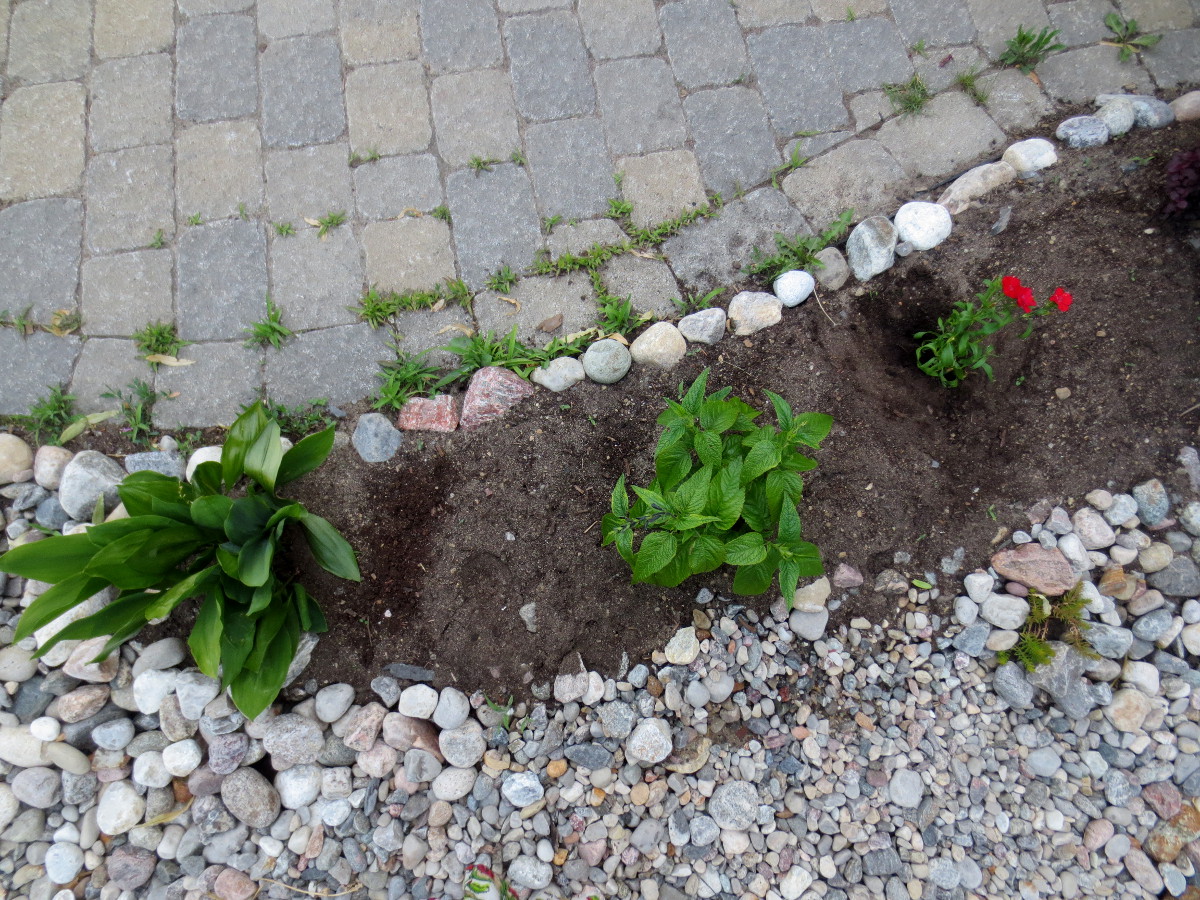
Use larger bushes to strengthen the curves – here the purple leaf bush contrasts with the white rock border, bringing attention to the curve separating the pavement stones from the garden bed.
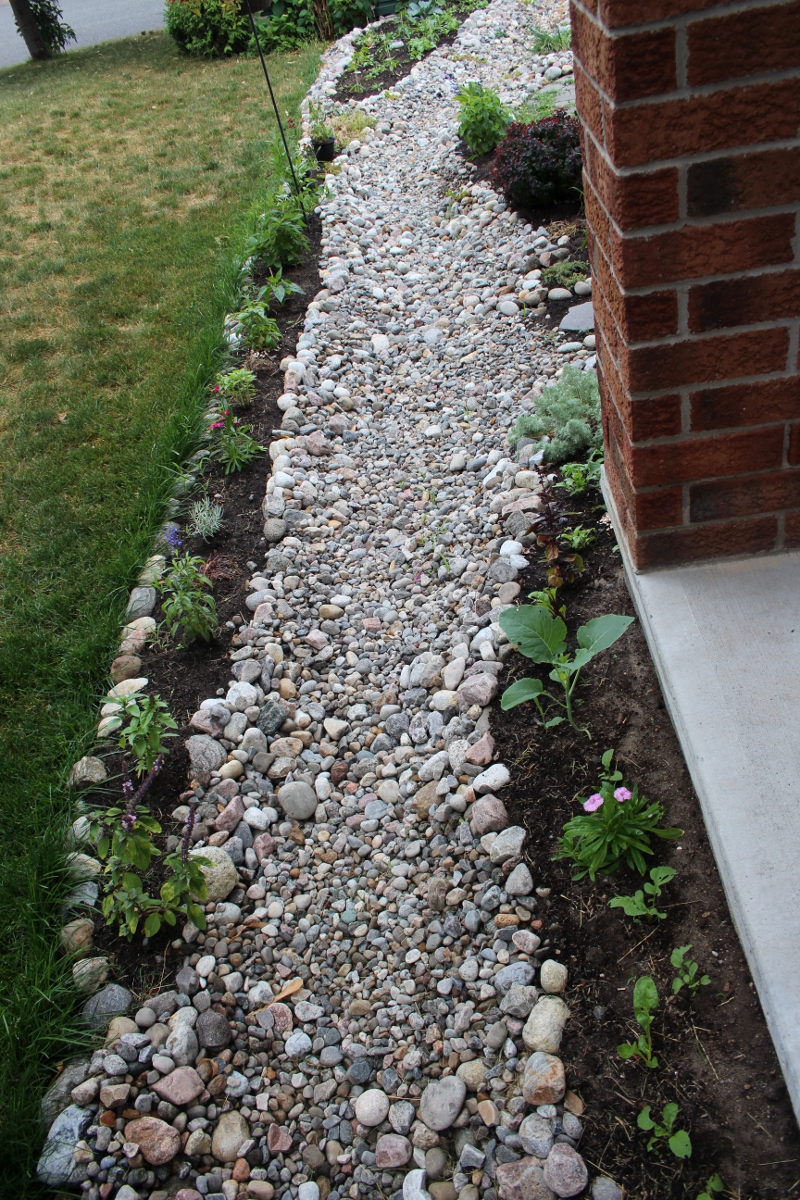
To create a more natural look, plant some thyme or other small creeping plants between rocks. Add some soil if needed and once planted, pack the soil with rocks all around, so it does not get washed off. In our case, the river bed is often dry and very hot, so whatever you plant in between rocks must be very heat resistant (heat reflects off the rocks) and be hardy enough to survive if the rain does not come for a while.

Add a few accent pieces. Vertical trellises and topiaries are a wonderful way to bring another dimension to the garden. Scarlet runner beans make for a beautiful display when they are blooming. You can also hang a blooming basket from a shepherd’s hook or plant a small tree (be carefull in selecting one though – many “dwarf” trees still grow quite tall, and their roots needs space).
Use components in groups of three. In our design, there are two topiaries and a shepher’s hook creating a visual triangle. There are three mini-phlox plants, accenting the corners where river bed and garden beds join, creating another triangle. It avoids symmetry and creates a more natural look.

The first time it rains, check how the water is flowing, whether there are any spots that need smoothing out or building up. See that the water can exit without damaging any other landscaping elements. Once the rain is over, examine and correct the problem spots if any.
For us, the first run worked very well (even with an incomplete river bed: for a few days, we had a patch without rocks between the spout and the river bed to create a path to the back yard for a wheelbarrow to pass). I had to adjust the rocks in the pond, to ensure that the water can flow freely out onto the driveway instead of the soil. It has worked well since then.
You can see that brown leaves have accumulated in the river bed – those were falling from the tall tree growing above the pond. However, after two or three rainy days, most of the leaves are gone.
Now that all the hard landscaping is done, it’s time to plant the vegetables and herbs. Consider companion planting. Some plants deter pests that would otherwise devastate plants growing next to them. Others fix nutrients needed by their neighbours. Many herbs and flowers attract beneficial insects that help pollinate the flowers, consume other pests, and provide food for birds which in turn also help with critter control. Some plants deter four-pawed mammal guests as well.
Above all, be creative and enjoy this space. It can be a space of wonder and relaxation for you and your family. We all can learn so much by watching plants grow. And water flowing along a rocky river bed during a rain is a wonderful focal point for meditation.
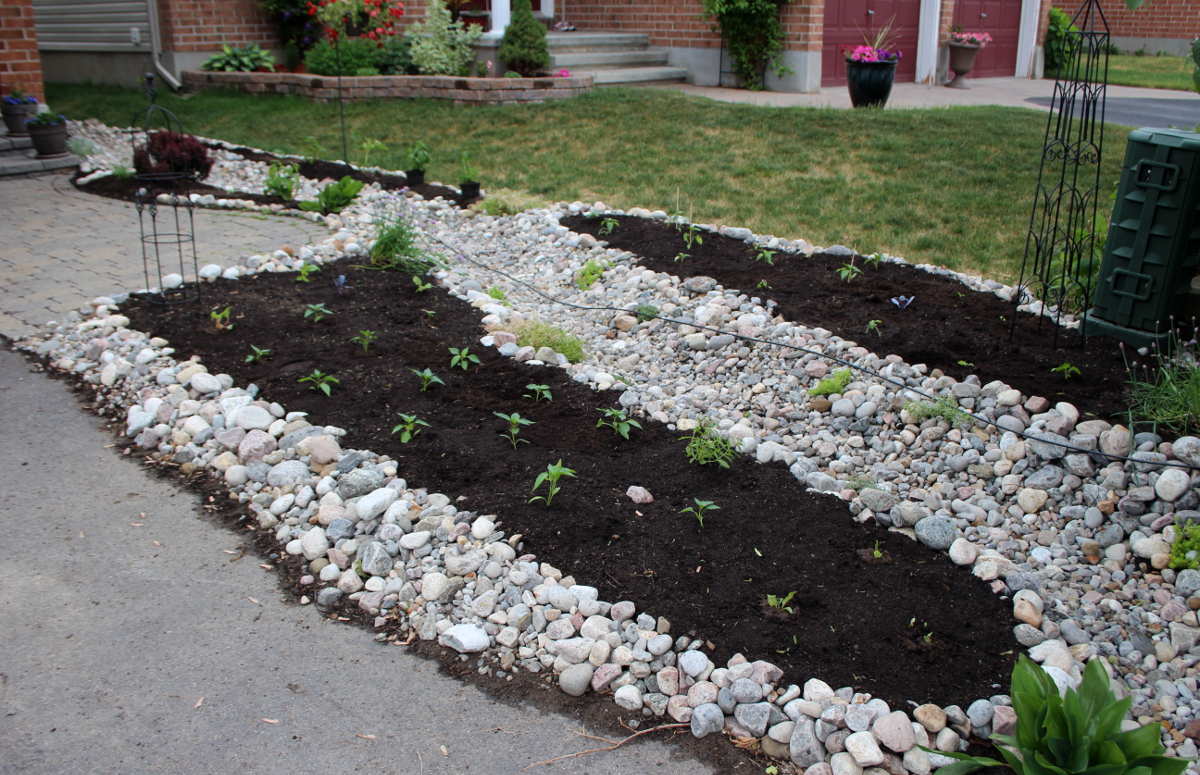
Front yard edible landscaping and dry river bed
Last week, we went for a walk in an affluent neighbourhood nearby, to explore. After our own edible landscaping project completion, I was curious to see what people do with their front yards, especially those people who have more land to sculpt. To my disappointment, most front yards were lawns, with barely even a flower to be seen. Some even had fake grass, like the synthetic turf they use on some sports fields (this one is beyond me).
Then we went a bit closer to home. Many houses here had landscaping with flowers and lawns. Yet we have found only two houses – both on corner lots – that had extra land on the side and had it landscaped to grow food, with raised beds and trellises. On another corner lot that has a beautiful alpine garden in the front (most of it rocks, trees, and flowers), when looking closely, I have spotted cabbages planted among the poppies.
I’ve lived in a place before that had only a balcony, and I’ve managed to grow plants there in pots. I’ve lived in another place that had a small patch of ground attached to it, covered with patio stones. We removed the stones and created a highly productive garden in that tiny space. Every day, we drive by a second-story apartment that has every inch of the roof-top veranda covered in plants in containers, and the tomatoes I can see from the road are growing beautifully.
People without access to ground level or with access to small spaces do wonders growing food there and having a green oasis to enjoy. It baffles me when home owners who have plenty of land spend quite a bit of time taking care of their lawn (watering, weeding, mowing, even fertilizing it), to get a plain green ornamental carpet. They pass on the opportunity to bring into their lives a green space, full of birds and butterflies, that grows delicious food and is a delight for adults and children.
This year, when I finally had a chance to shape my own space, I’ve decided to not only bring in good soil to grow food, but make the entire front yard into a flowing garden around a dry river bed. I stumbled across a dry river bed design online and fell in love with it:
Given a narrow shape of our front yard, the curved design of the pavement and the existing tall tree near the road, the design was born to have the river bed snake in between the two large garden beds.
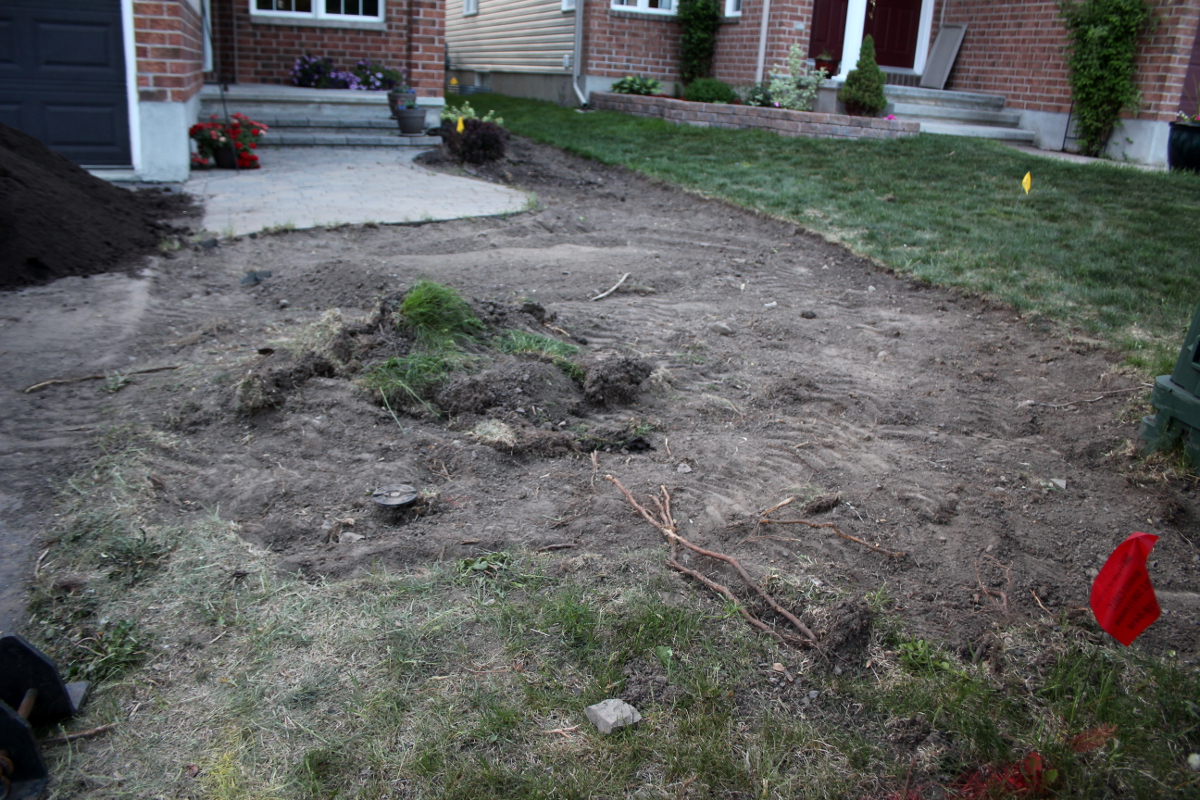
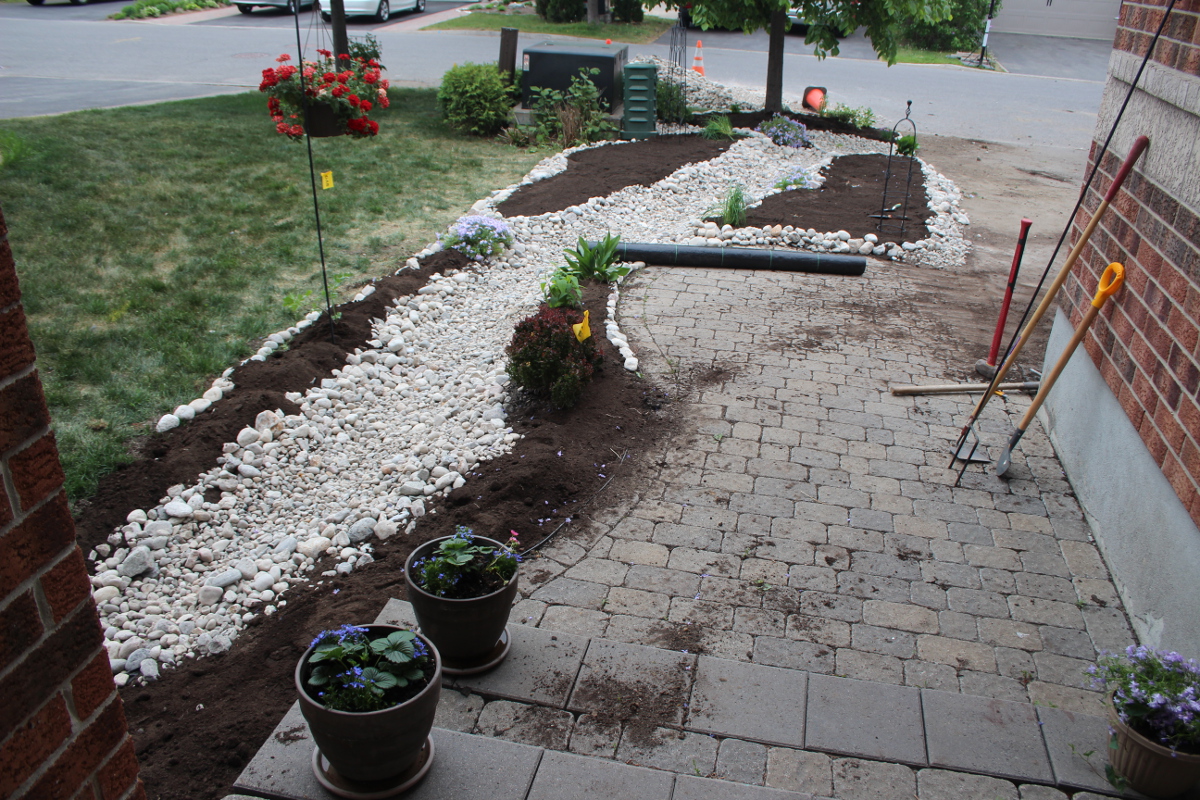
Our canvas was a somewhat dug-up mostly green lawn we were not interested in keeping, planted over a hard rocky clay soil unsuitable for planting:
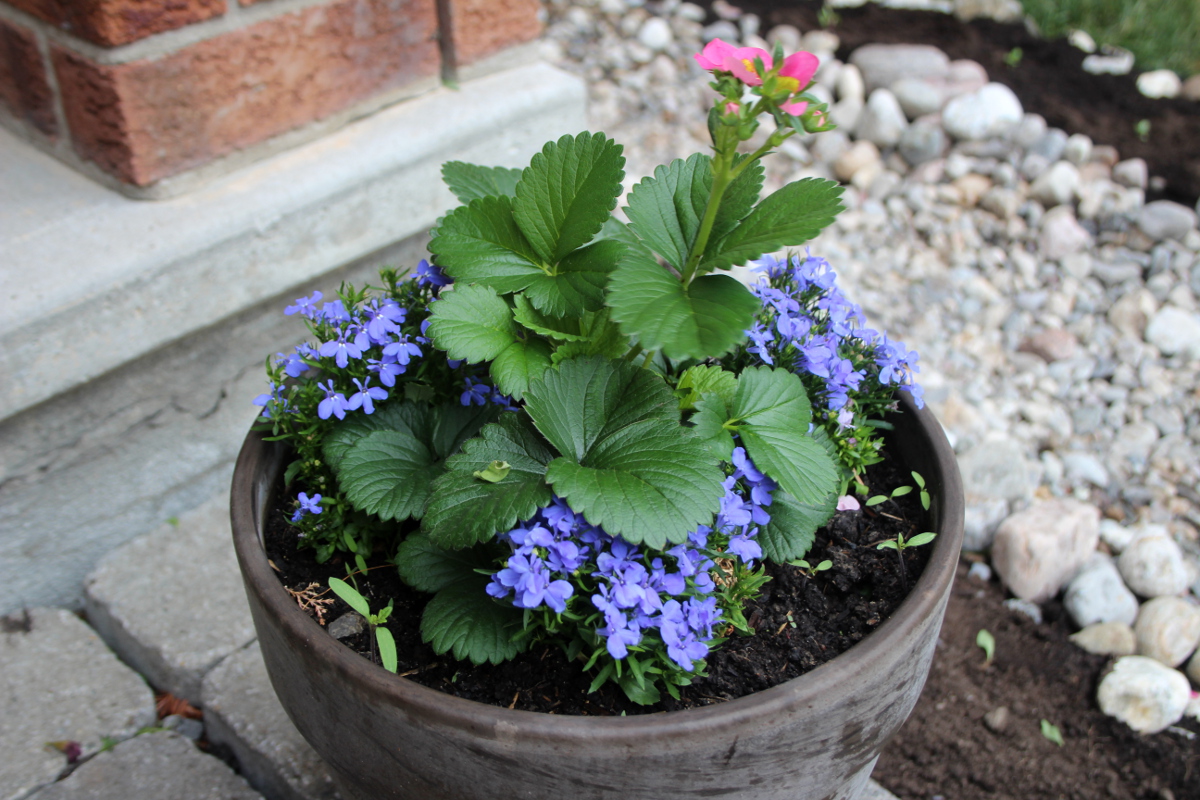
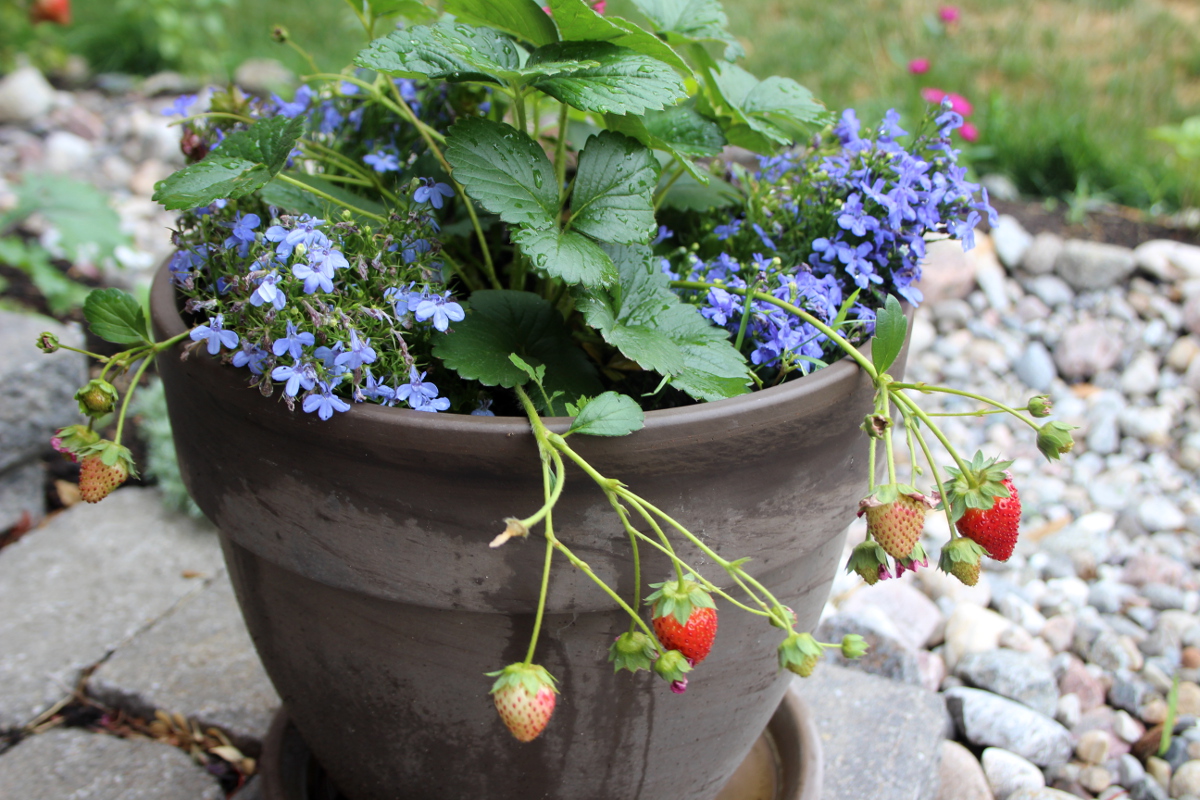
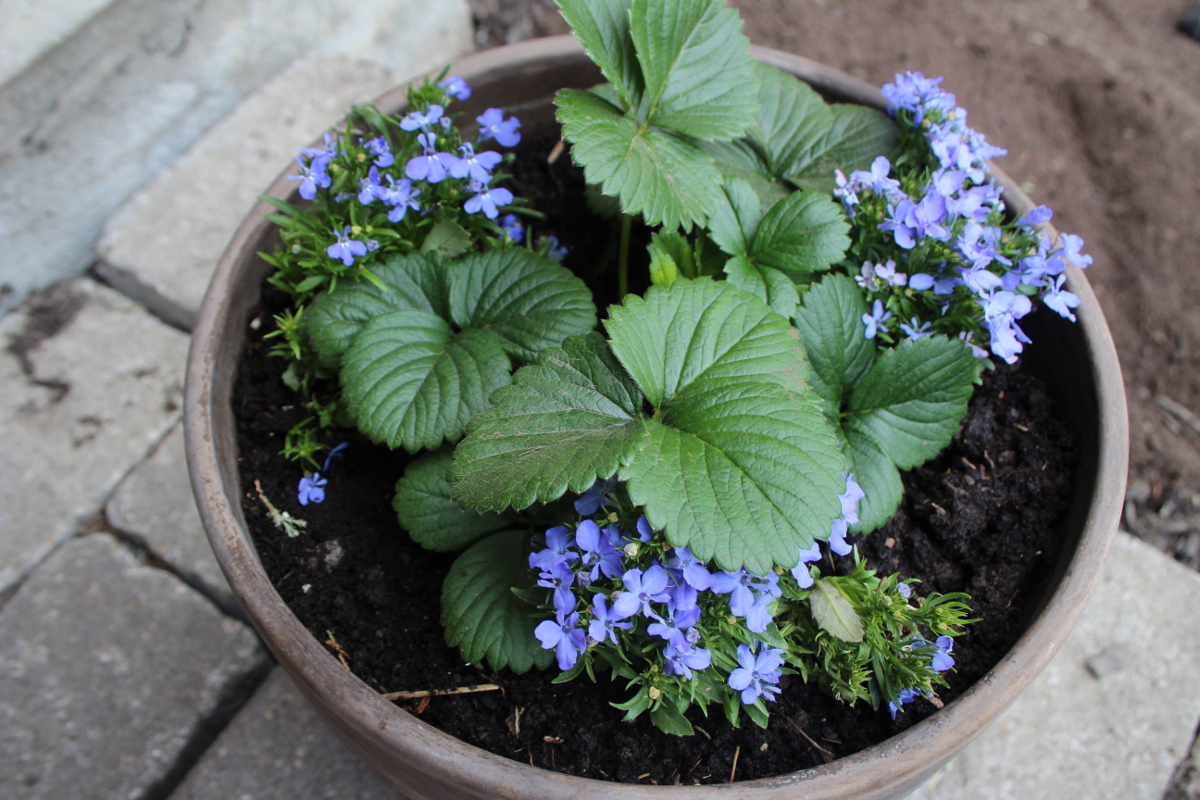
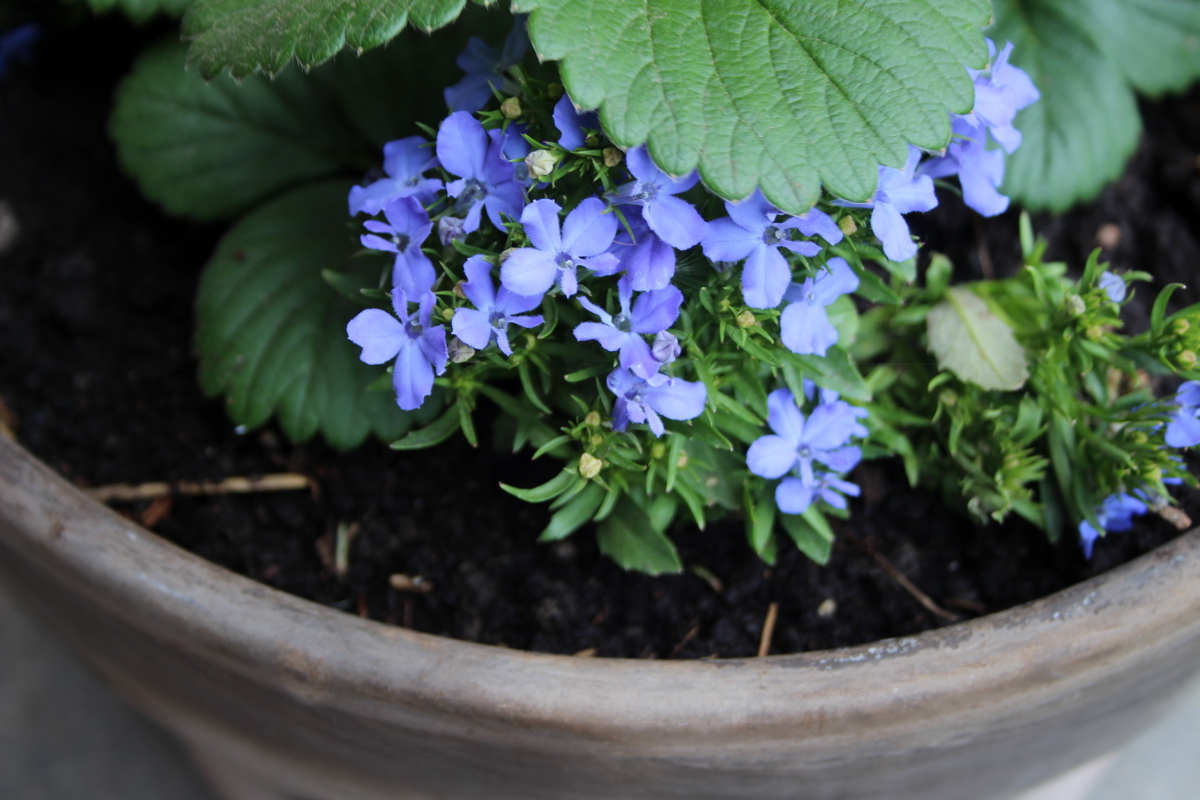
While I was waiting for the stars to align for work to begin, I’ve started seeds and planted strawberries and lobelia in two pots on the front porch.
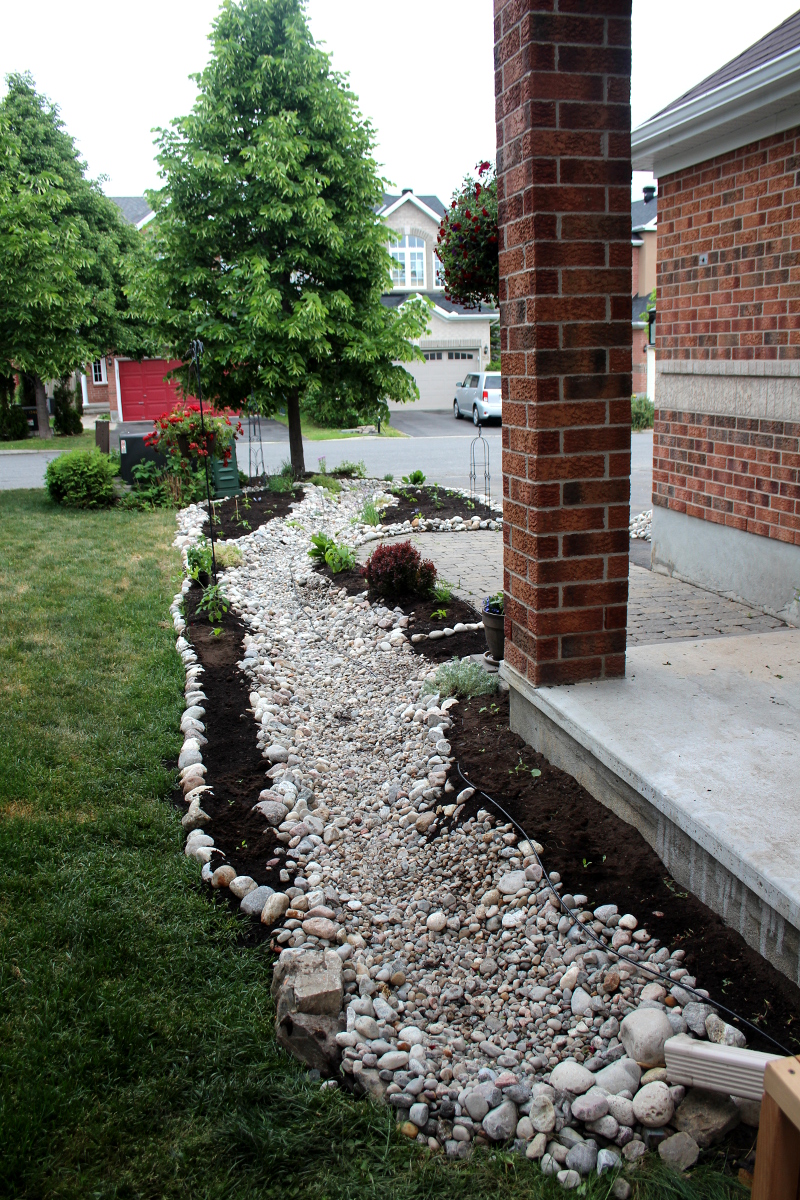
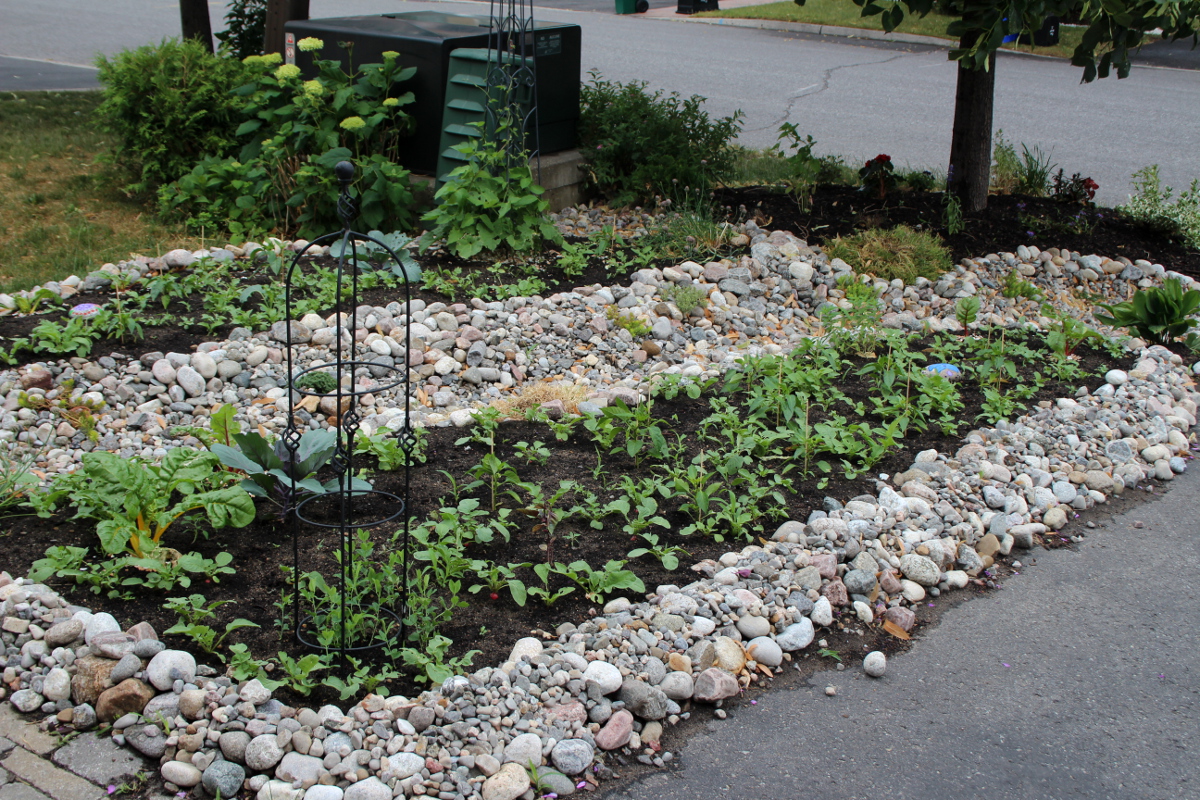
And this was the almost-completed landscaping (a few rock borders still needed to be finished and more planting still remained):
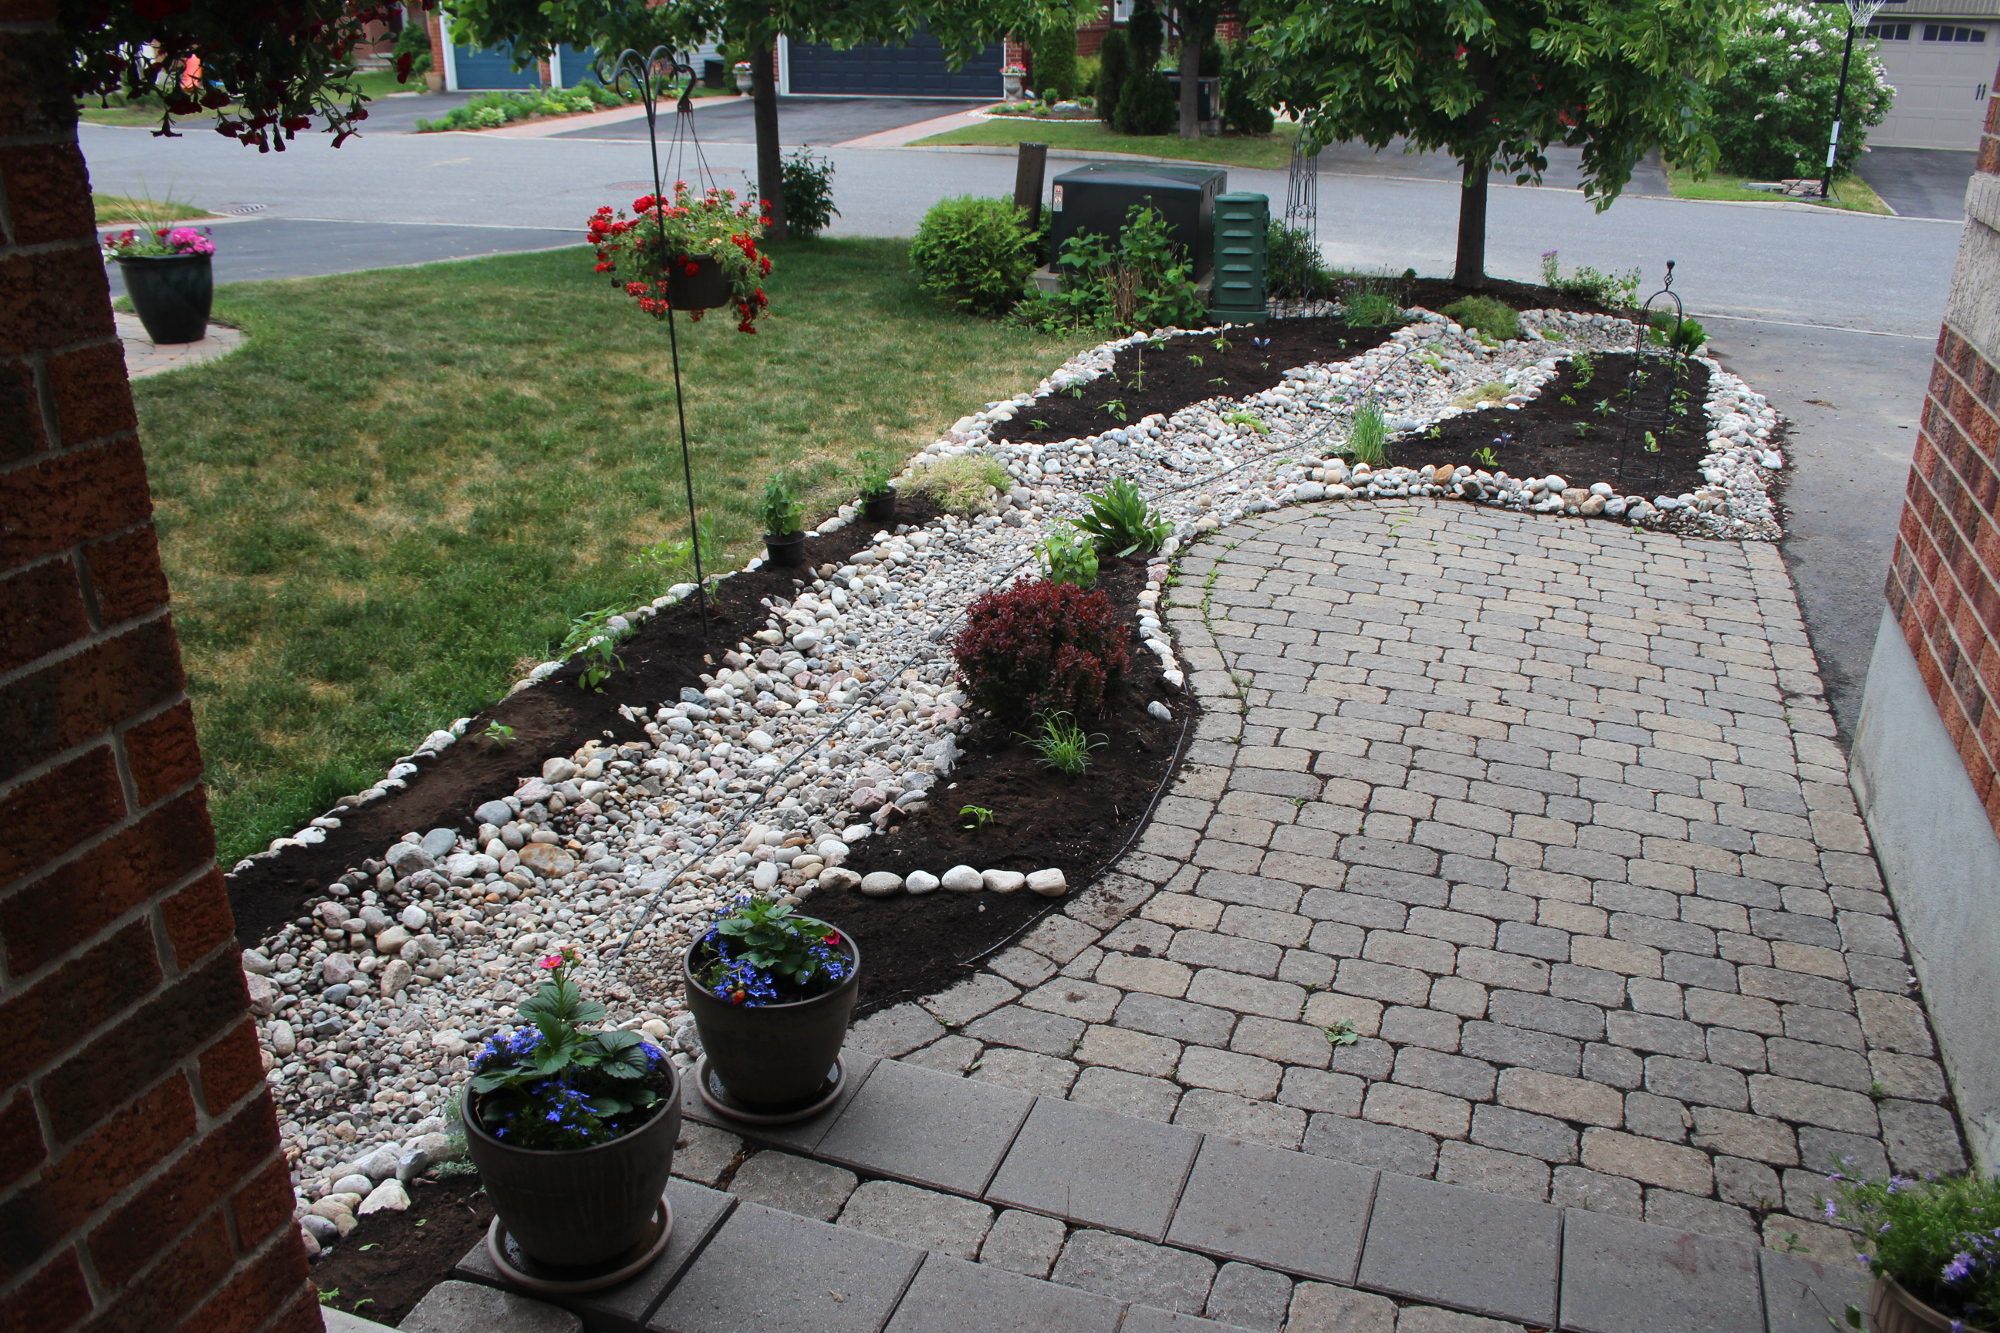
Even in the small spaces on the sides of the river bed, I have planted herbs – salvia, lovage, basil, kari, and placed two pots with mint, so that it doesn’t get a chance to spread its tentacles all through the soil.
I’ve interplanted ornamental flowers with herbs. I love the different shades of green that together with the black of good soil become the backdrop for a variety of colours and shapes that each plant brings.
Even in the narrow space along the porch, I am growing cauliflower, kale, radishes, and herbs.
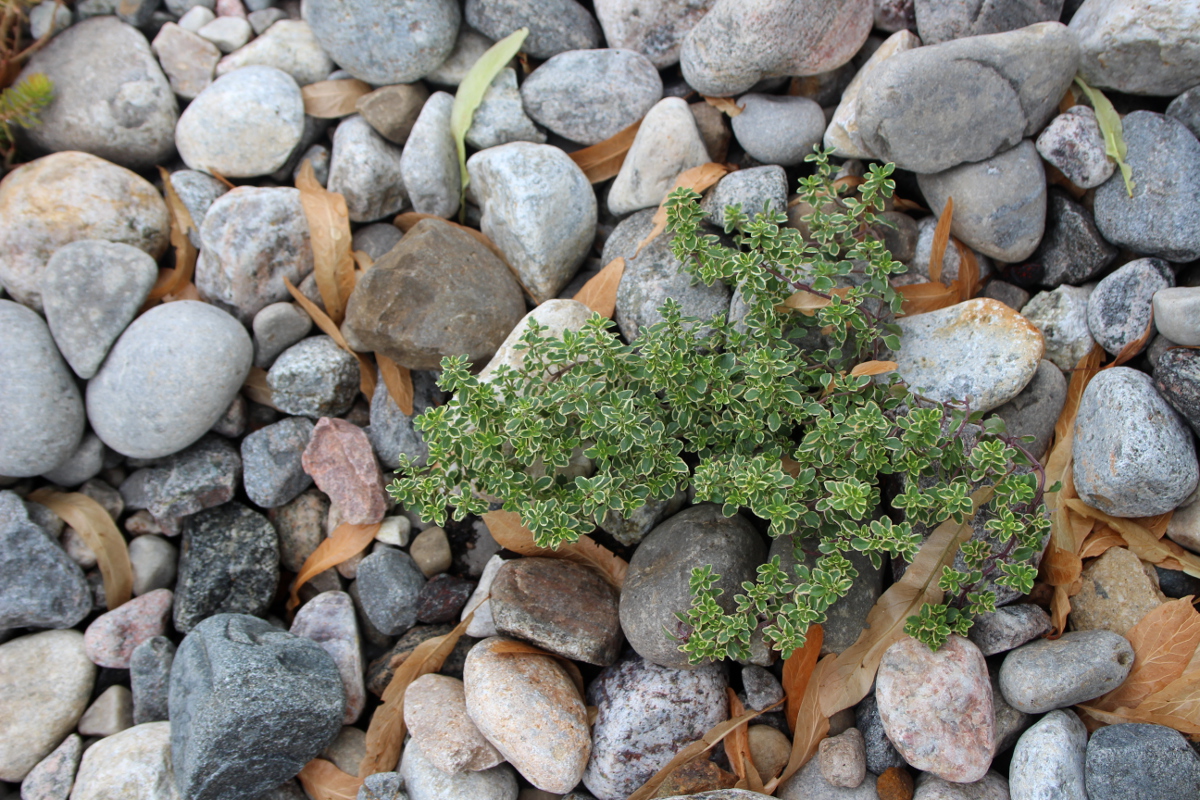
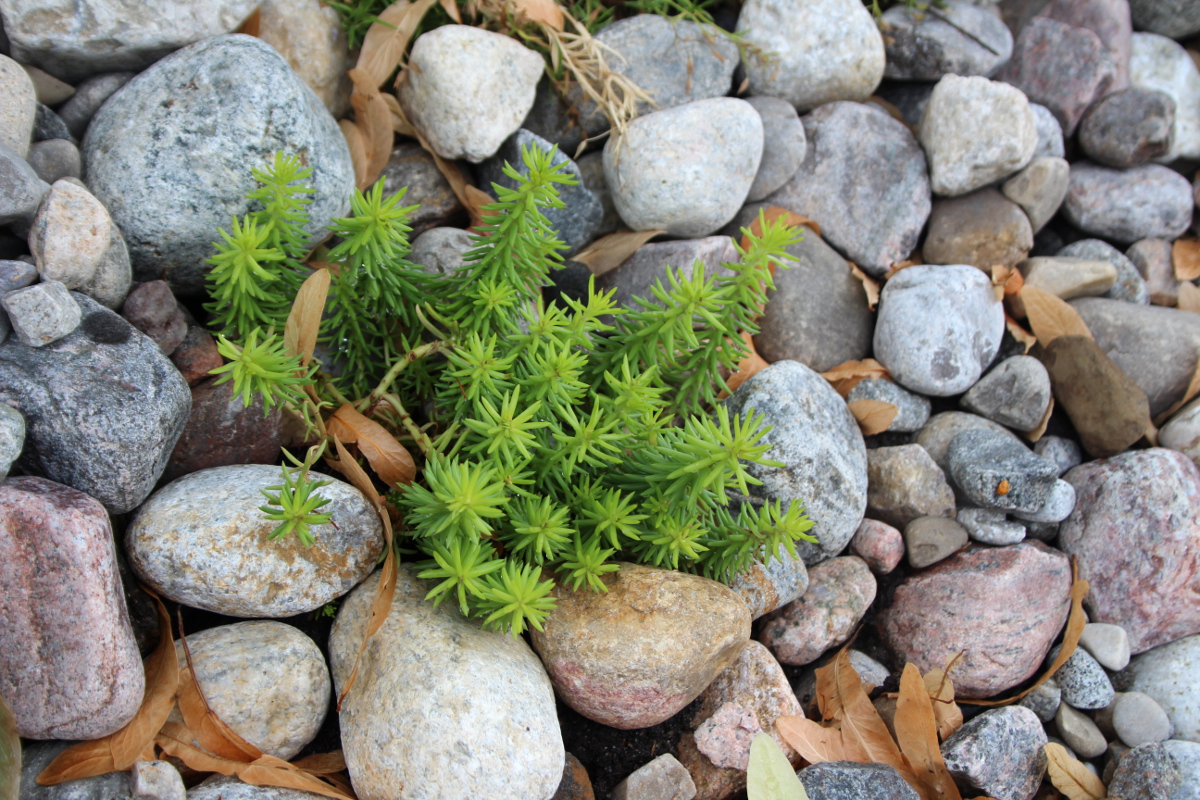
Sedum and thyme bring a splash of vibrant green over the natural texture of the stones.
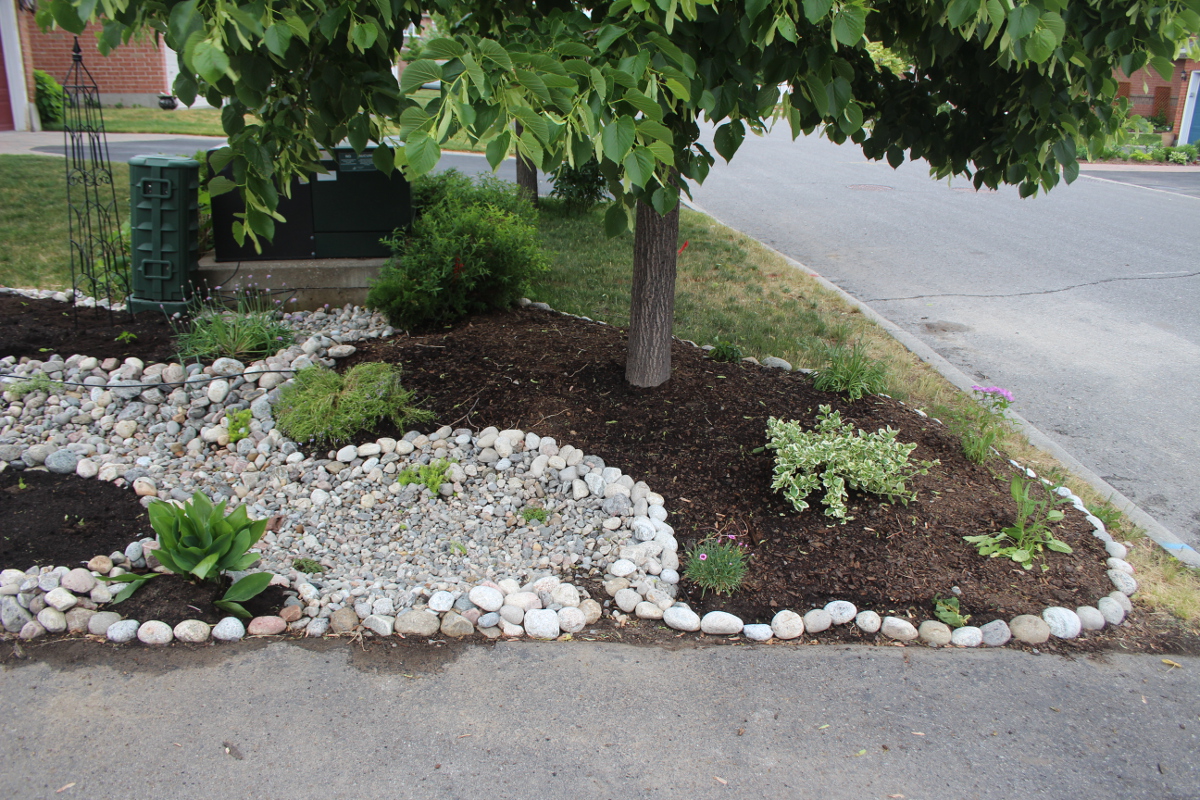
The river bed ends in a small round pond where the water collects during rain and gradulally flows out.
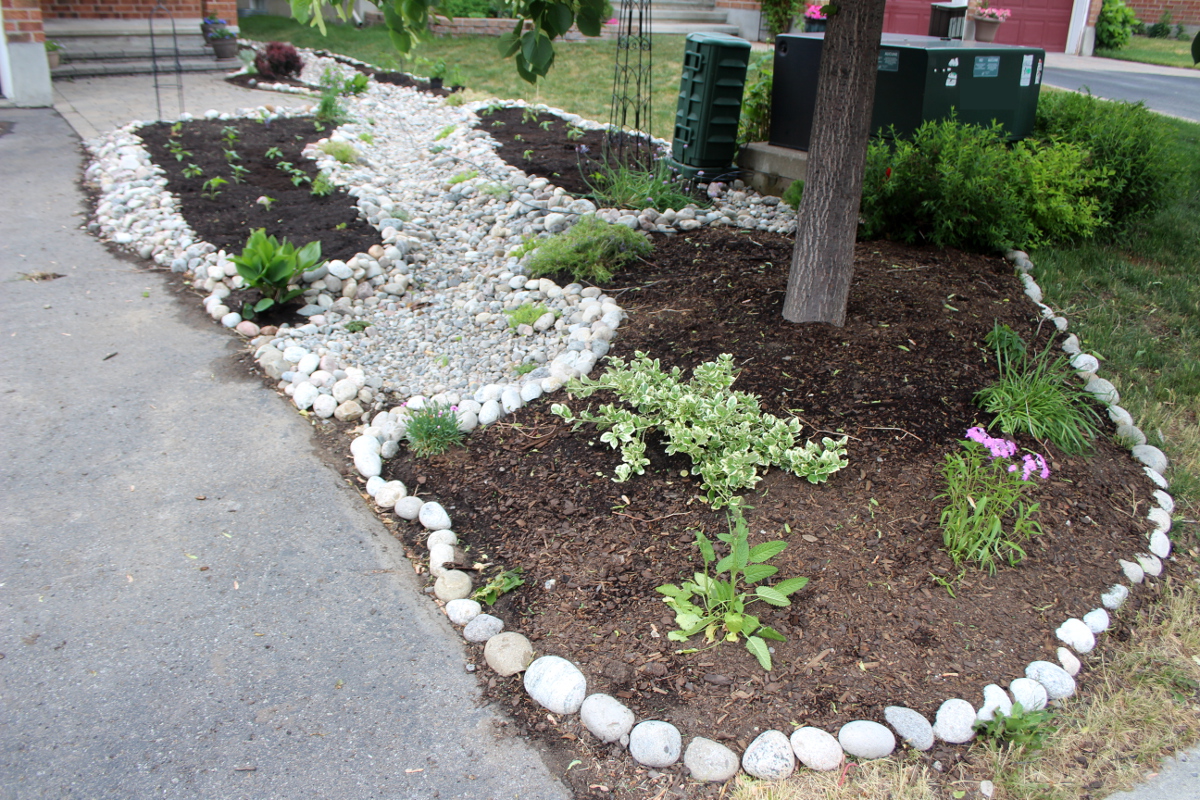
We have built another raised bed around the front tree. Since it’s so close to the road, I’m mostly growing ornamentals there. I will likely be planting tulip, lily, and hyacinth bulbs come fall, and perhaps will replace some of the annual ornamentals with swiss chard and other colourful edibles next year.
Many ornamentals are orange and yellow, yet I prefer the blues, reds and purples, so I have kept the decorative plants to that colour scheme.
Reds make for a bright accent to all the greenery.
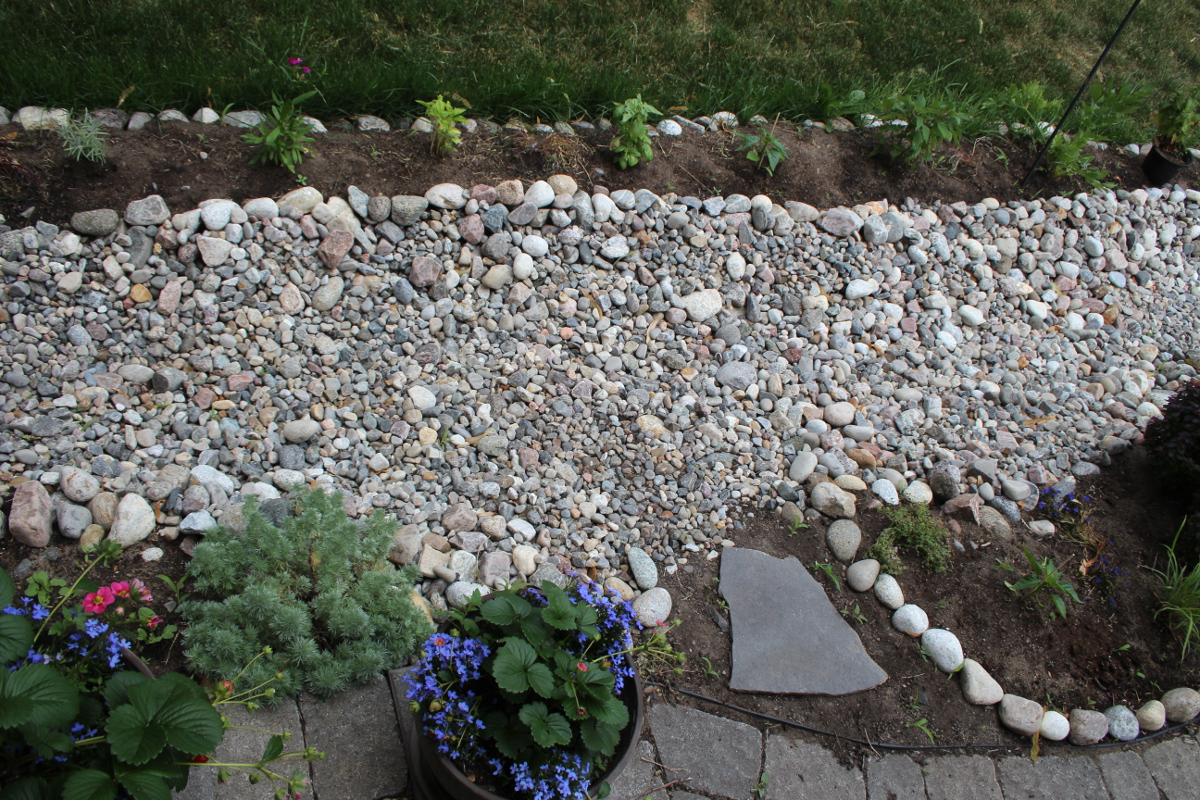
I have finished the rock borders and have placed a stepping stone in a place where one can cross the river bed to get to the back yard.
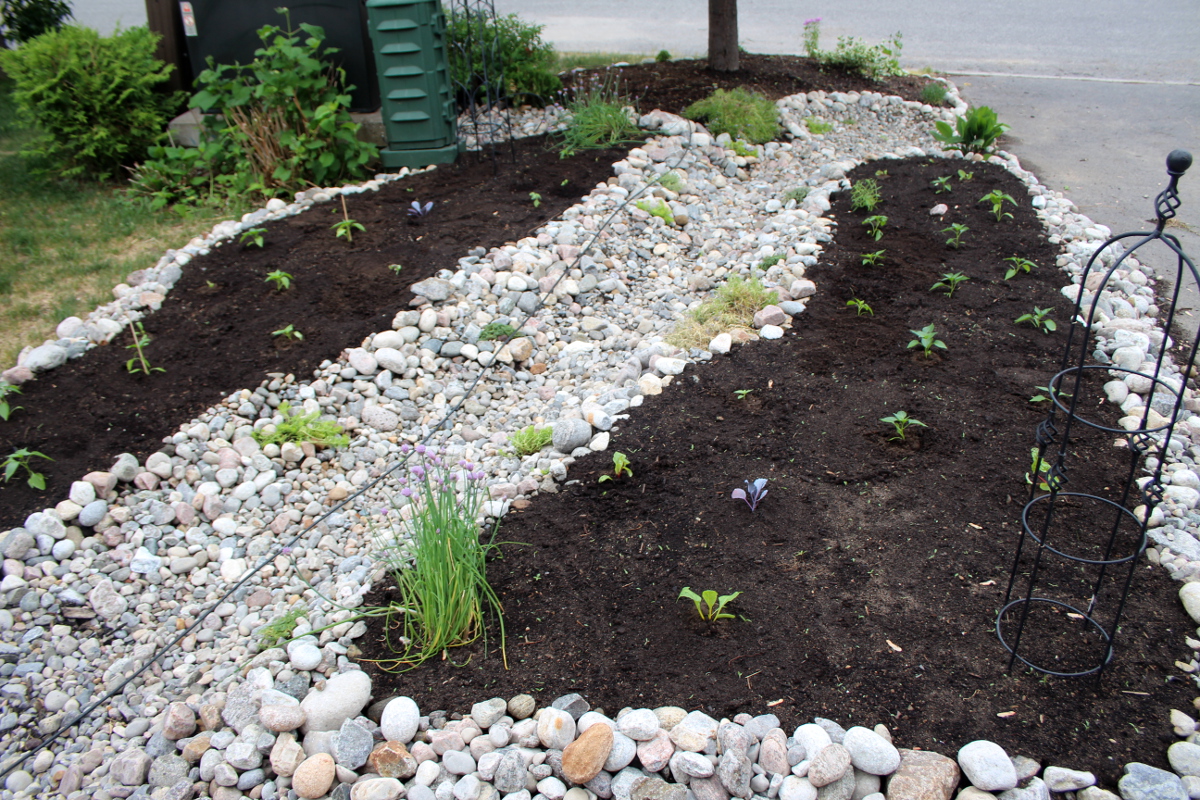
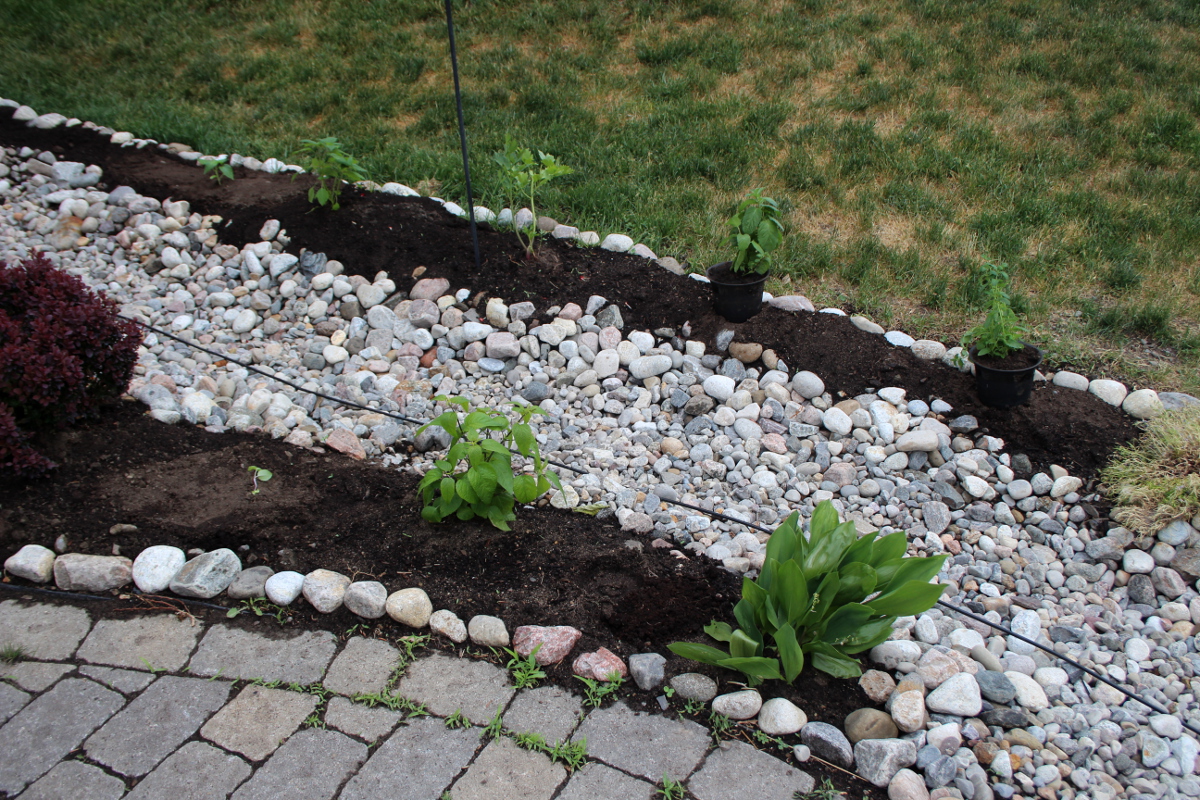
Here are the garden beds short after planting:

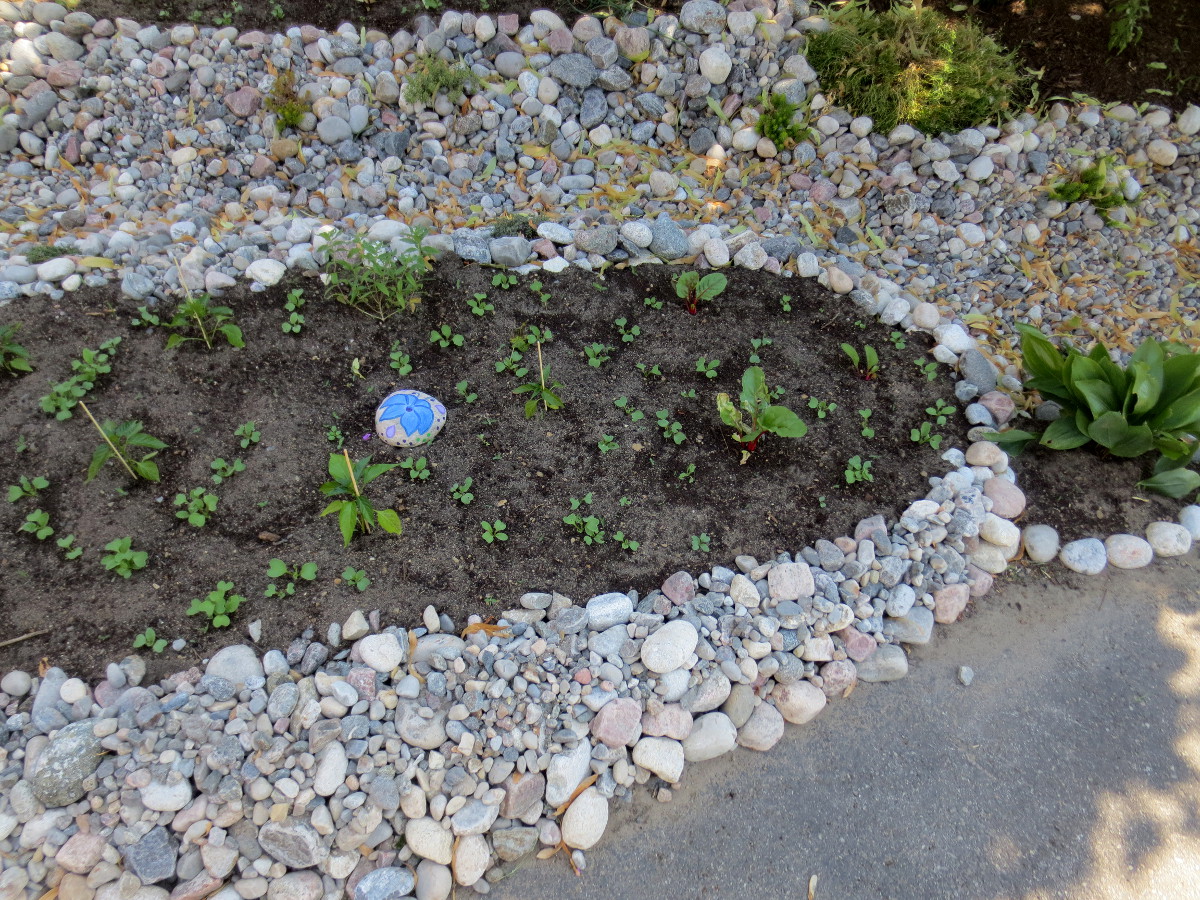
One of the garden beds covers our property’s water shut-off valve, so I have painted one of the river rocks to mark that spot. One of my favourite aspects of design is the combination of function and aesthetic.
For a visual balance, I’ve placed another painted rock on the second river bed.

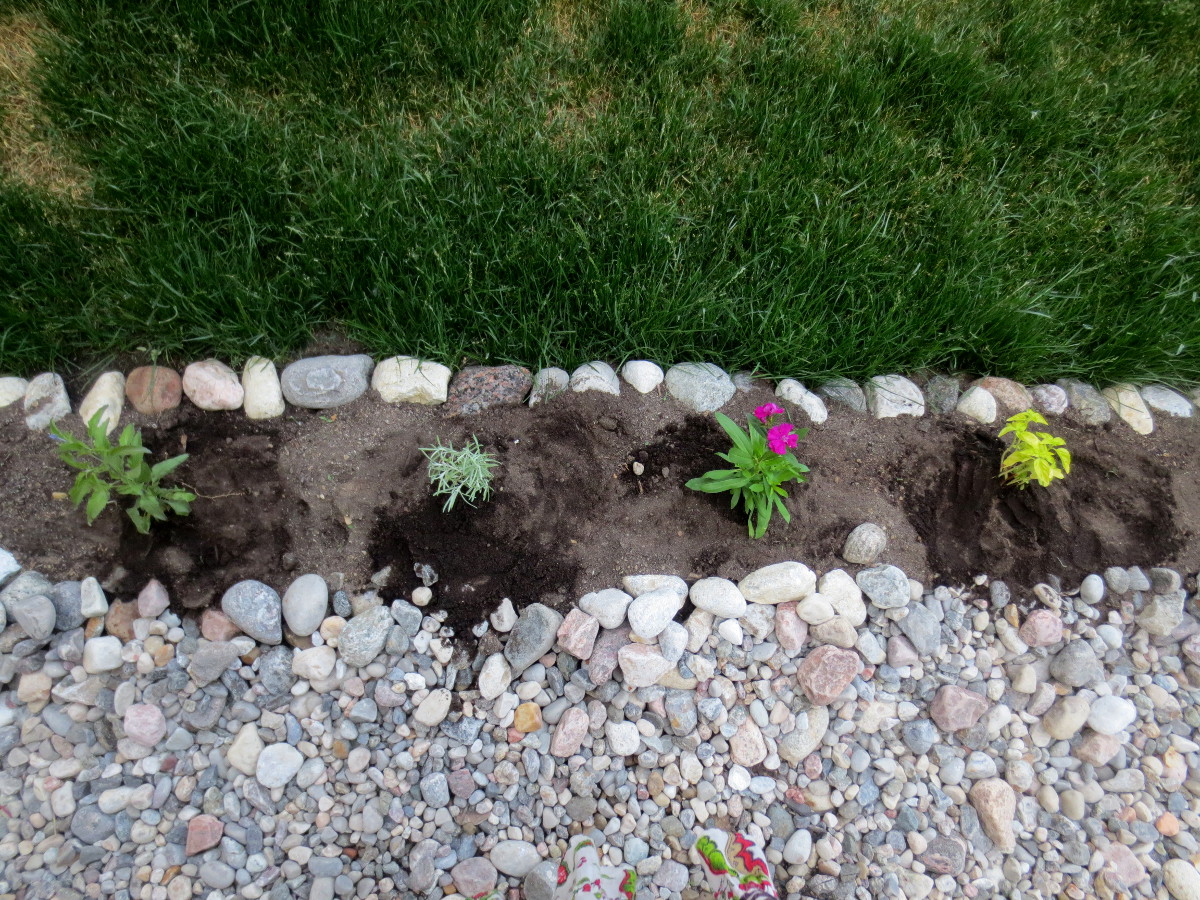
And here are the beds three weeks after planting. Peppers, radishes, and herbs are happily soaking up the sun.
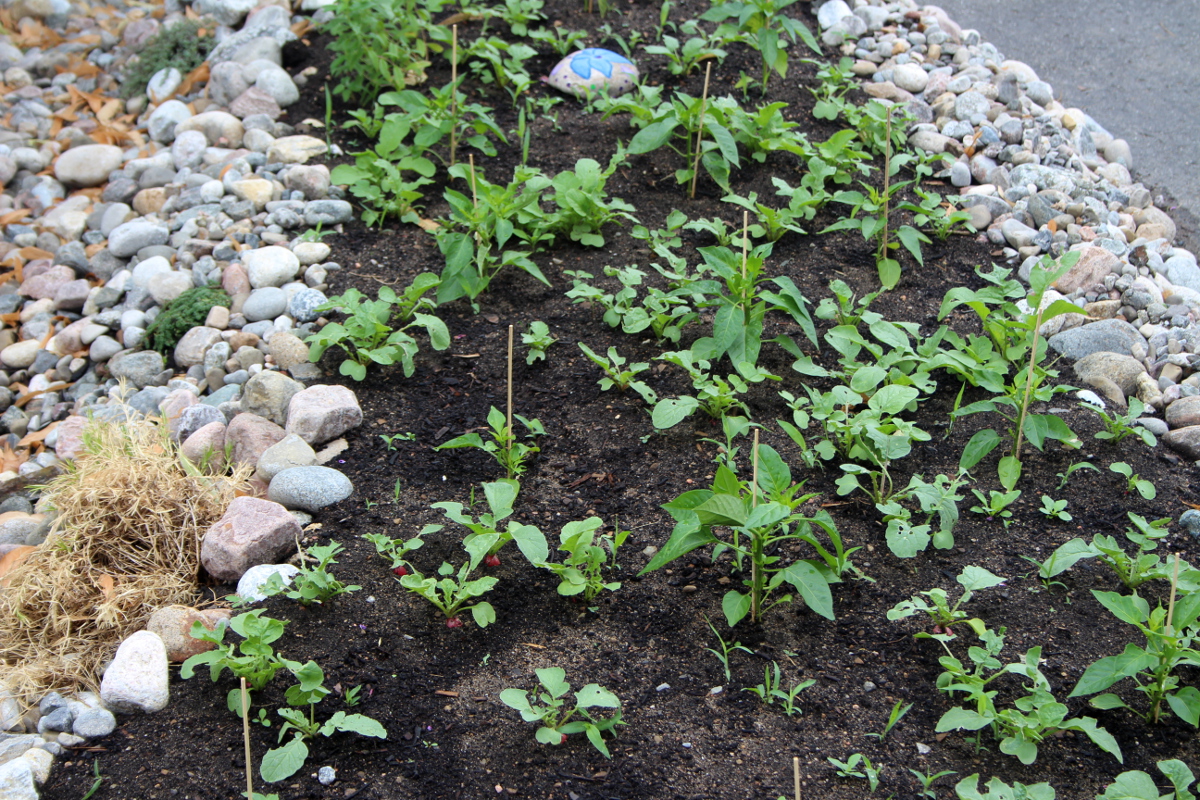
Beans and peas are getting taller. Swiss chard and cabbage are happy in full sun, and it looks like a neighbourhood bunny is frequenting our garden and sampling the greens.
The narrow areas near the house are nourishing plants well:
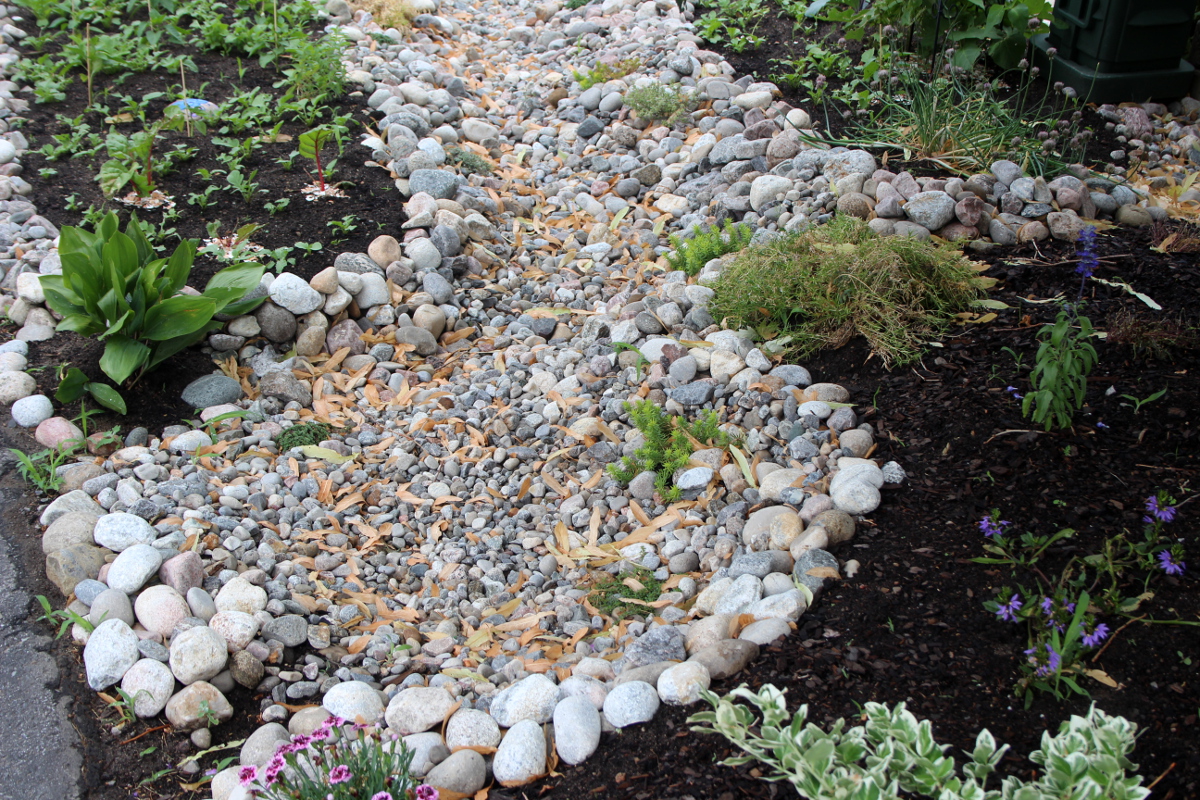
And it’s a pleasure to walk between the beds on the rocky river bottom.
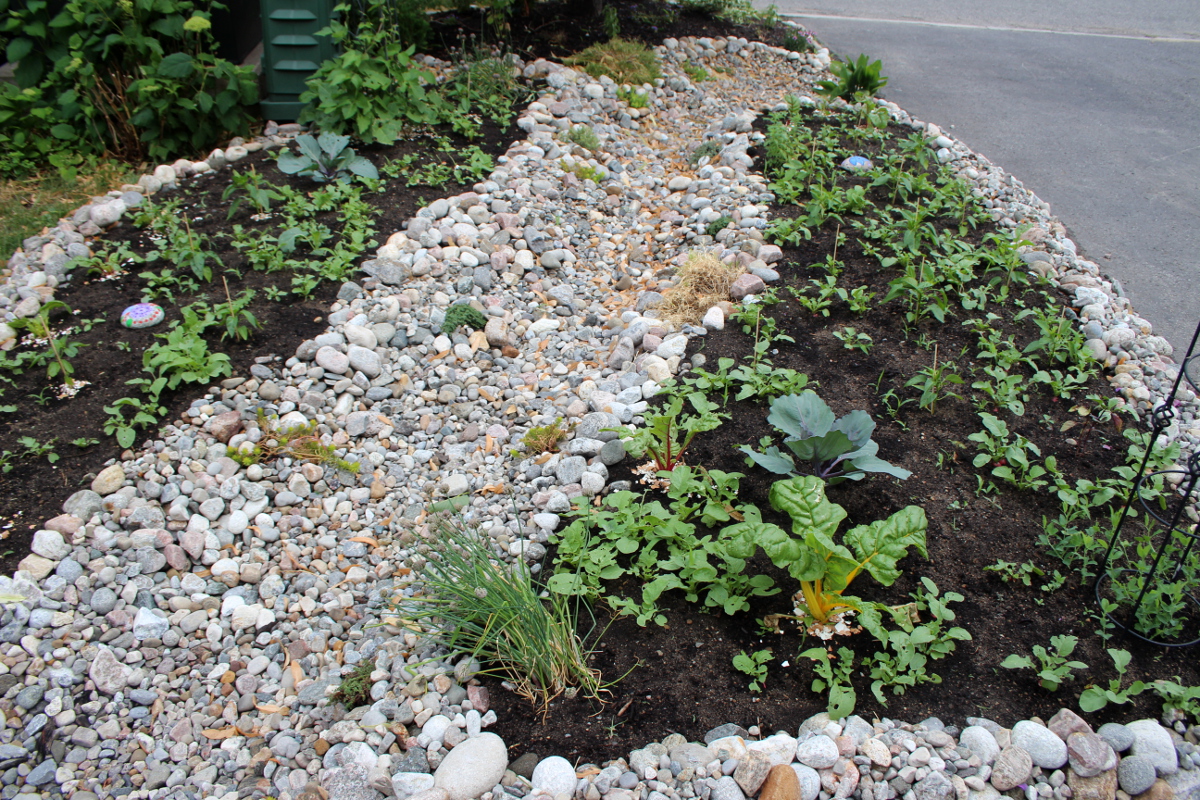
Sedum and thyme in between the river rocks seem quite happy.
Beans have started to crawl up the trellis, and their scarlet flowers will soon show up:
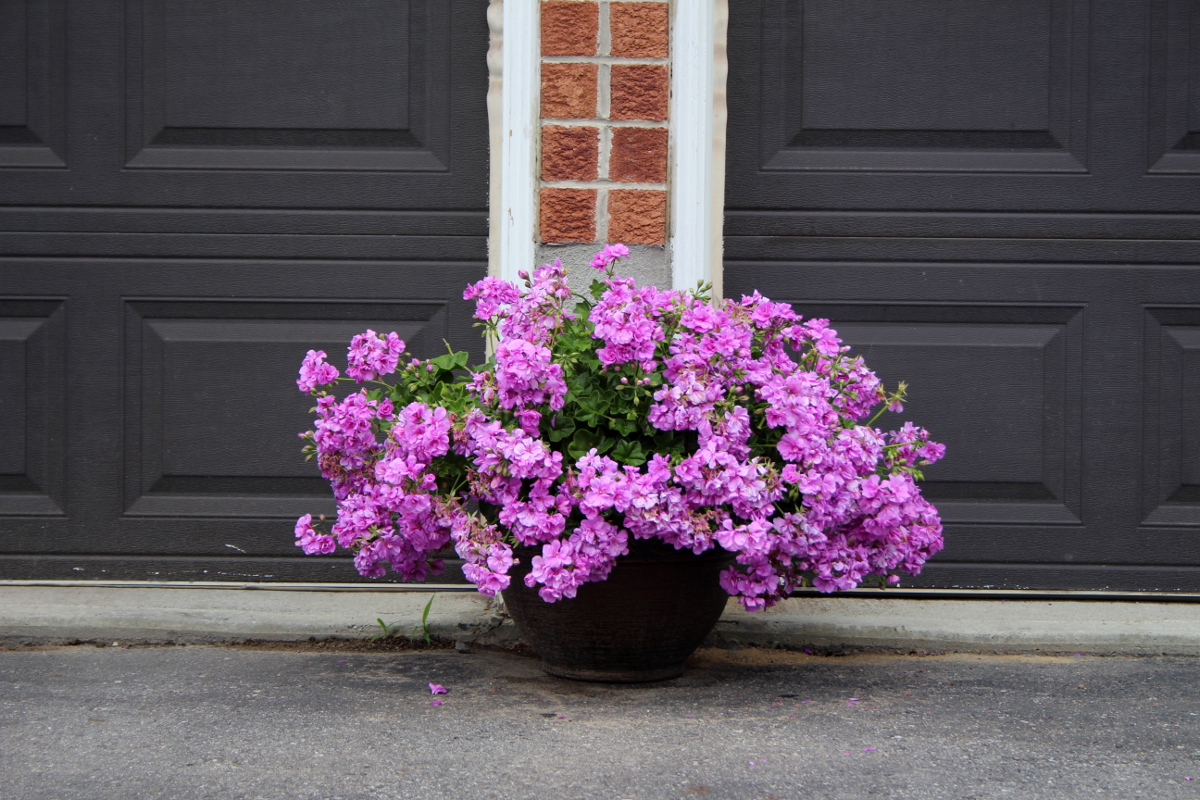
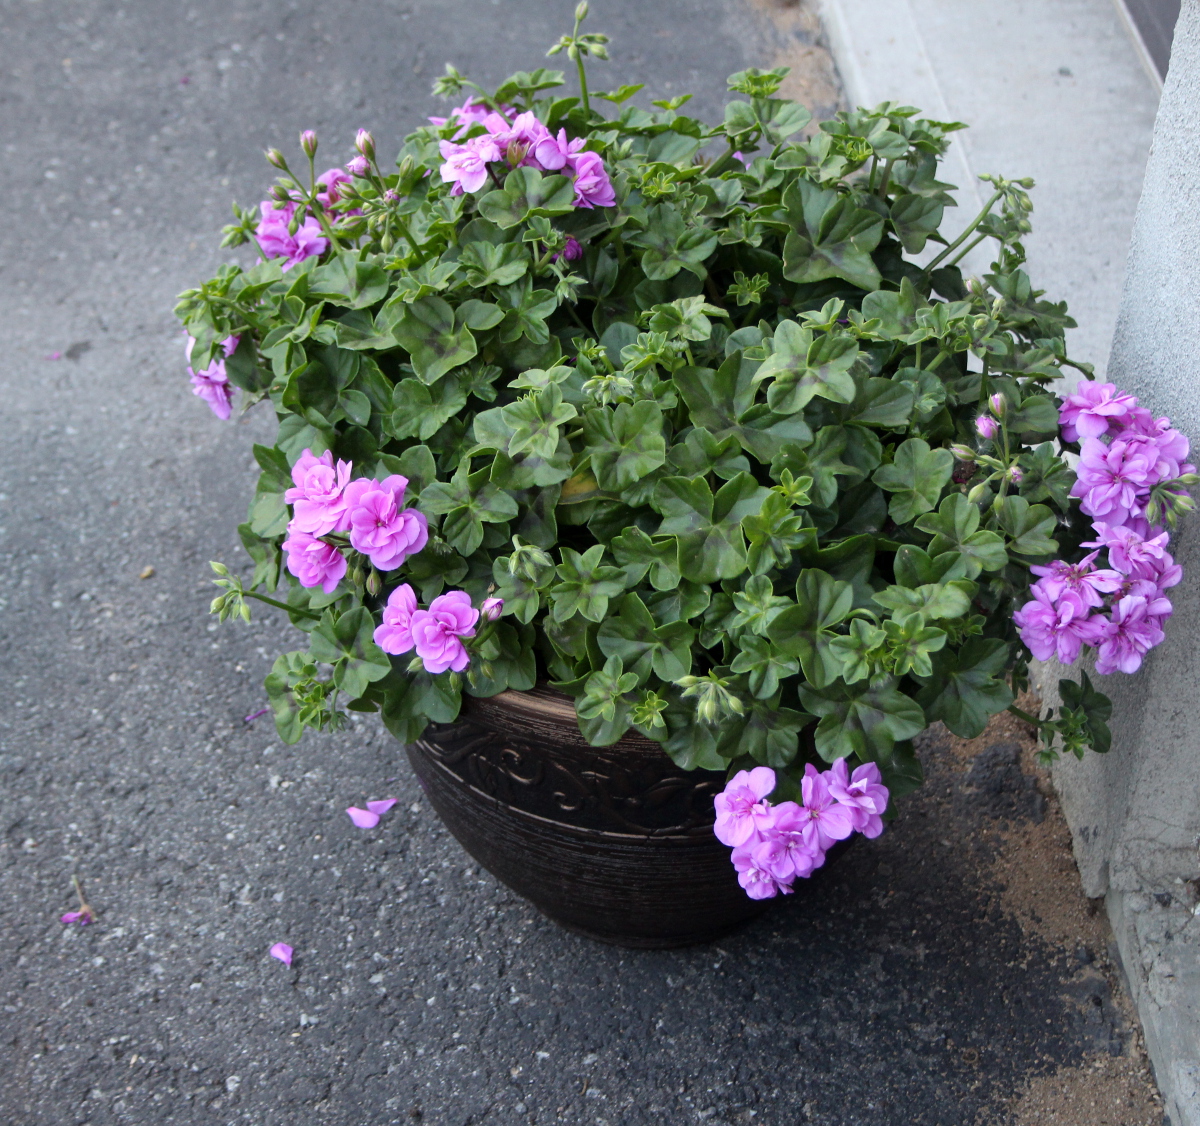
My centerpiece lilac geranium is covered in blooms, with green barely visible.
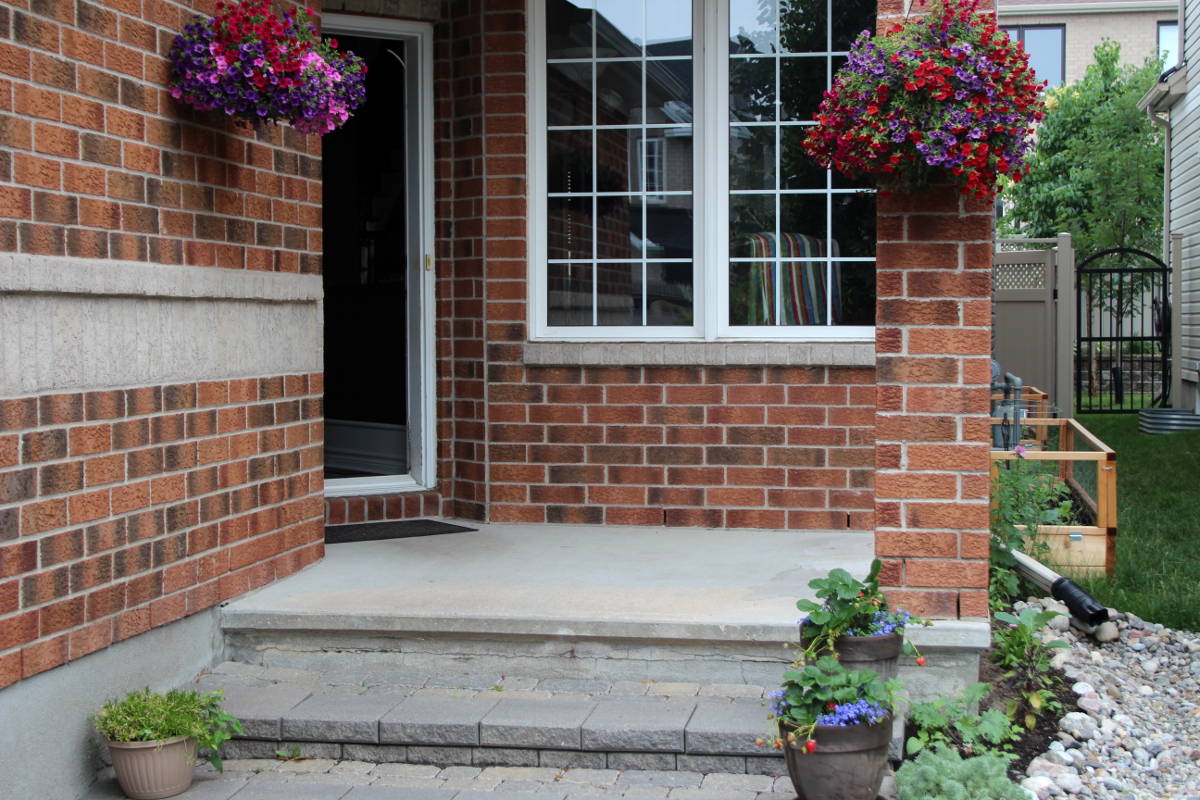
And the flowers around the front porch make everything brighter:
Almost every day now, there is a strawberry or two to enjoy. The kids love finding ripe berries in the morning.
Last year, when we moved to our new place, we spent a few months making it cozy and functional on the inside. This summer, my garden meets me when I come home. I can’t wait to go outside, to breathe, to ground myself, to let my eyes rest and my worries lighten when I look at all that grows and blooms around me.
And here is how the river bed transforms in the rain:
If you are inspired, here is how to build a river bed on your lawn, with photos of the construction.
Convert small lawn strips into berry bushes with edible landscaping
When we moved into our new place last year, we brought with us two black currant bushes and a load of good soil for the back yard garden. We wanted to plant the bushes in front of the house, on a strip of useless lawn, but after digging a hole for one of them in the terrible rock-filled clay soil, we have decided against digging another hole. We have also realized that we might hit a utility line and there was no time to call up a locate in all the whirlwind of moving in. So the second bush got planted in the back yard.
Fast-forward one year. As part of our edible landscaping project, I wanted to incorporate as many berry bushes as possible on the underused parts of land. Thus the following plan was born:

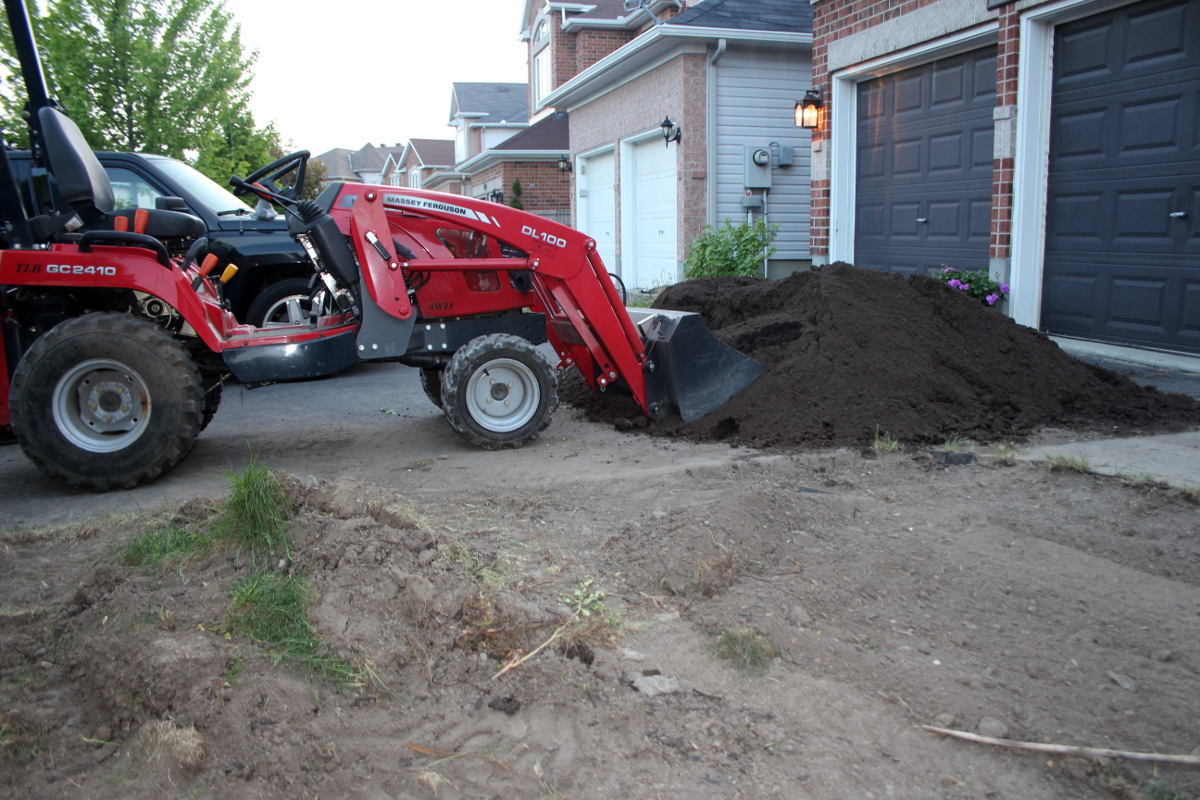
This time, we had heavy equipment with which to dig and plenty of good mix of soil and compost, thanks to Gavin from Edible Landscaping Ottawa.
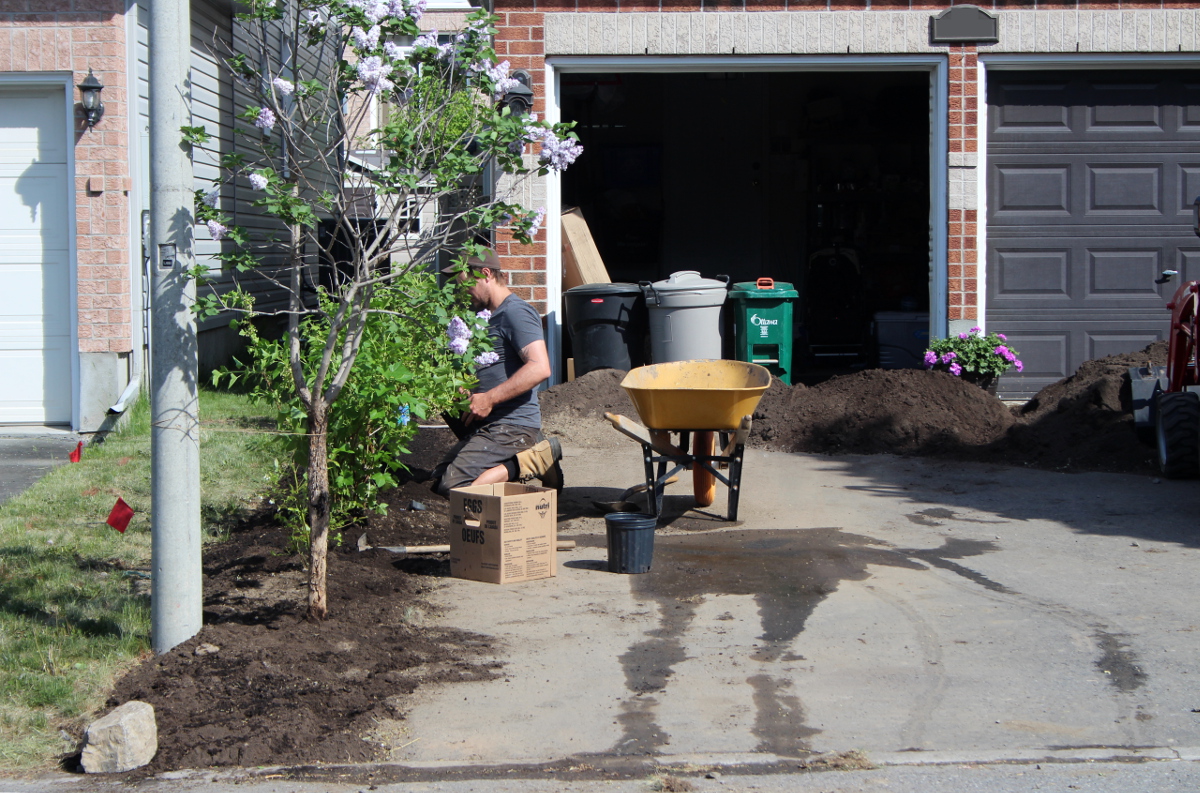
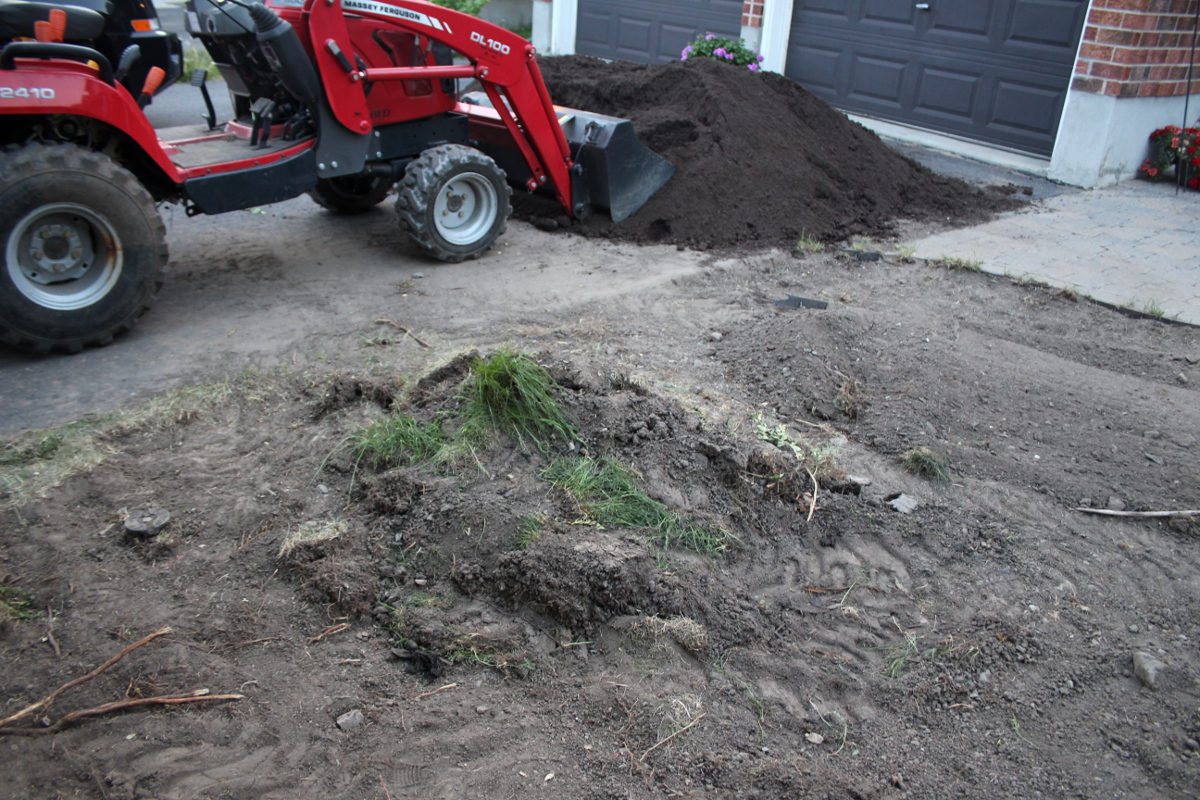
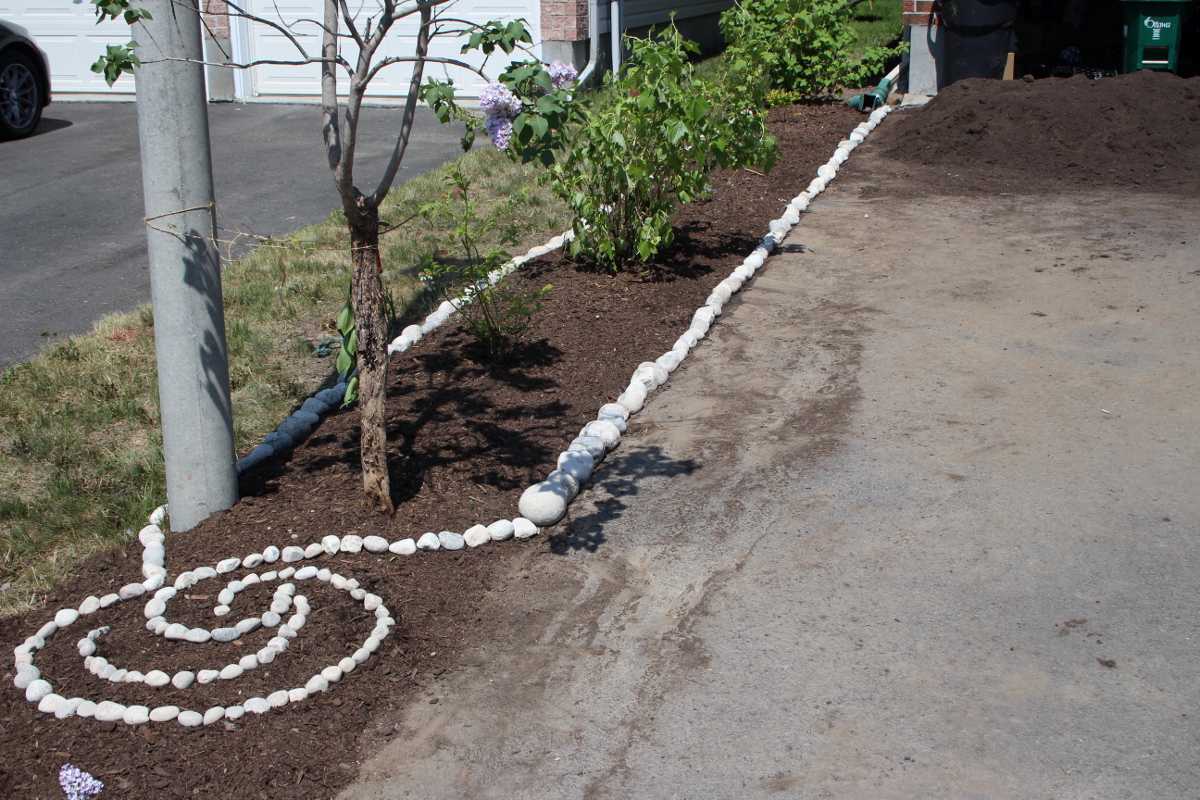
First, we stripped off the top layer of soil and grass You can see the difference between the soil under our lawn and the fresh pile of soil on the driveway in the photo above. Then we filled this new bed in with good soil, and have moved the lilac tree from the back garden to this new bed, to provide the vertical accent at the front and free up space in the back yard. The second black currant bush was also replanted from the back garden.
As Gavin was planting the bushes, I was mixing in eggshells I’ve collected over the winter, to add mineral content to the soil.
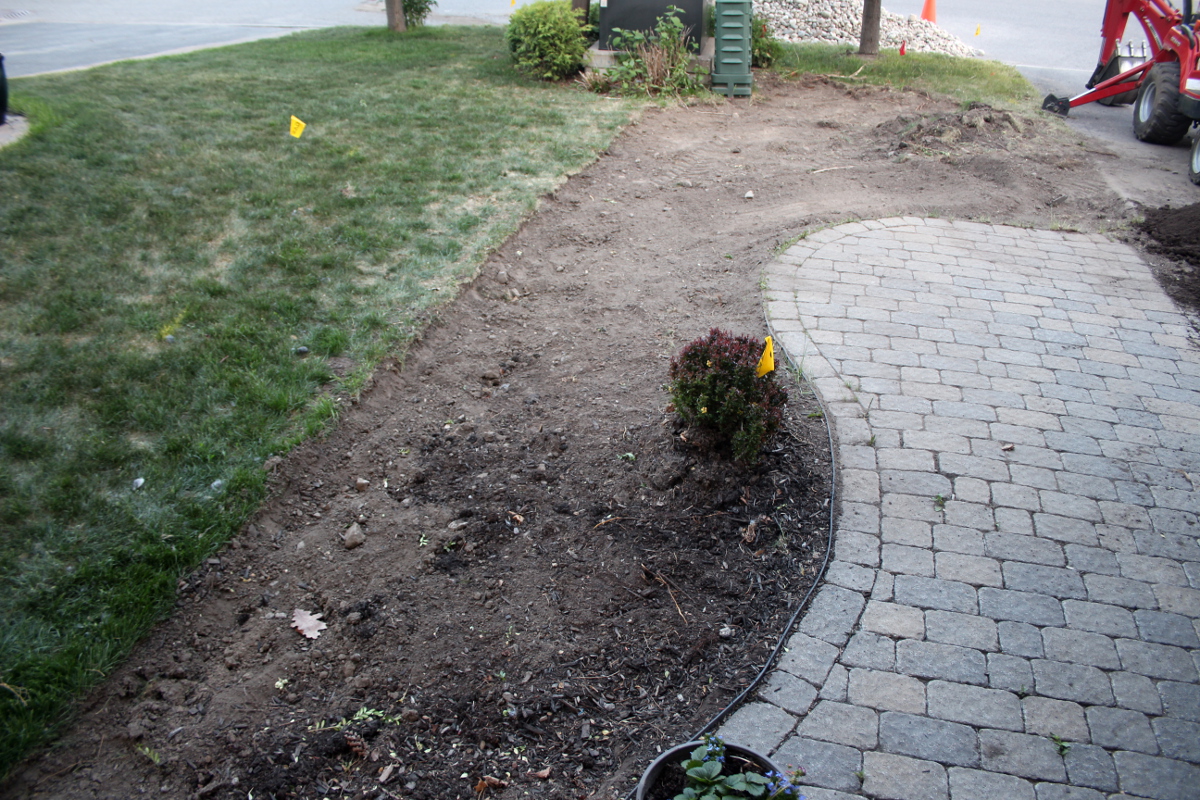
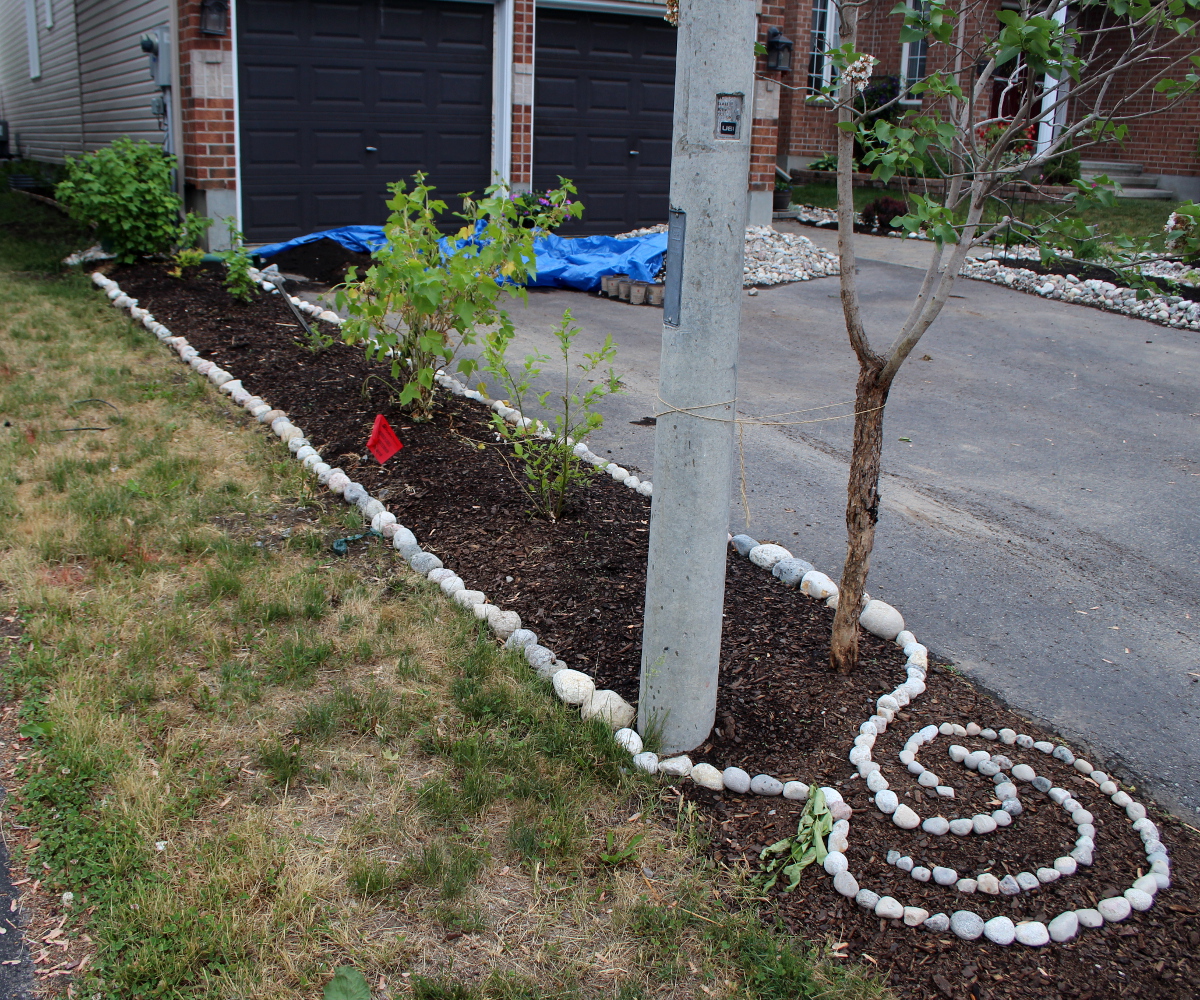
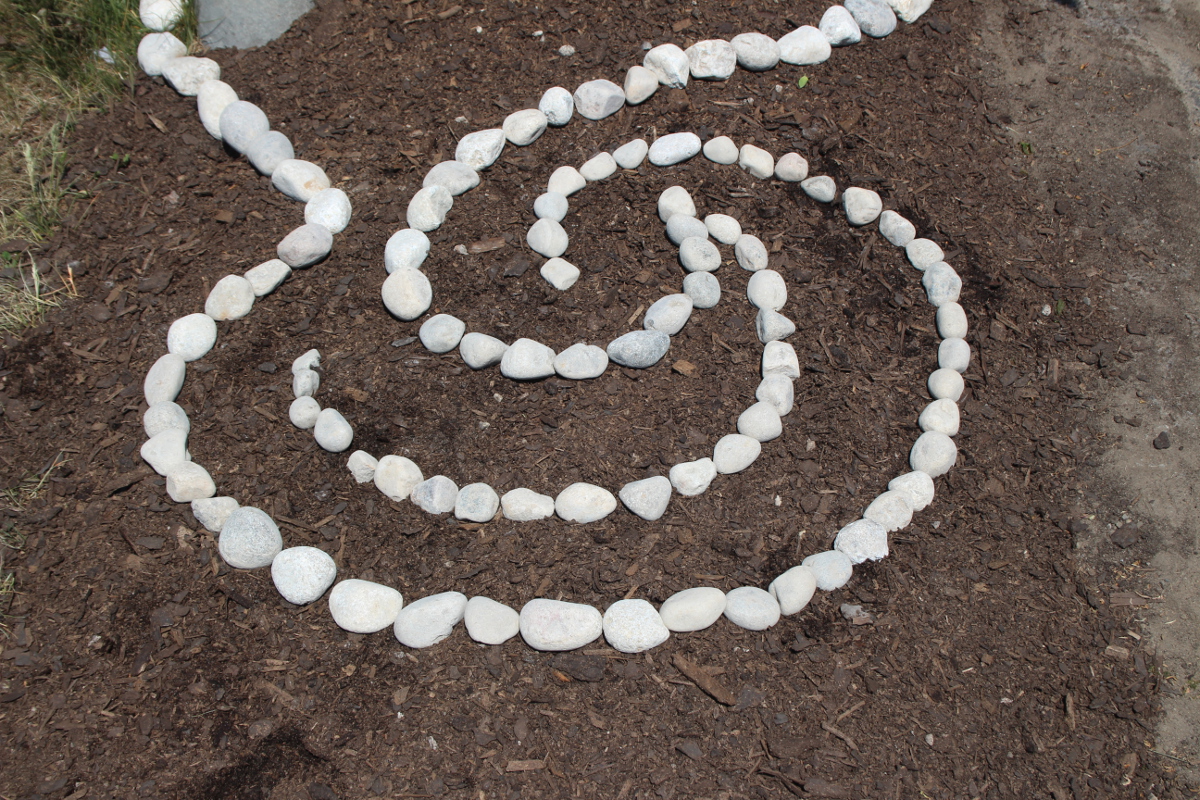
Once everything was planted, we’ve added a layer of mulch. Then kids and I have built the rock borders around the bed, to keep the soil and mulch in and give the bed a visual frame. On a whim, I’ve decided to make a spiral design at the end of the berry bush bed.
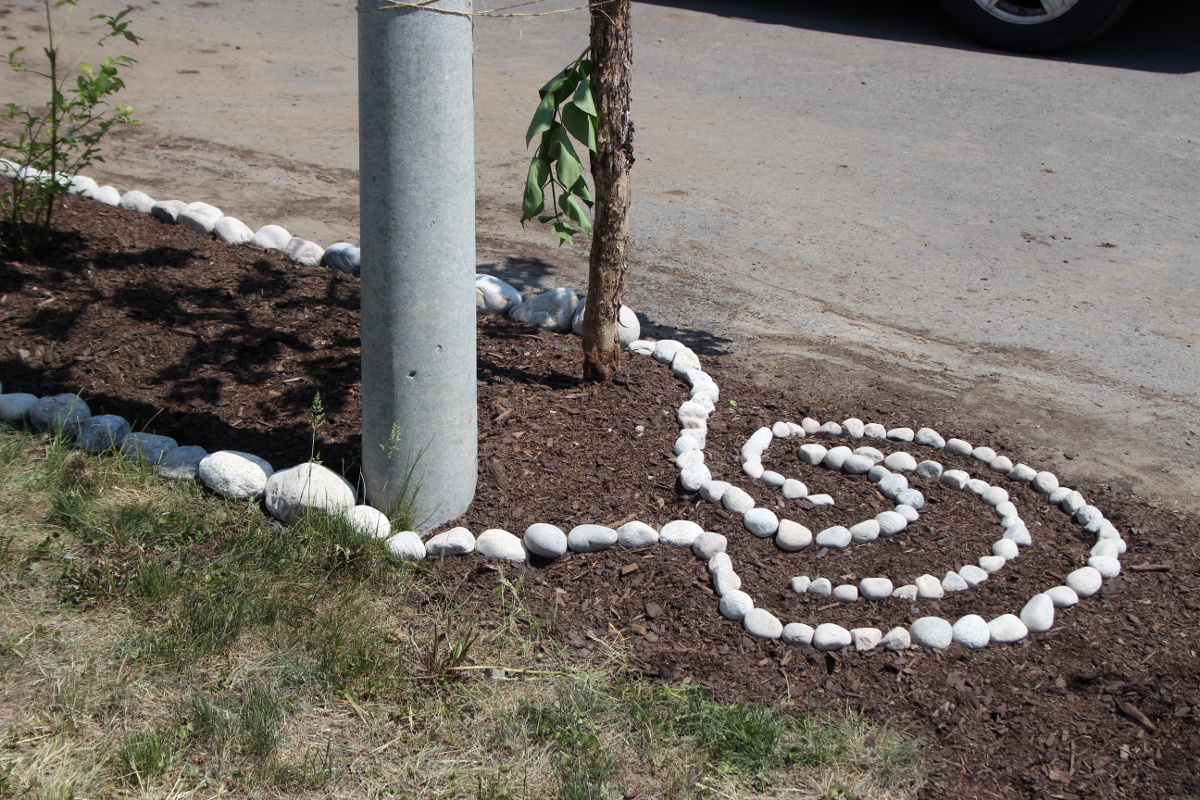
A few days later, I’ve planted various herbs and small ornamental plants in between bushes and around the spiral, to give the bed some character while the bushes are small.
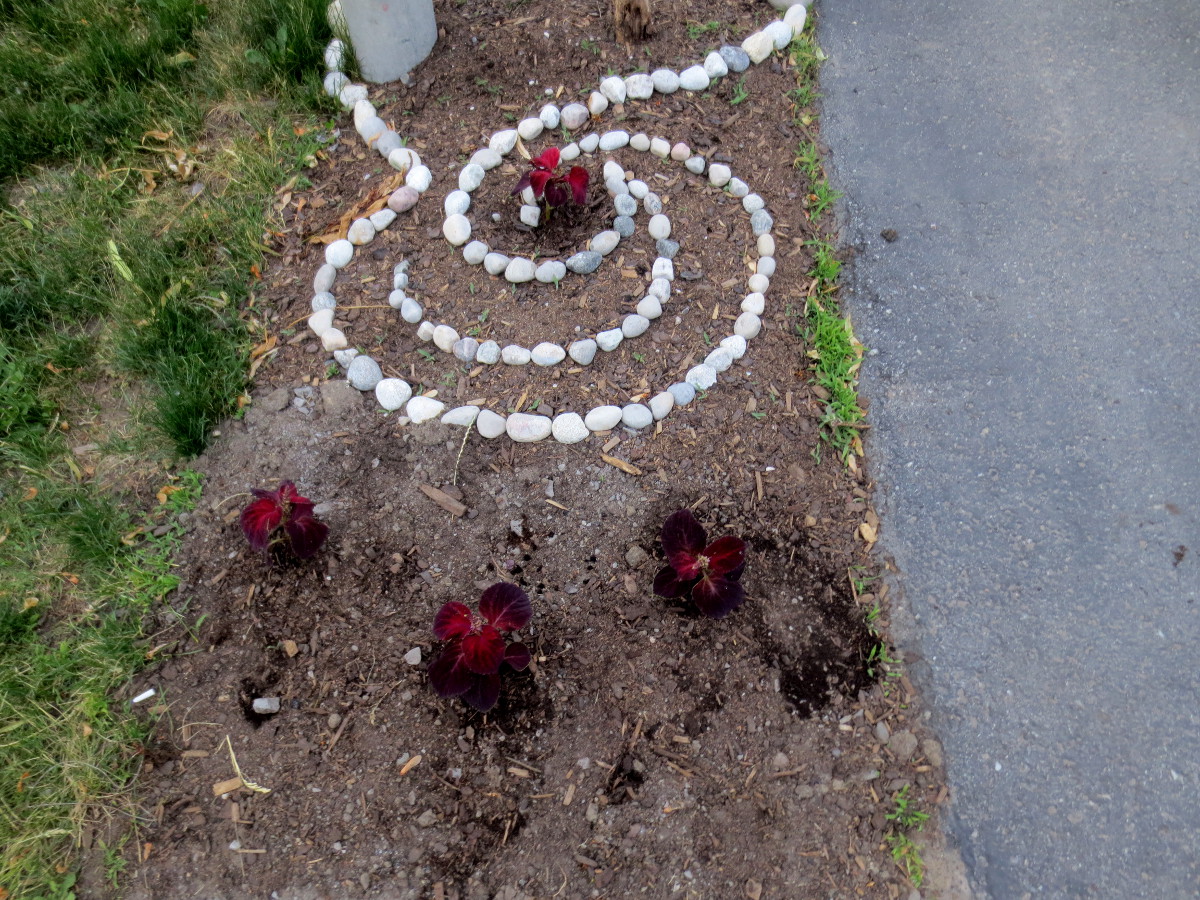
Afterwards, I filled in the bed contours with smaller river rocks, to give it more dimension visually and to minimize washing out of the soil, which is due to the bed being heaped in the middle.
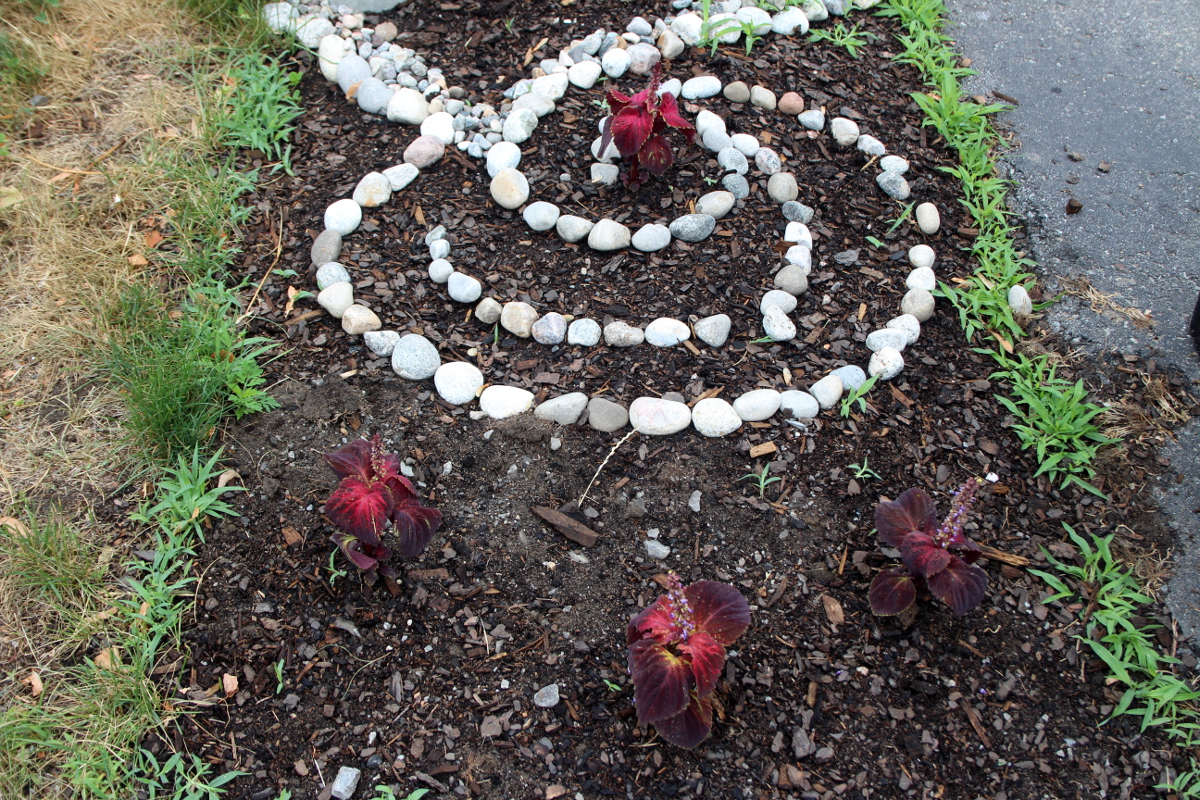
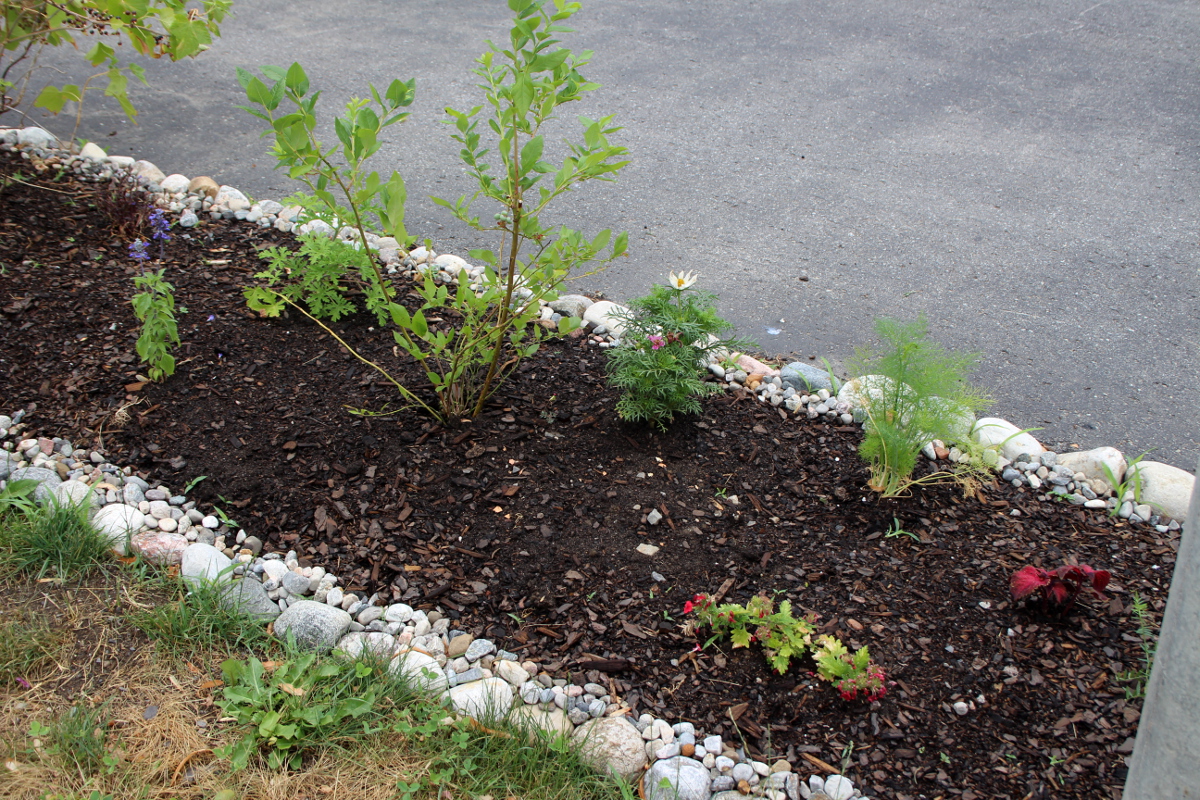
Here are some fennel, verbena, cosmos and purple salvia around a blueberry bush.
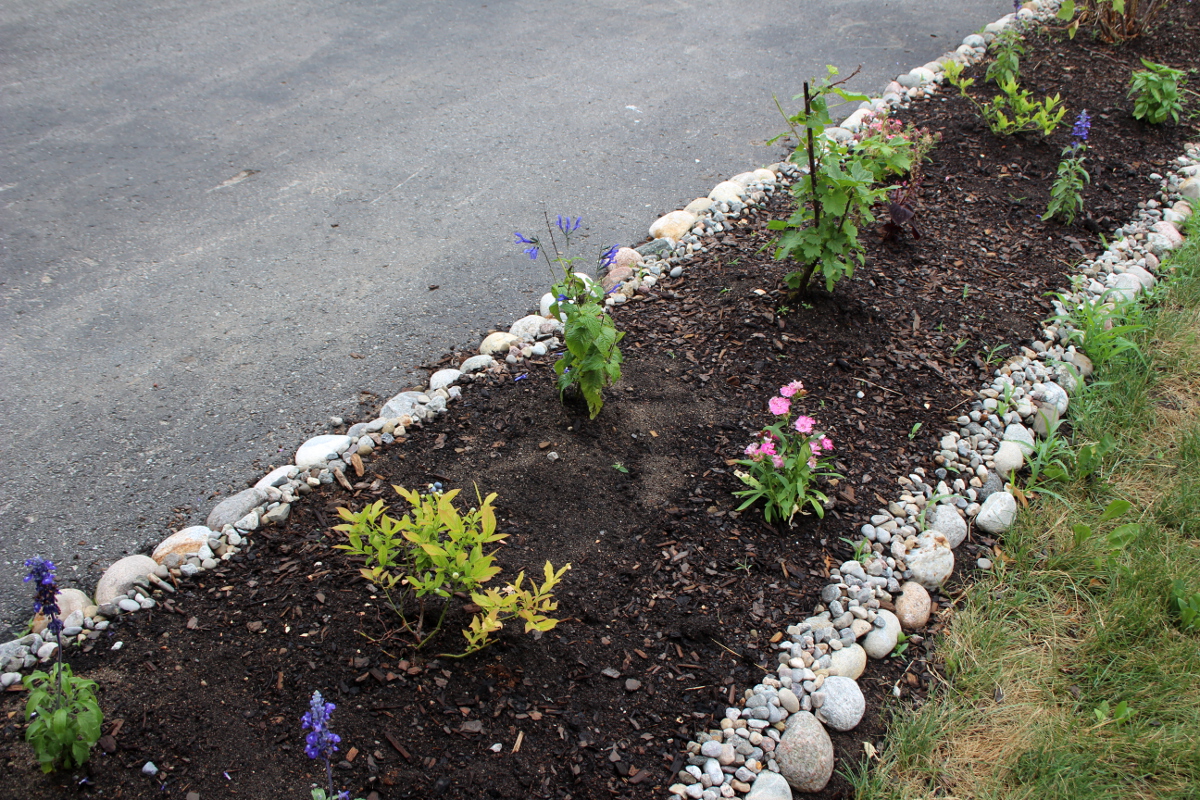
Basil, pelargonium, and more salvia around the bluberry bush (bright green) and the red currant bush.
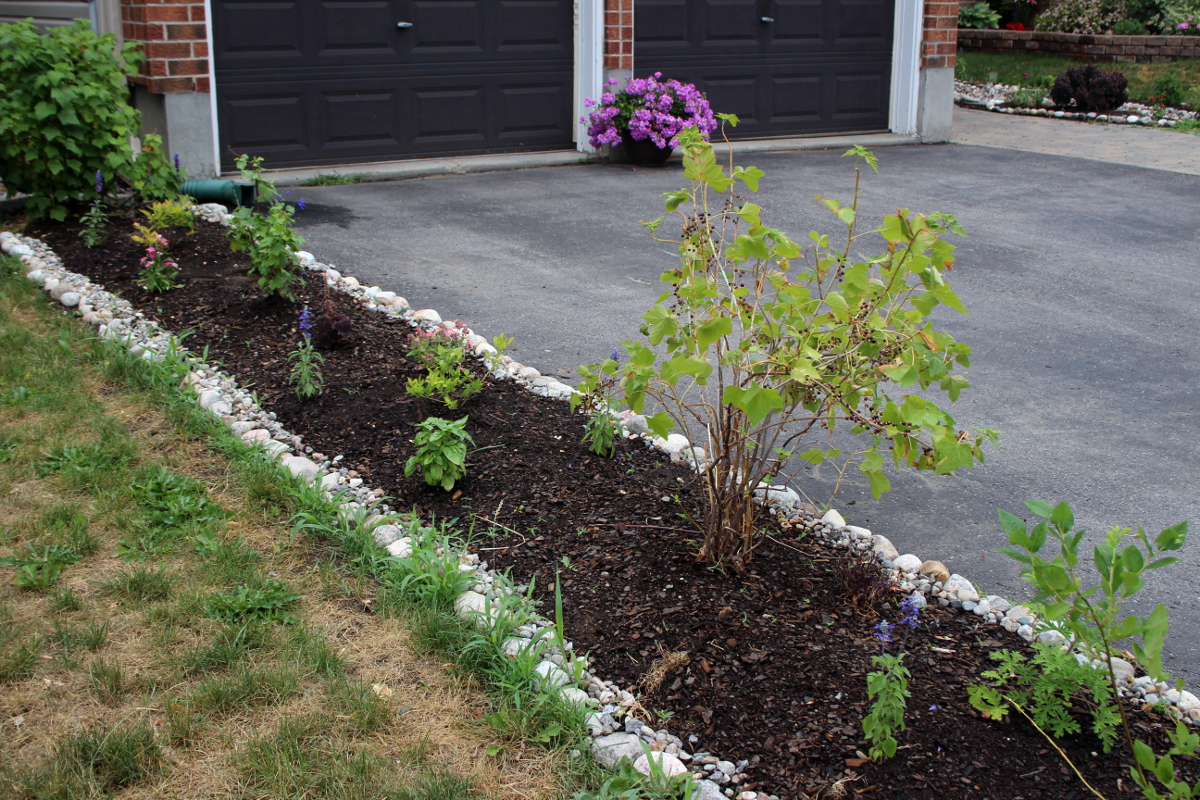
The tall bush here is the replanted black currant from the back yard. It might need another year to fully recover, but it’s already covered in berries.
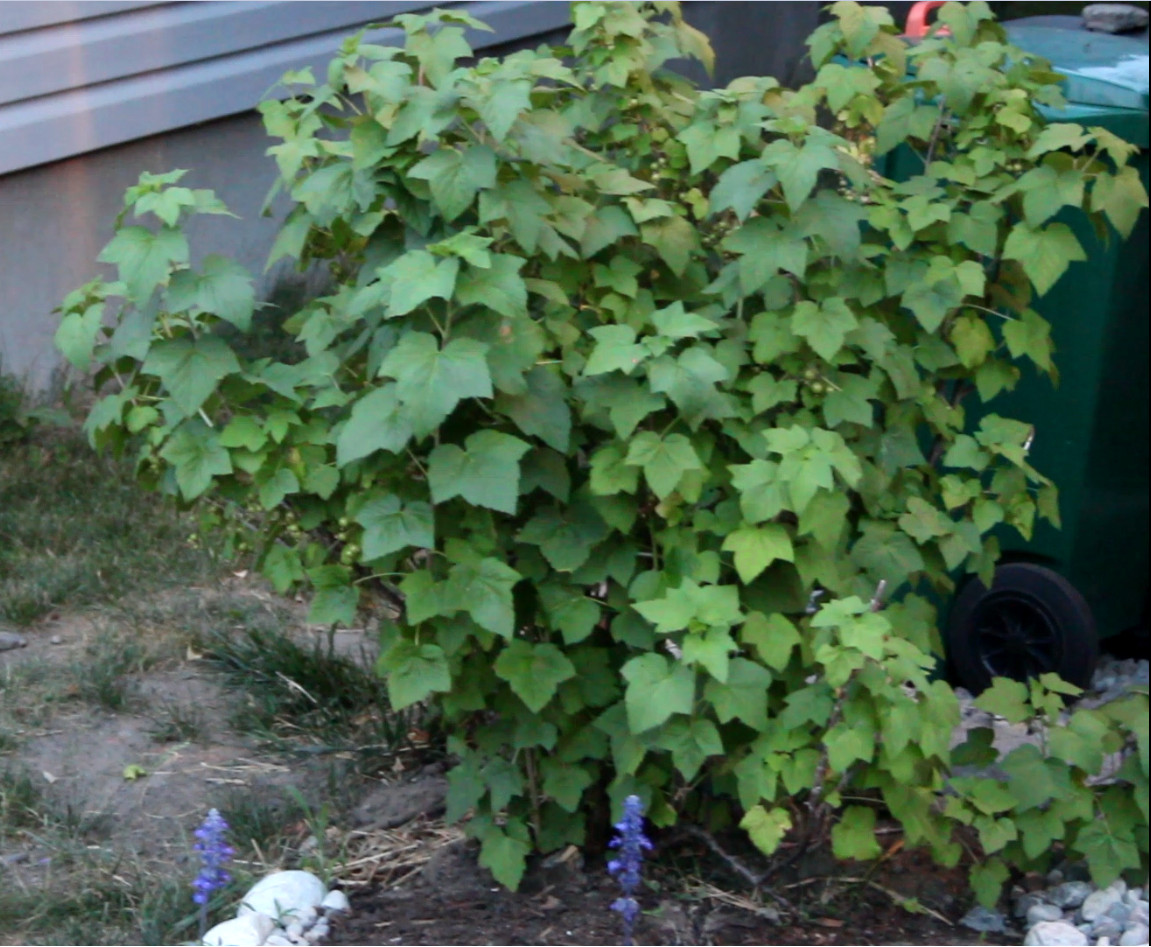
And this lush beauty is the black currant that was replanted from our former place last year. My hope is that the second bush fills out just as nicely as this one had.
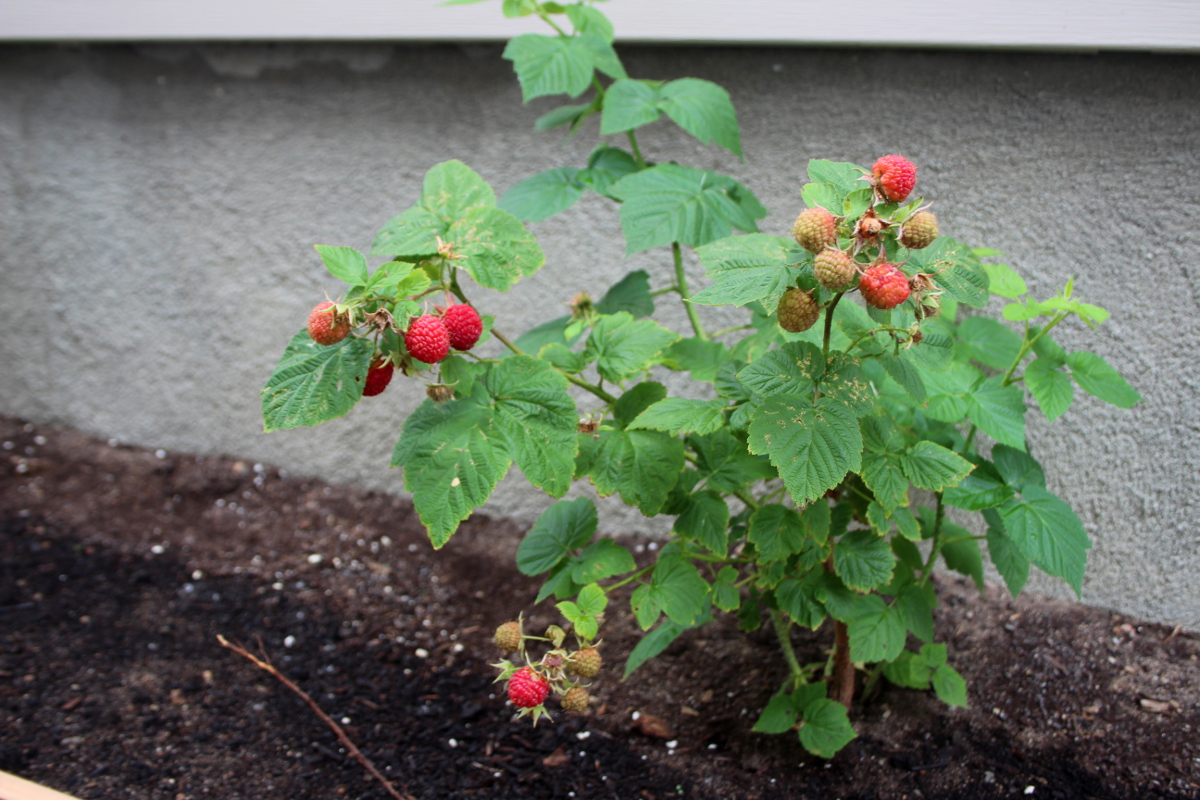
We have also planted a row of raspberry bushes along the shady side of the house. They were put in sunken beds to provide them with the good soil and to curb their spread.
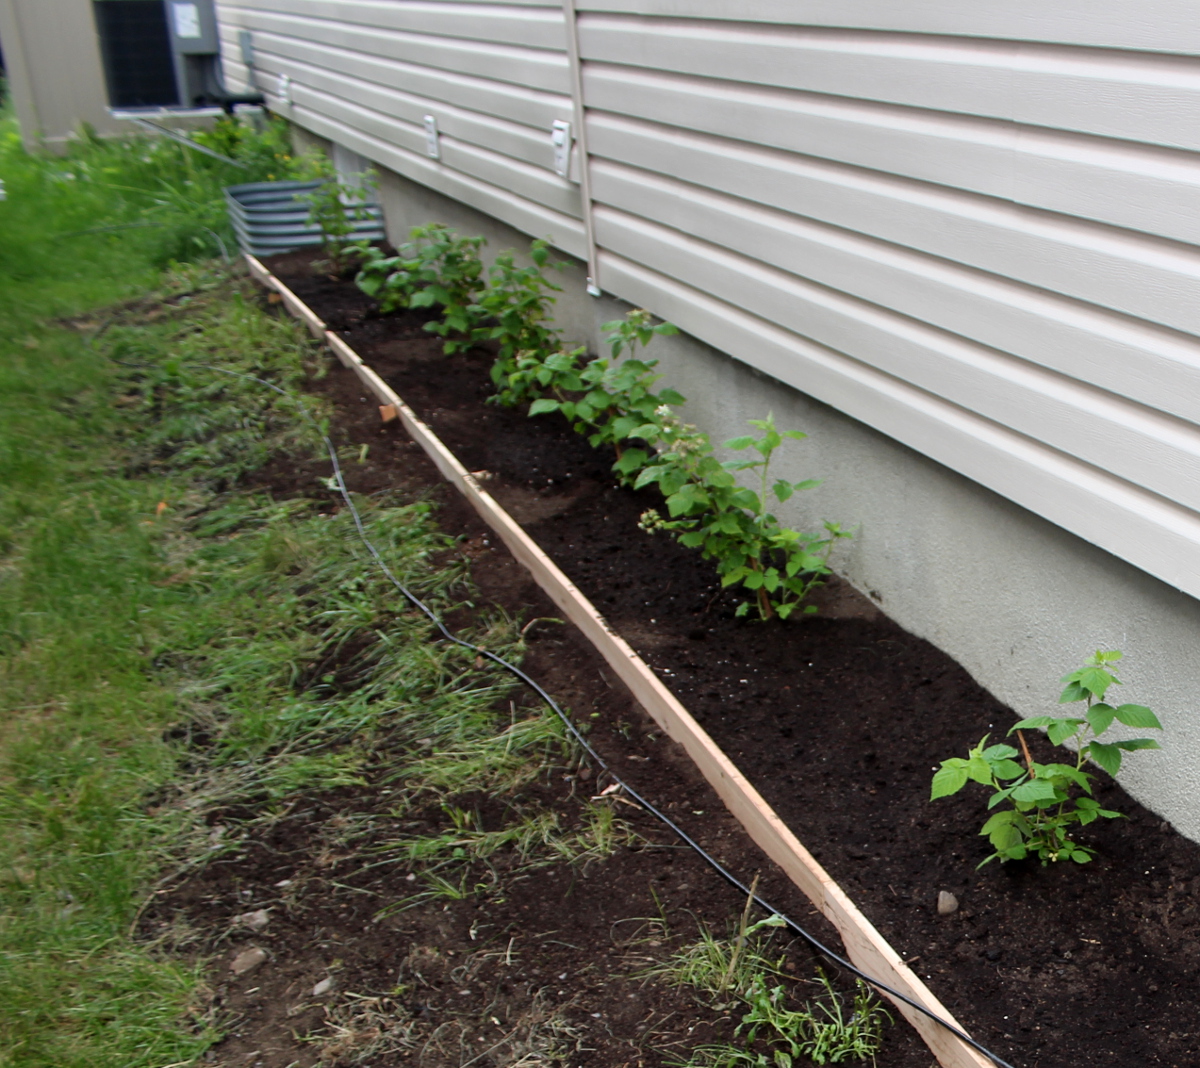
A month later, we are picking a few raspberries each day. Kids come exploring with me, and my 2-year old points to the not-yet-ripe berries and confidently states “not ready”. They love picking berries right off the bush.
On the other side of the house, where it’s sunny for a part of the day, we’ve built bigger boxes protected from rabbits, to grow tomatoes, cucumbers, eggplant, beets, cabbage, and radishes.
Do you have spaces around your house that you can use to grow food?
Reclaim small spaces – edible landscaping between houses
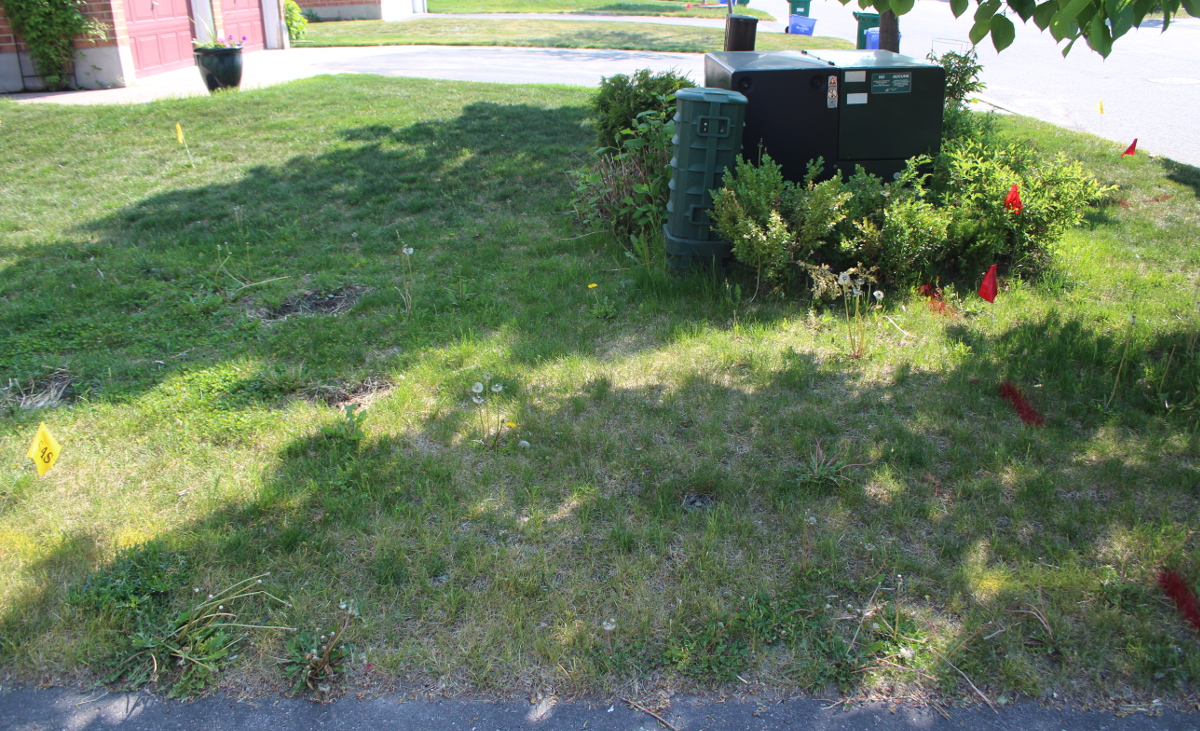
Often, we have quite a bit of space available on the sides of houses – space occupied by unsightly bulging appliances, window wells, utility meters, and seeded with dying grass. I see a great opportunity to convert these unused areas into bountiful growing space.
Last year, as an experiment, I have dug out a small patch on the mostly shady part of the house. The going was tough, since our soil is a very shallow layer of clay and rocks. It felt like I was working ground in Ireland, extracting lots of rocks to make the soil to be of any use and piling them up into a rock border around the dug out patch. I added some good soil we brought in for the herb spiral and planted some lettuce there.
In a month or so, with minimum maintenance, we had four lettuce plants, supplying us with salad greens. I considered it a successful test of this planting area.
This year, I’ve decided to maximize the growing potential of this strip of land, and after discussing it with Gavin from Edible Landscaping Ottawa, we’ve decided to put in two raised beds filled with good soil and compost. After working on my front yard during a hot day, Gavin noted that the space closest to the front of the house was getting at least 6 hours of sun, making it a good location to plant not just greens but sun-loving vegetables. Thus the following plan was born (click to enlarge):

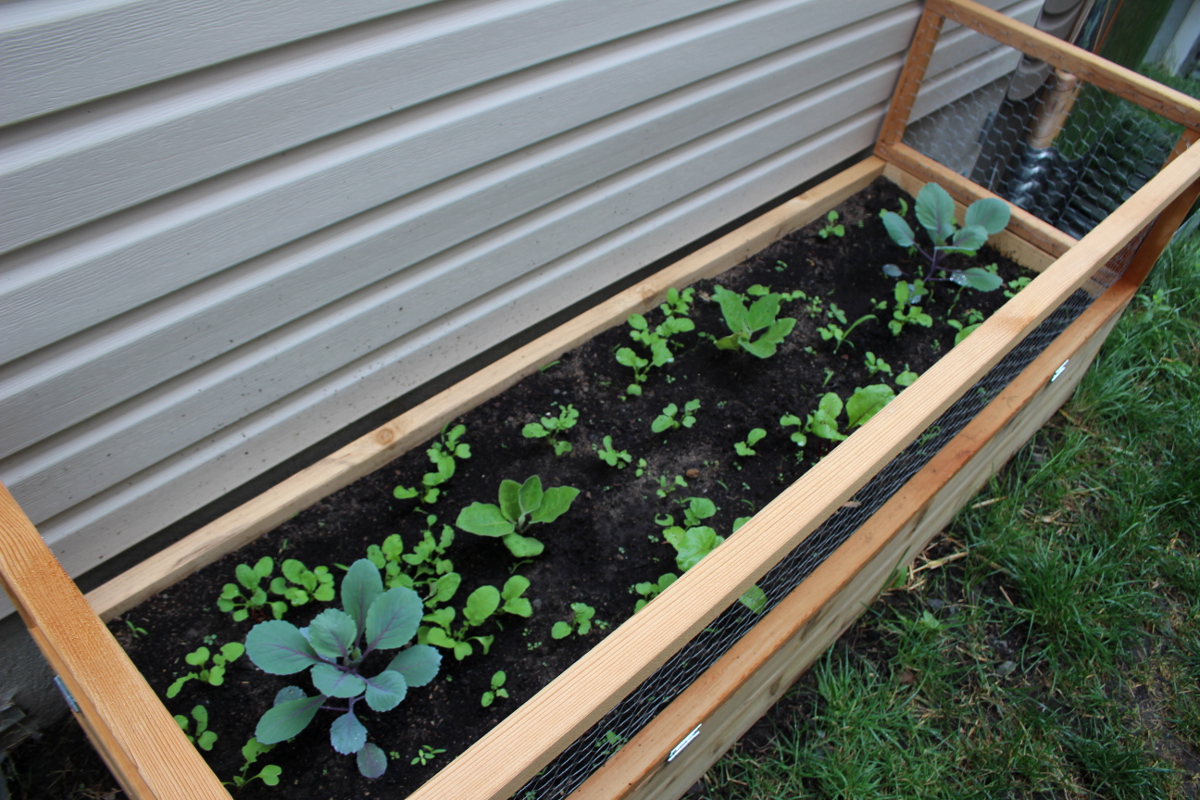
Since our most frequent mammal visitors in this area are rabbits, we’ve decided to add frames with wire on top of the raised beds, to prevent them from hopping on to enjoy the cabbage. The sides are locked with latches and can drop to provide easier access to the soil.
Here are the two beds right after planting cucumbers, tomatoes, eggplants and cabbages (radishes were not in yet):
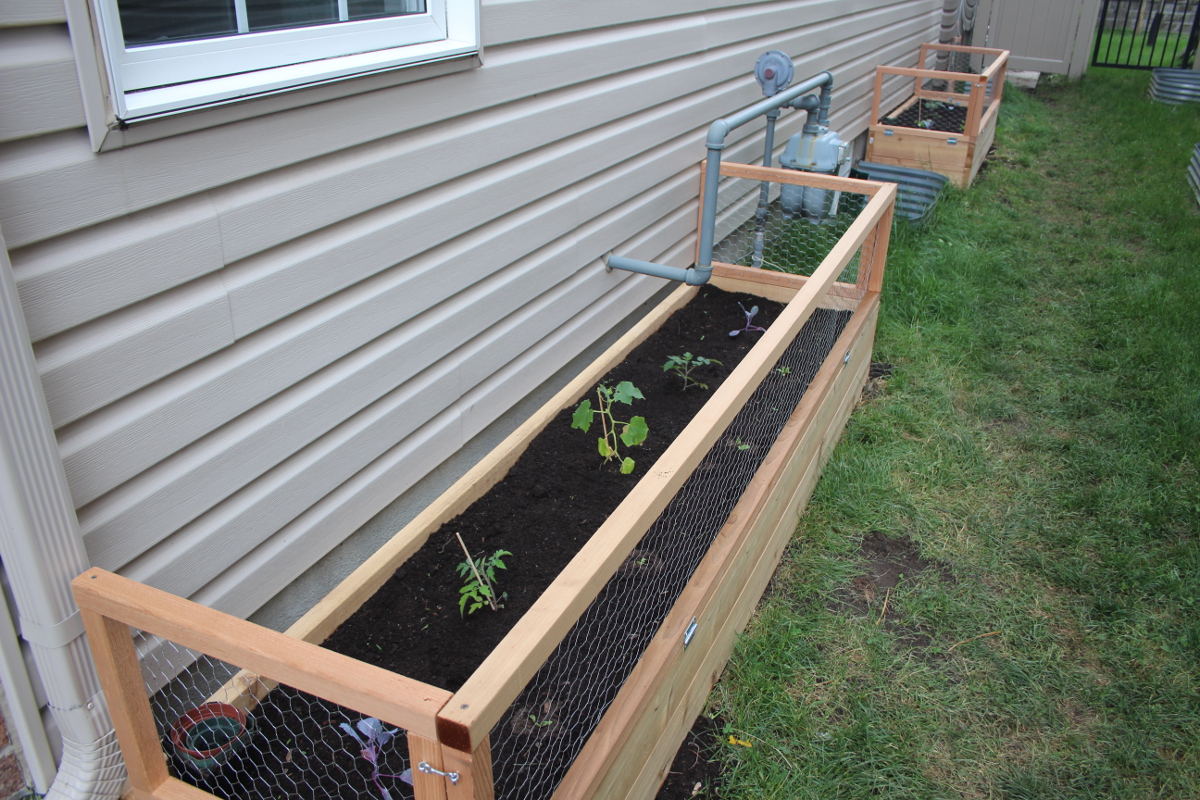
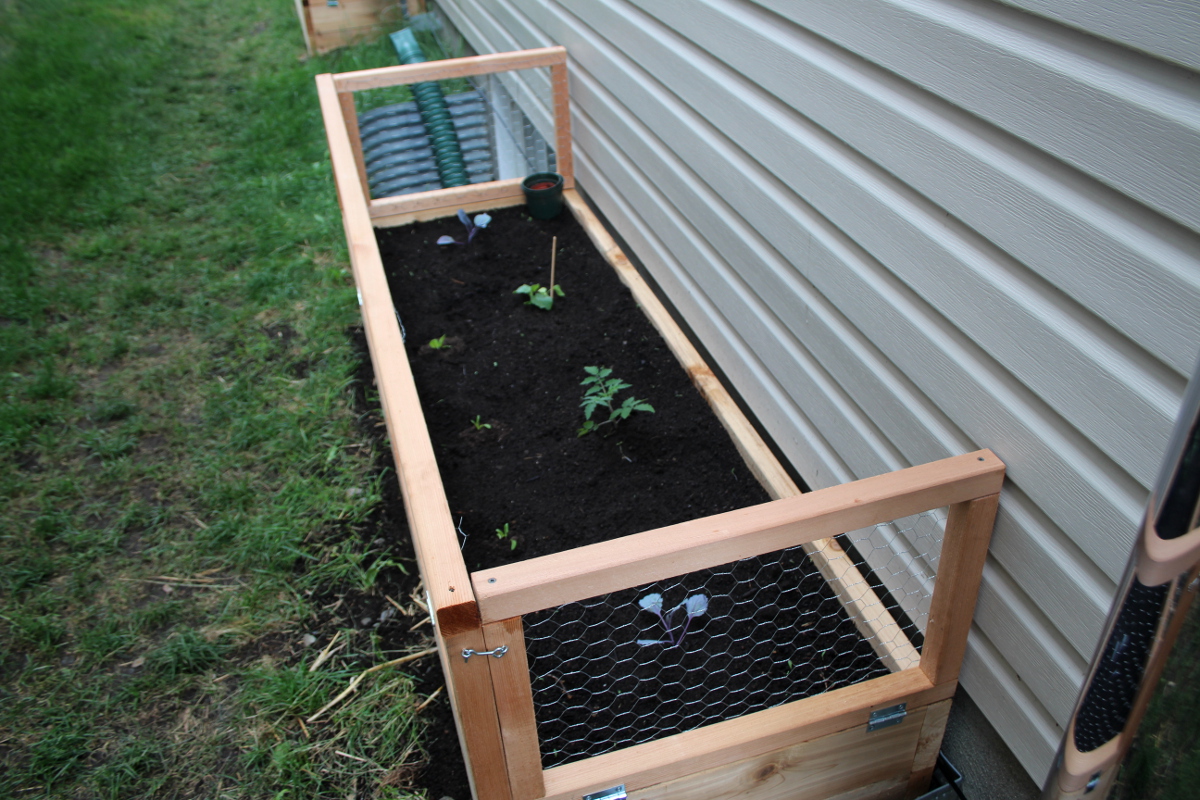
And here are the beds about a month later, with cages for tomatoes and a small trellis for cucumbers. The first box is the one getting the most sun.
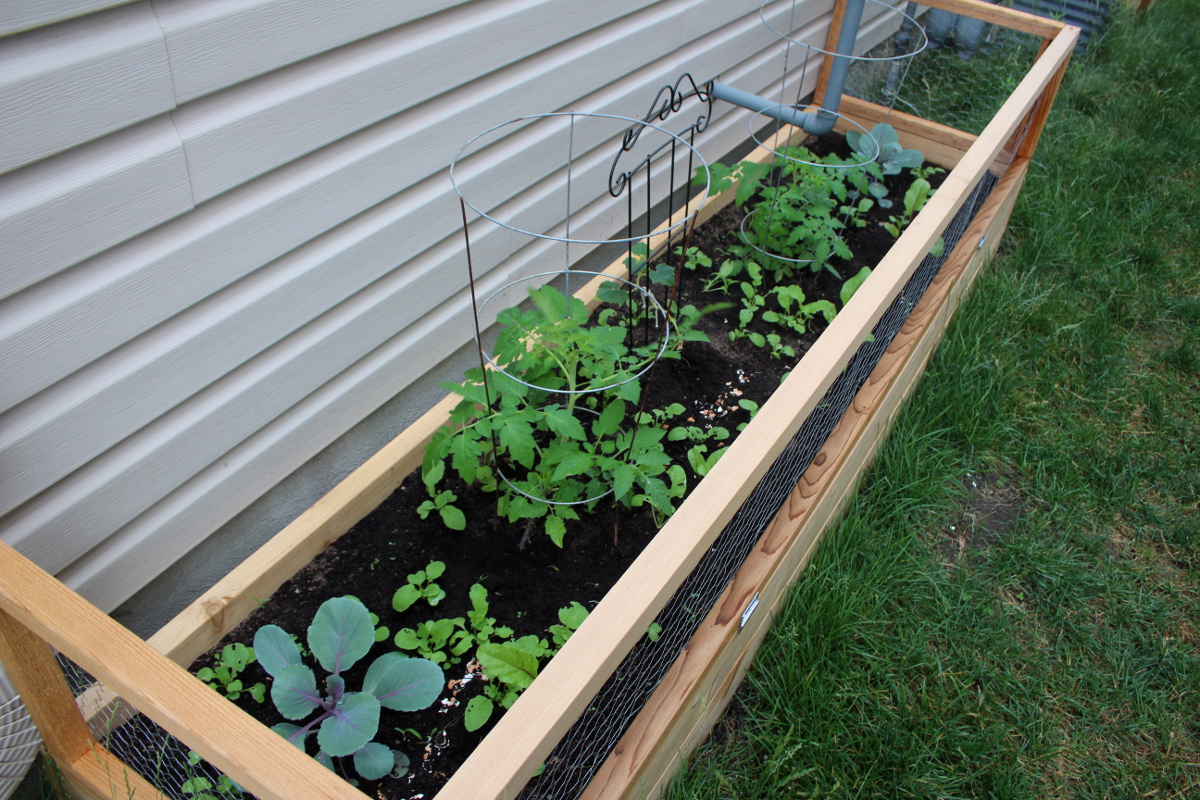
The tomato and the cucumber plant in the second box were not happy, so I’ve replaced them with two eggplant seedlings. The cabbages, beets and the radishes are growing well.
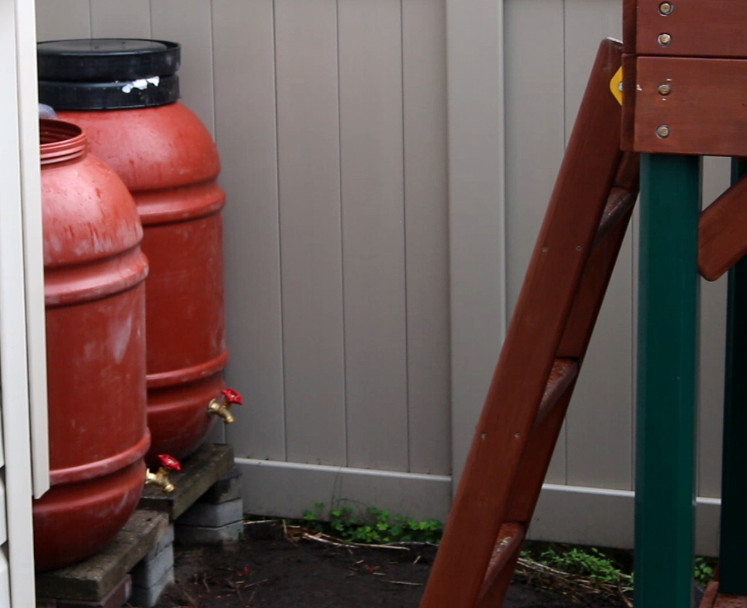
Another options is to use the smaller spaces for rain barrels – you can use the water to irrigate your garden. I have seen people having a staircase setup, where each rain barrel is lower than the one before. They also make beautiful ponds:
My other side of the house is in full shade, and I have planted raspberry bushes there:
Consider the spaces around your home that you are not using. If they are in the sun, you can plant herbs, scarlet runner beans, cabbage – all of these make for beautiful plants. If they are in shade or part-sun, think lettuce, kale, arugula, other greens. Reclaim small spaces to grow your own food.
Edible Landscaping Journey
After long winter months dreaming about the wonders of growing my own food, I have finally completed my edible landscaping project. Where nothing but a useless lawn, more brown than green, has been taking up space, I now have a beautiful dry river bed snaking between two vegetable and herb beds in full sun. Along the side of the house, there are two raised beds soaking up more sun. On the other side of the driveway, there is a row of berry bushes. And in the back yard, there are three layers of planting spaces with raised beds, herb spiral, and trellises. I now spend most evenings outside, grounded in taking care of the plants and reveling in all their splendour.
Come along, I’ll show you my front yard right after the landscaping and planting was done:
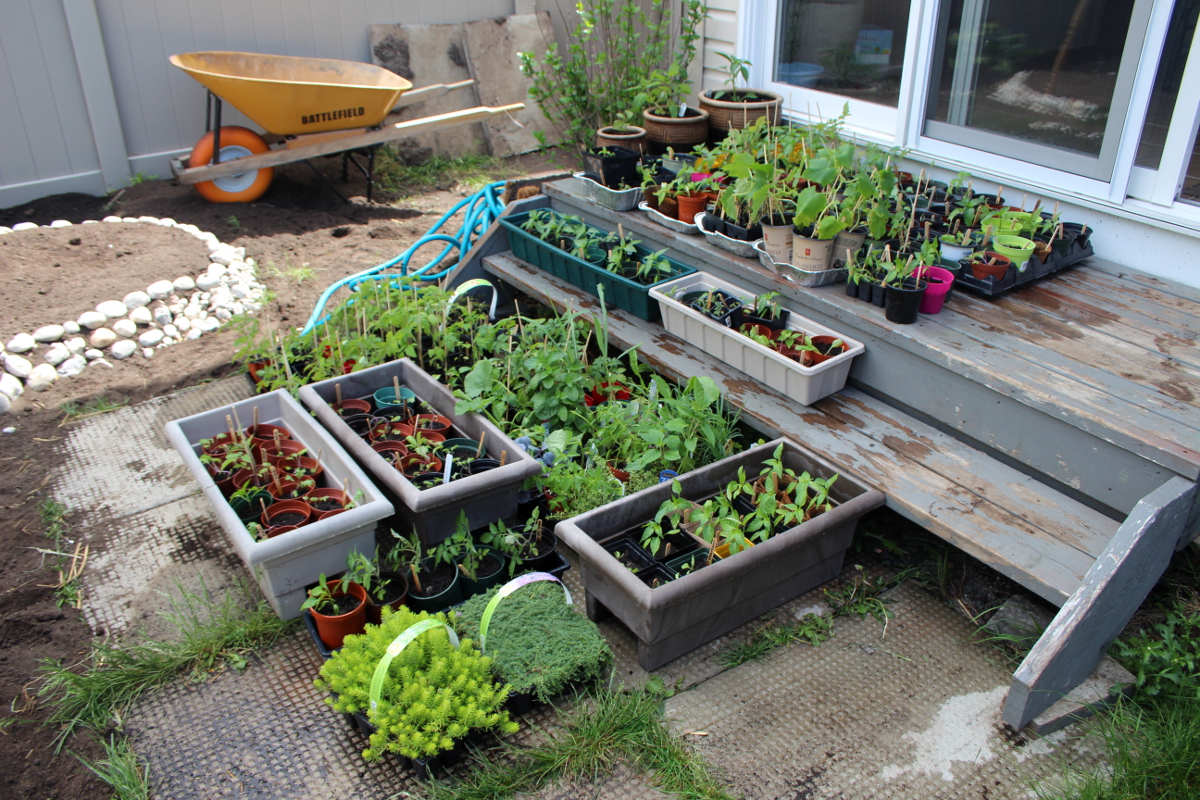
And here is the back yard – you can see the initial space right after the raised beds were built and seedlings planted, and the same space now, a month later, lush with greenery:
Let me take you on my edible landscaping journey and show you how all this was built.
I have met with Gavin from Edible Landscaping Ottawa in early April to discuss the tentative plan. Once he was available, we have worked back and forth via email, before we have come up with a more specific plan. The next step was to acquire locates for city services (“Call before you dig“) – gas, electricity, internet, phone, to be sure we don’t bust a cable or a pipe when digging. Gas and electricity were promptly marked. Phone and internet cables were not. It appears, it’s cheaper for the telecom companies to come and fix the cables if they are cut than to try locating them beforehand.
Here is the space in front of the house with yellow and red flags marking gas and electricity. This was our canvas.
Once we have decided on the plan, Gavin had sourced the materials – river rock and garden soil, both from Greely Sand and Gravel.
I have drawn my garden plan on a large sheet of white paper, and have been updating it as we shaped the landscape and put plants in the ground. Later I have transferred it into the Garden Planner format (albeit not to scale, since I find the smaller plan labels unreadable):
Front yard with dry river bed, raised beds and containers, full sun:
Berry bushes on the other side of the driveway (full sun) and along the side of the house (mostly shade):
Raised beds with chicken wire to protect the plants from rabbits, along the other side of the house, partial shade:
Back yard with herb spiral, ponds, trellises, rain barrels, sun and partial shade throughout:
While waiting for the landscaping to start and itching to get planting, I have arranged strawberries and lobelia in two pots for the front steps.
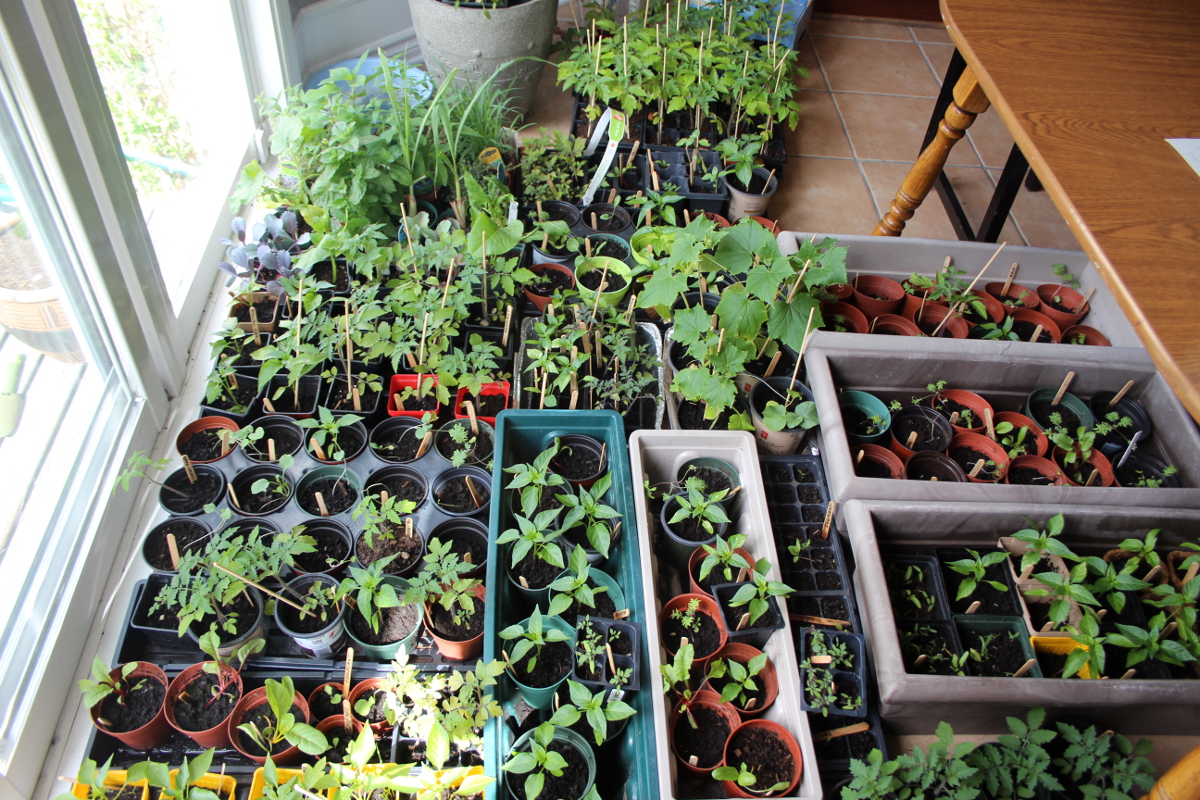
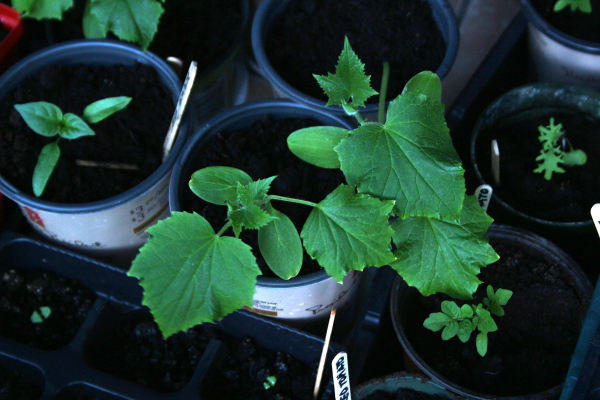
I have also started a lot of seeds, and the seedlings pretty much took over my kitchen.
I got a beautiful giant geranium plant with lilac-coloured flowers, to create a house facade centerpiece.
In May, I’ve been taking the seedlings outside each morning for more hours each day to harden off. I would water them outside, let them soak up the wind and the sunshine, and then bring them in for the night.
On May 24th, the digging began. First two days, Gavin was digging with the excavator to remove the soil full of clay and rock. In the process, the internet cable got cut, since it was not marked, and I had to call TekSavvy to arrange a replacement for it.
Meanwhile we were planning the back garden, setting cardboard squares cut from a rescued curbside headboard box where the paths were to be, to kill the grass and make it easier to split the garden into separate beds. I really like my herb spiral with the small pond, so I have decided to keep it and place the raised beds around it.
On the third day, we put in the dry river bed with a pond and two raised garden beds in the front. In the near future, I shall write a detailed post on the construction of the river bed. The water comes from the roof and flows between the garden beds, pooling at the end in the little pond before it flows out. The river bed acts as a path to get access to the plants in the garden beds, and walking on rocks does marvels for your feet (especially in this day and age when we spend so much time on flat hard surfaces like concrete).
Here is Josh from Edible Landscaping Ottawa filling in the round pond by following the outline I’ve set with the river rocks.
Then we planned and planted the bed on the other side of the driveway. The lilac tree got replanted here from the back garden to free up space there and provide a vertical accent here. Gavin planted the blueberry and currant bushes (one of the black currants was replanted from the back yard as well) and I have added crushed eggshell to the soil to boost its mineral content.
While digging to plant the lilac tree, we have found the unmarked phone line which promptly left us without the home phone.
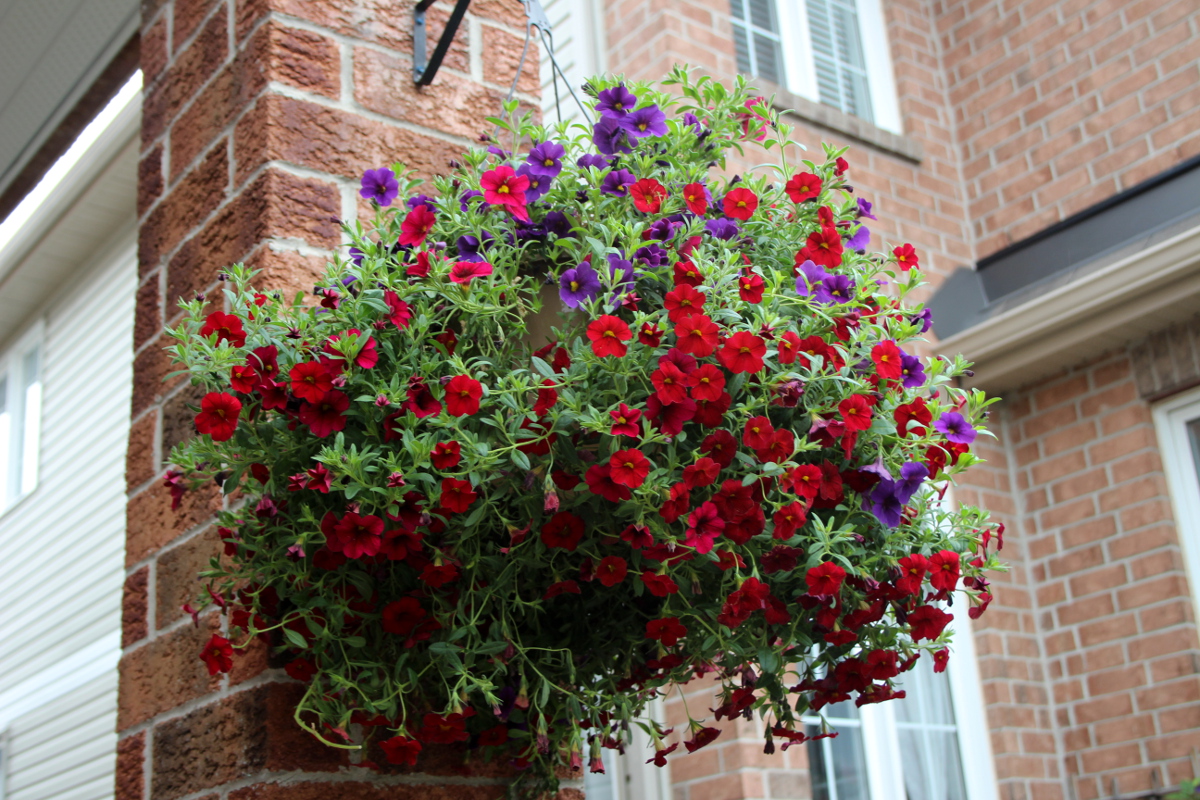
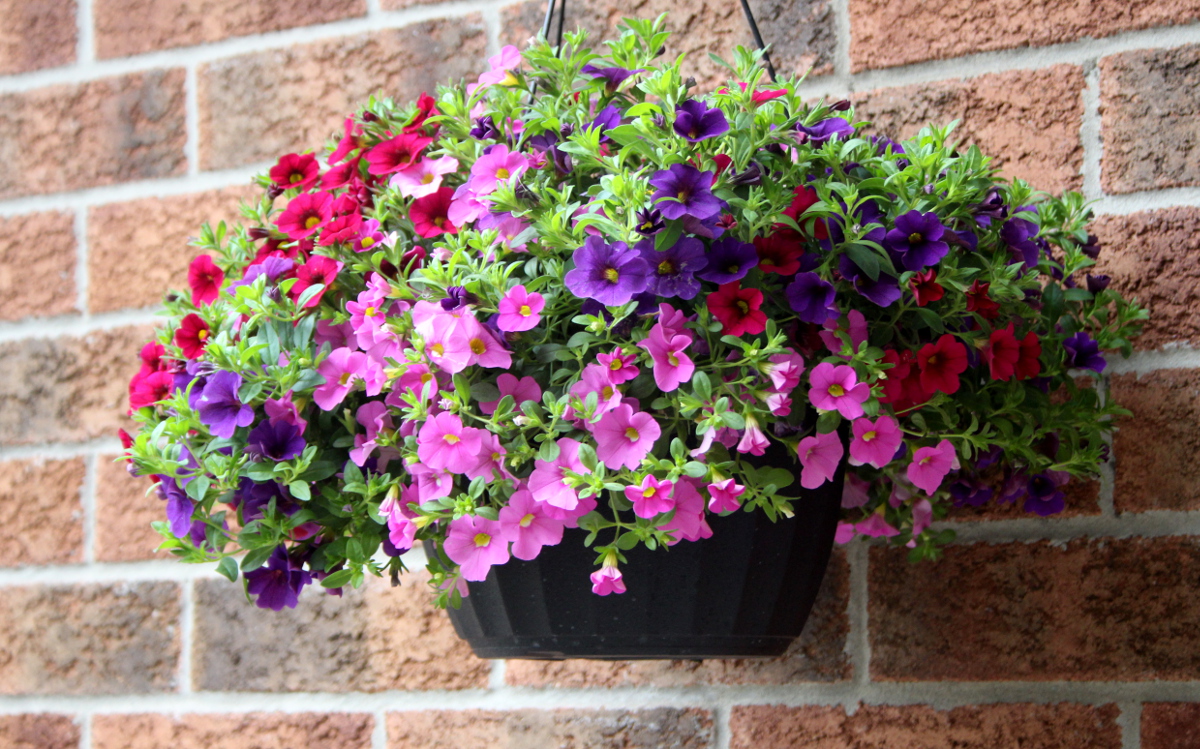
Then we hung the flower planters. I love those Irish pub-style hanging baskets where small flowers quiver with the wind in one giant colourful blob.
This one is a wanna-be pub basket, we shall see how it grows in the next while.
We have also created a curved bed around the front tree for ornamentals. I shall also plant bulbs here, come autumn.
Next we put in the raised beds on the sunny side of the house and added soil. The sides are made with wire to prevent rabbits hopping on and munching on plants.
Then we have added mulch to the circular bed under the tree and the bed containing bushes, replanted perennials (chives and mini-phlox) from the back yard fence to decorate the river bed. We’ve installed the topiaries for beans and peas to climb, and the shepherd’s hook to hang a red verbena flower basket on it.
Gavin’s work in the front was done except for a part left incomplete, since we needed to be able to keep a path open for a wheelbarrow, to bring rocks and soil to the back yard. It now was time to plan the back garden which we were going to do on our own, having participated in and learned from the construction of river rock beds in the front.
First step was arranging the removal of the weeping elm tree by offering it for free on kijiji and facebook, via a cell phone plan since we were still without an internet line at home. As much as we liked the tree aesthetically, it was taking up a huge amount of space, shading a large part of the garden and not contributing to the food production. The offer went out and we settled to wait for a response.
Gavin and Josh have removed the ornamental bush behind the play structure to place rain barrels. That evening, a couple came by to try removing the weeping elm. They dug out the roots, but were unable to move it out of the yard, due to the narrow gate topped with a bar. They took an offshoot instead.
Fourth day, we found other people interested in attempting the removal of the weeping elm. It required four of us to maneuver and carry, and a trailer to transport. We had to disassemble a part of the garden gate to safely carry it through. Hopefully, the tree gets a second life in a bigger yard.
In the afternoon, there was pouring rain, which made for a great first test of the incomplete river bed, and it passed with flying colours. We had to run in the downpour, covering the dirt pile with a tarp and picking up the cardboard in the back garden that the wind was blowing away. That was a refreshing day.
On day 5, we planted two dwarf cherry trees and after have been working for two days to build the raised beds in the back yard, fill them with soil, and water it so the soil settles.
I have also built a raised bed behind the tree along the fence, to maximize on planting space. The rest of the space along the fence was going to contain raised cedar beds built by Gavin.
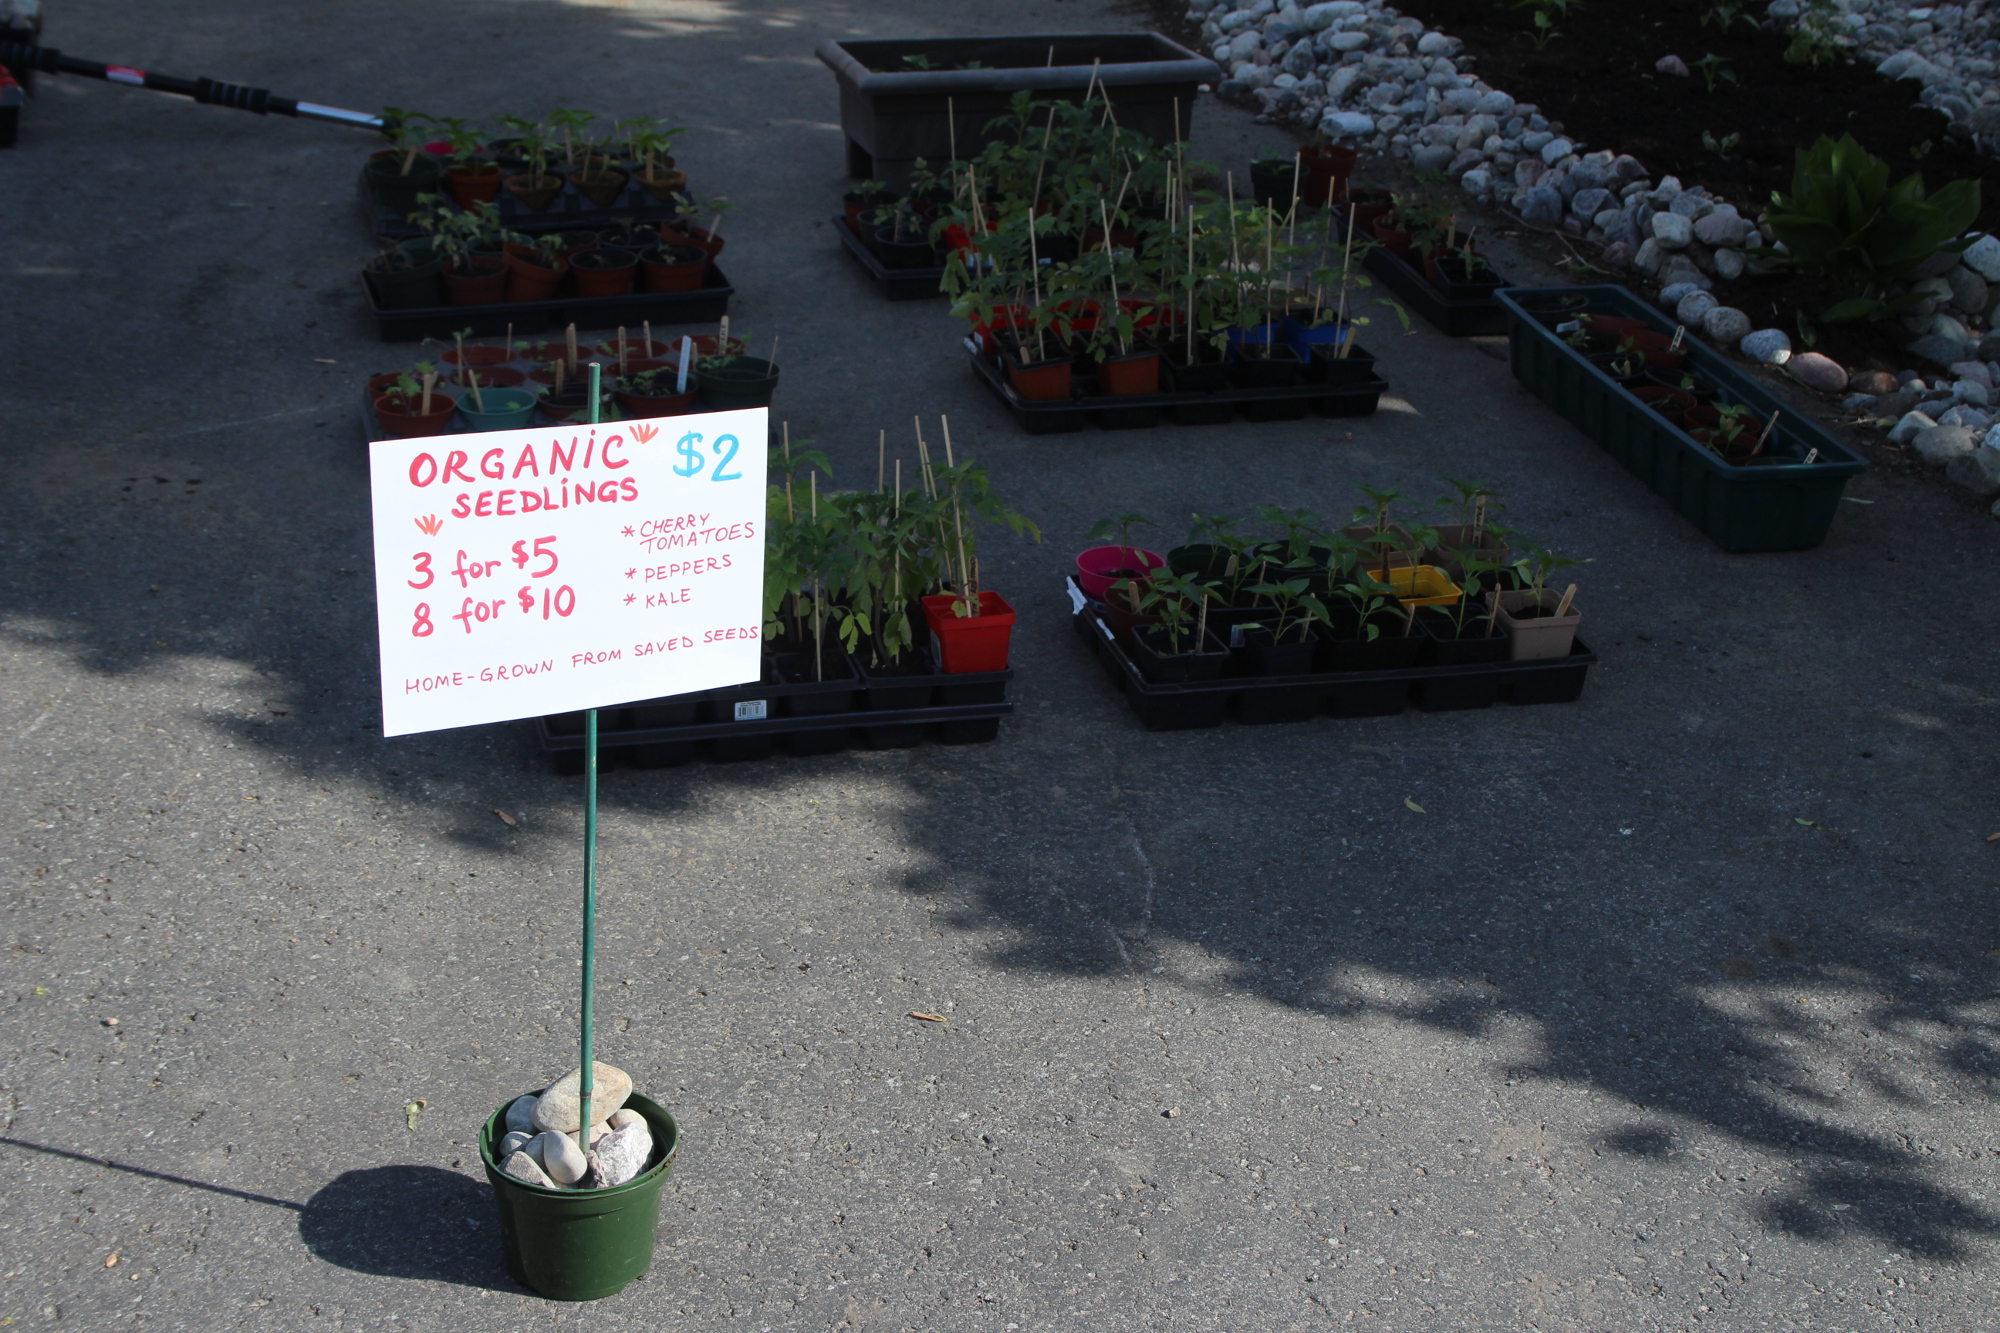
To take a break, we went on a trip to source organic seedlings and seeds from Greta’s Organic Gardens. Kids loved the trip – they got to play with tadpoles, feed grass to chickens, and watch fish and frogs in a pond. Inspired by water features at Greta’s, we got a water hyacinth to place in the herb spiral pond. For the next couple of days it was floating around in circles like a tiny boat, until it grew to fill the pond.
Then the kids were climbing the dirt and rock piles on the driveway and helping me by spreading dirt evenly on the asphalt and bringing me rocks. Meanwhile, I was working on the rock borders for the berry bush bed and, on a whim, put in a spiral design in the front. I have also adjusted the contours of the dry river bed and front raised beds with more river rocks, to strengthen the places the rain revealed.
Seventh day, Gavin and Josh brought raised beds for the back yard fence, installed them and filled them with soil. They have also installed sunken beds for the shady side of the house, filled them with soil and planted raspberry bushes.
Then they installed rain barrels (formerly used for bell peppers), connected them with a flexible pipe, to create communicating vessels, and installed the taps to let the water out.
Then Gavin and Josh completed the front landscaping and the dry river bed, now that a wheelbarrow need no longer go through.
I have modified the drawn plan to include the actual shape and location of all beds. Our phone line was replaced, first with a temporary line and then with a permanent one, breaking a large lilac tree branch in the process.
That day, or rather during the night, by starlight, as the kids slumbered peacefully, I planted out the seedlings.
It was magical to be planting in the cool night air, in the silence and quiet – it made for a great meditative experience. Front vegetable beds, more herbs to spiral, back fence beds and 3 out of 4 raised beds were filled. I have left the last bed to be seeded with greens.
I have also planted out herbs and greens into the front garden and planted more scarlet runner beans under a topiary in the back garden.
In daylight, I added more thyme and sedum among the rocks of the riverbed.
I have built another small raised bed along the back fence to maximize planting space and have put a black cherry tomato in it. I planted mint in pots to place in front garden where the soil is too shallow for anything else to plant. Mint spreads quickly, so I prefer keeping it contained.
As I planted, I’ve been updating my paper garden plan, to keep track of what had been planted where.
A temporary internet line was put in, wrapping around the house. You can see it in the video, snaking through the river bed. The people who came to put it in were reckless, trampling plants in the process and stubbornly reciting the same mantra in answer to my every question until I started following them around the garden and pointedly asking them not to destroy anything else.
Eighth day, I filled a long hanging coconut fiber planter hooked on the porch steps and planted garlic bulbs into it. The containers lined up on the back porch got a cayenne pepper plant, pineapple sage, and a sprouted acorn or nut we have found – of which we are still not sure whether it is an oak or a hazelnut. Squirrels bring many treasures into our garden.
I have planted radish seeds throughout most vegetable beds, since the radishes will mature long before the other crops will need the root space. I have seeded the fourth remaining back garden bed with different types of lettuce, arugula, bok choy, spinach, kale, mustard greens, mesclun, and have updated the garden plan to reflect the actual distribution of seeds.
I had lots of seedlings left over, and the next day our neighbourhood hosted a garage sale, so I took the evening to prepare for it.
In the morning on the ninth day, I have sold 16 seedlings, 5 puzzles, and a samovar at the garage sale. We have spent the evening relaxing with friends in the Rideau River Park, where kids were catching frogs, splashing in the river and delighting in all things nature.
Tenth day, I weeded the garden and sourced broken flagstones as garden stepping stones from a landscaping centre. I picked them in pouring rain with an injured ankle (nothing like a few obstacles to make things challenging) and placed them in the garden in between the beds, interplanting with thyme. We’ve installed the solar fountain which birds like so much.
After, it’s been maintenance, watering, weeding and watching the plants unfold. A much more attentive and professional team came by to replace the temporary internet line with the permanent one. They cleaned up after themselves and reconstructed the small part of a garden bed that was disturbed in the process.
I have spent about a week to distributing remaining seedlings to people who wanted them – to friends, colleagues, and like-minded mamas from Pathways Connect. Kale was gone fast. Peppers and tomatoes were going well – to be planted in pots in an apartment, and in gardens across the city.
We have also replaced a giant decorative bush in the back yard with an elderberry bush.
We got goldfish for the rain barrels and the herb spiral pond. Goldfish are good for consuming mosquito larvae that accumulates in standing pond water. We have taken another trip to Greta’s for the end-of-season sale, and picked up a water lily for a third pond, which we had temporarily placed in a rain barrel.
Then we acquired and installed more hoses to provide coverage for all the garden beds.I also picked up a larger pot for a patio pond, transplanted the water lily and one of the water hyacinths there, and got a goldfish to inhabit this pond.
The next day, I have added peat moss to blueberry bush soil, and added crushed eggshell and worm castings to vegetable beds. The last stage was to build bamboo trellises for grapes, cucumbers, tomatoes, and pumpkins.
The project is still on-going, and will be so for the rest of the summer. We would still like to seed moss and/or clover in remaining places where grass used to be to create a pleasant, low maintenance coverage. But that is to come later.
Now I am enjoying my lush garden of greens, herbs, berries, vegetables, and flowers.
What do you see when you step outside your door? Do you have blooming and growing things to calm, delight, and inspire you?